SixSpeedFuryRegular64 posts
Posted Jun 22, 2018, 10:12 PM#1
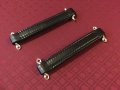
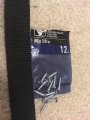
Post here if you have detailed step-by-step instructions or videos on how to disassemble and reassemble the table, as well as changing out the cloth, cup holders, etc. And if you're in the market for one, show off your results here!
navelsMicro-Stakes Grinder15 posts
Posted Jun 23, 2018, 2:44 AM#2
navelsMicro-Stakes Grinder15 posts
Posted Jun 25, 2018, 5:08 AM#3
MG20Newbie2 posts
Posted Jun 25, 2018, 4:30 PM#4
These look very handy, I might have to do it too.
SixSpeedFuryRegular64 posts
Posted Jun 26, 2018, 6:30 PM#5
SixSpeedFuryRegular64 posts
Posted Sep 10, 2018, 6:14 PM#6
Did anyone else have this issue with their table out of the box? Seems like flimsy screws or they drilled the holes too wide.


navelsMicro-Stakes Grinder15 posts
Posted Sep 10, 2018, 6:18 PM#7
I've found that the placement of those tension bars varies and can cause the screws to pop out :-(
I've had to reposition one side on my table.
SixSpeedFuryRegular64 posts
Posted Sep 10, 2018, 10:29 PM#8
I've found that the placement of those tension bars varies and can cause the screws to pop out :-(
I've had to reposition one side on my table.
That seems to have been the case. I'm gonna try with thicker screws this weekend and see if that works.
TexasKev211Newbie4 posts
Posted Sep 10, 2018, 10:47 PM#9
Mine did not have the issue but my buddies certainly did. Drilled them back in and it’s been fine since.
ReallyGoodUsernameRegular42 posts
Posted Oct 8, 2018, 1:55 PM#10
Does anyone know if there's a difference between the three tables below besides the felt? I've seen these tables consistently for this style of table and almost always the first table (brown felt) is the cheapest. I looked at the specs of each and they're identical besides the felt. Is the discount (usually $50-$120) on the first table just because it's got uglier felt?


The last one comes with handles already but they're in a pretty poor spot so I'll likely get one of the first two and add my own handles.
ReallyGoodUsernameRegular42 posts
Posted Oct 8, 2018, 1:55 PM#11
Also has anyone tried re-felting the ESPN version of this table with the LED lights?
allforcharityRegular91 posts
Posted Oct 8, 2018, 3:11 PM#12
Maybe it's cheaper because it was their first in the product line, and they either ordered more of that one for initial manufacturing or got a better deal at the time? I might be giving strange-sounding advice here, but try going on local craigslist and finding a really cheap but serviceable used folding-leg table, and then putting some money aside every month until you've got enough for a basic custom, either built by @T_Chan (https://www.pokerchipforum.com/members/71/) or someone more local, that you'll be happier about in the long run. It's a natural progression, start with least expensive everything, upgrade your chips, then upgrade your table. Everyone wins in the end!
ReallyGoodUsernameRegular42 posts
Posted Oct 8, 2018, 3:32 PM#13
It's a natural progression, start with least expensive everything, upgrade your chips, then upgrade your table.
I agree and hear what you're saying but I can't fit a non-folding table let alone a 8x4 in the space I'm playing in right now. I'm looking at these used but still found the similar price difference between them all and since its something I'll have for a few years it'd be worth it to me to spend an extra $50 if there's a difference besides the felt. As for overall cost, I'm estimating it'll be around $200-250 including re-felting, adding in new and deeper cup holders, plus a few handles which is a drop in the bucket considering I just purchased a barrel of hundos for $200 alone.
If anyone knows if there's a structural or manufacturing benefit with the more expensive tables please let me know :D
saleen121212Micro-Stakes Grinder16 posts
Posted Oct 13, 2018, 2:02 AM#14
Crappy picture sneak peak. Was in a big hurry to finish so didn't get to document as much as I wanted to. I'm an idiot when it comes to diy and this was super easy. Happy to answer any questions.


saleen121212Micro-Stakes Grinder16 posts
Posted Oct 14, 2018, 12:32 AM#15
All done. Hardest part for me was getting the hinges back on and working right. Some clamps helped tremendously.


allforcharityRegular91 posts
Posted Oct 14, 2018, 1:40 AM#16
saleen121212Micro-Stakes Grinder16 posts
Posted Oct 14, 2018, 1:55 AM#17
Looks great!
Thanks. Toying with the idea of making some custom rails down the road so it would be 1 piece on each side instead of 3. Would make them taller with better cup holders also.
ReallyGoodUsernameRegular42 posts
Posted Oct 14, 2018, 6:17 PM#18
@saleen121212 (https://www.pokerchipforum.com/members/4738/) question: in this picture (more visible in the one before this one) there’s what may be chalk marks on the far side of the table near the edge of the felt. Are these chalk marks (if so what purpose) and if not what are they?
Also, in this picture have you just not cut the felt on the near side of the table yet or do you wrap it underneath the table and staple gun it there?
saleen121212Micro-Stakes Grinder16 posts
Posted Oct 14, 2018, 7:03 PM#19
@saleen121212 (https://www.pokerchipforum.com/members/4738/) question: in this picture (more visible in the one before this one) there’s what may be chalk marks on the far side of the table near the edge of the felt. Are these chalk marks (if so what purpose) and if not what are they?
Also, in this picture have you just not cut the felt on the near side of the table yet or do you wrap it underneath the table and staple gun it there?
Not sure which picture you mean, but it was probably the lighting or dust. No chalk. The half closer to me was not stapled or cut yet I stapled both on top under where the arm rests would go.
saleen121212Micro-Stakes Grinder16 posts
Posted Oct 14, 2018, 7:07 PM#20
One pro tip I can give is you might find it alot easier to put the hinges and legs back on before the arm rests. One of my rails was to far forward and created a gap between the two halfs when it was all finished. Had to redo the rail and all hinges.
ReallyGoodUsernameRegular42 posts
Posted Oct 14, 2018, 7:28 PM#21
Thanks for the info would have definitely run into that issue if you hadn’t mentioned it. Is the felt from YAT?
As for the picture I was referring to these:
saleen121212Micro-Stakes Grinder16 posts
Posted Oct 14, 2018, 7:30 PM#22
Thanks for the info would have definitely run into that issue if you hadn’t mentioned it. Is the felt from YAT?
As for the picture I was referring to these:
Nah I went with the cheap stuff from Amazon (https://www.amazon.com/?tag=amznpcfx-20) since I had no idea what I was doing. The silver things are the staples if that's what you mean
PolochrisMicro-Stakes Grinder7 posts
Posted Oct 15, 2018, 11:22 PM#23
Really interested in the table. May get the ESPN version. Would this table really sit 10? My guess is no, but it looks like 8 people might feel cramped.
What do you think?
saleen121212Micro-Stakes Grinder16 posts
Posted Oct 15, 2018, 11:35 PM#24
10 might work but it would be pretty cramped.
Moxie MikeRegular41 posts
Posted Oct 17, 2018, 6:48 PM#25
Just did mine last night. Pretty straightforward project and took about 90 minutes. The only semi tricky part when getting the rail sections to line up when reattaching them to the playing surface - I ended up laying on the floor and putting a couple screws in place, then flipping the whole thing to screw the rest down.
One tip I might add is to try to reupholster your table in a clean space where you can work around the perimeter 360 degrees. In my instance, I used my office.
The only modification I made was I used some longer screws when I reattached the gusset part of the table legs to the frame.
In the future, I expect the cheap vinyl on the rails to tear - in which case I'll either replace them entirely with a one-piece ring or simply reupholster the sections with a more durable product.


saleen121212Micro-Stakes Grinder16 posts
Posted Oct 17, 2018, 7:01 PM#26
90 minutes? I should have paid you to do mine. I guessing doing it in the living room with a baby and your wife arguing with you about the best way to do it slows you down lol! I also used way too many staples but had no idea what I was doing so I wanted it to be tight.
Moxie MikeRegular41 posts
Posted Oct 17, 2018, 7:08 PM#27
I would have done it in trade for some of those Horseshoe Quarters in your profile pic... those are slick :)
I don't think you used too many staples... better to use too many than not enough and have it tear when you're pulling it taut.
It's probably worth pointing out that I've built many tables before, so doing the upholstery work isn't anything new to me... I think it took longer to take apart and re-assemble than it did to actually re-felt the table.
ReallyGoodUsernameRegular42 posts
Posted Oct 17, 2018, 7:21 PM#28
I know this isn't Barrington :eek: but has anyone owned or tried refelting one of these tables? I see the a lot and they look like they may have better rails plus ones available near me for $50.

Moxie MikeRegular41 posts
Posted Oct 17, 2018, 7:28 PM#29
I know this isn't Barrington :eek: but has anyone owned or tried refelting one of these tables? I see the a lot and they look like they may have better rails plus ones available near me for $50.
It depends on how the rail sections come off and how the felt is attached to the playing surface. If the rails are simply screwed in place from the underside of the table then they should pop right off... and even if the felt is attached using some type of adhesive you could just go over the top of it with your SSC and not deal with it.
What makes the Barrington tables so convenient to reupholster is that the stock cloth just peels right off the padding with no adhesive residues to deal with. Not sure about this one... so the best thing to do is start disassembling and see what you're working with.
BGinGAShark148 posts
Posted Oct 17, 2018, 11:20 PM#30
I know this isn't Barrington :eek: but has anyone owned or tried refelting one of these tables? I see the a lot and they look like they may have better rails plus ones available near me for $50.
View attachment 208764 (https://www.pokerchipforum.com/attachments/208764/)
I've redone a couple of those table types for friends, and it's a real PITA. Easiest way to get a new playing surface is to make a fitted insert (1/4" MDF) with padding/felt and just set it in place on top of the existing table (inside the rail circumference). You lose rail depth, but trying to do anything else is usually much more than you bargained for.
The construction techniques used on those tables are typically designed to be quick and very inexpensive (aka often shoddy), making disassembly extremely difficult and almost impossible to do without destroying something. Often the outer edge of the rail covering is stapled/glued to the underside of the table, and then wrapped up, over, and back under the rail top and is also stapled/glued to the table top under the rail, if that makes sense (and actually constructed in reverse order). Some rails aren't even really fully wrapped at all, but just have vinyl on two sides with the playing surface glued on top of the vinyl (which is glued/stapled to the table). Difficult to describe without corresponding pics, but once you discover how they're done during disassembly, it's a combination of OMG and WTF. Bottom line: the rail generally doesn't come off of the table unless you destroy it, so easily getting down to just the playing surface felt isn't feasible.
After repairing the second one, I decided it's not worth the effort/cost. I just consider them disposable tables -- cheap, functional for awhile, and when they break or need repair, just throw 'em away. Similar to War Games, the only winning move is not to play buy.
ReallyGoodUsernameRegular42 posts
Posted Oct 17, 2018, 11:35 PM#31
Wish I had the room to get a real table or else I'd be all over it plus I do like taking things apart and putting them back together / modding them, computers, engines, plumbing, toaster ovens... have little idea what I'm doing to start but you name it and I'll take it apart to figure out how it works !
jcooper911Micro-Stakes Grinder15 posts
Posted Nov 22, 2018, 3:17 AM#32
Ok so here goes!
I did this today. Quick primer, i suck at diy, had only 4 clamps, a staple gun and a manual philips screwdriver. I would advise you probably want at least a posi drive if not an electric drill/screwdriver. Going to take you through my steps, along with a piece of advice so you can do this too. I would not say it is easy, it took me nearly 5 hours, but like i said, I had rudimentary tools and wanted to make sure i didnt screw up...
-
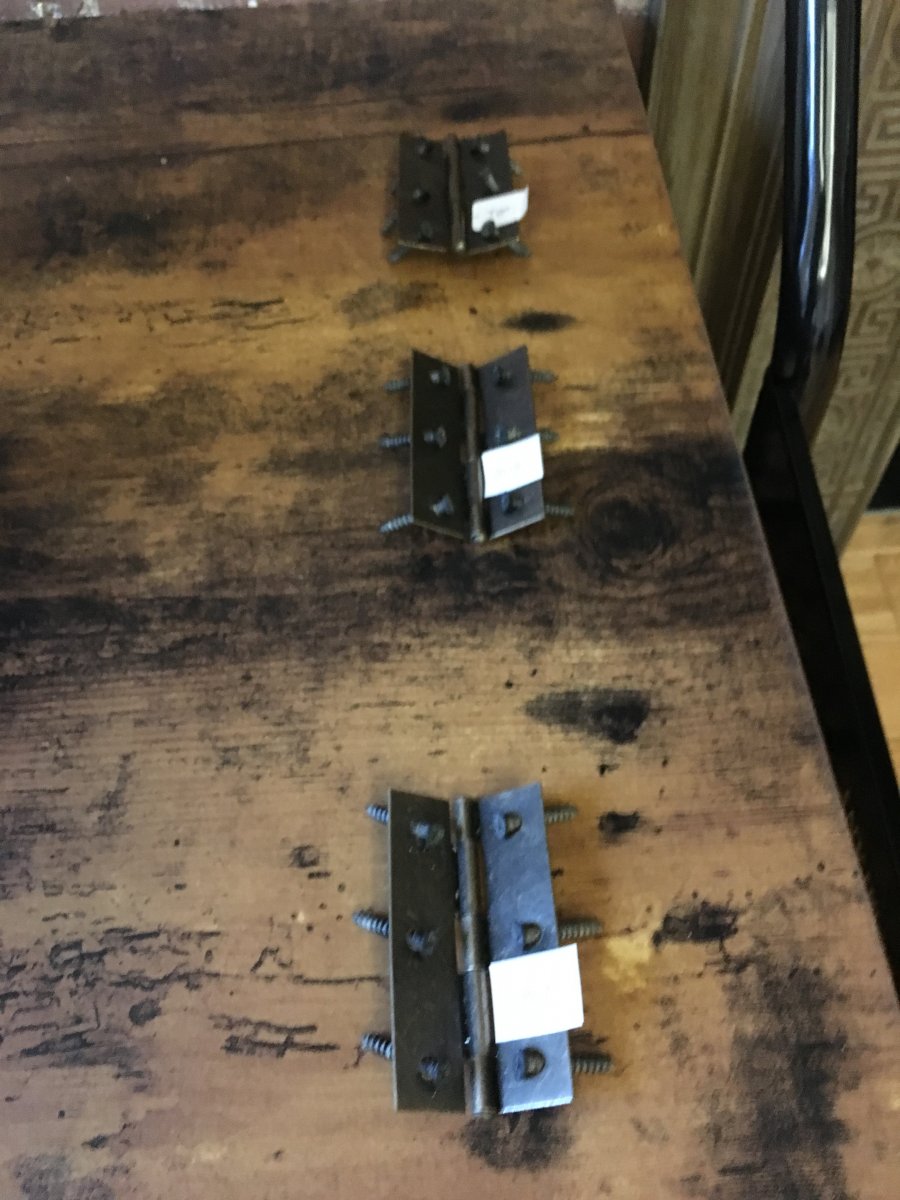
LABEL EVERYTHING! It makes everything a million times easier. Label the legs, the table sections, the legs attachments, the hinges. Just do it.
-
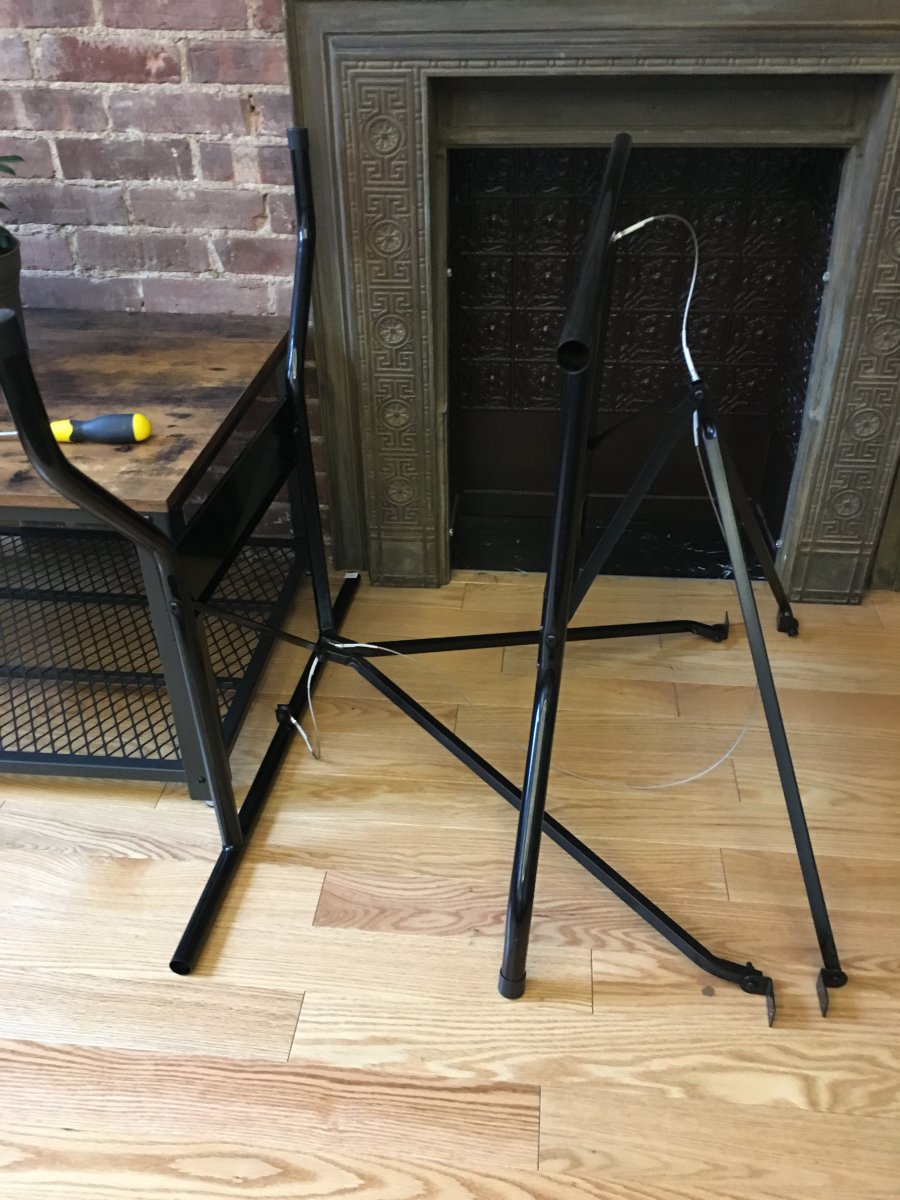
Remove legs. I place them in this position with the right leg over the left side. My table was very taught with the silver cable between the legs so it made this a tiny bit awkward at first.
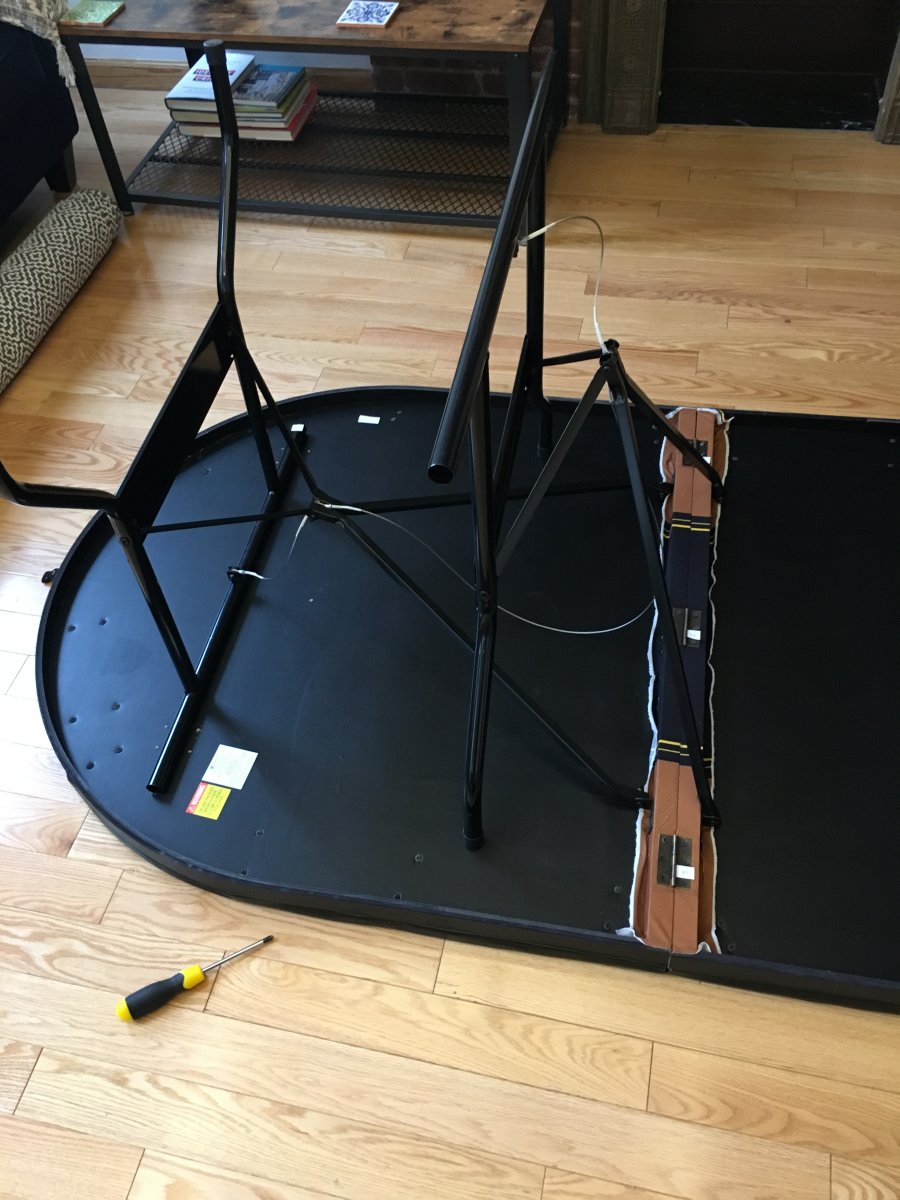
- Seriously, label everything!
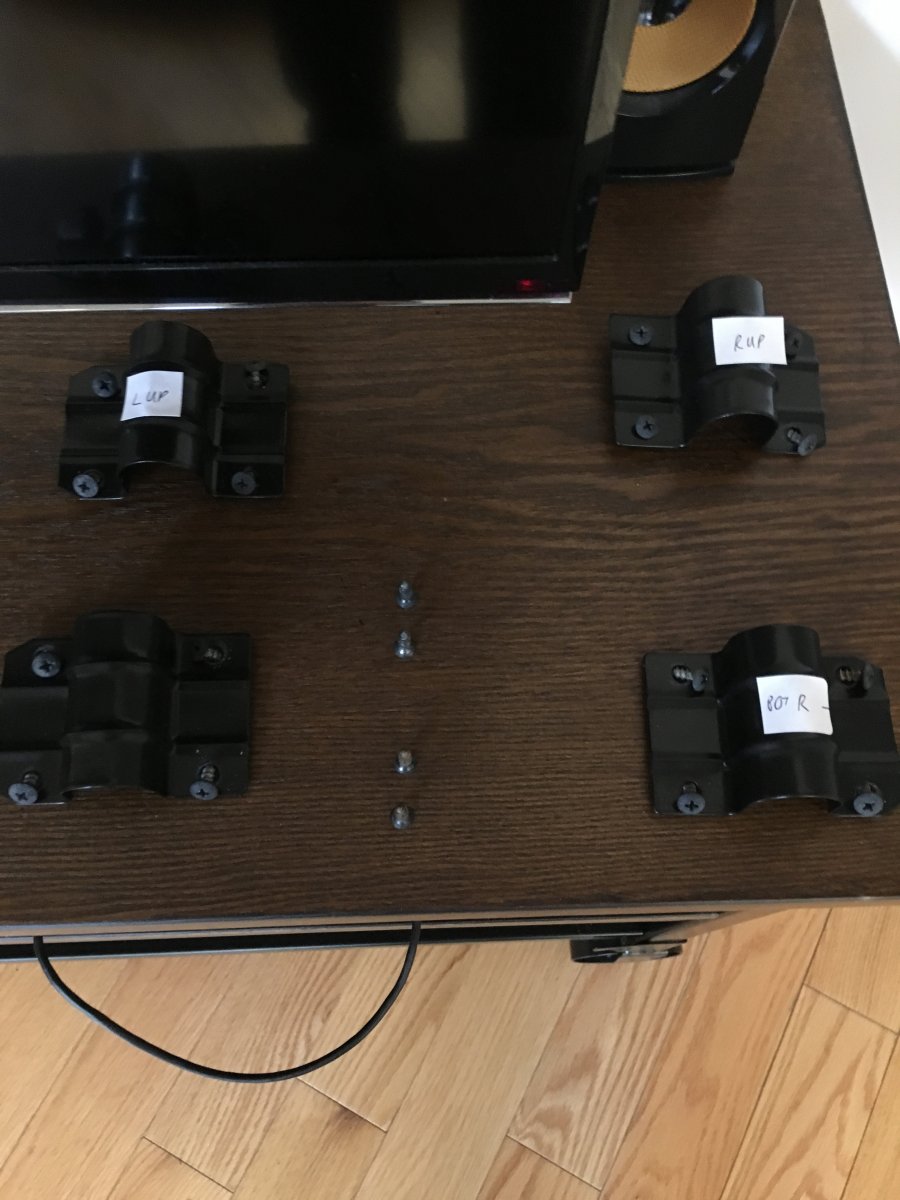
- Remove legs and leave in the same position for simple(r) reattachment later
- Definitely label your hinges, these are a ballache to get off and then to reattach at the end. You really need the right hinge and screw in the original spot
- Split the table apart
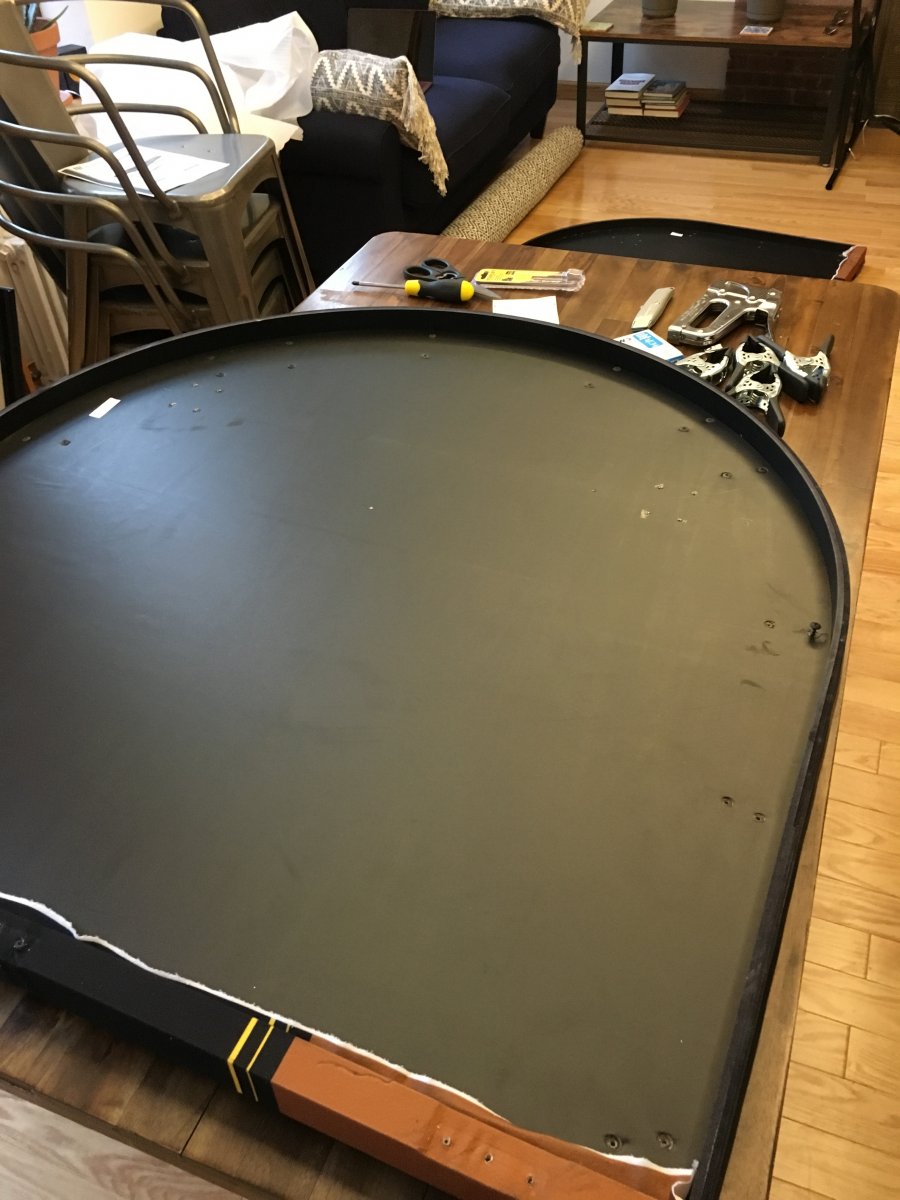
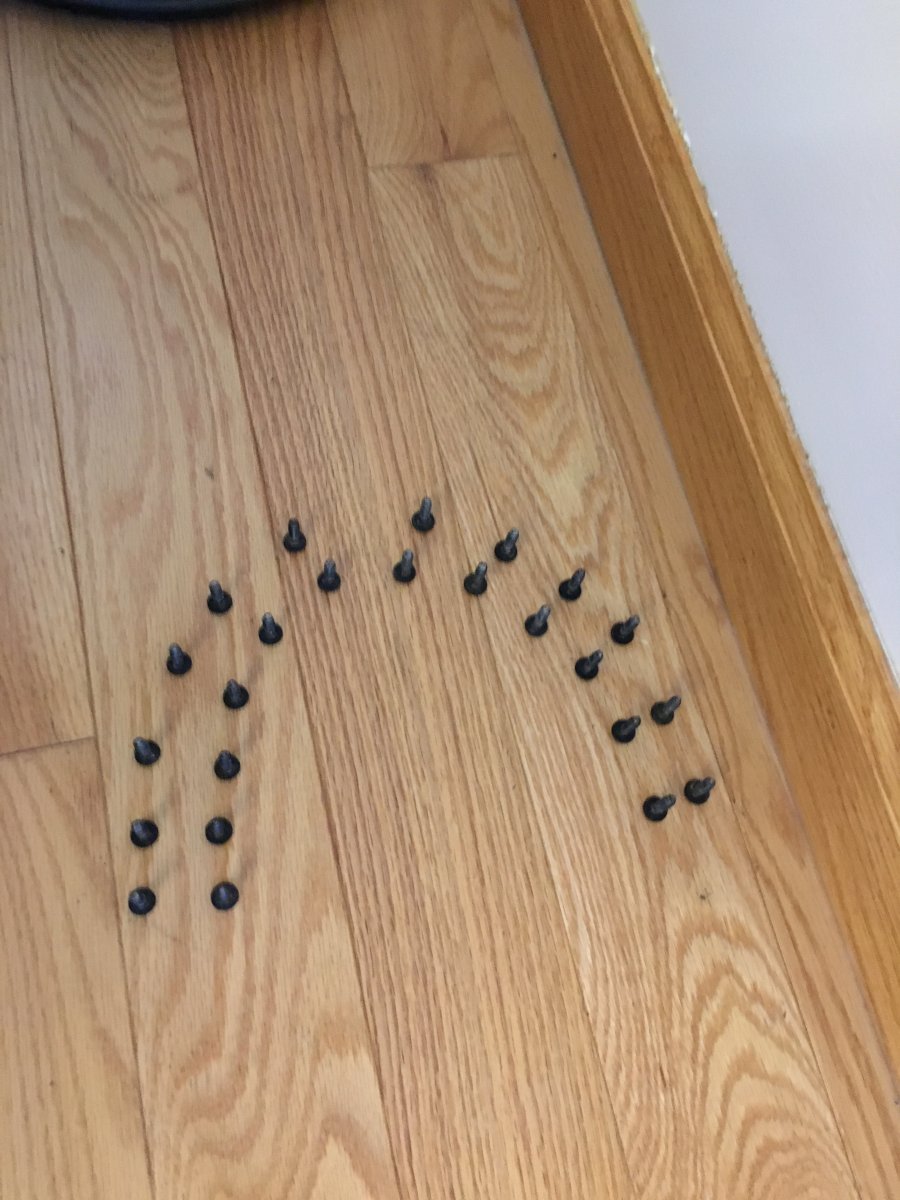
- Remove the screws from all the rails. Definitely keep all of these in the order they came out!
- Pry off the rails. At first i was gentle but then only some of the glue came off and it was messy. When i was more forceful, the glue was left on the board and could easily be removed along with the felt...
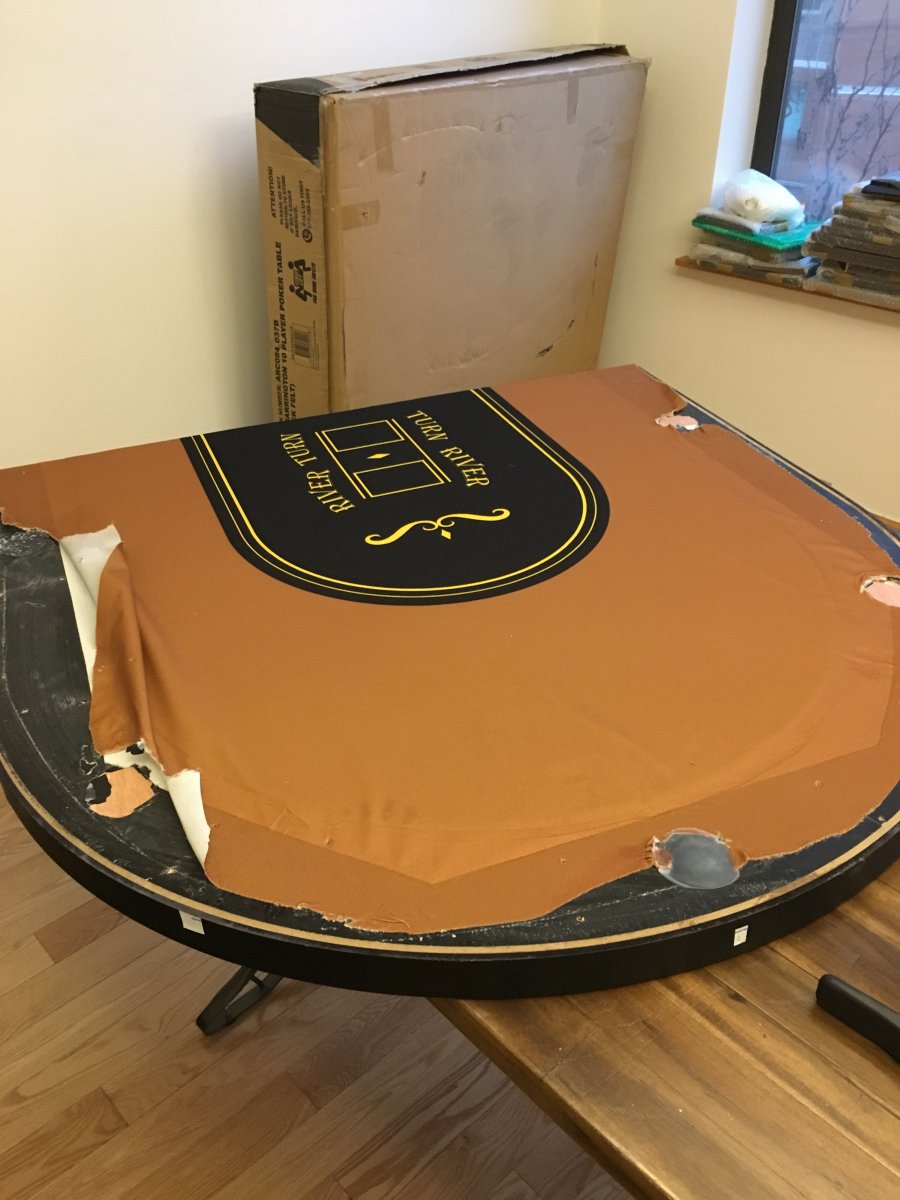
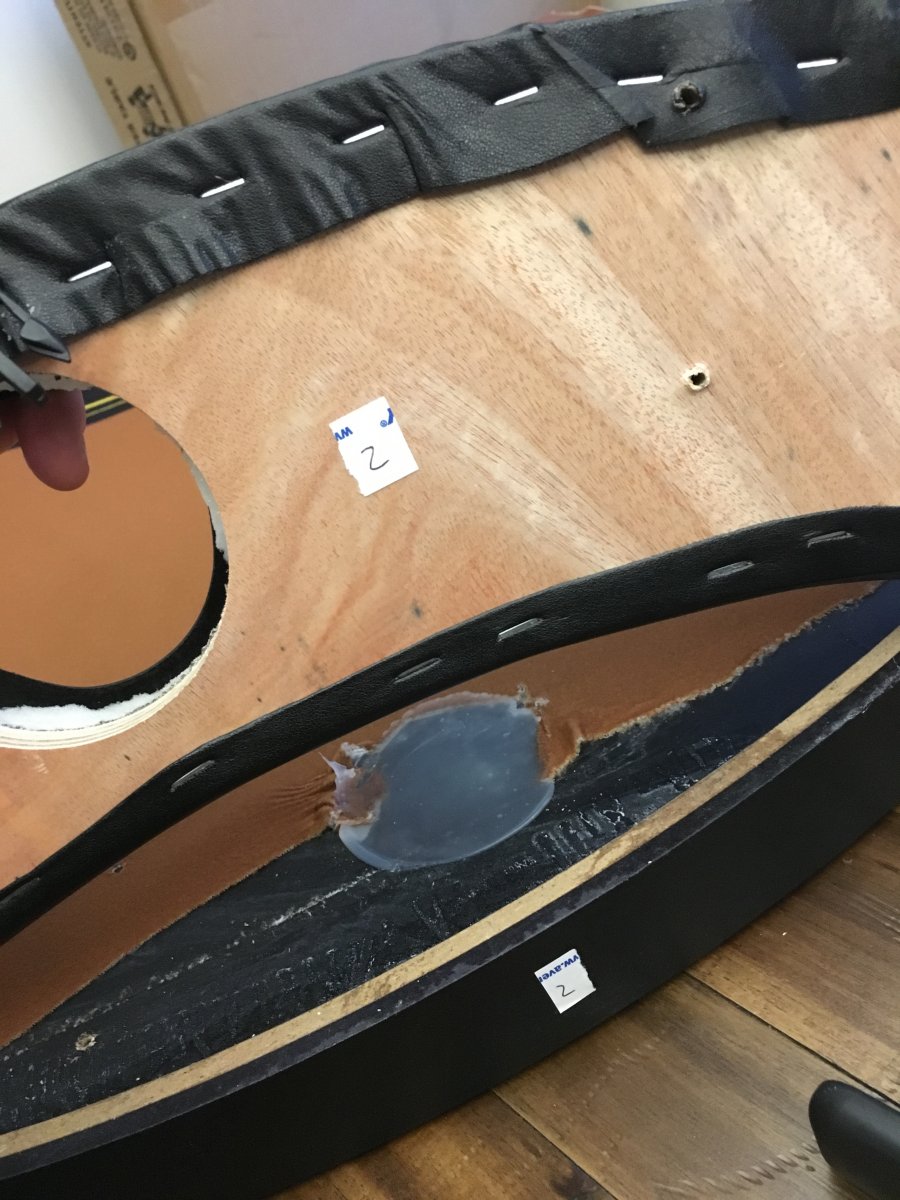
- Label where the rails will go back!
-
Remove the felt. You are best off just ripping it out from under the staples on the underside.
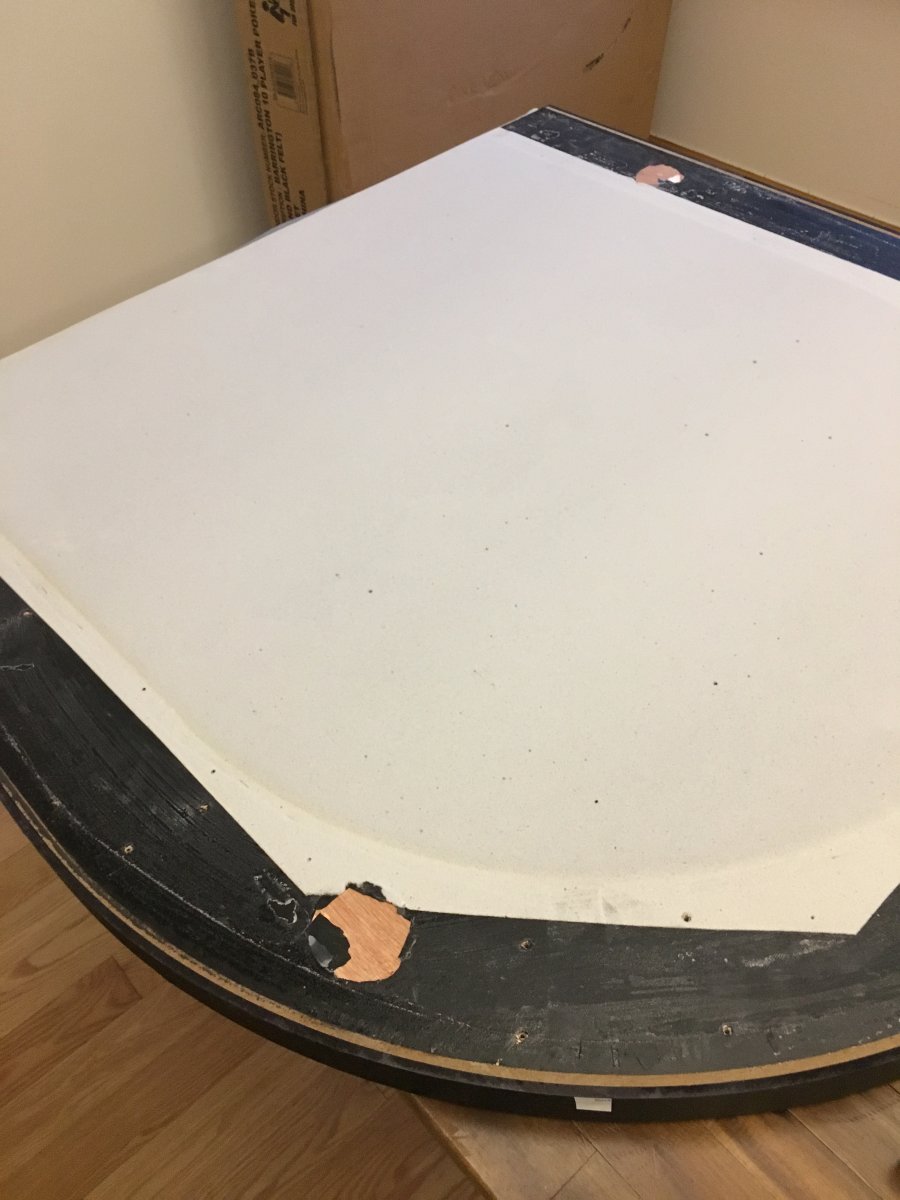
-
Cut your felt. I used Suited cloth from amazon (https://www.amazon.com/?tag=amznpcfx-20) which was fine for me. I trimmed it to just larger than the table overall first, used clamps to hold it tight across the foam, then stapled. Take your time and you will be fine. I then trimmed the cloth again after stapling so it was smaller than the rails and would be hidden suitably.
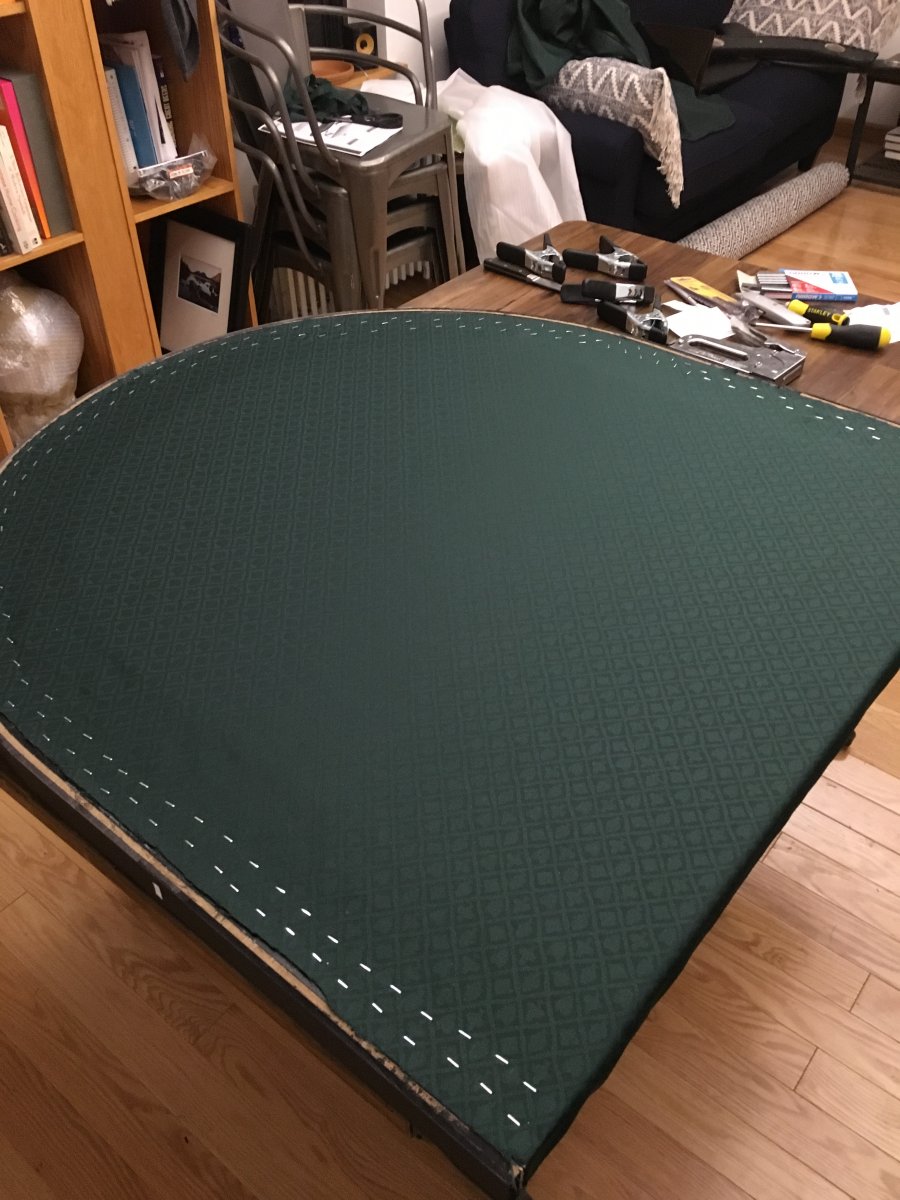
- Clamp the underside and staple. I clamped at the indented hinge points to ensure i didnt staple there, and thus would know where the hinges would need to go and where i needed to cut the cloth later...
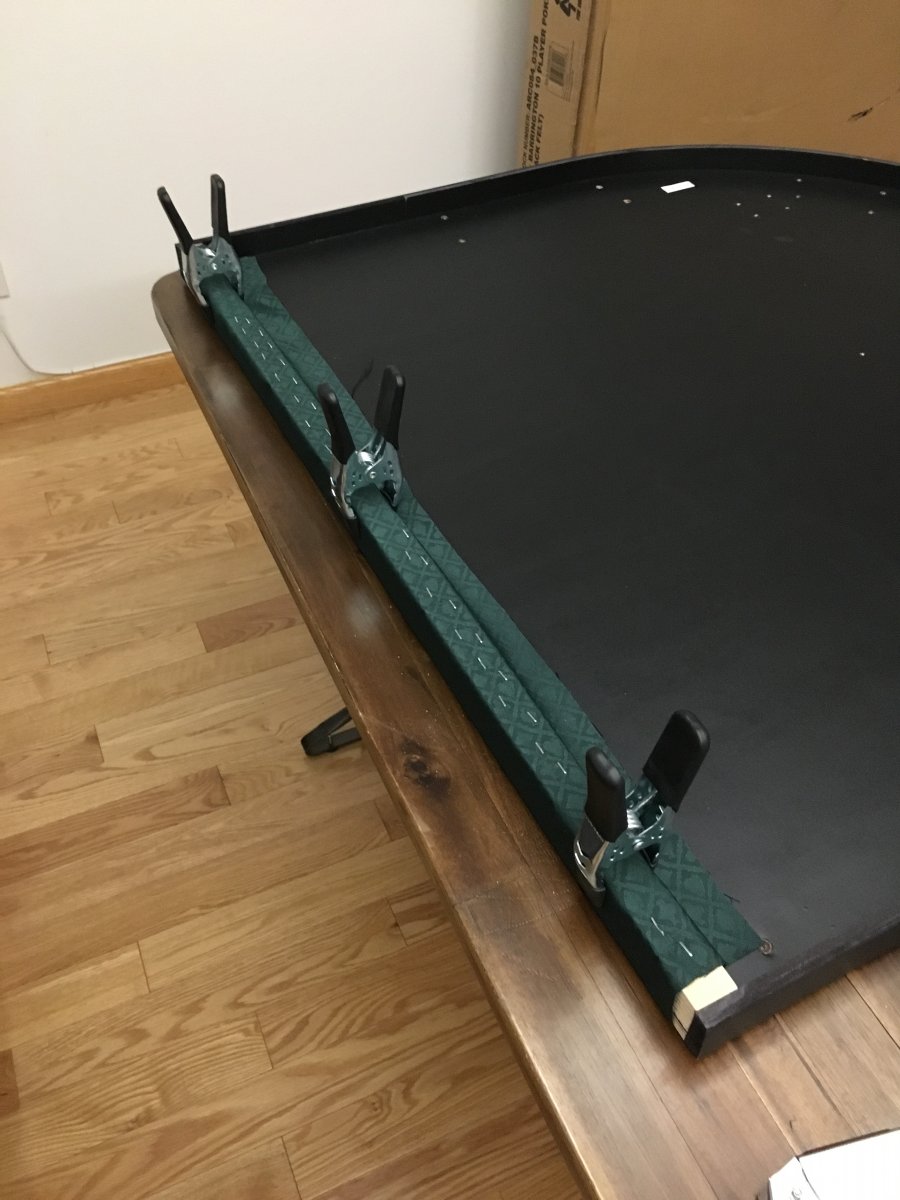
- Reattach the rails. I would advise that you actually place all the rails under the table section in order to line them all up, and then screw one in each at a time. It is vital you put some pressure down on the table as you screw, otherwise you will end up with a gap between the table and the rail where the screw pushed the rail up. I had to redo a rail because of this.
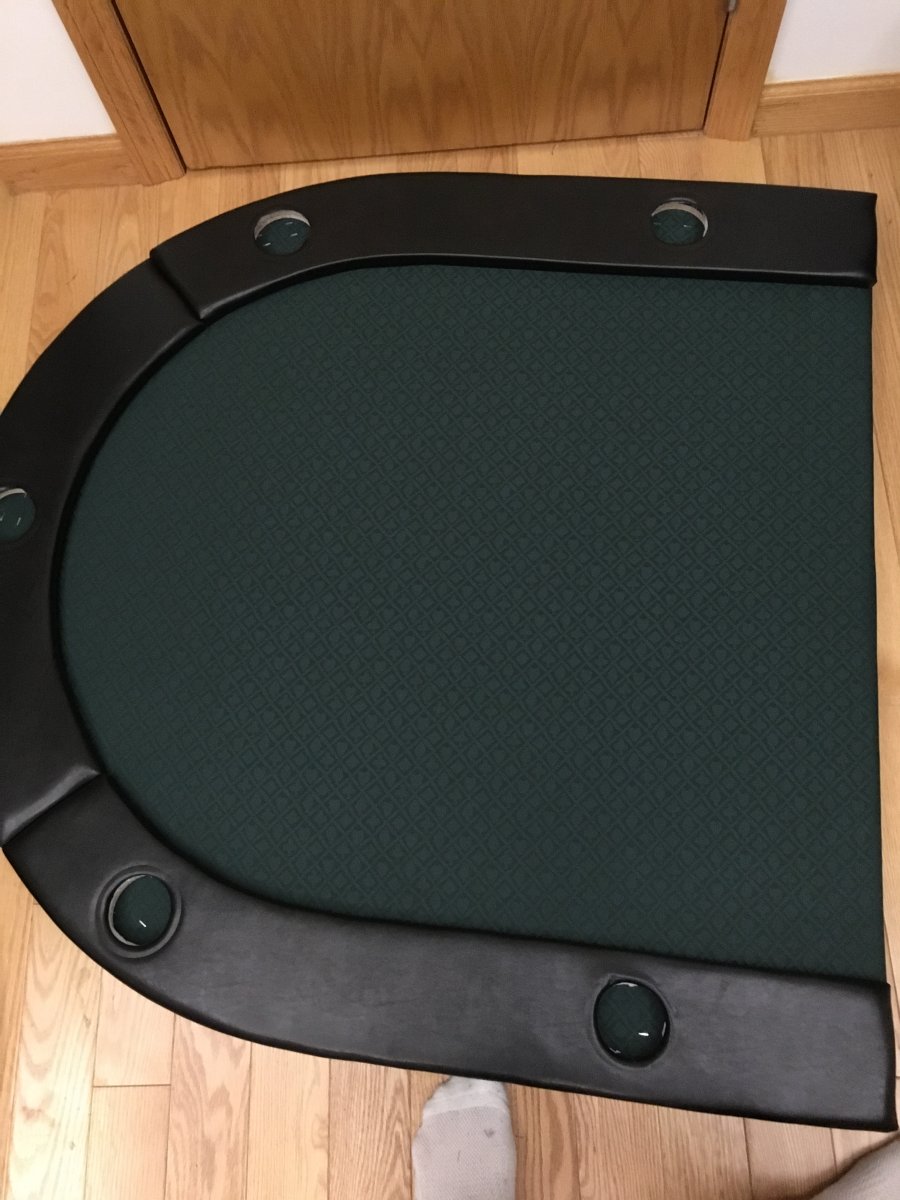
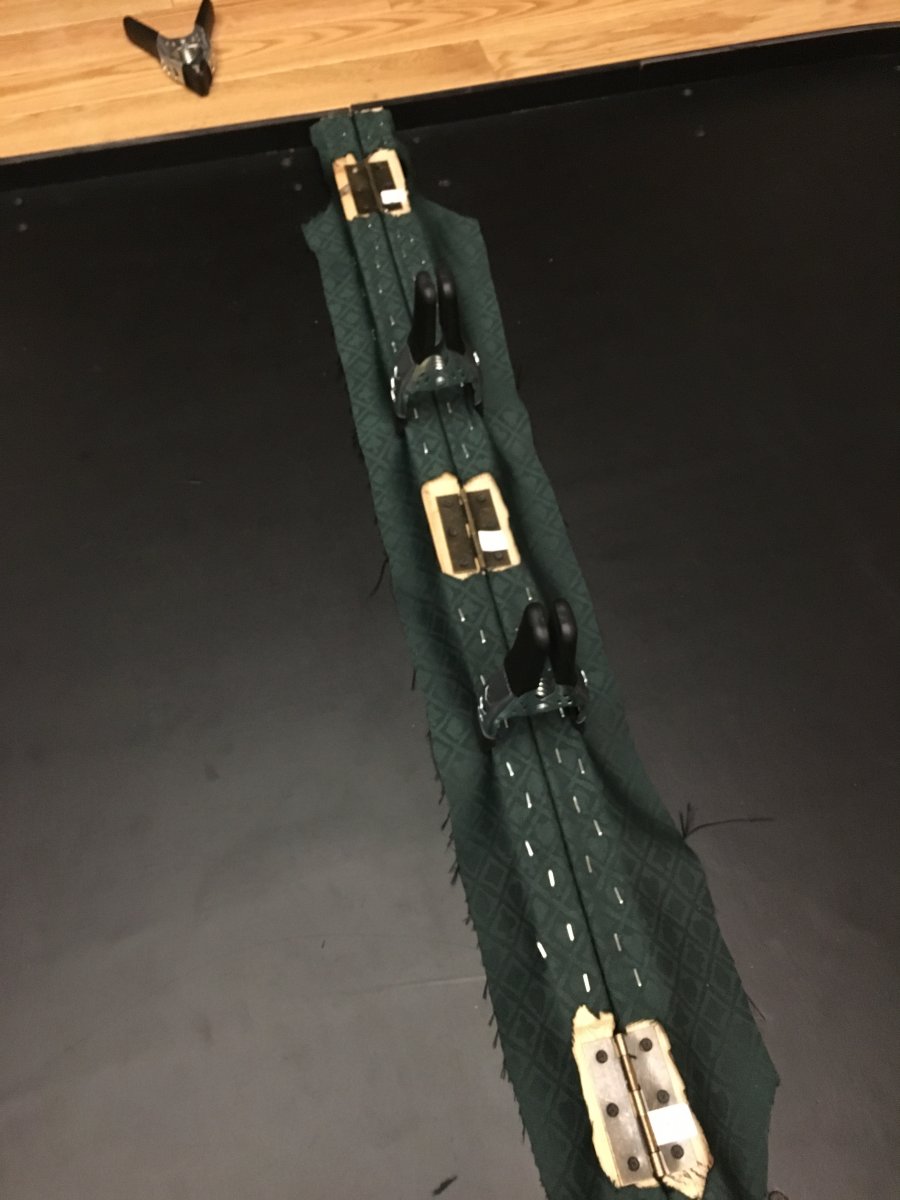
- Reattach the two table sections together via the hinges. I think my hinges were pretty poorly screwed originally, so this was a real pain for me. Some of the screws are at an angle, some took a lot of work to get back in and one is in fact missing. Clamps are real important here in my opinion... note the areas of cloth i have cut out deliberately, rather than screwing through the felt...
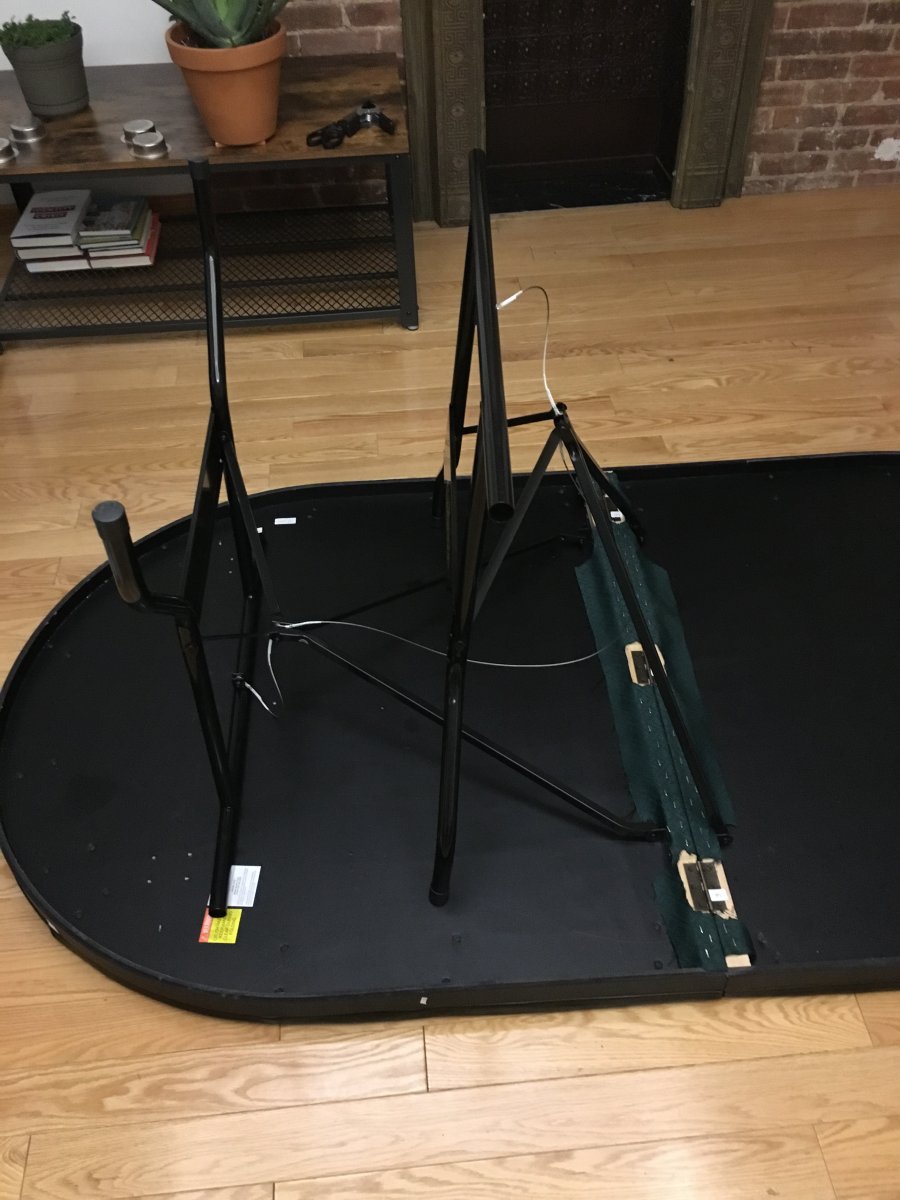
- Lay the legs back on as we took them off previously. Your labels from before should help. Lightly screw down the central supporting leg sections first before the outer leg sections. This allows you flex on moving the outer leg sections a little and also tensing the metal cable suitably. This was a bit fiddly, honestly doing this with help may have been easier...
- Admire your work, your success and look forward to planning your next game!
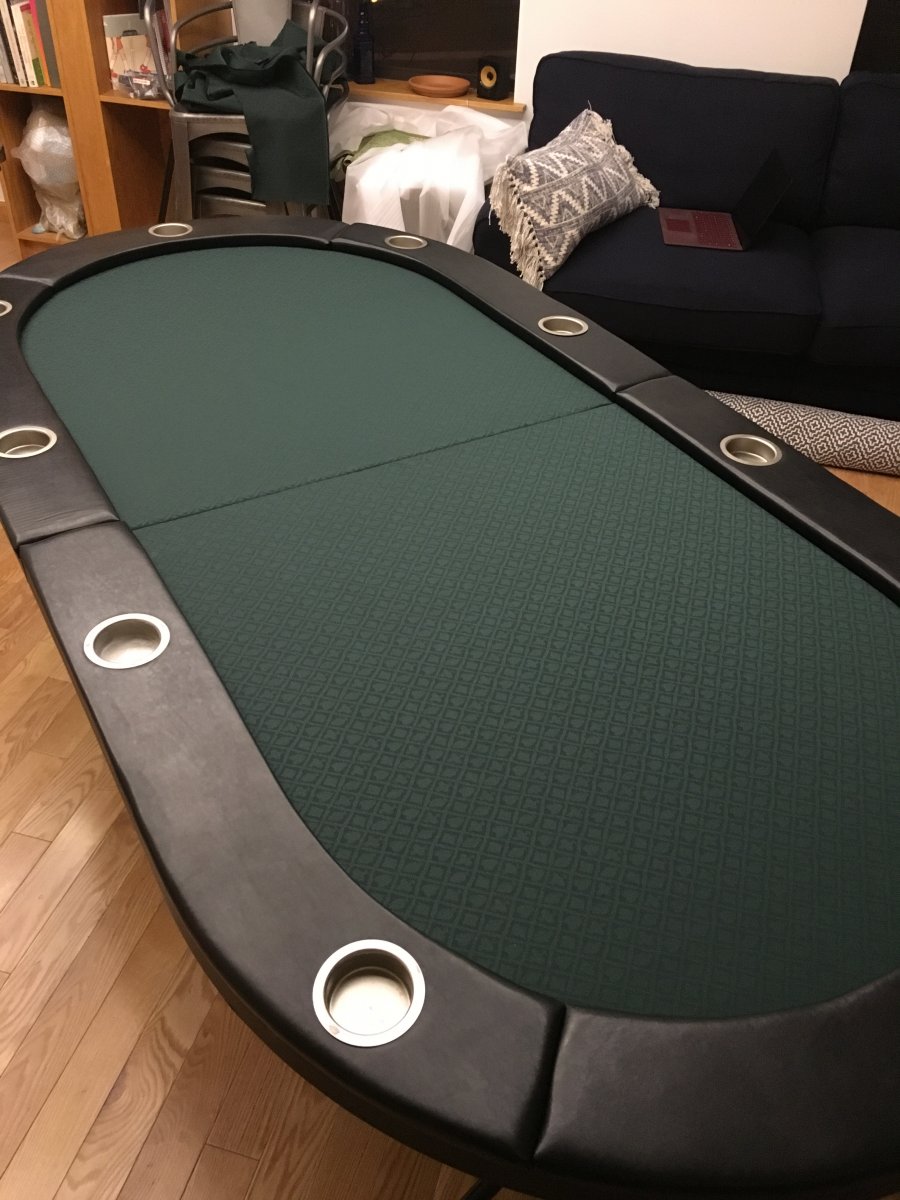
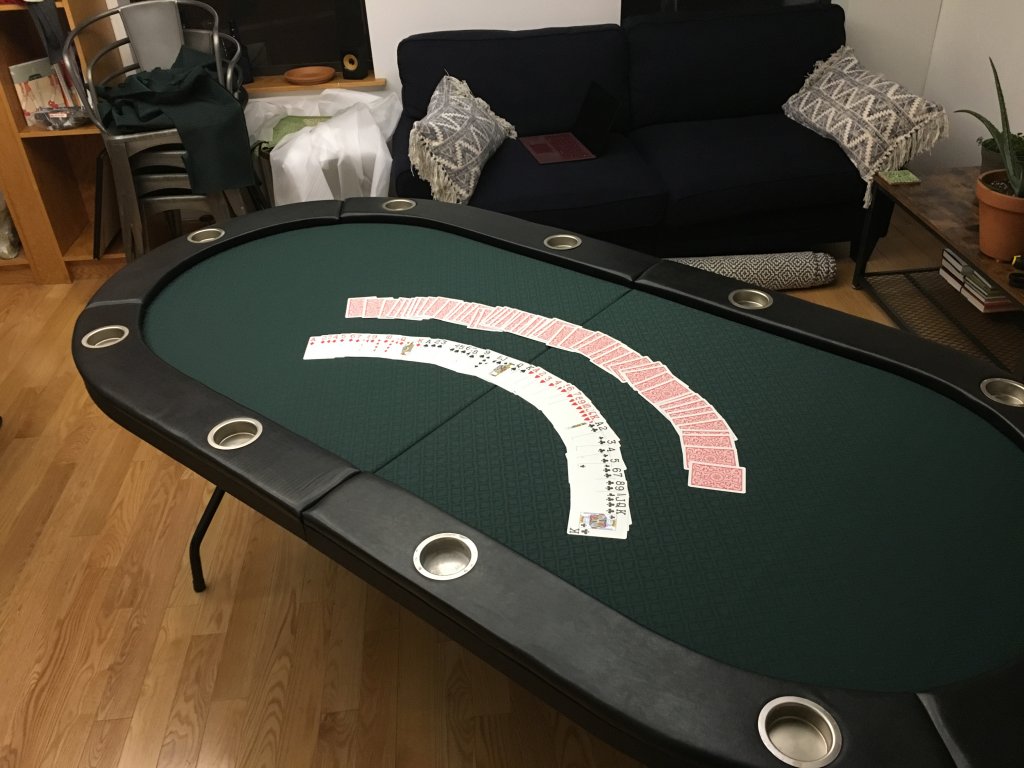
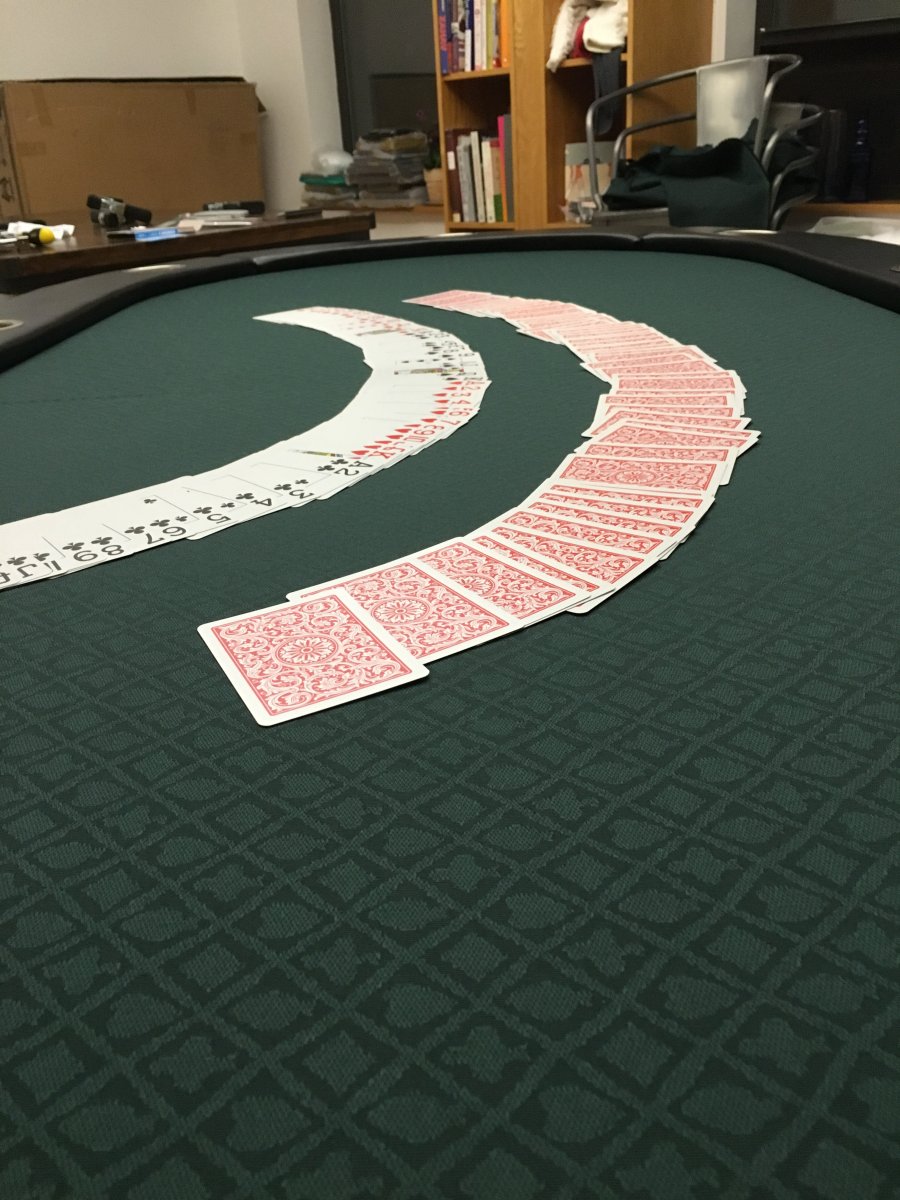
Honestly, i managed to do this in an apartment in New York City with pretty much the most rudimentary skills and tools possible. I think anyone with a modicum of room and a good power screwdriver should be able to. However, I would advise you take your time and plan your steps. Hopefully this guide helps!
Any questions lets me know!
JC
navelsMicro-Stakes Grinder15 posts
Posted Nov 22, 2018, 3:44 AM#33
nice writeup! and yeah, I also lost a screw in the process :ROFL: :ROFLMAO:
jcooper911Micro-Stakes Grinder15 posts
Posted Nov 22, 2018, 3:47 AM#34
I didnt lose a screw, it just would not screw in more than halfway! Like i said, think my hinges were pretty poorly screwed in originally tbh...
DoubleEagleShark192 posts
Posted Nov 22, 2018, 3:49 AM#35
Well done! Very resourceful.
dew4auMicro-Stakes Grinder17 posts
Posted Nov 22, 2018, 4:11 AM#36
Weren't these on sale for $99 last black friday? Looks like wally world has them for 156 shipped currently. I need a new table since I sold mine before the move. I'm tempted to get one just as a temp table until I settle. I guess I need to get some new friends first, though! :LOL: :laugh:
jlb2782Newbie3 posts
Posted Jan 16, 2019, 6:22 PM#37
Very cool. Saving for later...
BeakertwangRegular79 posts
Posted Jan 16, 2019, 6:31 PM#38
Weren't these on sale for $99 last black friday? Looks like wally world has them for 156 shipped currently. I need a new table since I sold mine before the move. I'm tempted to get one just as a temp table until I settle. I guess I need to get some new friends first, though! :LOL: :laugh:
I was waiting them to go on another big sale, and now they’re up to $189.99.:(
Forty4Regular44 posts
Posted Jan 16, 2019, 6:36 PM#39
I was waiting them to go on another big sale, and now they’re up to $189.99.:(
Really think we need to stop price checking everyday for a month.
MG20Newbie2 posts
Posted Jan 16, 2019, 6:45 PM#40
Has anyone added better cup holders to one of these yet?
jcooper911Micro-Stakes Grinder15 posts
Posted Jan 16, 2019, 7:54 PM#41
Has anyone added better cup holders to one of these yet?
Pro tip - instead of changing the cupholders, I simply forced everybody to bring cans of beer - so much less likely to topple over than bottles and fill the holders quite well!
2jzMk3Newbie1 posts
Posted Jan 19, 2019, 9:51 AM#42
I’m having trouble removing my cup holders. I don’t want to yank on them and rip the vinyl. I’ve managed to get a couple out but they sure did use a liberal amount of glue. Any tips?
jlb2782Newbie3 posts
jlb2782Newbie3 posts
Posted Jan 30, 2019, 12:27 AM#44
Well, I received one for my birthday, which I nagged her to open early :) Glad I did because I wanted to change the felt before my first home game. My wife was originally a little miffed that I wanted to change the cloth so soon, and worried about what it would look like. But I assured her that it was the norm, hahah. I ordered samples from YAT and wasn't really sold on any of them. Then I found the reverse platinum SSC from Texas Poker Supply. It's awesome. The pictures don't even do it justice. It looks so great in person. My wife was actually really happy the way it turned out. It really does look like a much better table now. The wife and I have been playing heads up on it for the past couple of nights. Im stoked to get an actual game going on it.
The process wasn't really that bad. Just time consuming. All in I would say about 4 hours. And I was mostly working by myself. Just made sure to put everything in one area. The legs aren't bad, just make sure you pay attention to how they come off. The hardest part I would say is lining up the fabric between the two halves. Clamps really came in handy as well. I used 8 per side. Maybe a bit overkill, but it definitely helped. And the glued cupholders. Christ, they used a lot, at least on my table. I attempted to pry up, but felt like they were going to come through the rail. So I used a hairdryer like someone suggested and they popped up very quickly. Like I said, really very easy. Just give yourself enough time and space.
Here are some pics. First ones are in the daytime light. Definitely pops. The others are after my wife played around with staging and whatnot. Haha. She was having too much fun. Enjoy!!
Edit: Can only add a couple. Not sure why, but I will work on it.
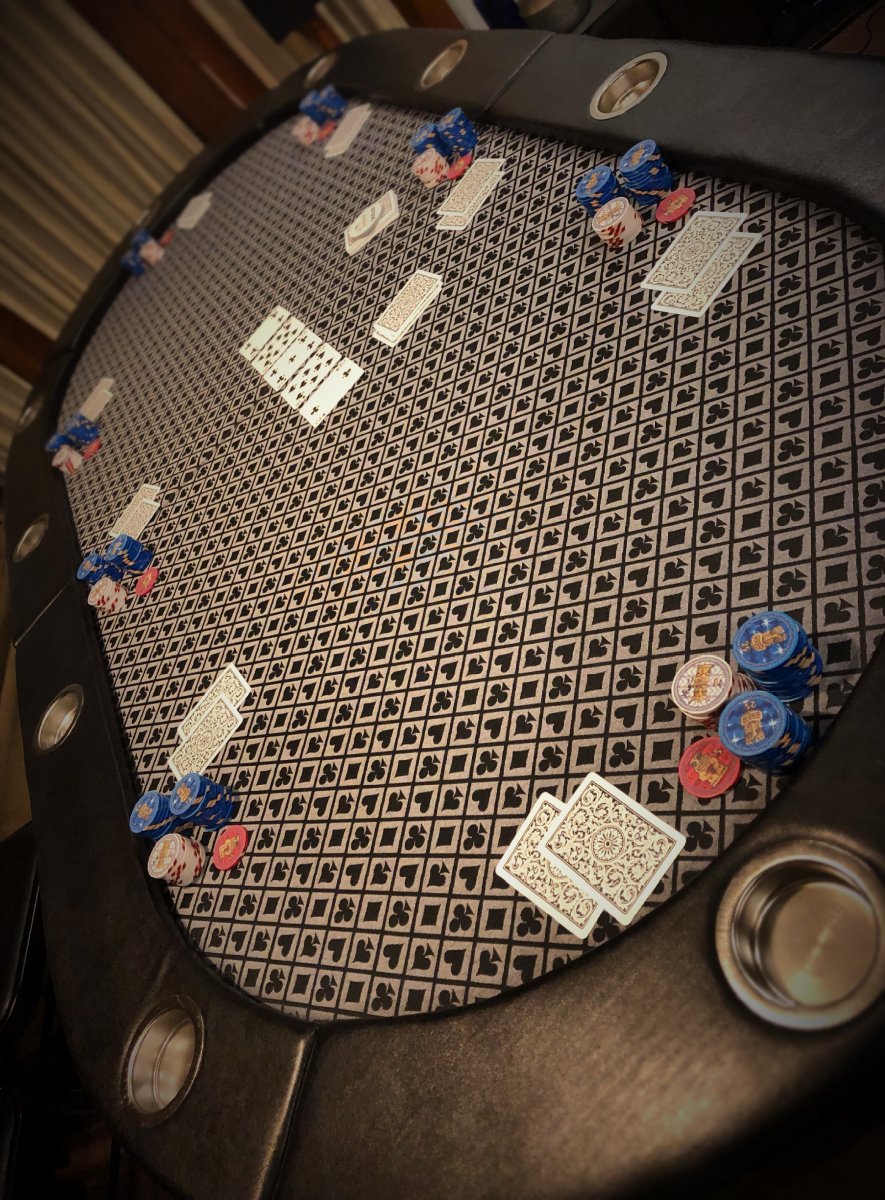
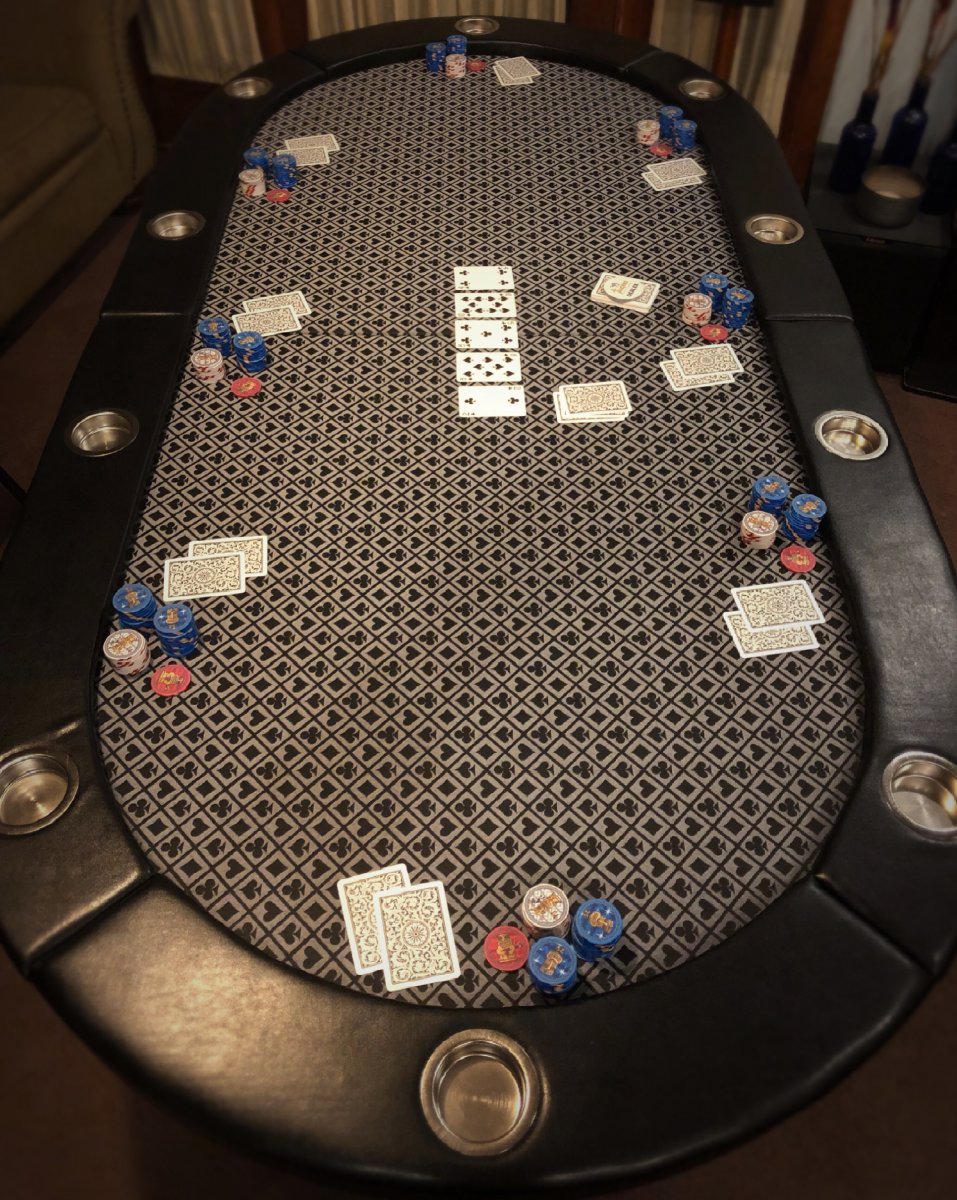
SprinsdNewbie4 posts
Posted Mar 3, 2019, 7:57 PM#45
Anyone have any advice on how to purchase these at discounted prices? Does their pricing fluctuate throughout the year? Are they normally marked down on Black Friday? Any tips? Seems like a fun project for the right price. Thanks!
Forty4Regular44 posts
Posted Mar 3, 2019, 10:27 PM#46
Anyone have any advice on how to purchase these at discounted prices? Does their pricing fluctuate throughout the year? Are they normally marked down on Black Friday? Any tips? Seems like a fun project for the right price. Thanks!
Christmas 2017 they were $100. Saw them for 160 normally now they are over $200. Think the traffic of us is driving the price up. I’m in a holding pattern until they are $160 or less.
ReallyGoodUsernameRegular42 posts
Posted Mar 3, 2019, 10:29 PM#47
Anyone have any advice on how to purchase these at discounted prices? Does their pricing fluctuate throughout the year? Are they normally marked down on Black Friday? Any tips? Seems like a fun project for the right price. Thanks!
Remember to look at all 3 versions (brown, blue, and ESPN). ESPN w/ light was the cheapest one a few months ago even though it was the most expensive for a while.
BeakertwangRegular79 posts
ChipTalkerRegular31 posts
Posted Mar 3, 2019, 10:49 PM#49
Wish they made a 96 inch version of this.
ReallyGoodUsernameRegular42 posts
Posted Mar 3, 2019, 10:50 PM#50
Wish they made a 96 inch version of this.
too big to carry at least for me and I'm still young and in good shape! the current version is already a pain in the ass to move even across the room folded
ChipTalkerRegular31 posts
Posted Mar 3, 2019, 11:23 PM#51
Not harder to move and store my 96 that does not fold in half ...
ReallyGoodUsernameRegular42 posts
Posted Mar 3, 2019, 11:25 PM#52
Not harder to move and store my 96 that does not fold in half ...
I guess you need to start a company and make 96" folding tables ! :D
SprinsdNewbie4 posts
Posted Mar 4, 2019, 9:23 PM#53
Thank you all for the information. I will stop googling so price isn’t inflated lol. If anyone sees a great deal please post!!
pbravesNewbie2 posts
Posted Mar 7, 2019, 7:44 AM#54
I'm holding as well for the 120-140 price range.
DavinciFoxNewbie1 posts
Posted Mar 7, 2019, 2:09 PM#55
Keep checking. I got the espn table a few months ago for $129 from Walmart
kaimatNewbie3 posts
DonkeyKingNewbie1 posts
Posted Mar 9, 2019, 5:13 PM#57
Deleting my post. Its not on the right thread about the table.
Altheman003Newbie4 posts
Posted Mar 31, 2019, 10:15 PM#58
Can someone give me the total thickness of the 10 man table when it’s folded up. Looking to see if this is going to fit somewhere for storage.
Thanks
-Alen
ReallyGoodUsernameRegular42 posts
Posted Mar 31, 2019, 10:40 PM#59
Can someone give me the total thickness of the 10 man table when it’s folded up. Looking to see if this is going to fit somewhere for storage.
Thanks
-Alen
5-5.5?

Altheman003Newbie4 posts
BeakertwangRegular79 posts
Posted Apr 1, 2019, 12:42 AM#61
Anyone know of a good cover to protect this while it's folded up, especially in transport?
Forty4Regular44 posts
Posted Apr 22, 2019, 7:51 PM#62
Back down to $180 still not $100 but better than the $230 they were the past few weeks.
pbravesNewbie2 posts
Posted Apr 24, 2019, 9:38 PM#63
I’m on the cusp of buying one now, tired of waiting. One thing I’m questioning is how comfortable the arm rests are — they look super boxy, sharp, and stiff. Can anyone comment on how it feels playing for 3+ hours?
ReallyGoodUsernameRegular42 posts
Posted Apr 24, 2019, 9:47 PM#64
I’m on the cusp of buying one now, tired of waiting. One thing I’m questioning is how comfortable the arm rests are — they look super boxy, sharp, and stiff. Can anyone comment on how it feels playing for 3+ hours?
If you're a heavy arm rester you'll definitely start to feel it but you'll manageable. I'd always advise going for a lightly used non-folding table from facebook marketplace/offerup/letgo etc. You can usually get something awesome for $300-$400 - so about double a Barrington. Granted most people inevitably invest another $30-$150 in fixing up into Barrington tables for new felt/hinge/handles/deep cupholders etc etc etc.
If you don't have the room though and need a folding table then they're your best and practically only option.
Forty4Regular44 posts
Posted May 3, 2019, 2:42 PM#65
I picked mine up last night and even though I only “spent” $50 on mine as I had gift cards, I will say I was a little disappointed. I’ll try to take pictures this weekend but visible staples on the underside of the rail, poorly inserted screws, poor rail padding, poor wrapping job on the rail.
Now if I was getting this for sub $100 I would expect those things but the current price of $180 I just want to let everyone know what to expect. I think money could be spent in better ways. I got this as a travel table and not sure how long it will actually hold up to travel before something happens.
We will also see how it goes when I redo the gaming surface.
Altheman003Newbie4 posts
Posted Jun 2, 2019, 4:35 PM#66
After contemplating for a while I finally picked up one these tables. Had the wife give me a hand to take it apart and throw some new speed cloth on. I went with the reverse platinum and it really upgraded the look of the table big time. I got it all back together but my issue is that it doesn’t seem as stable in the center of the table. You guys think it’s the hinges? Legs? I tried my best putting everything back exactly how they were. Any help to solve this issue without taking everything completely apart again would be appreciated.
Only progress shot I took till I get a game together
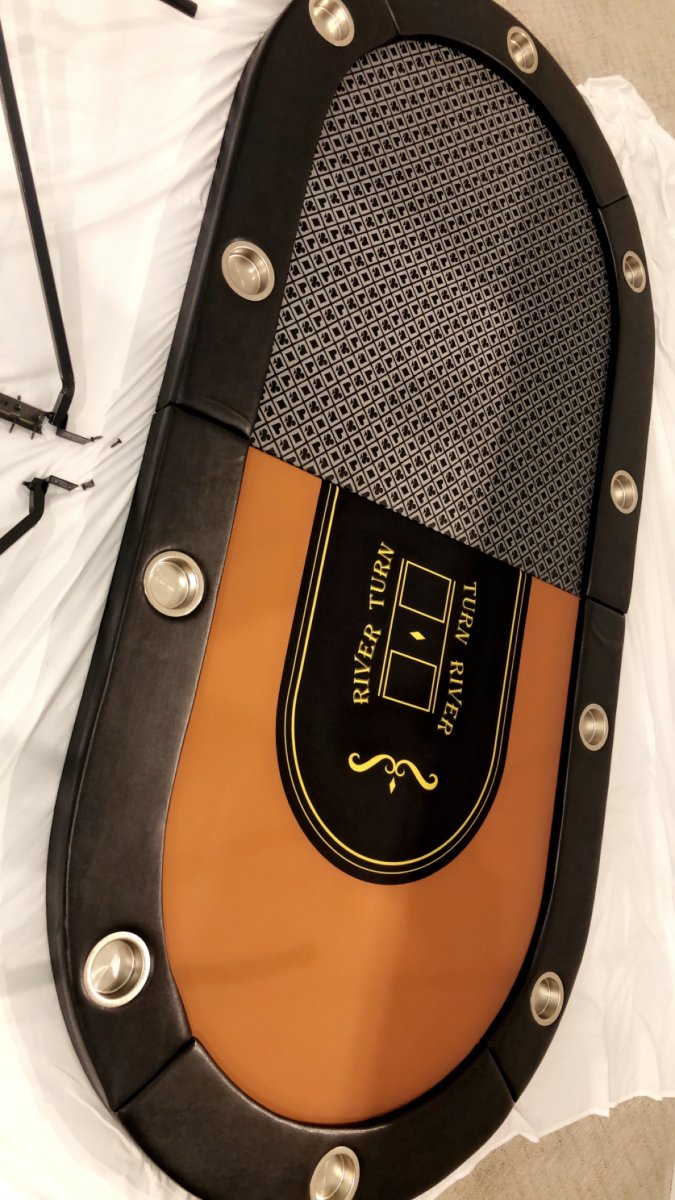
Thanks
-Alen
1A25RMicro-Stakes Grinder5 posts
Posted Jun 26, 2019, 6:51 AM#67
Anyone tried to dim the original LED lights of the ESPN Barrington table? I found that they are too bright, therefore unusable...
ReallyGoodUsernameRegular42 posts
Posted Jun 26, 2019, 12:49 PM#68
Anyone tried to dim the original LED lights of the ESPN Barrington table? I found that they are too bright, therefore unusable...
not me but a couple here had and said the same
1A25RMicro-Stakes Grinder5 posts
Posted Jun 26, 2019, 1:08 PM#69
TonZagaRegular76 posts
Posted Jul 3, 2019, 7:51 PM#70
Went through the speed cloth swap out on the Barrington this afternoon. PSA: pay attention as to what side of the speed cloth will be showing! :D. I was in such a rush to get it back together that I think one of the halves cloth is upside down. Either side is 10000x better than that shitty felt. Hopefully none of my buddies notice it or I'm sure I'll never live it down lol.
SixSpeedFuryRegular64 posts
Posted Jul 4, 2019, 1:37 AM#71
For those who did custom felts, how did you get the image centered so perfectly if you have to cut the felt in half?
Moxie MikeRegular41 posts
Posted Jul 4, 2019, 2:53 AM#72
For those who did custom felts, how did you get the image centered so perfectly if you have to cut the felt in half?
The suited speed felt is pretty forgiving as far as the pattern goes. As long as you don't put it on crooked, it isn't difficult to get the pattern reasonably close when you go to reupholster the second half.
If I recall, I think I used spring clamps to hold the felt in place on the curved end as I stretched and lined it up with the other half, then I stapled it. The felt wraps around the edge of the playing surface and there's a slight gap between the two halves so it's not like it needs to match up perfectly to look decent.
SixSpeedFuryRegular64 posts
Posted Jul 4, 2019, 6:24 AM#73
The suited speed felt is pretty forgiving as far as the pattern goes. As long as you don't put it on crooked, it isn't difficult to get the pattern reasonably close when you go to reupholster the second half.
If I recall, I think I used spring clamps to hold the felt in place on the curved end as I stretched and lined it up with the other half, then I stapled it. The felt wraps around the edge of the playing surface and there's a slight gap between the two halves so it's not like it needs to match up perfectly to look decent.
What I have seen thus far have been reupholstered with a speed cloth. What I meant was a custom logo. How much leeway should you tell a designer to use so the final product won't look uneven when replaced?
wonderpuddleMicro-Stakes Grinder9 posts
Posted Jul 4, 2019, 8:10 AM#74
What I have seen thus far have been reupholstered with a speed cloth. What I meant was a custom logo. How much leeway should you tell a designer to use so the final product won't look uneven when replaced?
If you deal with @T_Chan (https://www.pokerchipforum.com/members/71/) he will print it so that it’ll line up nicely:


pedrofiskNewbie2 posts
SixSpeedFuryRegular64 posts
Moxie MikeRegular41 posts
Posted Jul 4, 2019, 5:13 PM#77
What I have seen thus far have been reupholstered with a speed cloth. What I meant was a custom logo. How much leeway should you tell a designer to use so the final product won't look uneven when replaced?
If your discussing something like a giant detailed logo in the center of the table (ala center ice of a hockey arena), I wouldn't try to reupholster a Barrington table that way. I don't think you could get the logo halves to line up considering that the material needs to be stretched over the ends of the playing surface and stapled to the underside.
Now if we're discussing a repeating pattern like in @wonderpuddle (https://www.pokerchipforum.com/members/3167/)'s example, then getting the pattern lined up shouldn't be too difficult since there's plenty of excess material to get it lined up the way you want it.
T_ChanShark223 posts
Posted Jul 4, 2019, 6:07 PM#78
Whenever I do a design for a cloth for a table with a fold, I do the artwork in 2 halves with plenty of extra space where the center of the table will be. Any logo, whether it's a pattern or a single large image isn't a problem.
BGinGAShark148 posts
RegularjohnRegular30 posts
Posted Sep 20, 2019, 12:11 AM#80
Couple questions... but first just want to say how good of idea this is. I've been struggling with finding a table at a reasonable price with speed cloth, and not having the time to do a full table build.
Where do you guys order the speed cloth from? And how much of it? I've seen it on Amazon (https://www.amazon.com/?tag=amznpcfx-20) but wasn't sure if thags the right place to order it.
I'm a fan of classic looks, so I was going to go with green. Any issues with that? I've noticed a lot of people like blue.
When applying the cloth, is it as simple as stapling one side, and then pulling the other side super tight, and then stapling that end? And then repeat for all sides? Cut excess off. Want to make sure it's on there smooth but also not rip it.
How stable is it? Does require any reinforcement?
Thanks!
Moxie MikeRegular41 posts
Posted Sep 20, 2019, 3:37 AM#81
Couple questions... but first just want to say how good of idea this is. I've been struggling with finding a table at a reasonable price with speed cloth, and not having the time to do a full table build.
Where do you guys order the speed cloth from? And how much of it? I've seen it on Amazon but wasn't sure if thags the right place to order it.
I'm a fan of classic looks, so I was going to go with green. Any issues with that? I've noticed a lot of people like blue.
When applying the cloth, is it as simple as stapling one side, and then pulling the other side super tight, and then stapling that end? And then repeat for all sides? Cut excess off. Want to make sure it's on there smooth but also not rip it.
How stable is it? Does require any reinforcement?
Thanks!
Welcome to PCF :)
Barrington tables are a decent product and a solid value for the price... can comfortably seat 9 and are easily modifiable.
https://www.yourautotrim.com (https://www.yourautotrim.com/) is a good source for the premium SSC. Texas Poker Supply (a PCF vendor) also has quality stuff. If you see the SSC that's 1/2 the price as others (like you find on Amazon (https://www.amazon.com/?tag=amznpcfx-20)), it's a lower quality fabric so buyer beware.
The Barrington table is 7 feet long. So the standard 9 ft roll is more than enough.
The vinyl is black, so any color you choose is going to be fine. That said, SSC does come in some brighter colors that people have expressed a disdain for - so I'd be conservative in your color choice unless you want to give your guests a migraine :)
Yes reupholstering the playing surface is pretty easy... I did mine in 90 minutes. Search PCF for 'Barrington' and read the walkthroughs people have been kind enough to post.
As to stability, it's an 8.5 out of 10. Very acceptable for the price but it can wobble a little bit if someone bumps into it with a little force.
The one thing you might one to think of is installing deeper cupholders. The ones that come with it are only about 1" deep, and we've had spills. I posted a thread about my project earlier this month.
jcooper911Micro-Stakes Grinder15 posts
Posted Sep 20, 2019, 11:59 AM#82
Couple questions... but first just want to say how good of idea this is. I've been struggling with finding a table at a reasonable price with speed cloth, and not having the time to do a full table build.
Where do you guys order the speed cloth from? And how much of it? I've seen it on Amazon but wasn't sure if thags the right place to order it.
I'm a fan of classic looks, so I was going to go with green. Any issues with that? I've noticed a lot of people like blue.
When applying the cloth, is it as simple as stapling one side, and then pulling the other side super tight, and then stapling that end? And then repeat for all sides? Cut excess off. Want to make sure it's on there smooth but also not rip it.
How stable is it? Does require any reinforcement?
Thanks!
I got my cloth from amazon (https://www.amazon.com/?tag=amznpcfx-20) and it’s great.
Went with deep green and am v happy, deep navy or deep burgundy also classy.
I used cheap clamps to make sure cloth was stretched and ready for staple, but the way you suggest probably works.
Table doesn’t need reinforcement, just have 2 people put it up and fold away so you don’t stress the hinges you will have taken apart and reassembled...
Good luck and let me know any questions!
Forty4Regular44 posts
Posted Sep 20, 2019, 12:18 PM#83
With fall around the corner I should be recovering mine. Also debating on the deeper cup holders.
RegularjohnRegular30 posts
Posted Sep 30, 2019, 2:44 PM#84
First half done! Going to be doing the other half tonight. Definitely not hard, just tedious with all of the screws and staples.
1A25RMicro-Stakes Grinder5 posts
Posted Sep 30, 2019, 3:29 PM#85
Which foam thickness did you used under the speed cloth?
Moxie MikeRegular41 posts
Posted Sep 30, 2019, 4:51 PM#86
Which foam thickness did you used under the speed cloth?
It comes padded. All you need to do is peel the cloth off.
RegularjohnRegular30 posts
Posted Oct 1, 2019, 11:41 AM#87
Done! Can't believe how good it looks compared to the original. Don't understand why they don't start doing this and charge and extra 50 bucks.
It definitely wasn't hard, just tedious. I'd say the worst parts were stapling the felt down (just so many damn staples)... And the end of putting everything back together. Not hard, just a pain. I'm not sure what others think, but I it's my opinion this shouldn't be done more than once. I think it would be too much for the wood to handle. I know others have asked if you could make the cup holders deeper, and you definitely could with the rigjt tools. My only concern would be the wood being able to handle that kind of beating.
I do have 1 problem tho. See the last picture. On one of the rails at the one end, the screws would not grab into the wood at all. I pushed with everything I had, and it wouldn't grab. My thought process was the holes were probably too big now for the screws. Does anyone have any suggestions to help this? It's probably more visual than anything. But if someone accidentally pulls there, it would be an issue. Maybe glue it down? Adhesive? Bigger screws? Other than that it's great and ready for my Friday game! Thanks to everyone past and present in this thread.
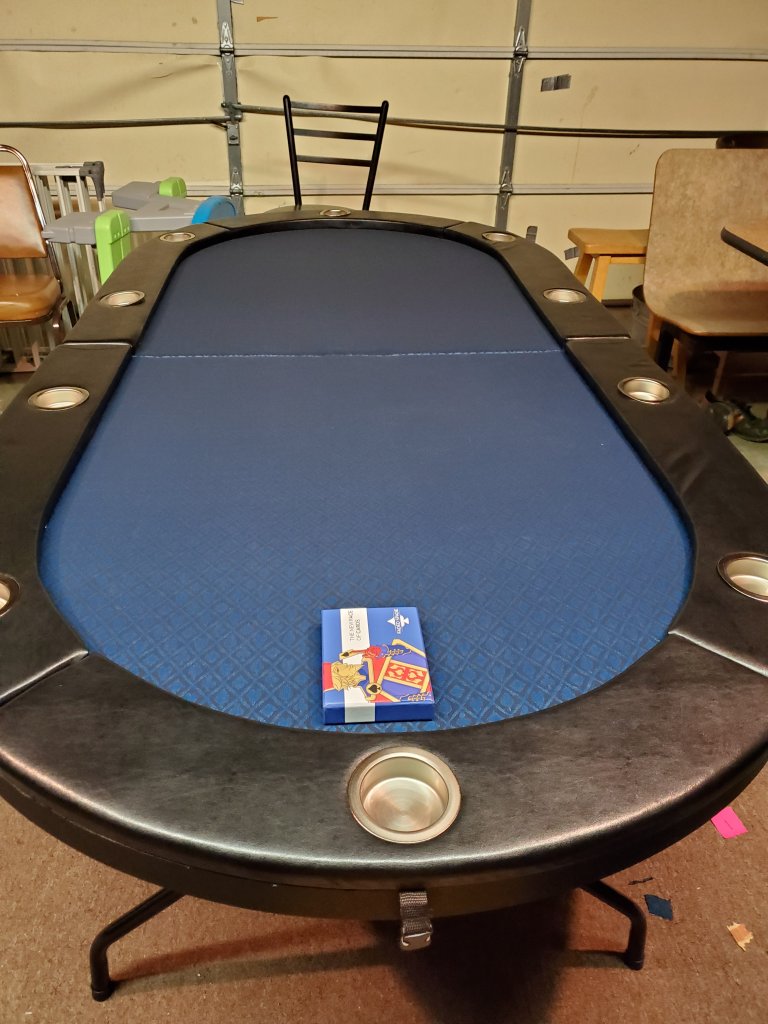
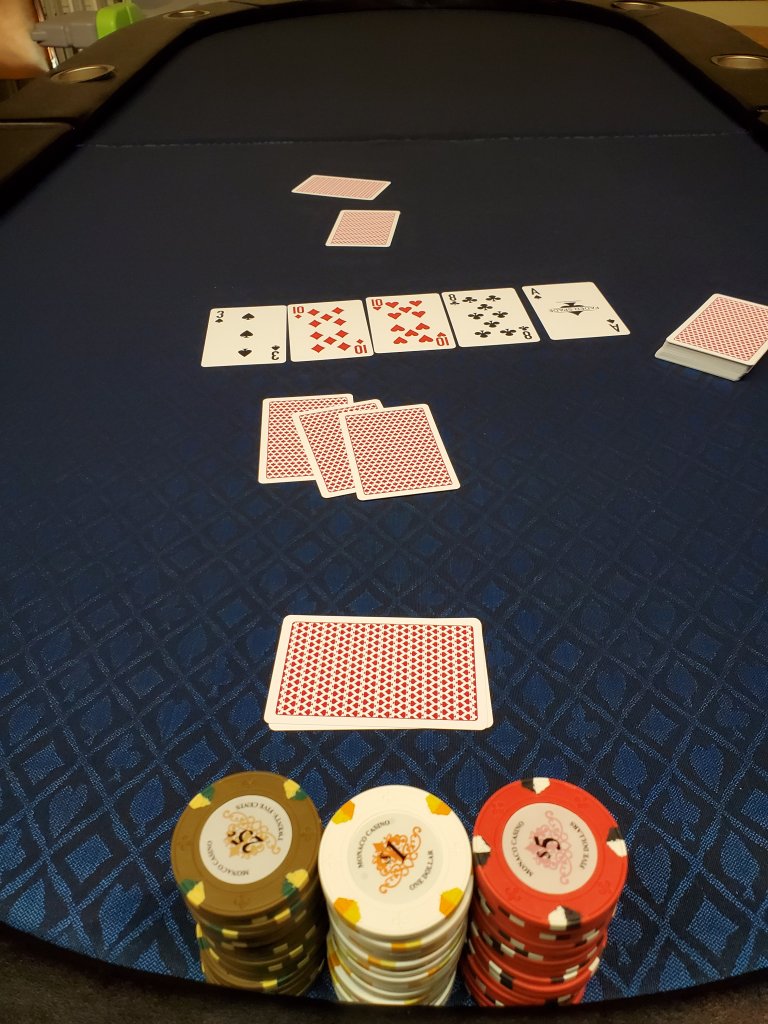
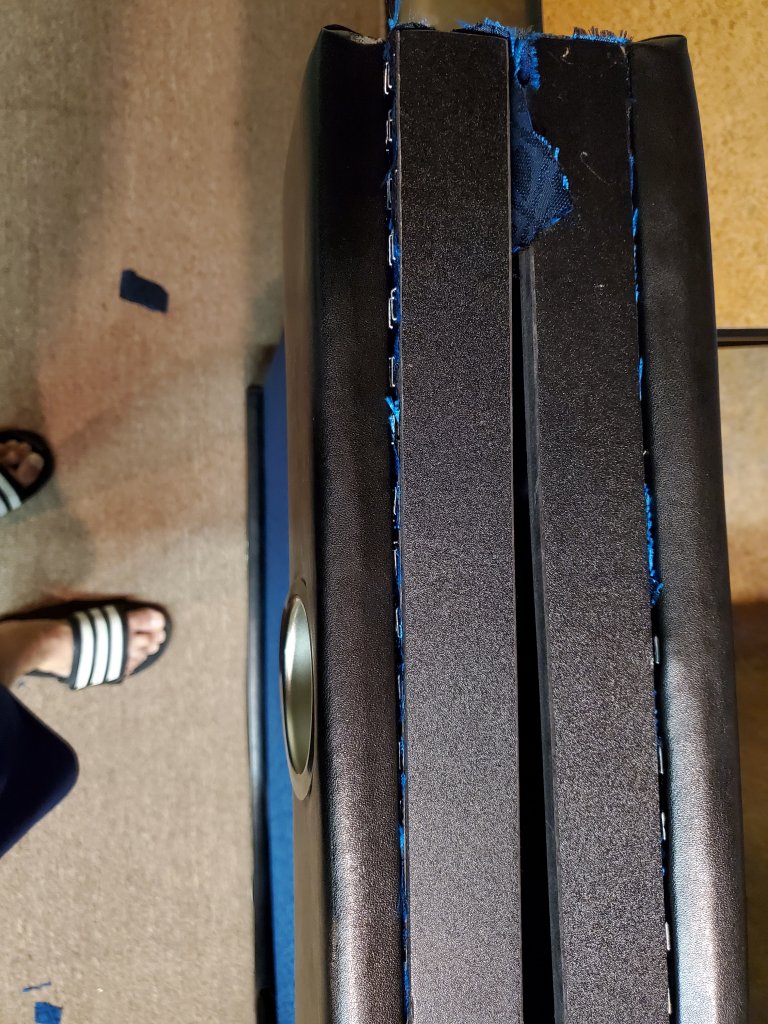
DoubleEagleShark192 posts
Posted Oct 1, 2019, 5:55 PM#88
Fill the holes with a golf tee or wooden match sticks and cut them flush with the surface. You should then be able to tighten the screws.
Moxie MikeRegular41 posts
Posted Oct 1, 2019, 6:04 PM#89
I know others have asked if you could make the cup holders deeper, and you definitely could with the rigjt tools. My only concern would be the wood being able to handle that kind of beating.
I do have 1 problem tho. See the last picture. On one of the rails at the one end, the screws would not grab into the wood at all. I pushed with everything I had, and it wouldn't grab. My thought process was the holes were probably too big now for the screws. Does anyone have any suggestions to help this? It's probably more visual than anything. But if someone accidentally pulls there, it would be an issue. Maybe glue it down? Adhesive? Bigger screws? Other than that it's great and ready for my Friday game! Thanks to everyone past and present in this thread.
Deeper cupholders make a big difference. All you need to do is take the old ones out, then bore through the bottom with a hole saw (2 3/4" I think). On mine, there were 4 spots where the tubular legs were in the way - I just zipped them off with a sawzall outfitted with a metal cutting blade.
Walmart has the best price on the cupholders you need: https://www.walmart.com/ip/Trademark-Poker-Lot-Of-10-Stainless-Steel-Cup-Holders/21070419
As to your stripped out screw hole, you can fill it (spackle, bondo or some type of wood-filler product would probably be fine), wait for it to dry and then run your screw in, or move it over slighty.
If it were me, I'd probably just drill a quick pilot hole right beside the stripped out one and run your screw in.
ATLarchipMicro-Stakes Grinder15 posts
Posted Oct 1, 2019, 6:07 PM#90
Deeper cupholders make a big difference. All you need to do is take the old ones out, then bore through the bottom with a hole saw (2 3/4" I think). On mine, there were 4 spots where the tubular legs were in the way - I just zipped them off with a sawzall outfitted with a metal cutting blade.
Walmart has the best price on the cupholders you need: https://www.walmart.com/ip/Trademark-Poker-Lot-Of-10-Stainless-Steel-Cup-Holders/21070419
.
Do you have a picture of the deeper cup holder installed? I’m assuming you would need to take the cup holders out when folding the table?
Moxie MikeRegular41 posts
Jake14mwMicro-Stakes Grinder15 posts
Moxie MikeRegular41 posts
Posted Oct 1, 2019, 7:20 PM#93
Great price on those cupholders. How deep are they? The site seems to say they are 2 1/2, but they look shorter.
That's about right:

One Eyed DollarMicro-Stakes Grinder15 posts
Posted Oct 1, 2019, 8:08 PM#94
Jake14mwMicro-Stakes Grinder15 posts
Posted Oct 1, 2019, 10:06 PM#95
That's about right:
View attachment 346990 (https://www.pokerchipforum.com/attachments/346990/)
If you get a chance to measure them, I would appreciate it. Just got black ones for a different table, they were 2 3/4" deep and I like them deep. I would not want to go less than 2 1/2" for the table I'm planning. Thanks.
Moxie MikeRegular41 posts
Posted Oct 1, 2019, 10:13 PM#96
If you get a chance to measure them, I would appreciate it. Just got black ones for a different table, they were 2 3/4" deep and I like them deep. I would not want to go less than 2 1/2" for the table I'm planning. Thanks.
They're about 2 inches deep.

Fully installed (the cutoff leg is visable in the rear):


Jake14mwMicro-Stakes Grinder15 posts
Posted Oct 1, 2019, 11:52 PM#97
RegularjohnRegular30 posts
Posted Oct 2, 2019, 4:33 PM#98
Thanks for all of the responses about the stripped wood. I bought some plastic wood filler from home depot and will re-do that rail after my game on Friday.
Also seeing those cup holders makes me want to do that next.... What kind of drill attachment do you need?
Moxie MikeRegular41 posts
RegularjohnRegular30 posts
Moxie MikeRegular41 posts
Posted Oct 3, 2019, 2:36 PM#101
Nice! Might not be so bad. Do you have to re-staple the felt around the hole you create so the felt still stays tight? And do you cut the felt first or just start drilling?
No. Just remove the stock cupholders and bore through it all. The staples and the rail are plenty to hold the felt in place.
RegularjohnRegular30 posts
Posted Oct 3, 2019, 5:05 PM#102
No. Just remove the stock cupholders and bore through it all. The staples and the rail are plenty to hold the felt in place.
Almost seems too easy! Thanks for the info
TonZagaRegular76 posts
Posted Nov 29, 2019, 9:36 AM#103
Decided to get some work done during my vacation time. Fixed one half of the SSC that was originally applied upside down, drilled for new cup holders (thanks @Moxie Mike (https://www.pokerchipforum.com/members/4492/)), and will be installing 10 usb charging ports and mounting a charging station underneath that will plug into an outlet
Teach42Regular39 posts
Posted Nov 29, 2019, 2:55 PM#104
That’s a wicked cool idea!!
TonZagaRegular76 posts
Posted Dec 1, 2019, 12:45 AM#105
It’s not pretty but it’s functional!
tabletalker7Shark116 posts
Posted Dec 1, 2019, 1:08 AM#106
All the sillyness is hidden under the table - pretty enough for me and my guys. Good deal there man
Al AzouriMicro-Stakes Grinder6 posts
Posted Dec 2, 2019, 12:37 AM#107
Decided to get some work done during my vacation time. Fixed one half of the SSC that was originally applied upside down, drilled for new cup holders (thanks @Moxie Mike (https://www.pokerchipforum.com/members/4492/)), and will be installing 10 usb charging ports and mounting a charging station underneath that will plug into an outlet
Where did you find those USB plugs?
TonZagaRegular76 posts
FordPickup92Micro-Stakes Grinder5 posts
Posted Dec 2, 2019, 3:19 AM#109
SoulreadNewbie1 posts
Posted Dec 12, 2019, 6:12 AM#110
Just a heads up. The ESPN table is down to 149.99 right now and the brown felt 10 seater is down to 119.99 on walmart.com
EnjoyLifeMicro-Stakes Grinder6 posts
Posted Dec 12, 2019, 2:12 PM#111
TunnelMoneyMicro-Stakes Grinder15 posts
Posted Dec 12, 2019, 2:17 PM#112
Just a heads up. The ESPN table is down to 149.99 right now and the brown felt 10 seater is down to 119.99 on walmart.com
What's the consensus on which is better? Is the ESPN $30 better in quality?
Does anyone make a storage case/bag for these tables?
BeakertwangRegular79 posts
Posted Dec 12, 2019, 2:20 PM#113
What's the consensus on which is better? Is the ESPN $30 better in quality?
Does anyone make a storage case/bag for these tables?
Not sure about a case for these.
The ESPN table is practically the same, except it has a lighted rail. Kind of cool, but I've seen complaints that the lights are too bright. Not worth it for me. YMMV
TonZagaRegular76 posts
Posted Dec 12, 2019, 2:38 PM#114
What's the consensus on which is better? Is the ESPN $30 better in quality?
Does anyone make a storage case/bag for these tables?
I would spend the extra $30 you would save on SSC of your choosing and cup holders. Not sure about the case or bag but someone posted about a handles mod for easier carrying.
TheBigTaterRegular48 posts
Posted Dec 12, 2019, 2:46 PM#115
Just a heads up. The ESPN table is down to 149.99 right now and the brown felt 10 seater is down to 119.99 on walmart.com
Yep, the 10 player model is down to $116 for pickup, back to almost "worth it" price again. I bet it will drop down a little more in the last few days between now and Xmas.

wonderpuddleMicro-Stakes Grinder9 posts
Posted Dec 12, 2019, 3:42 PM#116
What's the consensus on which is better? Is the ESPN $30 better in quality?
Does anyone make a storage case/bag for these tables?
The espn felt is slightly more palatable if you aren’t going to refelt. But you should refelt. The lights seem cool but are too bright. I never really use mine except to show new players how annoying the lights are. I’d recommend the regular version.
Teach42Regular39 posts
Posted Dec 22, 2019, 11:55 PM#117
Quick question... After you put the new speed cloth on, and reinstall the rails... Do the cupholders just rest on top of the padded rail? Or do you reglue them back down to keep them in?
TonZagaRegular76 posts
Posted Dec 23, 2019, 12:14 AM#118
Quick question... After you put the new speed cloth on, and reinstall the rails... Do the cupholders just rest on top of the padded rail? Or do you reglue them back down to keep them in?
Yeah my stock cup holders just rested on top until I decide to put in deeper ones. You'd have to do a little cleaning or risk just gluing them back down with the old glue and stuff stuck to them. Alot of them didn't come up cleanly.
Teach42Regular39 posts
Posted Dec 23, 2019, 1:09 AM#119
Yeah my stock cup holders just rested on top until I decide to put in deeper ones. You'd have to do a little cleaning or risk just gluing them back down with the old glue and stuff stuck to them. Alot of them didn't come up cleanly.
LoL, yeah, the bottoms are kinda a mess. Definitely a struggle to get any of that crap off.
Any tips for securing the rails back to the base in order to get them screwed in nice and tight? I hesitate to clamp to the padding...
TonZagaRegular76 posts
Posted Dec 23, 2019, 1:14 AM#120
LoL, yeah, the bottoms are kinda a mess. Definitely a struggle to get any of that crap off.
Any tips for securing the rails back to the base in order to get them screwed in nice and tight? I hesitate to clamp to the padding...
I screwed in one screw on both sides of each pad just enough to catch the holes on each pad. Once those are in, the others should fall into place where they need to be.
Teach42Regular39 posts
Posted Dec 23, 2019, 3:58 AM#121
Holy crap, what a difference! Halfway done, and I just thought I would test it out. I guess I'm just used to crappy tables and surfaces, but the difference is like playing air hockey with the air on vs the air off! What an easy project and massive upgrade...
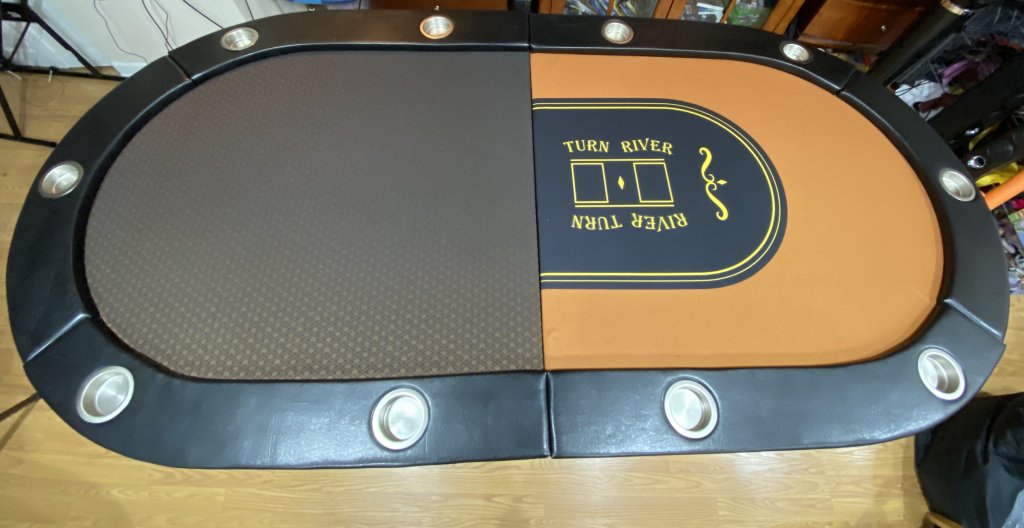
Teach42Regular39 posts
Posted Dec 23, 2019, 4:03 AM#122
Bah. Created a video showing the difference (https://imgur.com/mmNL3qM), but can't seem to embed it. Either as a video, or as a GIF. Hrrrrm....
Chile85Newbie4 posts
Posted Dec 23, 2019, 4:27 AM#123
Holy crap, what a difference! Halfway done, and I just thought I would test it out. I guess I'm just used to crappy tables and surfaces, but the difference is like playing air hockey with the air on vs the air off! What an easy project and massive upgrade...
View attachment 383600 (https://www.pokerchipforum.com/attachments/383600/)
Very nice, which speed felt did you use? Planning to so deeper cup holders or having okay luck with the current size?
Teach42Regular39 posts
Posted Dec 23, 2019, 4:37 AM#124
Got it from Texas Poker Supplies (https://texaspokersupply.com/products/build-a-table/suited-speed-cloth/). $5 per foot. Bought 9 feet and probably could have gotten away with 8. Planning to replace the cupholders down the road, but that's an easy project. The current ones come back out easy and should be easy to drill new holes. Project for another day.
Teach42Regular39 posts
Posted Dec 24, 2019, 12:10 AM#125
And.... done! Second half really flew now that I knew what I was doing.


tabletalker7Shark116 posts
Posted Dec 31, 2019, 2:06 AM#126
What size staples do you guys use for the new felt?
Moxie MikeRegular41 posts
Posted Dec 31, 2019, 2:26 AM#127
What size staples do you guys use for the new felt?
I think I used 6mm staples. The material is only 1/2" thick - so reasonably speaking anything slightly less than the thickness of the playing surface should be fine.
SixSpeedFuryRegular64 posts
Posted Dec 31, 2019, 2:46 AM#128
Did anyone swap out the cup holders yet for shallow ones? I ordered some from Amazon (https://www.amazon.com/?tag=amznpcfx-20), but don't know what portable saw I should use for cutting.
Moxie MikeRegular41 posts
SixSpeedFuryRegular64 posts
Posted Dec 31, 2019, 5:59 AM#130
TeamNapoliNewbie1 posts
Posted Dec 31, 2019, 12:42 PM#131
All great upgrades, just curious why start with a purchased table for 130 - 160, then buy speed cloth cup holders and handles when you can get ply wood for that and cut to your table size you want, yes i understand you still need foam for rails, marine vinyl l for rail covers neoprene for under speed cloth.
Is it time management? buying the base saves time
ReallyGoodUsernameRegular42 posts
Posted Dec 31, 2019, 1:15 PM#132
All great upgrades, just curious why start with a purchased table for 130 - 160, then buy speed cloth cup holders and handles when you can get ply wood for that and cut to your table size you want, yes i understand you still need foam for rails, marine vinyl l for rail covers neoprene for under speed cloth.
Is it time management? buying the base saves time
I think that for most people these tables are backup tables or temporary tables (needed out of necessity) so putting in the money, time, and effort to build one from scratch isn’t that attractive for someone who hasn't done this type of thing before. My table all in was about $180 (new felt, deep cup holders, new center bracket, and carrying handles) for a total of 5 hours of amateur carpentry. I could have bought the additional tools and scrap supplies but would be afraid after 5 days, I’d look down and see this:

Could I eventually learn and execute a pretty good looking poker table? Yes. It’s just personally, not worth the additional time it’d take someone with my skill level to do right now.
Teach42Regular39 posts
Posted Dec 31, 2019, 2:49 PM#133
What he said. I'll just add in that due to space, I needed a folding table, which adds complexity. And I just wasn't confident in my skills to pull it off well. Replacing the cloth and cup holders re ridiculously easy projects. Building one from scratch is a much bigger commitment.
KenscoMicro-Stakes Grinder12 posts
Posted Dec 31, 2019, 8:24 PM#134
Picked up the table for $119 at Walmart and played a game on the original very loose, very pillowy felt. The felt aside, it's a nice table for the cost +tax & free shipping.
I have inexpensive "speed cloth" (all polyester for $29 - perfectly fine for this table) coming Friday, from Amazon (https://www.amazon.com/?tag=amznpcfx-20), and will have to dig out some old cup holders to see if they fit diameter-wise before committing to that upgrade initially. Either way: much less expensive than a full build from scratch.
@Irish (https://www.pokerchipforum.com/members/114/) , anyone else: Question regarding the cable running between the table legs: There is no tension on it, so I fail to see how it lends any support. Anyone else in this boat or are your cables taught?
ReallyGoodUsernameRegular42 posts
Posted Dec 31, 2019, 8:30 PM#135
@Irish (https://www.pokerchipforum.com/members/114/) , anyone else: Question regarding the cable running between the table legs: There is no tension on it, so I fail to see how it lends any support. Anyone else in this boat or are your cables taught?
Lots of people have noted the same. There's a way to fix it but I completely forget how someone said to do it.
Moxie MikeRegular41 posts
Posted Dec 31, 2019, 8:53 PM#136
All great upgrades, just curious why start with a purchased table for 130 - 160, then buy speed cloth cup holders and handles when you can get ply wood for that and cut to your table size you want, yes i understand you still need foam for rails, marine vinyl l for rail covers neoprene for under speed cloth.
Is it time management? buying the base saves time
You really can't beat the price - raw materials alone would cost far more than a Barrington with the standard upgrades. And yes building your own table takes some time - although most people who take on the challenge can get it done in a couple of weekends.
Plus the fact that it folds and stores conveniently, and free shipping to your door make it pretty much the best value for the money.
IrishRegular51 posts
Posted Dec 31, 2019, 11:55 PM#137
@Irish (https://www.pokerchipforum.com/members/114/) , anyone else: Question regarding the cable running between the table legs: There is no tension on it, so I fail to see how it lends any support. Anyone else in this boat or are your cables taught?
Not sure, never seen one of these up close. But based on the pics ITT, the cable looks like it provides a secondary catch/support for the middle piano hinge. If it functions fine with the cable slack I'd think you could just leave it as is, but if its sagging at the hinge it'll probably need to be reset.
Teach42Regular39 posts
Posted Jan 1, 2020, 4:22 PM#138
Question regarding the cable running between the table legs: There is no tension on it, so I fail to see how it lends any support. Anyone else in this boat or are your cables taught?
Are you checking when the table is standing? It's kind of annoying when unfolding the table, but mine pulls taut when the table is standing up. Definitely seems to add a layer of security.
KenscoMicro-Stakes Grinder12 posts
Posted Jan 1, 2020, 6:44 PM#139
Not sure, never seen one of these up close. But based on the pics ITT, the cable looks like it provides a secondary catch/support for the middle piano hinge. If it functions fine with the cable slack I'd think you could just leave it as is, but if its sagging at the hinge it'll probably need to be reset.
Are you checking when the table is standing? It's kind of annoying when unfolding the table, but mine pulls taut when the table is standing up. Definitely seems to add a layer of security.
Yep, when standing it's a bit slack. The table held level during our first game, but everything wears over time. Maybe it will pull taught if the middle sags, but seems it should have tension before it comes to that point.
If it becomes an issue I'll give some thought to mending plates & bolts with wingnuts/turnbuckles/C-clamps/making it a permanent table, etc.. Thanks for the responses & insight
JRReynolds6181Micro-Stakes Grinder6 posts
Posted Jan 1, 2020, 10:35 PM#140
All great upgrades, just curious why start with a purchased table for 130 - 160, then buy speed cloth cup holders and handles when you can get ply wood for that and cut to your table size you want, yes i understand you still need foam for rails, marine vinyl l for rail covers neoprene for under speed cloth.
Is it time management? buying the base saves time
I received mine as a gift. My wife is aware that I like all things poker but it’s no fun buying your husband plywood and foam padding. ;)
DJ_FettNewbie2 posts
Posted Jan 2, 2020, 2:49 PM#141
All great upgrades, just curious why start with a purchased table for 130 - 160, then buy speed cloth cup holders and handles when you can get ply wood for that and cut to your table size you want, yes i understand you still need foam for rails, marine vinyl l for rail covers neoprene for under speed cloth.
Is it time management? buying the base saves time
Our game went for 6-8 people to 10-12, so I needed a second table. I plan to add the speed cloth, but this was a cheap option for a second table that is Immediately usable, then when I have some time I can work on the upgrades
Mr MonopolyNewbie3 posts
Teach42Regular39 posts
Posted Jan 6, 2020, 12:53 AM#143
SgajacketNewbie2 posts
Posted Jan 7, 2020, 3:31 AM#144

Thanks to this thread, I bit the bullet and replaced the surface on my ESPN table. I had some dimmable lights lying around, so I replaced the super bright and unusable ones while I was at it. There are definitely some tricks to this versus the standard brown table, but it wasn’t difficult at all. Adding deeper cup holders and a turnbuckle for the leg cable later this week, but it’s ten times more playable already!
Teach42Regular39 posts
Posted Jan 7, 2020, 5:23 PM#145
Looks awesome! Take any pics of the lighting replacement process?
Lucks7ShadowNewbie1 posts
Posted Jan 7, 2020, 7:36 PM#146
View attachment 388950 (https://www.pokerchipforum.com/attachments/388950/)
Thanks to this thread, I bit the bullet and replaced the surface on my ESPN table. I had some dimmable lights lying around, so I replaced the super bright and unusable ones while I was at it. There are definitely some tricks to this versus the standard brown table, but it wasn’t difficult at all. Adding deeper cup holders and a turnbuckle for the leg cable later this week, but it’s ten times more playable already!
Looks great. what kind of tricks would you say to pay attention to for the ESPN table? I am planning to try this soon myself.
Mr MonopolyNewbie3 posts
Posted Jan 7, 2020, 8:54 PM#147
SgajacketNewbie2 posts
Posted Jan 7, 2020, 9:43 PM#148
Looks awesome! Take any pics of the lighting replacement process?
I didn’t take any pictures, but it was pretty straightforward. The lighting I used to replace the original was the same style and size. I had to peel the original off anyway. The new is just stuck to the spacer board with the 3M tape that came on it. The light strips feed through a hole in the table near the edge of the spacer board, and they plug into wires from a remote module that replaces the block from the original lights. With the lights I used, I don’t think you can get by without having a splitter off the box to run two separate light ribbons.
Looks great. what kind of tricks would you say to pay attention to for the ESPN table? I am planning to try this soon myself.
Use a flat pry bar between the table and the spacer board and be careful. The spacer board is brad nailed to the table. Peel the lights off and be prepared with double sided tape if you want to add them back. (Before I remembered I had this other set, a friend had recommended putting the lights under the table for a cool “underglow” effect. I think this is preferable to trying to use such bright lights without a diffuser.) If you are scrapping the lights, you will want to paint the inside rim of the spacer. I also considered replacing the spacer boards and making the table deeper. This would leave a gap on the outside that would need to be considered. (Another potential place for the lights.) the cupholders are glued to the spacer board, which is thin MDF, so the flat pry bar is essential again, as you pull them away carefully.
I didn’t take off any legs or hinges. My fabric is attached in the gap in the middle of the table and I see no reason to do otherwise.
Once fabric is attached, nail the spacer back down and screw the rail on, same as the brown table.
Teach42Regular39 posts
Posted Jan 7, 2020, 11:56 PM#149
I know that. I clicked on the link. The item shown only displays the USB cords. A charging station is not pictured.
DOH!! Sorry about that.
justsomedudeRegular76 posts
Posted Jan 9, 2020, 5:39 AM#150
All great upgrades, just curious why start with a purchased table for 130 - 160, then buy speed cloth cup holders and handles when you can get ply wood for that and cut to your table size you want, yes i understand you still need foam for rails, marine vinyl l for rail covers neoprene for under speed cloth.
Is it time management? buying the base saves time
Time and tools are a big factor. Also, the cost can add up quick, even if you're buying basic materials.
I'm working on my first custom build now and it's coming in right around $475 in total materials cost. Granted, that is with an upgraded table layout and legs, but even with basic legs and speed cloth, the total is more than you might think.
Here's my recent build spreadsheet modified with suited speed cloth and basic folding table legs to keep the cost down...

And that still requires one to have a jigsaw, power drill, and driver. You'll also need a host of other things, like a staple gun, utility knife, forstner bits, sawhorses, wood screws, extra jigsaw blades, etc. An air compressor and pneumatic stapler are nice bonuses as well. And let's not forget the weekend or so (and workshop space) that you'll need to build the thing. For some one new to woodworking and/or power tools, the costs, space, and time commitment can be substantial.
For a first time table build you could easily exceed $400, even if you already have most of the tools. The Barrington table, even with upgrades, is still well under $200, which is an incredibly attractive option as a pre-built alternative.
justsomedudeRegular76 posts
Posted Jan 9, 2020, 5:52 AM#151
Bah. Created a video showing the difference (https://imgur.com/mmNL3qM), but can't seem to embed it. Either as a video, or as a GIF. Hrrrrm....
FYI - If you upload it to YouTube and paste the link, the forum will embed the video.
Teach42Regular39 posts
Posted Jan 9, 2020, 1:15 PM#152
FYI - If you upload it to YouTube and paste the link, the forum will embed the video.
Sonuva.... Now you tell me!
Teach42Regular39 posts
Posted Jan 9, 2020, 1:15 PM#153
Time and tools are a big factor. Also, the cost can add up quick, even if you're buying basic materials.
I'm working on my first custom build now and it's coming in right around $475 in total materials cost. Granted, that is with an upgraded table layout and legs, but even with basic legs and speed cloth, the total is more than you might think.
Here's my recent build spreadsheet modified with suited speed cloth and basic folding table legs to keep the cost down...
View attachment 389722 (https://www.pokerchipforum.com/attachments/389722/)
And that still requires one to have a jigsaw, power drill, and driver. You'll also need a host of other things, like a staple gun, utility knife, forstner bits, sawhorses, wood screws, extra jigsaw blades, etc. An air compressor and pneumatic stapler are nice bonuses as well. And let's not forget the weekend or so (and workshop space) that you'll need to build the thing. For some one new to woodworking and/or power tools, the costs, space, and time commitment can be substantial.
For a first time table build you could easily exceed $400, even if you already have most of the tools. The Barrington table, even with upgrades, is still well under $200, which is an incredibly attractive option as a pre-built alternative.
This is ridiculously helpful. Should be saved into the Resource section. Well played, sir.
Teach42Regular39 posts
raynmanasRegular49 posts
Posted Jan 23, 2020, 3:03 PM#155
I have a price watch on these to pick one up if they get deeply discounted again. I want to replace my octagon with it because I hate having to cap weeknight games at 8, but I am wondering how well this can actually accomodate 10 full grown men?
BeakertwangRegular79 posts
Posted Jan 23, 2020, 3:24 PM#156
I have a price watch on these to pick one up if they get deeply discounted again. I want to replace my octagon with it because I hate having to cap weeknight games at 8, but I am wondering how well this can actually accomodate 10 full grown men?
I had 10 around it once. It was snug, but not undoable. However, no one was particularly large either.
Mr MonopolyNewbie3 posts
Posted Jan 23, 2020, 3:26 PM#157
Comfortably, but I recommend using chairs without armrests if you’re gonna have that many players side by side. At my table I have noticed when the table was full the armrests were more of nuisance than a convenience.
DarkestHorseNewbie1 posts
Posted Jan 25, 2020, 5:05 AM#158
Just wanted to say thank you to everyone for posting. This table seems like a pretty interesting option.
Has anyone tried just cutting a roll out neoprene poker mat (like the PCF one) and just putting that on top? I would be curious how well that would work because I have a mat already.
It would cover the crack in the middle, but I worry about it not fitting perfectly and/or bunching up.
DarsonMicro-Stakes Grinder20 posts
Posted Jan 25, 2020, 7:56 AM#159
The PCF mat doesn’t fit - I tried, it’s a few inches too short.
Teach42Regular39 posts
Posted Jan 25, 2020, 2:10 PM#160
And don't worry about the crack. It's not even noticeable when playing. Cards just fly right over it once you've upgraded to speed cloth.
Xlcjw72Newbie1 posts
Posted Jan 25, 2020, 3:35 PM#161
is there still a good place to buy this thing? walmart is back to normal price
Teach42Regular39 posts
Posted Jan 25, 2020, 4:23 PM#162
is there still a good place to buy this thing? walmart is back to normal price
It seems to fluctuate every few months. Just keep checking on it, it'll go back down.
Or keep an eye on Craigslist. They do pop up used for the same sales price. But if you're ripping off the cloth, who cares that it's used?
BugeRegular53 posts
Forty4Regular44 posts
Posted Feb 1, 2020, 1:57 AM#164
Inquiring from expert builders trying to save money might have cost me money. Using the headliner foam doubled up. Will these creases indentations affect the gaming cloth? Just don’t want them to show.

Lent53Micro-Stakes Grinder8 posts
Posted Feb 1, 2020, 3:00 AM#165
Inquiring from expert builders trying to save money might have cost me money. Using the headliner foam doubled up. Will these creases indentations affect the gaming cloth? Just don’t want them to show.
View attachment 400945 (https://www.pokerchipforum.com/attachments/400945/)
I just resurfaced mine last night. Don't worry about those imperfections on the foam. Once you start stretching/stapling the speed cloth, you won't see any of that.
pivey101Newbie4 posts
Posted Feb 1, 2020, 3:10 AM#166
I just resurfaced mine last night. Don't worry about those imperfections on the foam. Once you start stretching/stapling the speed cloth, you won't see any of that.
Excited to see the end result!
Lent53Micro-Stakes Grinder8 posts
Posted Feb 1, 2020, 3:30 AM#167
Excited to see the end result!
End results! Thanks for the help! Ended up going with the SSC from TPS. Very glad I did. It came out great


BugeRegular53 posts
Lent53Micro-Stakes Grinder8 posts
Posted Feb 1, 2020, 4:09 AM#169
That looks awesome! Is that midnight blue?? I just ordered mine from TPS yesterday. Also how long did it take to receive the cloth after ordering?
Thanks! Yes, it's dark blue. Mine arrived 3-4 days after I ordered it. It did take 2 days before the shipping tracking updated and caught up.
Forty4Regular44 posts
Posted Feb 1, 2020, 4:15 AM#170
I just resurfaced mine last night. Don't worry about those imperfections on the foam. Once you start stretching/stapling the speed cloth, you won't see any of that.
If I was using SSC I wouldn’t worry but I’m using a overrun from the layout company.
Lent53Micro-Stakes Grinder8 posts
Posted Feb 1, 2020, 4:16 AM#171
If I was using SSC I wouldn’t worry but I’m using a overrun from the layout company.
Oh I see. Interested to see how this turns out.
BugeRegular53 posts
Posted Feb 1, 2020, 4:51 AM#172
Thanks! Yes, it's dark blue. Mine arrived 3-4 days after I ordered it. It did take 2 days before the shipping tracking updated and caught up.
Ok cool! Can’t wait to get started with the upgrade. Deeper cup holders coming tomorrow.
Lent53Micro-Stakes Grinder8 posts
Posted Feb 1, 2020, 2:05 PM#173
Ok cool! Can’t wait to get started with the upgrade. Deeper cup holders coming tomorrow.
I would like to do this as well and was reading up on it. Not sure I have the right tools. And would I need to remove the rail again or just pop out the cup holders and drill down?
TonZagaRegular76 posts
Posted Feb 1, 2020, 2:09 PM#174
I would like to do this as well and was reading up on it. Not sure I have the right tools. And would I need to remove the rail again or just pop out the cup holders and drill down?
If the teeth on your hole saw are sharp enough, you can just remove the cup holders and drill through the SSC and the surface. I did it just fine and that ensures that everything lines up
Lent53Micro-Stakes Grinder8 posts
Posted Feb 1, 2020, 2:23 PM#175
If the teeth on your hole saw are sharp enough, you can just remove the cup holders and drill through the SSC and the surface. I did it just fine and that ensures that everything lines up
Got it. And how far down did you drill and which cup holders did you use? Thanks
TonZagaRegular76 posts
TonZagaRegular76 posts
Posted Feb 1, 2020, 2:40 PM#177
@Lent53 (https://www.pokerchipforum.com/members/7082/) you will need to cut down the table leg on each for 4 of them to slide past when inserted. I used a dremel with a cutting wheel but you can use a sawzall or preferred method.
Lent53Micro-Stakes Grinder8 posts
TonZagaRegular76 posts
Posted Feb 1, 2020, 2:51 PM#179
BugeRegular53 posts
Moxie MikeRegular41 posts
BugeRegular53 posts
Posted Feb 1, 2020, 5:40 PM#182
What type of glue did you guys use to glue the cup holders down?
TonZagaRegular76 posts
Posted Feb 1, 2020, 5:43 PM#183
What type of glue did you guys use to glue the cup holders down?
Between the 2.75" hole and the leather, it was tight enough fit that I didn't use any, plus it makes it easier to dump them out if they get anything spilled in them
ReallyGoodUsernameRegular42 posts
Posted Feb 1, 2020, 5:55 PM#184
What type of glue did you guys use to glue the cup holders down?
I didn't use any either to make for easy cleaning. I built a "cradle" for them with two blocks of wood with a flat piece of wood between them (on the underside of the table) to 1) prevent them from being pushed through and 2) I put velcro on the bottom of the cup holder and the "cradle" to prevent them from being pulled up.
BugeRegular53 posts
Posted Feb 1, 2020, 6:17 PM#185
Ok, thanks. I will skip the glue and see how well I get them to fit inside the hole. Is something underneath the cup holder necessary? Will the cup holder push through towards the floor without a support underneath?
JRReynolds6181Micro-Stakes Grinder6 posts
Posted Feb 1, 2020, 6:23 PM#186
And don't worry about the crack. It's not even noticeable when playing. Cards just fly right over it once you've upgraded to speed cloth.
I worried about that too. And you’re 100% right once the game starts you forget it’s even there.
ReallyGoodUsernameRegular42 posts
Posted Feb 1, 2020, 7:10 PM#187
Ok, thanks. I will skip the glue and see how well I get them to fit inside the hole. Is something underneath the cup holder necessary? Will the cup holder push through towards the floor without a support underneath?
The holes they drill into the plywood of the armrest are significantly larger than the holes they cut in the foam. This means there's not much support underneath the foam so I felt it was necessary to add something additional. See the photos below for what I did. Doing so did require I cut the end part of the legs that come into the contact with the table itself (see white caps) in order to fit the 4 cup holder "cradles" that overlap the leg support bars.
]


TonZagaRegular76 posts
Posted Feb 1, 2020, 7:15 PM#188
Ok, thanks. I will skip the glue and see how well I get them to fit inside the hole. Is something underneath the cup holder necessary? Will the cup holder push through towards the floor without a support underneath?
The ones that Moxie Mike and I are using the lip is solid enough that it can't be pulled through unless the hole is way too big
ReallyGoodUsernameRegular42 posts
TonZagaRegular76 posts
Posted Feb 1, 2020, 7:44 PM#190
^^ Easy to add a support or glue rather than add material to a hole you just cut too big
ReallyGoodUsernameRegular42 posts
Posted Feb 1, 2020, 7:47 PM#191
^^ Easy to add a support or glue rather than add material to a hole you just cut too big
Just to clarify, the large holes in the armrest are pre-cut by the manufacturer and the cradles as opposed to glue, were done so you have the option remove the cup holders if you want.
BugeRegular53 posts
Posted Feb 3, 2020, 8:28 PM#192
So I am starting my Barrington table upgrade today. :) So far I have removed the old cup holders and drilled holes for new cup holders. They used a ton of glue on those old cup holders! :banghead: Just purchased clips to hold the new speed cloth in place. I ended up going with midnight blue from TPS. I will post an updated picture after completion.

BugeRegular53 posts
Posted Feb 4, 2020, 6:56 PM#193
Ok so it’s finally done after a few hours. Not perfect by any means but overall not too bad. I’m glad I didn’t spend the extra money on an electric stapler. The handheld heavy duty Stanley stapler worked very well. This is a project that anyone can do so don’t be afraid to upgrade your table! Thanks for all the helpful comments that made this upgrade a breeze. :tup:


Lent53Micro-Stakes Grinder8 posts
BugeRegular53 posts
KenscoMicro-Stakes Grinder12 posts
Posted Feb 5, 2020, 7:40 PM#196
Finished my upgrade yesterday, very happy with the upgrade but can't add much to the prior "how-to" comments.
Table was a score at $120. I added about $60 in volara & knock-off SSC and the cup holders were from my first, scrapped, table build.

Consider you may have to add some padding to the table. In original condition the playing surface and padding on the table I purchased was incredibly slack and billowy. Had it not been an upgrade project it would have been a return for refund.
Easier to see the degree in the picture with the original felt removed. In real life it was only slightly mitigated by the felt.


I picked up a 84" cover from Casin4You because this table will remain set up in the shop.

Best advice in this thread deserves iteration: label the parts! Especially beneficial if, like me, you are easily distracted and let this sit a couple weeks between dis-assembly and re-assembly :rolleyes:
BugeRegular53 posts
Posted Feb 5, 2020, 7:52 PM#197
Finished my upgrade yesterday, very happy with the upgrade but can't add much to the prior "how-to" comments.
Table was a score at $120. I added about $60 in volara & knock-off SSC and the cup holders were from my first, scrapped, table build.
View attachment 403044 (https://www.pokerchipforum.com/attachments/403044/)
Consider you may have to add some padding to the table. In original condition the playing surface and padding on the table I purchased was incredibly slack and billowy. Had it not been an upgrade project it would have been a return for refund.
Easier to see the degree in the picture with the original felt removed. In real life it was only slightly mitigated by the felt.
View attachment 403042 (https://www.pokerchipforum.com/attachments/403042/)
View attachment 403050 (https://www.pokerchipforum.com/attachments/403050/)
I picked up a 84" cover from Casin4You because this table will remain set up in the shop.
View attachment 403046 (https://www.pokerchipforum.com/attachments/403046/)
Best advice in this thread deserves iteration: label the parts! Especially beneficial if, like me, you are easily distracted and let this sit a couple weeks between dis-assembly and re-assembly :rolleyes:
Looks great! I like the black cup holders
Forty4Regular44 posts
Posted Feb 5, 2020, 8:44 PM#198
Best advice in this thread deserves iteration: label the parts! Especially beneficial if, like me, you are easily distracted and let this sit a couple weeks between dis-assembly and re-assembly :rolleyes:
Mine has been apart for months. I think it was also smart to use ABC on one side and 123 on the other half. But time will tell if that was correct.
BugeRegular53 posts
Posted Feb 5, 2020, 11:28 PM#199
Mine has been apart for months. I think it was also smart to use ABC on one side and 123 on the other half. But time will tell if that was correct.
Def a good idea. I marked mine left and right with each rail marked L1,L2,L3,R1,R2,R3. Rails went back on no problem. Just make sure to tighten them down enough so cards don’t slide underneath them. I had to adjust a few spots that were allowing cards to slide underneath.
Forty4Regular44 posts
Posted Feb 6, 2020, 1:00 AM#200
Def a good idea. I marked mine left and right with each rail marked L1,L2,L3,R1,R2,R3. Rails went back on no problem. Just make sure to tighten them down enough so cards don’t slide underneath them. I had to adjust a few spots that were allowing cards to slide underneath.
I didn’t want to question which side of the I was standing on to determine L & R. :)
I also labeled the legs in a similar fashion.
BugeRegular53 posts
Posted Feb 6, 2020, 2:31 AM#201
I didn’t want to question which side of the I was standing on to determine L & R. :)
I also labeled the legs in a similar fashion.
Haha yea I see what you mean. Name of label didn’t matter as long as they matched up in the end lol
ZenWookieeNewbie2 posts
Posted Feb 6, 2020, 5:49 AM#202
Finished my upgrade yesterday, very happy with the upgrade but can't add much to the prior "how-to" comments.
Table was a score at $120. I added about $60 in volara & knock-off SSC and the cup holders were from my first, scrapped, table build.
View attachment 403044 (https://www.pokerchipforum.com/attachments/403044/)
Consider you may have to add some padding to the table. In original condition the playing surface and padding on the table I purchased was incredibly slack and billowy. Had it not been an upgrade project it would have been a return for refund.
Easier to see the degree in the picture with the original felt removed. In real life it was only slightly mitigated by the felt.
View attachment 403042 (https://www.pokerchipforum.com/attachments/403042/)
View attachment 403050 (https://www.pokerchipforum.com/attachments/403050/)
I picked up a 84" cover from Casin4You because this table will remain set up in the shop.
View attachment 403046 (https://www.pokerchipforum.com/attachments/403046/)
Best advice in this thread deserves iteration: label the parts! Especially beneficial if, like me, you are easily distracted and let this sit a couple weeks between dis-assembly and re-assembly :rolleyes:
Very nice. I'm eyeing one of these Barrington tables and I didnt think I'd need to do any upgrades, but all of these look so nice. Need to gain some confidence in my DIY skills.
BugeRegular53 posts
Posted Feb 6, 2020, 1:21 PM#203
Very nice. I'm eyeing one of these Barrington tables and I didnt think I'd need to do any upgrades, but all of these look so nice. Need to gain some confidence in my DIY skills.
You can do it! All you really need is a staple gun, scissors and a Phillips head screwdriver and you can upgrade it. A power drill def makes the job way easier but can be done without. Keep us posted if you decide to make the upgrade! :tup:
Teach42Regular39 posts
Posted Feb 6, 2020, 1:29 PM#204
Very nice. I'm eyeing one of these Barrington tables and I didnt think I'd need to do any upgrades, but all of these look so nice. Need to gain some confidence in my DIY skills.
@Buge (https://www.pokerchipforum.com/members/6951/) is right. Incredibly easy. It's a great starter project and upgrading the cloth makes a WORLD of difference. Night and day.
ZenWookieeNewbie2 posts
Posted Feb 6, 2020, 2:11 PM#205
Well I’m way more likely to give it a go now. Thanks, y’all.
JeepologyOffroadMicro-Stakes Grinder23 posts
Posted Feb 9, 2020, 12:59 AM#206
Anyone still have their shallow cup holders maybe taking up space?
Teach42Regular39 posts
Posted Feb 9, 2020, 2:31 AM#207
Anyone still have their shallow cup holders maybe taking up space?
I haven't replaced mine yet, but been planning to do so. Why you need some?
TonZagaRegular76 posts
Posted Feb 12, 2020, 12:20 AM#208
WhiteMamba1646Regular25 posts
Posted Feb 12, 2020, 12:32 AM#209
Forgot to add these here!


Teach42Regular39 posts
Posted Feb 12, 2020, 1:01 AM#210
Wow! Very nice!! Came out fantastic!
Chile85Newbie4 posts
BugeRegular53 posts
Posted Feb 12, 2020, 2:23 AM#212
That table came out great! Where’s the cloth from?
WhiteMamba1646Regular25 posts
BugeRegular53 posts
rjbf65Micro-Stakes Grinder13 posts
Posted Feb 12, 2020, 11:53 PM#215
That custom cloth is a thing of beauty!
raynmanasRegular49 posts
Posted Feb 16, 2020, 1:26 PM#216
replacing the cloth with SSC on one of these is my project for later today. appreciate the info and pics in this thread!
raynmanasRegular49 posts
Posted Feb 16, 2020, 10:23 PM#217
and done! pretty straightforward project, as others have mentioned the hardest part was lining up the pattern in the middle.


TheWoodsNewbie1 posts
Posted Feb 16, 2020, 10:25 PM#218
BugeRegular53 posts
Posted Feb 17, 2020, 1:06 AM#219
Teach42Regular39 posts
Posted Feb 17, 2020, 4:43 AM#220
raynmanasRegular49 posts
Posted Feb 17, 2020, 1:01 PM#221
Table looks amazing, but let's see more pics of the banjo!
ha, it's a cheapo hand-me-down from my father-in-law, i am just learning it. normally there is a guitar in that spot.
raynmanasRegular49 posts
Posted Feb 17, 2020, 6:14 PM#222
Nice job! Put some new cup holders in there if you can. It makes a huge difference
i probably will at some point, i actually already own a 2.75" hole saw. i haven't looked yet, but i would like to find black instead of silver cupholders if i am going to upgrade.
pedrofiskNewbie2 posts
Posted Mar 27, 2020, 3:24 AM#223
Finally was able to get away with picking up a Barrington. This is an odd one in that it has a printed hard top and then the felt lies on top. Which is fine for now as my kids are young and there will be spills. Then I'll re-felt it when I can. The opposite side of the poker felt is blackjack. It's also only a 6 foot which is the biggest that will fit the room.
Without topper felt:

With topper felt:

DodgerRegular46 posts
Posted May 31, 2020, 10:49 PM#224
Another successful upgrade! Had this thread bookmarked for ages. Followed @jcooper911 (https://www.pokerchipforum.com/members/4913/) steps with no issues. Deeper cup holders on order and will be installed later this week, along with some handles to help with carrying.


SixSpeedFuryRegular64 posts
Posted May 31, 2020, 11:38 PM#225
I need to get off my duff and start on this! Should be a good project while we're still locked up
DodgerRegular46 posts
Posted Jun 1, 2020, 1:11 AM#226
I need to get off my duff and start on this! Should be a good project while we're still locked up
It’s really pretty straight forward. Only a few hours if you are doing it solo, and less if you have some help.
(By the way, didn’t you start this thread nearly 2 years ago???) o_O
SixSpeedFuryRegular64 posts
Posted Jun 1, 2020, 1:12 AM#227
It’s really pretty straight forward. Only a few hours if you are doing it solo, and less if you have some help.
(By the way, didn’t you start this thread nearly 2 years ago???) o_O
Yes, and I seem to be the ONLY one that hasn't even started :D :banghead:
DodgerRegular46 posts
Posted Jun 1, 2020, 1:14 AM#228
Yes, and I seem to be the ONLY one that hasn't even started :D :banghead:
Getting started is the hardest part...
You got this!:cool:tup:
Forty4Regular44 posts
Posted Jun 1, 2020, 2:12 AM#229
Yes, and I seem to be the ONLY one that hasn't even started :D :banghead:
I’ve started but think my table has been apart longer than it was ever together even counting slow boat from China. Maybe soon finally got the Volara foam after experimenting with other types.
RegularjohnRegular30 posts
TonZagaRegular76 posts
Posted Jun 2, 2020, 7:57 PM#231
John,
I've left mine out in my basement for several months now and I'm not seeing any issues yet.
If you have the stock fabric on, I'd replace with a different surface.
If you've already replaced it with SSC or other, I was able to remove the hinges, pull tight, restaple, and reinstall the hinges.
RegularjohnRegular30 posts
Posted Jun 2, 2020, 7:59 PM#232
John,
I've left mine out in my basement for several months now and I'm not seeing any issues yet.
If you have the stock fabric on, I'd replace with a different surface.
If you've already replaced it with SSC or other, I was able to remove the hinges, pull tight, restaple, and reinstall the hinges.
yep, i put SSC on it. was hoping i could avoid taking the hinges off again. was a bit of a pain lol or maybe it was all of the rails
DodgerRegular46 posts
raynmanasRegular49 posts
Posted Jun 3, 2020, 3:10 PM#234
just ordered these guys: https://www.amazon.com/gp/product/B06W2JBLJJ/ref=ppx_yo_dt_b_asin_title_o00_s00?ie=UTF8&psc=1 (https://www.amazon.com/gp/product/B06W2JBLJJ/ref=ppx_yo_dt_b_asin_title_o00_s00?ie=UTF8&psc=1&tag=amznpcfx-20)
and the drill attachment. looking forward to the deeper cup holders. last time we played we had 2 drink spills :banghead:
some random questions for people:
instead of folding up the table, i just leave mine out. would this put extra stress on the wire?
i noticed where the table folds the fabric is a little loose. nothing crazy, but bothers me. has this happened with anyone else? worth it to try and tighten it?
reminds me i need to order these too. this has probably been asked/answered, but can they accommodate a regular pint glass?
regarding folding, my table (with cover) has become my work from home desk for the time being, so it has been unfolded/set up since i bought it, and used daily since mid-march. i don't think there is any concern with stress on the wire.
DodgerRegular46 posts
Posted Jun 3, 2020, 5:03 PM#235
reminds me i need to order these too. this has probably been asked/answered, but can they accommodate a regular pint glass?
Standard cans and bottles - no problem. For a standard pint glass, I'd say "sort of." The glass fits in partially, but does not reach the bottom of the cup holder, allowing for a little instability (aka, it can wobble).

RegularjohnRegular30 posts
Posted Jun 3, 2020, 5:18 PM#236
Standard cans and bottles - no problem. For a standard pint glass, I'd say "sort of." The glass fits in partially, but does not reach the bottom of the cup holder, allowing for a little instability (aka, it can wobble).
View attachment 470044 (https://www.pokerchipforum.com/attachments/470044/)
nice comparison. for the pint glass, is it "spill-able"... which is what I want to avoid.
raynmanasRegular49 posts
Posted Jun 3, 2020, 6:34 PM#237
Standard cans and bottles - no problem. For a standard pint glass, I'd say "sort of." The glass fits in partially, but does not reach the bottom of the cup holder, allowing for a little instability (aka, it can wobble).
View attachment 470044 (https://www.pokerchipforum.com/attachments/470044/)
thanks for doing this - the pint glass still looks like it would be safer than in the stock cupholders.
DodgerRegular46 posts
Posted Jun 3, 2020, 6:34 PM#238
nice comparison. for the pint glass, is it "spill-able"... which is what I want to avoid.
The pint glass isn't coming out of the cup holder with a tap or bump. But, if it's full, liquid could spill over the lip of the glass. I don't think you have to worry about a fully knocked over glass though (unless your crew is a bit more rowdy).
RegularjohnRegular30 posts
Posted Jun 3, 2020, 7:05 PM#239
The pint glass isn't coming out of the cup holder with a tap or bump. But, if it's full, liquid could spill over the lip of the glass. I don't think you have to worry about a fully knocked over glass though (unless your crew is a bit more rowdy).
good to know. we had a 2 spills last time, both were bottles. wonder how a solo cup would be? not sure if its the same size as the pint glass.
DodgerRegular46 posts
Posted Jun 3, 2020, 8:09 PM#240
good to know. we had a 2 spills last time, both were bottles. wonder how a solo cup would be? not sure if its the same size as the pint glass.
Standard 16 oz plastic cup (side note: not Solo brand). Fits snug. Appears stable.

RegularjohnRegular30 posts
BGinGAShark148 posts
Posted Jun 3, 2020, 10:37 PM#242
Those Solo cups work great for a lot of snacks, too.
They take up less space than plates, napkins, or bowls, contain the crumbs, and allow for fingerless no-contact eating -- which means less debris and oils (and saliva) transferring to the cards, chips, and felt.
TonZagaRegular76 posts
Posted Jun 3, 2020, 10:53 PM#243
Those Solo cups work great for a lot of snacks, too.
They take up less space than plates, napkins, or bowls, contain the crumbs, and allow for fingerless no-contact eating -- which means less debris and oils (and saliva) transferring to the cards, chips, and felt.
Fill one of these bad boys with pub mix from Costco and the other with your favorite beverage and it's PARTY TIME
RowlettTexasChipGuyMicro-Stakes Grinder12 posts
Posted Jun 4, 2020, 1:38 AM#244
Question: the Pit Boss folding Table vs the Barrington Table
Are they the same thing, I have had the pit boss version and would like to upgrade it if possible
If not able to I did find the Barrington on OfferUp app cheap and could buy it and upgrade it
Next question: has anyone fixed or replaced the vinyl on their rail, I section of mine ha a bad tear
RegularjohnRegular30 posts
Posted Jun 4, 2020, 1:04 PM#245
Those Solo cups work great for a lot of snacks, too.
They take up less space than plates, napkins, or bowls, contain the crumbs, and allow for fingerless no-contact eating -- which means less debris and oils (and saliva) transferring to the cards, chips, and felt.
never even thought of this, wow. especially in the covid world, this is pretty huge.
jcooper911Micro-Stakes Grinder15 posts
Posted Jun 4, 2020, 8:36 PM#246
Another successful upgrade! Had this thread bookmarked for ages. Followed @jcooper911 (https://www.pokerchipforum.com/members/4913/) steps with no issues. Deeper cup holders on order and will be installed later this week, along with some handles to help with carrying.
Congrats - that looks great, is it the standard black YAT speedcloth? Very nice. Glad i could help with the instructions :-)
DodgerRegular46 posts
Posted Jun 4, 2020, 9:54 PM#247
Congrats - that looks great, is it the standard black YAT speedcloth? Very nice. Glad i could help with the instructions :)
Thank you for the detailed tutorial. Super helpful!
Went with ‘charcoal’ from Texas Poker Supply. I’m digging the overall darker look.
On to the cup holders...


RegularjohnRegular30 posts
Posted Jun 6, 2020, 5:49 PM#248
How do I deal with this?

Also, any recommendations for repairing this? Casualty of war

TonZagaRegular76 posts
Posted Jun 6, 2020, 5:52 PM#249
Leather repair kit? I didn't have anything like that happen to mine. Must have been extremely dry or something?
As for the support bar, I took a dremel with a small cutting wheel and cut it flush with the opening.
RegularjohnRegular30 posts
Posted Jun 6, 2020, 5:58 PM#250
Leather repair kit? I didn't have anything like that happen to mine. Must have been extremely dry or something?
As for the support bar, I took a dremel with a small cutting wheel and cut it flush with the opening.
Thanks!
RegularjohnRegular30 posts
Posted Jun 11, 2020, 11:59 AM#251
Leather repair kit? I didn't have anything like that happen to mine. Must have been extremely dry or something?
As for the support bar, I took a dremel with a small cutting wheel and cut it flush with the opening.
Not pretty, but worked!

TonZagaRegular76 posts
Posted Jun 11, 2020, 12:03 PM#252
Could use a light sanding :)
RegularjohnRegular30 posts
Posted Jun 11, 2020, 12:19 PM#253
If you couldn't tell, this was my first time. I bought some rubber end caps to hide the shame.
BugeRegular53 posts
Posted Jun 11, 2020, 1:31 PM#254
Mine looked pretty similar. Just make sure to sand the sharp edges a little. I also put some electrical tape over it so nobody cut their knees on it. The larger cup holders really make a big difference and will surely lead to less spilling of beers. Great job :tup:
DodgerRegular46 posts
Posted Jun 11, 2020, 4:14 PM#255
If you couldn't tell, this was my first time. I bought some rubber end caps to hide the shame.
I threw on some end caps as well - easy fix!
raynmanasRegular49 posts
Posted Jun 11, 2020, 7:15 PM#256
for those of you that did the cupholder upgrade, was your speed cloth all the way to the edges? i.e. did you hole saw right through the speed cloth as well? this had not occurred to me until now...

TonZagaRegular76 posts
Posted Jun 11, 2020, 7:19 PM#257
I put the torque on my handheld drill on 2 and just went through the speed cloth. I'd recommend starting the drill before hitting the cloth for best results.
RegularjohnRegular30 posts
RegularjohnRegular30 posts
Posted Jun 11, 2020, 7:35 PM#259
Before I forget, be careful not to catch any of the "leather" when you put the hole in. Made this mistake and tore some of it
DodgerRegular46 posts
Posted Jun 11, 2020, 8:56 PM#260
for those of you that did the cupholder upgrade, was your speed cloth all the way to the edges? i.e. did you hole saw right through the speed cloth as well? this had not occurred to me until now...
View attachment 474346 (https://www.pokerchipforum.com/attachments/474346/)
You can go right through the SSC. Make sure the hole saw is past the padded rail, but above the SSC. Your drill bit should be centered up nicely and in contact with the SSC/table. Start your drill before contacting the SSC. Apply continuous pressure through the table. Couple of seconds per cup holder. Watch the 4 corners as the table legs support is just under those. You'll need to trim about 1-1.5 inches off those to make room for the cup holders in those spots. Check @Regularjohn (https://www.pokerchipforum.com/members/6445/) 's posts just above.
pipdennyMicro-Stakes Grinder7 posts
Posted Jun 12, 2020, 9:46 PM#261
I’ve been waiting for the price of this table to drop for a few weeks, but it went up from $250 to $260!
Does anyone think the price will dip back down to the $99-$160 that have been mentioned in older posts? Has it event been this high? Is my waiting futile, and is the table still worth it at current prices?
definitely looking to get one of these and do all the upgrades, but I Don’t want to feel like a fool buying it at $260 when it’s been at $99 in the past.
TonZagaRegular76 posts
Posted Jun 12, 2020, 10:00 PM#262
I would say the sales are usually around black friday and Christmas but could get lucky and may have a sale close to July 4th to try to push products post-COVID19
BGinGAShark148 posts
Posted Jun 12, 2020, 10:42 PM#263
And they will raise (or lower) the price based on the number of views. The more you browse, the less likely it is to become cheaper.
DodgerRegular46 posts
Posted Jun 12, 2020, 11:43 PM#264
You can also keep your eye on Amazon (https://www.amazon.com/?tag=amznpcfx-20) Warehouse. Sometimes items become available there for cheaper - may have a blemish or not have original packaging, etc. But, you could score a decent deal if one becomes available there.
RudysNYCRegular26 posts
Posted Jun 13, 2020, 12:14 AM#265
Is my waiting futile, and is the table still worth it at current prices?
I lurked for a while, managed to finally grab it a couple months back for $210 at Wal-Mart. I got it for the fact that it stores pretty great, and it really does. The playing surface kinda stinks, but if you're willing to refelt it it shouldn't be an issue
tabletalker7Shark116 posts
Posted Jun 13, 2020, 7:33 AM#266
I’ve been waiting for the price of this table to drop for a few weeks, but it went up from $250 to $260!
Does anyone think the price will dip back down to the $99-$160 that have been mentioned in older posts? Has it event been this high? Is my waiting futile, and is the table still worth it at current prices?
definitely looking to get one of these and do all the upgrades, but I Don’t want to feel like a fool buying it at $260 when it’s been at $99 in the past.
At that price it is most decidedly not worth it. At $99 it saves you some cash over building a table yourself. At $250, plus the cost of upgrades, you can build yourself at that price and have a better table.
RegularjohnRegular30 posts
Posted Jun 13, 2020, 10:23 AM#267
At that price it is most decidedly not worth it. At $99 it saves you some cash over building a table yourself. At $250, plus the cost of upgrades, you can build yourself at that price and have a better table.
I'd agree 250 is pushing it. I got mine for 170 which I think is the sweet spot. With a lot of casinos not opening poker rooms yet (or have plans to)a, wouldn't be surprised people are starting to host games more and need a table delivered quickly. Hence the price increase.
I think part of the draw with the barrington upgrade is that it's pretty easy and relatively quick to do. so I still think 250 is worth it. But that's at the top end. When I was doing research on a table, building from scratch seemed prohibitive due to difficulty, time, and tools needed. This seemed to fit perfectly. Good price and some customization that wasn't difficult.
RudysNYCRegular26 posts
Posted Jul 2, 2020, 2:42 PM#268
if you're willing to refelt it it shouldn't be an issue
I hit the point where not only am I willing to refelt it but I'm unwilling to play even one more hand on that POS gaming surface. Mine came loose at some edges and it's pilled like a SOB after limited sessions so it was high time for some cheap SSC. Figured if I'm already taking the thing apart, might as well upgrade the padding too. Will update later--gonna be doing it in a NYC shoebox, wish me luck!
jcooper911Micro-Stakes Grinder15 posts
Posted Jul 2, 2020, 10:26 PM#269
Will update later--gonna be doing it in a NYC shoebox, wish me luck!
i found the foam and rails actually perfectly fine - and i did mine in my NYC apt with only a manual screwdriver! check my old post if you need pointers :-) good luck!
RudysNYCRegular26 posts
Posted Jul 3, 2020, 3:10 AM#270
Finished a little while ago, finally made it back home (tables actually in the office lol). Came out spectacular. Broke the table down and did most of the first side by myself, then a few hours into it my buddy who's a IATSE stagehand came over and helped me knock out the rest and put it back together in just over an hour.
Two observations I had that I feel like sharing, to help someone avoid similar issues:
-
The cup holders have waaayyyy too much glue. I mean obscene amounts of glue--only way I was able to pry them off was taking a wallpaper scraper, a hammer, and getting in between the cup holder and the wood. My friend had mentioned a heatgun, but I was worried about melting the pleather on the rail.
-
When you put the rails back on, unless you're planning on painstakingly lining up the screws with the original holes in the rail pieces, put the side rails on before the middle curved piece. My buddy and I had to readjust the first side because if you go around the horn, good chance a few mm off on either rail piece will make the 3rd one stick out past the fold.
Couldn't have done it without my buddy's help and @jcooper911 (https://www.pokerchipforum.com/members/4913/) notes. Your post (from page 2) laying it all out made it infinitely easier than trying to do it freestyle. After doing it myself (with the help of a power drill), you have nothing but my respect for getting this done with a manual screwdriver before 2022. Shoutout to the NYC Barrington Mob!
EDIT: cupholders are missing because there was so much f*****g wood glue. Putting em back in would've ripped the pleather. New ones coming Sunday...

DodgerRegular46 posts
Posted Jul 3, 2020, 3:22 AM#271
Finished a little while ago, finally made it back home (tables actually in the office lol). Came out spectacular. Broke the table down and did most of the first side by myself, then a few hours into it my buddy who's a IATSE stagehand came over and helped me knock out the rest and put it back together in just over an hour.
Two observations I had that I feel like sharing, to help someone avoid similar issues:
-
The cup holders have waaayyyy too much glue. I mean obscene amounts of glue--only way I was able to pry them off was taking a wallpaper scraper, a hammer, and getting in between the cup holder and the wood. My friend had mentioned a heatgun, but I was worried about melting the pleather on the rail.
-
When you put the rails back on, unless you're planning on painstakingly lining up the screws with the original holes in the rail pieces, put the side rails on before the middle curved piece. My buddy and I had to readjust the first side because if you go around the horn, good chance a few mm off on either rail piece will make the 3rd one stick out past the fold.
Couldn't have done it without my buddy's help and @jcooper911 (https://www.pokerchipforum.com/members/4913/) notes. Your post (from page 2) laying it all out made it infinitely easier than trying to do it freestyle. After doing it myself (with the help of a power drill), you have nothing but my respect for getting this done with a manual screwdriver before 2022. Shoutout to the NYC Barrington Mob!
EDIT: cupholders are missing because there was so much f*****g wood glue. Putting em back in would've ripped the pleather. New ones coming Sunday...
View attachment 484667 (https://www.pokerchipforum.com/attachments/484667/)
Nicely done, sir! You’ll be happy with the new cup holders too.
jcooper911Micro-Stakes Grinder15 posts
Posted Jul 3, 2020, 3:37 AM#272
Looks great @RudysNYC (https://www.pokerchipforum.com/members/7793/) !
totally agree on the too much glue, I think maybe I got lucky with mine as mine ended up ok and now when I play I just put them back in the slots.
Glad the instructions were useful and damn you for having a power drill lol. I love that bright green, pops a little more than my classic forest green. I’m in for the first game
RudysNYCRegular26 posts
Posted Jul 3, 2020, 4:08 AM#273
I’m in for the first game
Absolutely. I was going to say earlier, when all this mishugas blows over and the dust settles just a bit more we should get a NYC PCF game going. I decided at the time that it was a touch off topic, but I now decide that it's totally relevant because given the nature of this thread (folding tables) and the real estate in NYC (claustrophobic) I'm pretty positive every NYC chipper will come across this thread at one point or another :ROFL: :ROFLMAO:
tabletalker7Shark116 posts
Posted Jul 3, 2020, 6:57 AM#274
- The cup holders have waaayyyy too much glue. I mean obscene amounts of glue
EDIT: cupholders are missing because there was so much f*****g wood glue. Putting em back in would've ripped the pleather. New ones coming Sunday...
When I did mine, I used a hair dryer to slowly heat the cupholders. After I got them out, a few more minutes with the hair dryer and all the glue wiped right off (I didn't have a rag so I just used the old felt).
pipdennyMicro-Stakes Grinder7 posts
JZPdubMicro-Stakes Grinder17 posts
Posted Jul 13, 2020, 3:18 PM#276
It looks like TPS is out of that nice blue color that many of you guys used for your tables. It is not even listed on th site.
Is this from casinosupply.com of similar high quality? Anyone buy from this site before?
https://www.casinosupply.com/collec...suited-speed-cloth-sold-per-running-foot-blue (https://www.casinosupply.com/collections/poker-cloth/products/pro-two-tone-suited-speed-cloth-sold-per-running-foot-blue)
Furthermore, would it be wise to cut the cupholder holes before installing the SSC? That way I can just use an exacto knife to cut out the holes in the SSC after installation, avoiding having to drill through it?
Thanks all!
So I just re-felted my Barrington table this weekend (pics coming soon) and I cut the cupholders before installing my cloth. I did that because I got a custom cloth (thanks @T_Chan (https://www.pokerchipforum.com/members/71/)) and was worried that the hole saw would somehow snag and rip the cloth.
I'm glad that I did - my particular hole saw had trouble with the felt and the foam, so I was relieved I was doing it on the old felt, not the new cloth. Cutting out the felt with an exacto knife after re-installing the rail was super easy. Also was able to start the hole with the rail on, but then remove the rail to finish cutting (since I didn't re-screw the rails in after removing the old cupholders).
Downside is that your alignment may be off slightly. For 9 out of 10 holes wasn't a problem (since the original cutout is larger than the new hole), but there was one hole where the alignment was just off , so the cupholder didn't go in right away. Was an easy enough fix - ended up just using a piece of sand paper to sand down the edge that wasn't aligned and after a minute or two was able to fit it in.
DodgerRegular46 posts
Posted Jul 13, 2020, 4:24 PM#277
So I just re-felted my Barrington table this weekend (pics coming soon) and I cut the cupholders before installing my cloth. I did that because I got a custom cloth (thanks @T_Chan (https://www.pokerchipforum.com/members/71/)) and was worried that the hole saw would somehow snag and rip the cloth.
I'm glad that I did - my particular hole saw had trouble with the felt and the foam, so I was relieved I was doing it on the old felt, not the new cloth. Cutting out the felt with an exacto knife after re-installing the rail was super easy. Also was able to start the hole with the rail on, but then remove the rail to finish cutting (since I didn't re-screw the rails in after removing the old cupholders).
Downside is that your alignment may be off slightly. For 9 out of 10 holes wasn't a problem (since the original cutout is larger than the new hole), but there was one hole where the alignment was just off , so the cupholder didn't go in right away. Was an easy enough fix - ended up just using a piece of sand paper to sand down the edge that wasn't aligned and after a minute or two was able to fit it in.
Let's see that custom cloth!!!
JZPdubMicro-Stakes Grinder17 posts
Posted Jul 13, 2020, 7:02 PM#278
Thanks to all the advice in this thread, I went ahead and re-felted my Barrington table (which I had bought before even knowing this forum existed) last weekend. Got a custom felt and decided to upgrade the cupholders as well. Pics of the process and final table below. Overall took me just over a day, working all by myself.
A couple things to note (on top of the advice already presented):
-
Labeled everything with painters tape, so nothing could get out of place
-
Decided to cut the holes for the cupholders before putting on the custom cloth (see post above)
-
The hairdryer was key in softening up the glue under the cupholders. Found the by putting a screwdriver/chisel under the rail and putting the hair dryer on the metal worked best
-
Spent a long time trying to get the felt to line up; pretty pleased with how it turned out, but definitely not 'perfect'
-
Ended up using a pipe-cutting tool to cut the legs. I started off with my Dremel and some cut discs, but burned through 5 of them and only got through 1.5 legs. Got the pipe cutting tool for like $12 (basically the cost of another set of cut discs) and was able to trim the legs in about 5 min. For anyone adding the cupholders, I'd recommend it.
-
Found it much easier to cut out the felt under the table to re-insert the hardware (no pics of that).
Finally - thanks to everyone that posted previously. Seeing your work and descriptions definitely made this possible.


Finished Product...


DodgerRegular46 posts
Posted Jul 13, 2020, 7:35 PM#279
Thanks to all the advice in this thread, I went ahead and re-felted my Barrington table (which I had bought before even knowing this forum existed) last weekend. Got a custom felt and decided to upgrade the cupholders as well. Pics of the process and final table below. Overall took me just over a day, working all by myself.
A couple things to note (on top of the advice already presented):
-
Labeled everything with painters tape, so nothing could get out of place
-
Decided to cut the holes for the cupholders before putting on the custom cloth (see post above)
-
The hairdryer was key in softening up the glue under the cupholders. Found the by putting a screwdriver/chisel under the rail and putting the hair dryer on the metal worked best
-
Spent a long time trying to get the felt to line up; pretty pleased with how it turned out, but definitely not 'perfect'
-
Ended up using a pipe-cutting tool to cut the legs. I started off with my Dremel and some cut discs, but burned through 5 of them and only got through 1.5 legs. Got the pipe cutting tool for like $12 (basically the cost of another set of cut discs) and was able to trim the legs in about 5 min. For anyone adding the cupholders, I'd recommend it.
-
Found it much easier to cut out the felt under the table to re-insert the hardware (no pics of that).
Finally - thanks to everyone that posted previously. Seeing your work and descriptions definitely made this possible.
View attachment 490667 (https://www.pokerchipforum.com/attachments/490667/)
View attachment 490668 (https://www.pokerchipforum.com/attachments/490668/)
View attachment 490669 (https://www.pokerchipforum.com/attachments/490669/)
View attachment 490670 (https://www.pokerchipforum.com/attachments/490670/)
View attachment 490672 (https://www.pokerchipforum.com/attachments/490672/)
View attachment 490673 (https://www.pokerchipforum.com/attachments/490673/)
Finished Product...
View attachment 490687 (https://www.pokerchipforum.com/attachments/490687/)
View attachment 490678 (https://www.pokerchipforum.com/attachments/490678/)
Strong work! Turned out great!
BGinGAShark148 posts
Posted Jul 13, 2020, 8:25 PM#280
Thanks to all the advice in this thread, I went ahead and re-felted my Barrington table (which I had bought before even knowing this forum existed) last weekend. Got a custom felt and decided to upgrade the cupholders as well. Pics of the process and final table below. Overall took me just over a day, working all by myself.
A couple things to note (on top of the advice already presented):
-
Labeled everything with painters tape, so nothing could get out of place
-
Decided to cut the holes for the cupholders before putting on the custom cloth (see post above)
-
The hairdryer was key in softening up the glue under the cupholders. Found the by putting a screwdriver/chisel under the rail and putting the hair dryer on the metal worked best
-
Spent a long time trying to get the felt to line up; pretty pleased with how it turned out, but definitely not 'perfect'
-
Ended up using a pipe-cutting tool to cut the legs. I started off with my Dremel and some cut discs, but burned through 5 of them and only got through 1.5 legs. Got the pipe cutting tool for like $12 (basically the cost of another set of cut discs) and was able to trim the legs in about 5 min. For anyone adding the cupholders, I'd recommend it.
-
Found it much easier to cut out the felt under the table to re-insert the hardware (no pics of that).
Finally - thanks to everyone that posted previously. Seeing your work and descriptions definitely made this possible.
View attachment 490667 (https://www.pokerchipforum.com/attachments/490667/)
View attachment 490668 (https://www.pokerchipforum.com/attachments/490668/)
View attachment 490669 (https://www.pokerchipforum.com/attachments/490669/)
View attachment 490670 (https://www.pokerchipforum.com/attachments/490670/)
View attachment 490672 (https://www.pokerchipforum.com/attachments/490672/)
View attachment 490673 (https://www.pokerchipforum.com/attachments/490673/)
Finished Product...
View attachment 490687 (https://www.pokerchipforum.com/attachments/490687/)
View attachment 490678 (https://www.pokerchipforum.com/attachments/490678/)
Very nice job!! Felt lines up infinitely better than their original work.
BugeRegular53 posts
Posted Jul 13, 2020, 8:40 PM#281
Wow! That felt looks awesome! I jumped the gun with SSC. I may have to do a re-refelt :banghead:
TChan custom cloth?
TonZagaRegular76 posts
Posted Jul 13, 2020, 8:41 PM#282
Wow! That felt looks awesome! I jumped the gun with SSC. I may have to do a re-refelt :banghead:
TChan custom cloth?
Buy a second table for tourneys lol
JZPdubMicro-Stakes Grinder17 posts
Posted Jul 13, 2020, 8:54 PM#283
Wow! That felt looks awesome! I jumped the gun with SSC. I may have to do a re-refelt :banghead:
TChan custom cloth?
Yep - it's a TChan. Saw he could do a version specifically for Barrington tables (maybe is was on this thread) and spent a bunch of time on the Custom Felt thread seeing what was possible. Inspired me to go for it over the SSC.
BugeRegular53 posts
Posted Jul 13, 2020, 9:15 PM#284
Buy a second table for tourneys lol
Lol if I ever hosted tournaments that would be a great idea. Usually only run a cash game with 9 guys. Plus the tables are considerably more expensive than when I purchased mine
pipdennyMicro-Stakes Grinder7 posts
Posted Jul 14, 2020, 4:08 AM#285
Wow that looks great, good job!
I think the fabric aligned perfectly.
pipdennyMicro-Stakes Grinder7 posts
Posted Jul 14, 2020, 4:24 AM#286
I am wondering if anyone else ran into this problem, or if it isn't really a problem at all:
When I push down on the rail in the center of the table, there is a sort of major tilting that happens. The legs are perfectly sturdy, but as I push down on the rail in the center (on either side), the top of the table tilts and flexes as the bracket holding it to the legs slides back and forth.
I hope that made sense.
TunnelMoneyMicro-Stakes Grinder15 posts
Posted Jul 27, 2020, 8:55 PM#287
Found one local for $120 brand new in box. Looking forward to digging into the modifications.
And keep the little tips coming. Like the tip that JZPdub gave about the pipe cutter is brilliant, and one less this I need to go out and get or worry about.
RegularjohnRegular30 posts
Posted Jul 28, 2020, 2:46 PM#288
has anyone here changed out their speed cloth before? i currently have mine with blue, and wanted to change it to a tan color i think. wasnt sure if refleting for a 2nd time would be too much wear and tear on the table.
TonZagaRegular76 posts
Posted Jul 28, 2020, 2:47 PM#289
has anyone here changed out their speed cloth before? i currently have mine with blue, and wanted to change it to a tan color i think. wasnt sure if refleting for a 2nd time would be too much wear and tear on the table.
I wouldn't think it would be a problem. May be a good time to replace some of the "foam" (if you can even call it that) across the whole playing surface.
RudysNYCRegular26 posts
Posted Jul 28, 2020, 3:13 PM#290
I wouldn't think it would be a problem. May be a good time to replace some of the "foam" (if you can even call it that) across the whole playing surface.
GREAT time to replace the foam. When I did my initial refelt I changed out the foam too, from the like 1/16” crap to 1/4” neoprene from a pretty great eBay seller (https://www.ebay.com/usr/foamforyou?_trksid=p2057872.m2749.l2754). When I say the difference was night and day, I’m not kidding. You won’t regret changing it if you do @Regularjohn (https://www.pokerchipforum.com/members/6445/)
TunnelMoneyMicro-Stakes Grinder15 posts
Posted Jul 28, 2020, 5:02 PM#291
If replacing the foam to something like a 1/4" Volara, you should only take the new foam to the edge of the rail, correct? Not under it?
Should the new thicker foam go down into the crease/fold in the middle? Or stop so that the thicker foam is only on the top of the table?
TonZagaRegular76 posts
Posted Jul 28, 2020, 5:07 PM#292
If replacing the foam to something like a 1/4" Volara, you should only take the new foam to the edge of the rail, correct? Not under it?
I would think so. If the original arm rest are going back on, you could even leave it a couple inches from the outside edge as the armrest would cover it
SixSpeedFuryRegular64 posts
RudysNYCRegular26 posts
Posted Jul 28, 2020, 5:28 PM#294
Do you happen to have photos of the foam replacement by any chance?
Of the process? No. Of the after product? Yes can send when I get home
RudysNYCRegular26 posts
Posted Jul 28, 2020, 5:53 PM#295
found a photo on my phone but it’s not the best to show the upgrade in terms of the foam. To put it in perspective, with the original foam I couldn’t leave my Apache 3800 on it for more than 90 seconds without the imprint lasting for quite a while. With the thicker neoprene, I can leave it on there for a stupid amount of time without it leaving much of a mark and it bounces back very quickly.
Highly recommend you won’t go wrong

justsomedudeRegular76 posts
Posted Jul 28, 2020, 6:08 PM#296
found a photo on my phone but it’s not the best to show the upgrade in terms of the foam. To put it in perspective, with the original foam I couldn’t leave my Apache 3800 on it for more than 90 seconds without the imprint lasting for quite a while. With the thicker neoprene, I can leave it on there for a stupid amount of time without it leaving much of a mark and it bounces back very quickly.
Highly recommend you won’t go wrong
View attachment 499120 (https://www.pokerchipforum.com/attachments/499120/)
Looks good!! :tup:
FrogzillaRegular30 posts
Posted Jul 28, 2020, 6:48 PM#297
If replacing the foam to something like a 1/4" Volara, you should only take the new foam to the edge of the rail, correct? Not under it?
Should the new thicker foam go down into the crease/fold in the middle? Or stop so that the thicker foam is only on the top of the table?
I did:
-
to edge of the rail and not under it. The foam armrests will not sit correctly with larger foam
-
just to the edge of the table, not into the crease
Photo below...I was sloppy with tucking the vinyl on that rail piece but the foam under the playing surface came out really well

DodgerRegular46 posts
Posted Jul 28, 2020, 7:13 PM#298
found a photo on my phone but it’s not the best to show the upgrade in terms of the foam. To put it in perspective, with the original foam I couldn’t leave my Apache 3800 on it for more than 90 seconds without the imprint lasting for quite a while. With the thicker neoprene, I can leave it on there for a stupid amount of time without it leaving much of a mark and it bounces back very quickly.
Highly recommend you won’t go wrong
View attachment 499120 (https://www.pokerchipforum.com/attachments/499120/)
Only thing left to do is upgrade those cup holders. ;)
BPTDirectorRegular47 posts
Posted Jul 28, 2020, 7:19 PM#299
I know that at one time or another I’ve posted this before but if you are looking for an inexpensive substitute for Volara foam try a product available at swimming pool supply stores named Happy Bottom. I have used it on all my tables and it has held up through seven years of use now. Costs about $12 a table to do.
RudysNYCRegular26 posts
Posted Jul 28, 2020, 7:20 PM#300
Only thing left to do is upgrade those cup holders. ;)
So unfortunately there was no real avenue for me to hole saw through the plywood, since a) I was doing the upgrades in my office lol and b) I don't have access to a hole saw. I thought I lucked out and found some unicorn cupholders that were deeper than the originals without popping up, but I was sorely mistaken--I mismeasured :(
If anyone has a line on gold shallow cupholders, I'd pick 10 up in a heartbeat though... Don't think I'll be getting deeper cupholders til the next refelt, and that'll be a while.
EDIT: upgrades not repairs
SixSpeedFuryRegular64 posts
Posted Jul 28, 2020, 9:01 PM#301
I know that at one time or another I’ve posted this before but if you are looking for an inexpensive substitute for Volara foam try a product available at swimming pool supply stores named Happy Bottom. I have used it on all my tables and it has held up through seven years of use now. Costs about $12 a table to do.
Is foam all they sell at Happy Bottom?
JRReynolds6181Micro-Stakes Grinder6 posts
Posted Jul 28, 2020, 10:12 PM#302
As a person who took off the foam, saw it went all the way to the table edge, did one side that now has a tilt and cards that get stuck under the rail and THEN read a comment about cutting the foam to the edge of the rail..... trust me.... cut the foam to fit the edge of the rail, don’t cut it to fit the full table. The rail will NOT compress volara foam enough to work right.
tabletalker7Shark116 posts
Posted Jul 28, 2020, 11:04 PM#303
As a person who took off the foam, saw it went all the way to the table edge, did one side that now has a tilt and cards that get stuck under the rail and THEN read a comment about cutting the foam to the edge of the rail..... trust me.... cut the foam to fit the edge of the rail, don’t cut it to fit the full table. The rail will NOT compress volara foam enough to work right.
Don't feel bad I did the exact same thing. Must be something in the drinking water here in Western New York ..............................
DarsonMicro-Stakes Grinder20 posts
Posted Jul 28, 2020, 11:22 PM#304
The resurrection of this thread reminded me that I have some work to do also!

jcooper911Micro-Stakes Grinder15 posts
RudysNYCRegular26 posts
Posted Jul 28, 2020, 11:56 PM#306
where did you get a roll wide enough/long enough? that ebay seller doesnt seem to have anything from what i can see...
This was the exact listing (https://www.ebay.com/itm/1-Neoprene-Closed-Cell-Foam-Waterproof-42-x-72-x-1-4-Thick/263747318706?hash=item3d6890b3b2:g:szkAAOxy0NtTBSga) I purchased. Keep in mind you're only "refoaming" the playing area, which is 73.5"x31.5"--but that measurement is two halves of the table. So each half is 36.75"x31.5".
You cut the 72"x42" neoprene in half and you have two pieces that measure 36"x42". The 36" edge of the neoprene goes along the 31.5" edge of the half-table and the 42" easily covers the 36.75" length.
(And to think I almost failed geometry in high school...)
RudysNYCRegular26 posts
Posted Jul 29, 2020, 12:12 AM#307
Also I will always defend neoprene over most gaming cushioning because it's totally waterproof. Especially with my stunted cupholders, with the combo of SSC and neoprene my crew can spill all they want... I actually prefer if they spill on the table not the carpeting lol. And it's just fine for shuffling/peeking at cards/splashing chips the lot. I'm a neoprene fan for life now
EDIT: wc
Forty4Regular44 posts
Posted Jul 29, 2020, 12:42 AM#308
I got both volera and neoprene was going to double up as I thought the volera was too stiff but was concerned the neoprene would be too soft.
raynmanasRegular49 posts
Posted Jul 29, 2020, 12:59 AM#309
just dropping in to say my resurfaced Barrington saw exactly one game, and has then been my work "desk" since March.
:(

been
TunnelMoneyMicro-Stakes Grinder15 posts
Posted Jul 29, 2020, 1:00 PM#310
When unboxing I noticed a small indent at the corner at the fold. When I refelt and likely add new foam, do you think it’s worth trying to throw some wood patch on it to rebuild the sharp edge? Or will it even be noticeable?
I noticed a Walmart return label on the box from February of this year. I assume whoever originally bought it opened it to see this small nick and closed it right back up for return, because all the other packing materials were like they were from the factory. I would bet that the person I bought it from got it on one of those return pallet auctions.
Other then that I saw no other damage at all despite the box being pretty beat up.
TonZagaRegular76 posts
Posted Jul 29, 2020, 1:05 PM#311
When unboxing I noticed a small indent at the corner at the fold. When I refelt and likely add new foam, do you think it’s worth trying to throw some wood patch on it to rebuild the sharp edge? Or will it even be noticeable?
I noticed a Walmart return label on the box from February of this year. I assume whoever originally bought it opened it to see this small nick and closed it right back up for return, because all the other packing materials were like they were from the factory. I would bet that the person I bought it from got it on one of those return pallet auctions.
Other then that I saw no other damage at all despite the box being pretty beat up.
I'd say if you're not in a hurry, try to rebuild it. you may see a slight dent when the table is unfolded and in play. It would bother me but may not bother you knowing that it's there LOL. But looks like an easy putty and sand flush situation
DarsonMicro-Stakes Grinder20 posts
Posted Aug 2, 2020, 1:25 AM#312
The most annoying part of this whole thing was removing the crappy table foam. Otherwise a relatively smooth resurfacing.


BSteckMicro-Stakes Grinder14 posts
DarsonMicro-Stakes Grinder20 posts
Posted Aug 2, 2020, 5:05 PM#314
Nice! I'm thinking of using that same red shade for my recover project but I've been a little nervous trying to guess how the color would look from the little thumbnail pics. Where'd you source your material?
Got it from Amazon (https://www.amazon.com/gp/product/B004UPHFNQ?th=1&psc=1&tag=amznpcfx-20). Since this is my spare table, I didn't want to spend too much money. When I bought the cloth it was $18 for 3 yards. Seems to have gone up a bit.
TunnelMoneyMicro-Stakes Grinder15 posts
Posted Aug 4, 2020, 12:10 AM#315
The PCF mantra: buy samples.

justsomedudeRegular76 posts
GianThaManMicro-Stakes Grinder8 posts
Posted Aug 10, 2020, 12:05 AM#317
I haven’t read through this whole thread, so forgive me if these have been answered, but how do you pry off the armrests? Should you just go in with your hands, or use some sort of tool? Also, what’s the best place to buy SSC and foam? Also also, when taking off foam, is it possible to do with your hands, or do you need another specific tool? Sorry for the dumb questions.
RudysNYCRegular26 posts
tabletalker7Shark116 posts
Posted Aug 10, 2020, 12:11 AM#319
I haven’t read through this whole thread, so forgive me if these have been answered, but how do you pry off the armrests? Should you just go in with your hands, or use some sort of tool? Also, what’s the best place to buy SSC and foam? Also also, when taking off foam, is it possible to do with your hands, or do you need another specific tool? Sorry for the dumb questions.
Each armrest is held on with two screws - only prying needed is if glue from the cup holders is really really stuck, and then I would say use a hair dryer to loosen up the glue so the cup holders pull out easily.
tabletalker7Shark116 posts
Posted Aug 10, 2020, 12:16 AM#320
I got my SSC on Amazon (does the trick in spades) but a lot of people swear by YourAutoTrim
I got the SSC from Amazon (https://www.amazon.com/?tag=amznpcfx-20) - one time the pizza showed up and I wasn't quite ready for it. We put the pizza box down on the poker table for two minutes. When we picked it up, the steam from the pizza somehow stained the Amazon (https://www.amazon.com/?tag=amznpcfx-20) SSC. That stuff from Amazon (https://www.amazon.com/?tag=amznpcfx-20) is cheaper for a reason. No Teflon coating :tdown: Yourautotrim is really your best friend here.
GianThaManMicro-Stakes Grinder8 posts
Posted Aug 10, 2020, 12:19 AM#321
Am I supposed to take out the cupholders and then the armrests, or is it an all-at-once kind of thing?
RudysNYCRegular26 posts
tabletalker7Shark116 posts
Posted Aug 10, 2020, 12:21 AM#323
Am I supposed to take out the cupholders and then the armrests, or is it an all-at-once kind of thing?
The cup holders are glued down to the base of the table - use a hair dryer and take your sweet time. Once the cup holder heats up you can pull it out of the table. Then work on the arm rest
EDIT - If you take your sweet time with that hair dryer most of the glue from the cup holder will stay with the cup holder when you pull it out. That makes cleaning it up and getting rid of it REALLY EASY
GianThaManMicro-Stakes Grinder8 posts
Posted Aug 10, 2020, 12:28 AM#324
The cup holders are glued down to the base of the table - use a hair dryer and take your sweet time. Once the cup holder heats up you can pull it out of the table. Then work on the arm rest
EDIT - If you take your sweet time with that hair dryer most of the glue from the cup holder will stay with the cup holder when you pull it out. That makes cleaning it up and getting rid of it REALLY EASY
I’m still not 100% clear on how the armrest itself is held onto the table, is it glue as well? If it’s screwed on, how do you take the screws out? Do you just yank it with the screws?
tabletalker7Shark116 posts
Posted Aug 10, 2020, 12:31 AM#325
I’m still not 100% clear on how the armrest itself is held onto the table, is it glue as well? If it’s screwed on, how do you take the screws out? Do you just yank it with the screws?
There are two philips head screws that go from underneath the table, through the table base, and into the wood for the arm rest. Unscrew them and the arm rest comes right off. Save the screws, you will screw the arm rests back on when all is said and done.
RudysNYCRegular26 posts
Posted Aug 10, 2020, 12:36 AM#326
There are two philips head screws that go from underneath the table, through the table base, and into the wood for the arm rest. Unscrew them and the arm rest comes right off. Save the screws, you will screw the arm rests back on when all is said and done.
Yea, my armrest did not come right off.
Idk if my table was just f'd in the a, but there was a legitimate glob of wood glue attaching each cupholder to the table. Obviously, if the cupholders are stuck, the rail won't come off by itself.
If you're patient @GianThaMan (https://www.pokerchipforum.com/members/7006/) , heat the suckers up using a hairdryer or heatgun. If you're efficient, chisel those f**kers off, especially if you're upgrading cupholders. A) Will give you a rough guide of where the holes should be and B) the glue will be gone once you cut through anyway. Easy peasy
RudysNYCRegular26 posts
Posted Aug 10, 2020, 12:37 AM#327
Do you just yank it with the screws?
Powerdrill or screwdriver to take them out. DO NOT yank with the screws in lol
tabletalker7Shark116 posts
Posted Aug 10, 2020, 12:37 AM#328
Yea, my armrest did not come right off.
Idk if my table was just f'd in the a, but there was a legitimate glob of wood glue attaching each cupholder to the table. Obviously, if the cupholders are stuck, the rail won't come off by itself.
If you're patient @GianThaMan (https://www.pokerchipforum.com/members/7006/) , heat the suckers up using a hairdryer or heatgun. If you're efficient, chisel those f**kers off, especially if you're upgrading cupholders. A) Will give you a rough guide of where the holes should be and B) the glue will be gone once you cut through anyway. Easy peasy
That's because you chiseled off the cup holders! Heat them up and the glue comes with them.
GianThaManMicro-Stakes Grinder8 posts
Posted Aug 10, 2020, 12:39 AM#329
Lol, I forgot there were screws in the bottom of the table. That explains a lot.
RudysNYCRegular26 posts
Posted Aug 10, 2020, 1:05 AM#330
That's because you chiseled off the cup holders! Heat them up and the glue comes with them.
Lol I'm not exaggerating, there was a half-to-a-full inch of hardened wood glue fastening my cupholders. My buddy who helped me redo the table is a union stagehand who essentially does similar stuff for a living, and his exact words were "holy sh!t I've never seen anything like this." After the fact we tried using a hairdryer to get the glue off the cupholders to reuse, but legit 10 minutes barely put a dent.
The wood glue mine came with was nothing short of ossified. Only thing that actually took care of it eventually was soaking 'em in Naphta for a while :banghead:
tabletalker7Shark116 posts
Posted Aug 10, 2020, 1:06 AM#331
Lol I'm not exaggerating, there was a half-to-a-full inch of hardened wood glue fastening my cupholders. My buddy who helped me redo the table is a union stagehand who essentially does similar stuff for a living, and his exact words were "holy sh!t I've never seen anything like this." After the fact we tried using a hairdryer to get the glue off the cupholders to reuse, but legit 10 minutes barely put a dent.
The wood glue mine came with was nothing short of ossified. Only thing that actually took care of it eventually was soaking 'em in Naphta for a while :banghead:
Mine wasn't wood glue - mine looked more like someone in assembly used a hot glue gun (overused it would be more accurate)
DodgerRegular46 posts
Posted Aug 10, 2020, 3:56 AM#332
I haven’t read through this whole thread, so forgive me if these have been answered, but how do you pry off the armrests? Should you just go in with your hands, or use some sort of tool? Also, what’s the best place to buy SSC and foam? Also also, when taking off foam, is it possible to do with your hands, or do you need another specific tool? Sorry for the dumb questions.
I’ll save you the one-off Q & A and having to search through this whole thread.
@jcooper911 (https://www.pokerchipforum.com/members/4913/) lays out the whole process right here - https://www.pokerchipforum.com/threads/barrington-poker-table-thread.30910/post-647297
Bookmark it. When you are ready, just follow that step-by-step for the felt change, and you are good.
If you want to upgrade the cup holders, search the forum for @Moxie Mike (https://www.pokerchipforum.com/members/4492/) thread on cup holders.
When you are done, be kind and share your work with the masses. :)
DarsonMicro-Stakes Grinder20 posts
Posted Aug 10, 2020, 4:25 AM#333
I haven’t read through this whole thread, so forgive me if these have been answered, but how do you pry off the armrests? Should you just go in with your hands, or use some sort of tool? Also, what’s the best place to buy SSC and foam? Also also, when taking off foam, is it possible to do with your hands, or do you need another specific tool? Sorry for the dumb questions.
I guess it may be different depending on who was on shift when they make these things but my armrests weren't glued on at all, just screws. But the cup holders were glued in on one half with almost nothing and the other half with elephant glue. Since the cup holders stop you from lifting the arm rests off, this is likely where you have to pay attention.
ReallyGoodUsernameRegular42 posts
Posted Aug 10, 2020, 4:41 AM#334
Forget it I posted these yet but here’s some from my replacement. Only think I wish I’d done different is I wish I had gotten a @T_Chan (https://www.pokerchipforum.com/members/71/) custom felt replacement as opposed to SSC. Nothing wrong with SSC just not as cool as a custom felt and it obviously doesn’t have a betting line. Still looking into a good way to add a betting line though.


SixSpeedFuryRegular64 posts
Posted Aug 10, 2020, 5:00 AM#335
JZPdubMicro-Stakes Grinder17 posts
Posted Aug 10, 2020, 12:57 PM#336
I haven’t read through this whole thread, so forgive me if these have been answered, but how do you pry off the armrests? Should you just go in with your hands, or use some sort of tool? Also, what’s the best place to buy SSC and foam? Also also, when taking off foam, is it possible to do with your hands, or do you need another specific tool? Sorry for the dumb questions.
For the rails/armrests, see picture below.
After you've removed the screws from the bottom of the table, stick a screwdriver under the rail next to the cupholder. Take a hair dryer and aim it directly at the cupholder, maybe 1/2" above the cupholder. Hold there for about a minute. Then start to pry up the rail with the screwdriver. The softened glue will start to separate. You'll either be able to just pry it off, or take the screwdriver and 'cut' the glue.

TunnelMoneyMicro-Stakes Grinder15 posts
ReallyGoodUsernameRegular42 posts
Posted Aug 10, 2020, 1:13 PM#338
What size end caps did you use on the bars?
Unfortunately I don’t know just grabbed them from a table I was tossing :D
Do you have a link for that piano hinge?
Here’s the one I got but it went from $16 (1.5 years ago) to $29 so I’d shop around.

JZPdubMicro-Stakes Grinder17 posts
Posted Aug 10, 2020, 1:23 PM#339
jcooper911Micro-Stakes Grinder15 posts
Posted Aug 14, 2020, 8:24 PM#340
jonn1ecakesRegular25 posts
Posted Sep 8, 2020, 6:43 PM#341
Question for you guys - Based on all the recs I’m gonna give this a shot. Where did you start stapling the felt? Did you start at the end of the table that folds and put the clamps on? From there, did you pull the felt tight and staple at top. I’d hate to put it on and have the felt tight but twisted
jonn1ecakesRegular25 posts
Posted Sep 8, 2020, 6:53 PM#342
@ReallyGoodUsername (https://www.pokerchipforum.com/members/4568/) curious - why’d you change to that 3’ hinge? I mean it looks like it’ll hold up better than the one on the table itself. Did you notice a diff?
jonn1ecakesRegular25 posts
Posted Sep 9, 2020, 11:44 PM#343
@jcooper911 (https://www.pokerchipforum.com/members/4913/) Your step-by-step is awesome. I may try this project this weekend. Got a question - where did you start the stapling? Did you clamp the end first and then pull the new felt to the round end of the a table and start there or did you start with the side of the table? Looking forward to any pointers from anyone to a non DIYer. LOL
tabletalker7Shark116 posts
Posted Sep 9, 2020, 11:50 PM#344
Did you clamp the end first and then pull the new felt to the round end of the a table and start there
That's what I did
tabletalker7Shark116 posts
Posted Sep 9, 2020, 11:53 PM#345
Looking forward to any pointers from anyone to a non DIYer
Tell a good friend you have a case of beer on hand and need an extra set of hands with this project. Clamps work but I found having a person helped more.
DodgerRegular46 posts
Posted Sep 10, 2020, 12:49 AM#346
Question for you guys - Based on all the recs I’m gonna give this a shot. Where did you start stapling the felt? Did you start at the end of the table that folds and put the clamps on? From there, did you pull the felt tight and staple at top. I’d hate to put it on and have the felt tight but twisted
If I recall correctly, I started at the underside (aka center of table). Flipped it over to pull tight and stapled the border that the arm rests cover up.
Enlist a buddy like @tabletalker7 (https://www.pokerchipforum.com/members/6127/) said, and you’ll be just fine.
Edit: typo
jcooper911Micro-Stakes Grinder15 posts
Posted Sep 10, 2020, 12:56 AM#347
@jcooper911 (https://www.pokerchipforum.com/members/4913/) Your step-by-step is awesome. I may try this project this weekend. Got a question - where did you start the stapling? Did you clamp the end first and then pull the new felt to the round end of the a table and start there or did you start with the side of the table? Looking forward to any pointers from anyone to a non DIYer. LOL
@john1ecakes so i overlaid the felt on the table, with excess hanging off both sides. i then clamped all around (4 clamps), pulling tight from the middle out. i then clamped, even with the excess hanging over all sides, and started stapling around the outer ring, which is easy to find because you have the edge of the table, and the foam. once i had stapled all around, only then did i start cutting the felt excess off. cut after stapling, not before, because you can always pull it tighter, which is harder if you have already cut to size...
i then stapled the underside of the table last (along the hinges) and then the back side of the middle strut)
i dunno if that makes sense, but i hope it does - i had 4 clamps which i think made it easy for me, although i did a second table at my buddies house, and having 2 people makes it exponentially easier than solo...
raynmanasRegular49 posts
Posted Sep 10, 2020, 1:05 AM#348
@jcooper911 (https://www.pokerchipforum.com/members/4913/) Did you clamp the end first and then pull the new felt to the round end of the a table
this is how you have to do it if you want to line the patterns up in the middle.
jonn1ecakesRegular25 posts
Posted Sep 10, 2020, 2:39 AM#349
Thank you guys for your input. I hope to post some pics this weekend if I can find the time before the football season starts.
jonn1ecakesRegular25 posts
Posted Sep 15, 2020, 12:56 AM#350
So I took the plunge and refelted my table. Thanks to the advice of @jcooper911 (https://www.pokerchipforum.com/members/4913/) i labeled everything! LOL I marked spots where the cup holders go as I cut out the cloth to prep for bigger cup holders at a later date. Took all the advice about how to do it and it turned out great. Thanks again for helping this noob out. I almost wanna get another table just do this again...but I’m not dropping $200+ for this table. LOL


JZPdubMicro-Stakes Grinder17 posts
jcooper911Micro-Stakes Grinder15 posts
Posted Sep 16, 2020, 2:42 PM#352
@jonn1ecakes (https://www.pokerchipforum.com/members/8206/) thats turned out great, awesome work. that bronze colour speedcloth is definitely unique, first time i have seen it i think. labels definitely make it easier!
so sad my table has been out of use since march 11th after 30 games in the prior 18 months...
jonn1ecakesRegular25 posts
Posted Sep 16, 2020, 3:50 PM#353
@jonn1ecakes (https://www.pokerchipforum.com/members/8206/) thats turned out great, awesome work. that bronze colour speedcloth is definitely unique, first time i have seen it i think. labels definitely make it easier!
so sad my table has been out of use since march 11th after 30 games in the prior 18 months...
Thanks; it also helped that the color was also on sale. ;)
I like the darker color so the chips and cards somewhat standout when they're on where the I can see some of the group losing a chip or two if I went with the traditional red or green felt. I'm excited to get some use out of this thing now!
ATLarchipMicro-Stakes Grinder15 posts
Posted Sep 18, 2020, 7:27 PM#354
Can somebody please tell me the dimensions for the playing surface? I think I would like this table, but the gap in the middle is killing me. Wondering if a poker mat can be placed on the table to cover it, similar to what Triton table does.
TheBigTaterRegular48 posts
Posted Sep 18, 2020, 7:35 PM#355
Table edge to edge is 84" x 42" with a 5" rail, so the viewable/playable felt area is 74" x 32" of course you also need to take into consideration the seam in the middle for design purposes.
jonn1ecakesRegular25 posts
Posted Sep 18, 2020, 9:23 PM#356
The gap is negligible TBH. Cards slide right over it, even with the crap that was on they’re before.
jonn1ecakesRegular25 posts
Posted Sep 18, 2020, 9:24 PM#357
Like someone previously said, I could’ve gotten away with a shorter length felt but I’d rather have way more than I need than being slightly short.
Forty4Regular44 posts
Posted Oct 9, 2020, 2:27 AM#358

I have to look but this table has spent more time apart than together (probably even if the shipping from China is included). Making progress. We’ll see how long the next steps take me to complete. :)
tabletalker7Shark116 posts
Posted Oct 9, 2020, 2:59 AM#359
View attachment 549179 (https://www.pokerchipforum.com/attachments/549179/)
I have to look but this table has spent more time apart than together (probably even if the shipping from China is included). Making progress. We’ll see how long the next steps take me to complete. :)
Why didn't you tell me? I could have hopped in my Jeep and been there
TX_Golf_N_PokerRegular48 posts
Forty4Regular44 posts
Posted Oct 9, 2020, 3:38 AM#361
Why didn't you tell me? I could have hopped in my Jeep and been there
Might have motivated me a little. Part of it was trying different things. Tried to plastidip the original foam, then headliner foam. But mainly motivation as this is my fourth table but oddly the only table at my house.
PinkdanRegular36 posts
Posted Oct 10, 2020, 9:35 PM#362
Do you all anticipate these going on sale again this year? I just saw one used near me for $150 pics:
jonn1ecakesRegular25 posts
Posted Oct 10, 2020, 10:44 PM#363
I mean, new is $200. Not much of a savings. Maybe wait? People here have said that they usually go on sale around Black Friday.
PinkdanRegular36 posts
Posted Oct 10, 2020, 10:48 PM#364
I mean, new is $200. Not much of a savings. Maybe wait? People here have said that they usually go on sale around Black Friday.
Dude said price is non-negotiable (he kinda seems like a jerk tbh). Yeah I can’t find this table new for $200 right now, but this close to Black Friday I may as well wait. It’s not like I’m hosting any games anytime soon anyways :p
jonn1ecakesRegular25 posts
Posted Oct 10, 2020, 10:55 PM#365
Yeah kinda douchey but whatever. Someone here posted one from Craigslist for $50 and I immediately grabbed it. Now he said price was non-negotiable. LOL I was okay w that.
PinkdanRegular36 posts
Posted Oct 10, 2020, 10:56 PM#366
Daaaaaaang nice snag. I’m gonna be patient.
lol I told the guy these tables have been as low as $120 or even $100 new and he told me I was dead wrong... mmmm K pal :banghead:
jonn1ecakesRegular25 posts
Posted Oct 10, 2020, 10:58 PM#367
I mean you ain’t wrong but the price on these have stayed pretty high. Sucks.
tabletalker7Shark116 posts
Posted Oct 11, 2020, 12:41 AM#368
Daaaaaaang nice snag. I’m gonna be patient.
lol I told the guy these tables have been as low as $120 or even $100 new and he told me I was dead wrong... mmmm K pal :banghead:
I got mine on sale for $99. I am not going to tell you how many years ago that was (mainly because I can't count that high).
TheBigTaterRegular48 posts
BGinGAShark148 posts
Posted Oct 12, 2020, 12:58 AM#370
My local Walmart had five of them on sale for $75 each on the day after Christmas a couple of years ago.
djfayzeMicro-Stakes Grinder23 posts
Posted Oct 14, 2020, 2:04 AM#371
Hey guys! Newer member here on the forum. Just got my barrington table and have some suited speed cloth arriving Friday. Did those of you who’ve replaced the felt use a spray adhesive in addition to staples or are staples alone enough to keep it tight? Thanks for all the great info in this thread!
jonn1ecakesRegular25 posts
Posted Oct 14, 2020, 2:32 AM#372
Hey guys! Newer member here on the forum. Just got my barrington table and have some suited speed cloth arriving Friday. Did those of you who’ve replaced the felt use a spray adhesive in addition to staples or are staples alone enough to keep it tight? Thanks for all the great info in this thread!
Just used a staple gun for the felt. The instructions in the beginning of the post were really helpful.
tabletalker7Shark116 posts
Posted Oct 14, 2020, 3:04 AM#373
Hey guys! Newer member here on the forum. Just got my barrington table and have some suited speed cloth arriving Friday. Did those of you who’ve replaced the felt use a spray adhesive in addition to staples or are staples alone enough to keep it tight? Thanks for all the great info in this thread!
Staples alone. Save the spray adhesive for replacing the foam under the felt
djfayzeMicro-Stakes Grinder23 posts
Posted Oct 14, 2020, 9:06 AM#374
Staples alone. Save the spray adhesive for replacing the foam under the felt
Thank you!
Forty4Regular44 posts
Posted Oct 16, 2020, 7:28 PM#375
I can do better but it’s also an overflow table travel table so I shouldn’t be too concerned as I already have two chanman tables and have another two to build so this was a way to see what worked what didn’t.
My contribution to the experiment ways to improve was that I used the original cup holders under the rail to prevent the new ones from falling through. Kind of a fail as the new cup holders now sit just above the rail. I can fix it but probably won’t, unless it won’t close all the way. Probably should have checked that before posting. But I didn’t want to build a bracket and since the new ones fit inside the originals I figured it was worth a shot. If I had put them under the table it would work perfectly but would also need the holes to line up exactly and I didn’t have to glue them to the underside of the table.
Forty4Regular44 posts
Posted Oct 16, 2020, 7:31 PM#376
Hey guys! Newer member here on the forum. Just got my barrington table and have some suited speed cloth arriving Friday. Did those of you who’ve replaced the felt use a spray adhesive in addition to staples or are staples alone enough to keep it tight? Thanks for all the great info in this thread!
I will say it depends on the cloth that you use. Mine was thin and had some stretch so I sprayed a light haze on the table first. It is important that it is a light coat of 77 too heavy and it bleeds through. Ask me how I know.
DodgerRegular46 posts
Posted Oct 16, 2020, 7:34 PM#377
I can do better but it’s also an overflow table travel table so I shouldn’t be too concerned as I already have two chanman tables and have another two to build so this was a way to see what worked what didn’t.
My contribution to the experiment ways to improve was that I used the original cup holders under the rail to prevent the new ones from falling through. Kind of a fail as the new cup holders now sit just above the rail. I can fix it but probably won’t, unless it won’t close all the way. Probably should have checked that before posting. But I didn’t want to build a bracket and since the new ones fit inside the originals I figured it was worth a shot. If I had put them under the table it would work perfectly but would also need the holes to line up exactly and I didn’t have to glue them to the underside of the table.
Sweet surface - where is the felt from?
Forty4Regular44 posts
djfayzeMicro-Stakes Grinder23 posts
Posted Oct 17, 2020, 11:56 PM#379
It is finished! I have to give a HUGE shoutout to @Nick@TPS (https://www.pokerchipforum.com/members/1599/) for some of the best customer service I’ve ever experienced anywhere. Not only did they ship my order out within a few hours, but when I realized I ordered 7 feet of SSC instead of 8 (for a little leeway) and emailed them he personally called me, assured me I had enough, gave me some info on refelting, and told me more about the different types of SSC. Top notch guy and he has earned a customer for life. This is their charcoal mini SSC and I’m super happy with it!

Here’s a pic of the construction process. It was so much more seamless than I anticipated. An electric drill and a hair dryer is a must. Just put that sucker on high, stick it down in the bottom of the cup holder, slip your screwdriver/pry bar under, and apply pressure while heating for 20 seconds or so and they lift right off of the glue. Lining up the two sides of the felt was the toughest part, but it’s close enough.

DodgerRegular46 posts
Posted Oct 18, 2020, 12:15 AM#380
It is finished! I have to give a HUGE shoutout to Nick at Texas Poker Supply for some of the best customer service I’ve ever experienced anywhere. Not only did they ship my order out within a few hours, but when I realized I ordered 7 feet of SSC instead of 8 (for a little leeway) and emailed them he personally called me, assured me I had enough, gave me some info on reflecting, and told me more about the different types of SSC. Top notch guy and he has earned a customer for life. This is their charcoal mini SSC and I’m super happy with it!
View attachment 554934 (https://www.pokerchipforum.com/attachments/554934/)
Here’s a pic of the construction process. It was so much more seamless than I anticipated. An electric drill and a hair dryer is a must. Just put that sucker on high, stick it down in the bottom of the cup holder, slip your screwdriver/pry bar under, and apply pressure while heating for 20 seconds or so and they lift right off of the glue. Lining up the two sides of the felt was the toughest part, but it’s close enough.
View attachment 554936 (https://www.pokerchipforum.com/attachments/554936/)
Nicely done! Looks great!
djfayzeMicro-Stakes Grinder23 posts
Posted Oct 18, 2020, 1:14 AM#381
Also added some LEDs underneath the table for a little extra pop.

jonn1ecakesRegular25 posts
djfayzeMicro-Stakes Grinder23 posts
Posted Oct 23, 2020, 11:44 AM#383
Got a pic of the underside? I’m curious about those lights.
Yeah! Here it is. Two $10 LED strips off of Amazon (https://www.amazon.com/?tag=amznpcfx-20). I have a little rechargeable battery pack with two USB outputs velcroed underneath so that I don’t have to run any cables to the table.

jonn1ecakesRegular25 posts
Posted Oct 23, 2020, 1:56 PM#384
This is wonderful. I may try this idea as well. I’d be curious to know which lights and battery packs you got.
djfayzeMicro-Stakes Grinder23 posts
jonn1ecakesRegular25 posts
Posted Oct 28, 2020, 8:55 PM#386
Random question - I've noticed the cup holders have gotten a little grimy. Anyone got recommendations on what they're made of and how you've cleaned them? I thought about upgrading to the deeper cup holders but I'm good with what I've got for now.
Or maybe I can just flat out replace them from Amazon (https://www.amazon.com/?tag=amznpcfx-20)?
BugeRegular53 posts
jonn1ecakesRegular25 posts
The NutsMicro-Stakes Grinder14 posts
Posted Oct 28, 2020, 10:57 PM#389
For all of you who have refelted this table, Did you also remove the old felt?
Did you add a layer of foam or anything below the new felt to give it some squish?
I'm going to re-felt mine soon and wasn't sure if I needed to buy some thin foam for underneath as well.
Thanks!
DodgerRegular46 posts
Posted Oct 28, 2020, 11:02 PM#390
For all of you who have refelted this table, Did you also remove the old felt?
Did you add a layer of foam or anything below the new felt to give it some squish?
I'm going to re-felt mine soon and wasn't sure if I needed to buy some thin foam for underneath as well.
Thanks!
I did not. Simple swap out - take off the stock surface, replace with SSC. There is some minimal stock padding in there. Not great, but reasonable for this type of table.
PinkdanRegular36 posts
Posted Oct 28, 2020, 11:02 PM#391
For all of you who have refelted this table, Did you also remove the old felt?
Did you add a layer of foam or anything below the new felt to give it some squish?
I'm going to re-felt mine soon and wasn't sure if I needed to buy some thin foam for underneath as well.
Thanks!
interesting... leaving the old felt on might add a little more cushion :jawdrop:
raynmanasRegular49 posts
Posted Oct 28, 2020, 11:11 PM#392
For all of you who have refelted this table, Did you also remove the old felt?
Did you add a layer of foam or anything below the new felt to give it some squish?
I'm going to re-felt mine soon and wasn't sure if I needed to buy some thin foam for underneath as well.
Thanks!
i think you definitely have to take the old felt off because it would be wrinkly under there, but it's super easy - it's loose, floppy, and easy to tear off.
i kept the existing foam. it's good enough, but it would definitely have been better w an upgrade.
tabletalker7Shark116 posts
Posted Oct 29, 2020, 12:00 AM#393
For all of you who have refelted this table, Did you also remove the old felt?
Did you add a layer of foam or anything below the new felt to give it some squish?
I'm going to re-felt mine soon and wasn't sure if I needed to buy some thin foam for underneath as well.
Thanks!
I did. Not because I thought the table needed more cushion but more because I was already ripping the table apart so why not
jonn1ecakesRegular25 posts
Posted Oct 29, 2020, 12:01 AM#394
I did not. Simple swap out - take off the stock surface, replace with SSC. There is some minimal stock padding in there. Not great, but reasonable for this type of table.
This. I’ve seen some swap out for thicker foam but I’m content with the foam already on there. Like @Dodger (https://www.pokerchipforum.com/members/4398/) said, rip off the original felt and swap with new SSC
Teach42Regular39 posts
Posted Oct 29, 2020, 2:41 AM#395
For all of you who have refelted this table, Did you also remove the old felt?
Did you add a layer of foam or anything below the new felt to give it some squish?
I'm going to re-felt mine soon and wasn't sure if I needed to buy some thin foam for underneath as well.
Thanks!
I didn't add any foam at all. Just stripped the old felt, and put the new one right on top of the foam. I was a bit worried because it didn't look like it went all the way to the edges. But when put together, it felt perfect. No need to replace or add to it.
PinkdanRegular36 posts
Posted Oct 29, 2020, 2:43 AM#396
Anyone here tried with and without the extra foam to see if it makes a big difference?
jonn1ecakesRegular25 posts
Posted Oct 29, 2020, 3:19 AM#397
Anyone here tried with and without the extra foam to see if it makes a big difference?
I think if your search earlier posts or other threads some have put more padding on the table and it came out good.
tabletalker7Shark116 posts
Posted Oct 29, 2020, 5:09 AM#398
Anyone here tried with and without the extra foam to see if it makes a big difference?
If you replace the foam, make sure you cut the foam AT THE RAIL! I made the mistake of thinking the rails would go back on with new foam underneath the rail pieces, yeah, didn't work. Once I cut the foam to the size on the playing surface only, everything went back together great.
PinkdanRegular36 posts
Posted Oct 30, 2020, 5:37 PM#399
Has anyone put a PCF topper on a barrington table?
The NutsMicro-Stakes Grinder14 posts
Posted Oct 30, 2020, 5:43 PM#400
Has anyone put a PCF topper on a barrington table?
Those aren't felts, they are meant to be placed on top of a table, I don't think they'd be thin enough for the railings to connect properly.
JeepologyOffroadMicro-Stakes Grinder23 posts
TX_Golf_N_PokerRegular48 posts
Posted Oct 30, 2020, 5:51 PM#402
Those aren't felts, they are meant to be placed on top of a table, I don't think they'd be thin enough for the railings to connect properly.
I think he's asking if it would fit to just lay it on top, not build it into the table. Or I could be wrong.
PinkdanRegular36 posts
Posted Oct 30, 2020, 5:51 PM#403
I think he's asking if it would fit to just lay it on top, not build it into the table. Or I could be wrong.
Either I guess. How does the topper compare to speed cloth?
JRReynolds6181Micro-Stakes Grinder6 posts
Posted Oct 30, 2020, 7:17 PM#404
Has anyone redone the rails? As in, took each section off, took off the material and stapled on new vinyl and stuffing?
The NutsMicro-Stakes Grinder14 posts
Posted Oct 30, 2020, 7:24 PM#405
Has anyone redone the rails? As in, took each section off, took off the material and stapled on new vinyl and stuffing?
Now you're getting into build your own table territory :D
If you're going that far why spend the initial investment on the table instead of just buying the wood and legs for much cheaper?
JRReynolds6181Micro-Stakes Grinder6 posts
Posted Oct 30, 2020, 7:26 PM#406
It was a Fathers Day present from my wife. She knew enough to order me the table which is a bullseye compared to dice chips. Also, who wants to buy their loved one plywood for a present? That’s no fun.
tabletalker7Shark116 posts
Posted Oct 30, 2020, 7:51 PM#407
Now you're getting into build your own table territory :D
If you're going that far why spend the initial investment on the table instead of just buying the wood and legs for much cheaper?
It isn't like we are doing all this at once. We refelted the table cause even after refelting it was a good deal. After a few years if rail sections wear out why not do maintenance work instead of starting from square one?
DarsonMicro-Stakes Grinder20 posts
Posted Oct 30, 2020, 8:05 PM#408
Has anyone put a PCF topper on a barrington table?
I was going to do this but the topper is too short/table too long.
markleteenieRegular28 posts
Posted Oct 30, 2020, 8:06 PM#409
@markleteenie (https://www.pokerchipforum.com/members/4766/) refurbed some type of table with one. Looks great
I planned to refurb a table, but after disassembling, I could only salvage the legs. So I basically built a brand new table for it, but it does look and perform well.
The NutsMicro-Stakes Grinder14 posts
Posted Oct 30, 2020, 8:08 PM#410
It isn't like we are doing all this at once. We refelted the table cause even after refelting it was a good deal. After a few years if rail sections wear out why not do maintenance work instead of starting from square one?
Fair enough. I'm doing all this at once cause I don't want to deal with pulling it apart again haha. This is my stop gap table until I eventually drop the big bucks on a chanman table.
If I was planning on replacing the railings too... I'd personally invest in just building a table from scratch so it would be a more traditional 8-9 ft size so it fit 10 players more comfortably. It's about the same amount of work as completely redoing a barrington for about the same price
BugeRegular53 posts
Posted Nov 6, 2020, 10:24 AM#411
quintoooMicro-Stakes Grinder5 posts
tabletalker7Shark116 posts
Posted Nov 9, 2020, 4:50 AM#413
think it'll go down more over the holidays? past forum posts always claim that the price dips to 110-150 during that time.
It was a few years ago when I got mine, but the day after Christmas sales dropped it to $100 for me. I would wait. Even at 190, you are spending almost another hundred upgrading felt and foam. At that price you can build it yourself
DodgerRegular46 posts
Posted Nov 9, 2020, 5:22 AM#414
It was a few years ago when I got mine, but the day after Christmas sales dropped it to $100 for me. I would wait. Even at 190, you are spending almost another hundred upgrading felt and foam. At that price you can build it yourself

Kingrich33Newbie2 posts
Posted Nov 12, 2020, 3:39 PM#415
Good morning everyone, I am new to PCF and the home gaming world. I chose the Barrington Charleston as my first table and thanks to all of the contributors in this forum I am moving ahead with some upgrades. Bought some SSC from YAT and stainless cup holders others recommended. Thanks to all for the great advice and instructions. Stay safe...

jonn1ecakesRegular25 posts
Posted Nov 12, 2020, 4:15 PM#416
Good morning everyone, I am new to PCF and the home gaming world. I chose the Barrington Charleston as my first table and thanks to all of the contributors in this forum I am moving ahead with some upgrades. Bought some SSC from YAT and stainless cup holders others recommended. Thanks to all for the great advice and instructions. Stay safe...View attachment 572502 (https://www.pokerchipforum.com/attachments/572502/)
Good luck. Everyone here is super helpful should you need it.
DodgerRegular46 posts
Posted Nov 12, 2020, 5:32 PM#417
Good morning everyone, I am new to PCF and the home gaming world. I chose the Barrington Charleston as my first table and thanks to all of the contributors in this forum I am moving ahead with some upgrades. Bought some SSC from YAT and stainless cup holders others recommended. Thanks to all for the great advice and instructions. Stay safe...View attachment 572502 (https://www.pokerchipforum.com/attachments/572502/)
Awesome! Be sure to share your results when all is said and done.
JZPdubMicro-Stakes Grinder17 posts
Posted Nov 12, 2020, 6:09 PM#418
Good morning everyone, I am new to PCF and the home gaming world. I chose the Barrington Charleston as my first table and thanks to all of the contributors in this forum I am moving ahead with some upgrades. Bought some SSC from YAT and stainless cup holders others recommended. Thanks to all for the great advice and instructions. Stay safe...View attachment 572502 (https://www.pokerchipforum.com/attachments/572502/)
This thread was also my first entry into the world of PCF. Welcome and enjoy!!
JRReynolds6181Micro-Stakes Grinder6 posts
Posted Nov 12, 2020, 7:08 PM#419
I’ve got the same style! ❤️ They clean up nice.
Kingrich33Newbie2 posts
Posted Nov 14, 2020, 3:24 AM#420
All right got the Barrington re-felted and put back together. I really like the way it came out and LOVE the deeper cup holders. Thanks so much to everyone who contributed to this thread, made my life so much easier. Here are a few pics...
DodgerRegular46 posts
Posted Nov 14, 2020, 7:20 AM#421
All right got the Barrington re-felted and put back together. I really like the way it came out and LOVE the deeper cup holders. Thanks so much to everyone who contributed to this thread, made my life so much easier. Here are a few pics...
Well done! Yes - the deeper cup holders are a big upgrade.
jonn1ecakesRegular25 posts
Posted Nov 14, 2020, 11:18 AM#422
All right got the Barrington re-felted and put back together. I really like the way it came out and LOVE the deeper cup holders. Thanks so much to everyone who contributed to this thread, made my life so much easier. Here are a few pics...
That felt color goes great w that rail. Awesome job!
RudysNYCRegular26 posts
Posted Nov 20, 2020, 8:06 PM#423
So I just had a vision...
would it be insanely impractical to have @T_Chan (https://www.pokerchipforum.com/members/71/) build a rail for the Barrington? I have no easy way to saw out holes for jumbo cup holders, and I kind of want to do a custom felt anyway. Would it be insane to have a rail with no cup holders made and I can just use slide-ins? Should I just get a new table at that point?
BugeRegular53 posts
Posted Nov 20, 2020, 9:33 PM#424
So I just had a vision...
would it be insanely impractical to have @T_Chan (https://www.pokerchipforum.com/members/71/) build a rail for the Barrington? I have no easy way to saw out holes for jumbo cup holders, and I kind of want to do a custom felt anyway. Would it be insane to have a rail with no cup holders made and I can just use slide-ins? Should I just get a new table at that point?
That sounds like it might be more expensive it’s worth. You can try reaching out to @FrankL333 (https://www.pokerchipforum.com/members/7400/) to see if he could build you a rail. He is located in NY. You could also ask him for a price for a whole new table. You would probably have to arrange to pick it up or ship it since he is on the Island. His website is https://www.tlcpokertables.com/
It looks like he does great, quality work. He is currently building my table so I give you personal feedback in a few weeks.
RudysNYCRegular26 posts
Posted Nov 20, 2020, 9:39 PM#425
That sounds like it might be more expensive it’s worth. You can try reaching out to @FrankL333 (https://www.pokerchipforum.com/members/7400/) to see if he could build you a rail. He is located in NY. You could also ask him for a price for a whole new table. You would probably have to arrange to pick it up or ship it since he is on the Island. His website is https://www.tlcpokertables.com/
It looks like he does great, quality work. He is currently building my table so I give you personal feedback in a few weeks.
Always an option. Thanks for the info—is local degens gotta support each other
BugeRegular53 posts
Posted Nov 20, 2020, 9:40 PM#426
Always an option. Thanks for the info—is local degens gotta support each other
Absolutely lol
christoflopNewbie3 posts
Posted Dec 4, 2020, 6:31 AM#427
So unfortunately there was no real avenue for me to hole saw through the plywood, since a) I was doing the upgrades in my office lol and b) I don't have access to a hole saw. I thought I lucked out and found some unicorn cupholders that were deeper than the originals without popping up, but I was sorely mistaken--I mismeasured :(
If anyone has a line on gold shallow cupholders, I'd pick 10 up in a heartbeat though... Don't think I'll be getting deeper cupholders til the next refelt, and that'll be a while.
EDIT: upgrades not repairs
Gonna redo mine and toss the old ones. Not sure if you still need these let me know
RudysNYCRegular26 posts
Posted Dec 4, 2020, 12:08 PM#428
Gonna redo mine and toss the old ones. Not sure if you still need these let me know
...pm sent was not expecting to wake up to a line on cup holders lol
TheBigTaterRegular48 posts
Posted Dec 4, 2020, 1:13 PM#429
For those looking at these for price drops seems that prices are staying pretty high this time around. Haven't seen any movement on pricing at least through Walmart on these this season. :(

Maybe some post Christmas pricing will happen.
BSteckMicro-Stakes Grinder14 posts
Posted Dec 4, 2020, 1:18 PM#430
Whoops - forgot to post a final pic of my Barrington project here (Chanman felt). Thanks to everyone for all the tips!!

DodgerRegular46 posts
Posted Dec 4, 2020, 2:51 PM#431
For those looking at these for price drops seems that prices are staying pretty high this time around. Haven't seen any movement on pricing at least through Walmart on these this season. :(
View attachment 585983 (https://www.pokerchipforum.com/attachments/585983/)
Maybe some post Christmas pricing will happen.
Wow - it was just $190 last week (pre-Thanksgiving). Don’t know if it’s worth more than $200 before upgrading.
Bummer.
BugeRegular53 posts
Posted Dec 4, 2020, 3:05 PM#432
Wow - it was just $190 last week (pre-Thanksgiving). Don’t know if it’s worth more than $200 before upgrading.
Bummer.
I think this is a great buy for around $200. Some minor upgrades (SSC and cupholders) for around $60ish and you have yourself a solid table that is easily stored. I don’t think anyone would be disappointed with it.
djfayzeMicro-Stakes Grinder23 posts
Posted Dec 4, 2020, 3:14 PM#433
I think this is a great buy for around $200. Some minor upgrades (SSC and cupholders) for around $60ish and you have yourself a solid table that is easily stored. I don’t think anyone would be disappointed with it.
I agree. I paid $200 for one and spent about that much on upgrades and it works perfectly. This is especially true as someone who has to take it down and store it after every game and who also doesn’t have easy access to the tools or time needed to make one myself.
Forty4Regular44 posts
Posted Dec 4, 2020, 3:16 PM#434
Wow - it was just $190 last week (pre-Thanksgiving). Don’t know if it’s worth more than $200 before upgrading.
Bummer.
I think this is a great buy for around $200. Some minor upgrades (SSC and cupholders) for around $60ish and you have yourself a solid table that is easily stored. I don’t think anyone would be disappointed with it.
I don’t think it’s worth it at $200. My max is ~$160 and even that’s high as I’d like to be around $200 all in. It’s not the best built thing and it will take some bumps setting it up and moving it. I have had a bunch of chips in the edges, easy fix with flat black spray paint. But everyone has different factors to consider.
upNdownShark114 posts
Posted Dec 4, 2020, 3:17 PM#435
For those looking at these for price drops seems that prices are staying pretty high this time around. Haven't seen any movement on pricing at least through Walmart on these this season. :(
View attachment 585983 (https://www.pokerchipforum.com/attachments/585983/)
Maybe some post Christmas pricing will happen.
Right, didn’t they go down below $90 a couple of years ago, after Christmas? I’m still kicking myself for not grabbing one at that price, just to have as a spare.
djfayzeMicro-Stakes Grinder23 posts
Posted Dec 4, 2020, 3:21 PM#436
I think it definitely comes down to your priorities for sure. I agree, the quality isn’t amazing, but for the trips it takes from my office to the living room once a week I haven’t seen any damage to it and don’t anticipate any. It would be a much better value under $200, but for me the convenience offsets the extra I paid.
Forty4Regular44 posts
Posted Dec 4, 2020, 3:22 PM#437
I think it definitely comes down to your priorities for sure. I agree, the quality isn’t amazing, but for the trips it takes from my office to the living room once a week I haven’t seen any damage to it and don’t anticipate any. It would be a much better value under $200, but for me the convenience offsets the extra I paid.
Admittedly my chips came more from the build process that took over a year.
JRald07Regular30 posts
Posted Dec 4, 2020, 3:24 PM#438
Got this done yesterday:

Upgrades:
Black Suited Speed cloth
1/4" "Ensolite" playing surface
2 1/4" cup holders
All things considered it fits my needs at a price point I am more than comfortable with. Thanks for everyone's posts. Made this process much simpler for a beginner DIYer like myself!
BugeRegular53 posts
Posted Dec 4, 2020, 3:27 PM#439
Got this done yesterday:
View attachment 586021 (https://www.pokerchipforum.com/attachments/586021/)
Upgrades:
Black Suited Speed cloth
1/4" "Ensolite" playing surface
2 1/4" cup holders
All things considered it fits my needs at a price point I am more than comfortable with. Thanks for everyone's posts. Made this process much simpler for a beginner DIYer like myself!
That came out awesome! Nice job
DodgerRegular46 posts
Posted Dec 4, 2020, 4:07 PM#440
All things considered it fits my needs at a price point I am more than comfortable with. Thanks for everyone's posts. Made this process much simpler for a beginner DIYer like myself!
This sums up the various discussions in this thread nicely.
Great info throughout to help PCFers upgrade.
Whatever the price point, as long as you are comfortable with it, that’s all that matters.
(I recall picking mine up for around $110 last year.)
JZPdubMicro-Stakes Grinder17 posts
Posted Dec 4, 2020, 6:39 PM#441
Whoops - forgot to post a final pic of my Barrington project here (Chanman felt). Thanks to everyone for all the tips!!
View attachment 585984 (https://www.pokerchipforum.com/attachments/585984/)
This if hawt!! Love the color and the gold cupholders.
Nice job!!!
christoflopNewbie3 posts
Posted Dec 5, 2020, 8:32 AM#442
Thanks to all the advice in this thread, I went ahead and re-felted my Barrington table (which I had bought before even knowing this forum existed) last weekend. Got a custom felt and decided to upgrade the cupholders as well. Pics of the process and final table below. Overall took me just over a day, working all by myself.
A couple things to note (on top of the advice already presented):
-
Labeled everything with painters tape, so nothing could get out of place
-
Decided to cut the holes for the cupholders before putting on the custom cloth (see post above)
-
The hairdryer was key in softening up the glue under the cupholders. Found the by putting a screwdriver/chisel under the rail and putting the hair dryer on the metal worked best
-
Spent a long time trying to get the felt to line up; pretty pleased with how it turned out, but definitely not 'perfect'
-
Ended up using a pipe-cutting tool to cut the legs. I started off with my Dremel and some cut discs, but burned through 5 of them and only got through 1.5 legs. Got the pipe cutting tool for like $12 (basically the cost of another set of cut discs) and was able to trim the legs in about 5 min. For anyone adding the cupholders, I'd recommend it.
-
Found it much easier to cut out the felt under the table to re-insert the hardware (no pics of that).
Finally - thanks to everyone that posted previously. Seeing your work and descriptions definitely made this possible.
View attachment 490667 (https://www.pokerchipforum.com/attachments/490667/)
View attachment 490668 (https://www.pokerchipforum.com/attachments/490668/)
View attachment 490669 (https://www.pokerchipforum.com/attachments/490669/)
View attachment 490670 (https://www.pokerchipforum.com/attachments/490670/)
View attachment 490672 (https://www.pokerchipforum.com/attachments/490672/)
View attachment 490673 (https://www.pokerchipforum.com/attachments/490673/)
Finished Product...
View attachment 490687 (https://www.pokerchipforum.com/attachments/490687/)
View attachment 490678 (https://www.pokerchipforum.com/attachments/490678/)
How did you get a seemless middle? Mine has a huge gap I’m thinking because I didn’t pad the middle where it joins I padded the top where the table starts. Any tips on how to make it less would be helpful here’s a pic of mine
christoflopNewbie3 posts
Posted Dec 5, 2020, 9:04 AM#443
I did:
-
to edge of the rail and not under it. The foam armrests will not sit correctly with larger foam
-
just to the edge of the table, not into the crease
Photo below...I was sloppy with tucking the vinyl on that rail piece but the foam under the playing surface came out really well
View attachment 499146 (https://www.pokerchipforum.com/attachments/499146/)
Any tips or suggestions my center has a gap and I see you foamed to the edge and not past the crease. I’m not sure as to why my gap is so big.
JZPdubMicro-Stakes Grinder17 posts
Posted Dec 5, 2020, 3:50 PM#444
How did you get a seemless middle? Mine has a huge gap I’m thinking because I didn’t pad the middle where it joins I padded the top where the table starts. Any tips on how to make it less would be helpful here’s a pic of mine
Can you send pics of the bottom of the table?
My initial guess is that table wasn't flush when you put the hinges back on, and so the hinges are creating the gap.
Maybe take off the hinges that hold the table together, clamp the two sides together so they are tight, and then reapply the hinges?
More pics would be useful.
RumbleDumbleNewbie1 posts
Posted Dec 28, 2020, 10:52 AM#445
Hey all! Do you guys have any knowledge about such poker table available in Europe?
Thanks in advance
jonn1ecakesRegular25 posts
Posted Jan 1, 2021, 6:39 PM#446
You can go right through the SSC. Make sure the hole saw is past the padded rail, but above the SSC. Your drill bit should be centered up nicely and in contact with the SSC/table. Start your drill before contacting the SSC. Apply continuous pressure through the table. Couple of seconds per cup holder. Watch the 4 corners as the table legs support is just under those. You'll need to trim about 1-1.5 inches off those to make room for the cup holders in those spots. Check @Regularjohn (https://www.pokerchipforum.com/members/6445/) 's posts just above.
Coming back to this, I’m afraid it will pull the SSC I installed as I don’t feel like refelting it again. No worries about that happening?
DodgerRegular46 posts
Posted Jan 1, 2021, 10:14 PM#447
Coming back to this, I’m afraid it will pull the SSC I installed as I don’t feel like refelting it again. No worries about that happening?
I installed my SSC first before drilling bigger holes for cupholders. I was afraid of pulling the SSC from the staples too, but it was a fairly clean cut. There is a bit of a tug when first coming into contact with the SSC, but that's why you need to start the drill before the hole saw teeth comes into contact with it and keep continuous pressure through the table. The drill bit extends beyond the teeth of the hole saw, so you should be able to center up and start stable.
Of course, I'm not in your shoes, so your attempt/experience may differ from mine. Hopefully, a few others who have done this method can chime in with their (successful) attempts and their thoughts.
jonn1ecakesRegular25 posts
Posted Jan 1, 2021, 10:49 PM#448
Thanks. Yeah I tried to accommodate for the cup holders but there’s a a few holes where the SSC felt is in the cutting range.
BugeRegular53 posts
Posted Jan 2, 2021, 1:40 AM#449
I cut the holes for the deeper cup holders before replacing the SSC so I didn’t have to worry about damaging it. If the cloth is already installed you can staple it around where the cup holders are. Then use a box cutter to remove the excess over the cup holders so you don’t have to use the saw on the cloth.
rjbf65Micro-Stakes Grinder13 posts
Posted Jan 21, 2021, 12:48 AM#450
Did my refelt on Monday. Pretty happy with it. Plan to do deeper cupholders and add some handles for easier table handling.
This thread was clutch city in the process.
DodgerRegular46 posts
Posted Jan 21, 2021, 4:41 AM#451
Did my refelt on Monday. Pretty happy with it. Plan to do deeper cupholders and add some handles for easier table handling.
This thread was clutch city in the process.
Looks great! And ‘clutch’ is the perfect word for this thread.
I did the deeper cupholders and handles also. Very clutch!
jcooper911Micro-Stakes Grinder15 posts
Posted Jan 23, 2021, 4:43 PM#452
Did my refelt on Monday. Pretty happy with it. Plan to do deeper cupholders and add some handles for easier table handling.
This thread was clutch city in the process.
Nice work man, looks pure.
Littleluck55Regular25 posts
Posted Feb 3, 2021, 3:43 AM#453
I helped a friend of mine re-do his Barrington table. He isn’t a PCF member, but I wanted to share his work. It turned out great.
pipdennyMicro-Stakes Grinder7 posts
Posted Feb 3, 2021, 3:50 AM#454
I helped a friend of mine re-do his Barrington table. He isn’t a PCF member, but I wanted to share his work. It turned out great.
Well done! What kind of cupholders are those?
WhiteMamba1646Regular25 posts
Posted Feb 3, 2021, 3:53 AM#455
I helped a friend of mine re-do his Barrington table. He isn’t a PCF member, but I wanted to share his work. It turned out great.
Nicely done! Aligning the center to match is always the toughest, looks super clean!
Littleluck55Regular25 posts
Posted Feb 3, 2021, 4:27 AM#456
Nicely done! Aligning the center to match is always the toughest, looks super clean!
Yes...that was a redo. We finished it and realized they didn’t align and had to take it back off. Lol
Littleluck55Regular25 posts
DodgerRegular46 posts
SixSpeedFuryRegular64 posts
Posted Feb 3, 2021, 6:20 AM#459
For those who installed deeper/wider cups, does the table still fold as normal or did you have to reconfigure some things to make it fold flush?
DodgerRegular46 posts
Posted Feb 3, 2021, 6:34 AM#460
For those who installed deeper/wider cups, does the table still fold as normal or did you have to reconfigure some things to make it fold flush?
I went with the deeper cup holders, but still standard width. I believe they are 2 1/4 inches tall. Table folds up no problem for storage. When you move up to the jumbo size cup holders, the depth of the cup holder increases as well so you may have to remove them prior to folding.
pipdennyMicro-Stakes Grinder7 posts
Posted Feb 4, 2021, 11:46 PM#461
Here was my experience, mostly following what I've read in this amazing thread with a couple of new things (at least I think they are new).
I drilled out the cupholders first. I used this auto trim remover tool kit I bought from harbor freight for a few bucks. If you back out the screws underneath the rail just a bit (enough for it to be able to lift up a little without becoming detached completely), and shimmy this auto trim remover tool underneath the cupholder while heating with a blow-dryer, they pop right out.
Another HUGE plus to drilling out the cupholders first, in my opinion, is that the hole and new cupholder will acts as a sort of alignment guide peg when reassembling the rail. After re-felting, you just lay the rail on top and insert the new cupholders. This way, there were absolutely no issues with alignment of the rail pieces; everything went back precisely in the same position/orientation.


From there, I drilled out the cupholders without having to worry about snagging the cloth. Note that you will only be able to drill out 6 of the cupholders as the other 4 are obstructed by the legs underneath. What I did was drill those 4 about halfway (to make sure I was drilling in the exact correct spot), then finished the job when the legs were removed. If I did this again, I would DEFINITELY buy a better hole saw bit. This thing was cheap and dull, and I nearly started a few fires. Be careful if you have a cheap dull bit like this the friction will cause the wood to smoke.

Another note. Wait for the glue to dry again after blow-drying or else it will gum up the teeth of the hole saw bit.

One last note is that you do not have to remove the screws underneath the rails completely. I just backed them out enough to remove the rail, but kept them screwed into the top. This way, you don't have to worry about labeling each one. This coupled with the cupholder-alignment-guide-peg thing mentioned earlier made for a totally seemless reassembly.


Here is me attempting to line up the cloth (I deemed it "good enough" especially doing this alone)


Finished product:

Super easy and fun project! I could not have done this without this forum, thank you all!!
RegularjohnRegular30 posts
Posted Feb 5, 2021, 12:15 AM#462
Here was my experience, mostly following what I've read in this amazing thread with a couple of new things (at least I think they are new).
I drilled out the cupholders first. I used this auto trim remover tool kit I bought from harbor freight for a few bucks. If you back out the screws underneath the rail just a bit (enough for it to be able to lift up a little without becoming detached completely), and shimmy this auto trim remover tool underneath the cupholder while heating with a blow-dryer, they pop right out.
Another HUGE plus to drilling out the cupholders first, in my opinion, is that the hole and new cupholder will acts as a sort of alignment guide peg when reassembling the rail. After re-felting, you just lay the rail on top and insert the new cupholders. This way, there were absolutely no issues with alignment of the rail pieces; everything went back precisely in the same position/orientation.
View attachment 629197 (https://www.pokerchipforum.com/attachments/629197/)
View attachment 629193 (https://www.pokerchipforum.com/attachments/629193/) View attachment 629194 (https://www.pokerchipforum.com/attachments/629194/) View attachment 629195 (https://www.pokerchipforum.com/attachments/629195/)View attachment 629196 (https://www.pokerchipforum.com/attachments/629196/)
From there, I drilled out the cupholders without having to worry about snagging the cloth. Note that you will only be able to drill out 6 of the cupholders as the other 4 are obstructed by the legs underneath. What I did was drill those 4 about halfway (to make sure I was drilling in the exact correct spot), then finished the job when the legs were removed. If I did this again, I would DEFINITELY buy a better hole saw bit. This thing was cheap and dull, and I nearly started a few fires. Be careful if you have a cheap dull bit like this the friction will cause the wood to smoke.
View attachment 629198 (https://www.pokerchipforum.com/attachments/629198/)
Another note. Wait for the glue to dry again after blow-drying or else it will gum up the teeth of the hole saw bit.
View attachment 629200 (https://www.pokerchipforum.com/attachments/629200/)
One last note is that you do not have to remove the screws underneath the rails completely. I just backed them out enough to remove the rail, but kept them screwed into the top. This way, you don't have to worry about labeling each one. This coupled with the cupholder-alignment-guide-peg thing mentioned earlier made for a totally seemless reassembly.
View attachment 629201 (https://www.pokerchipforum.com/attachments/629201/)View attachment 629202 (https://www.pokerchipforum.com/attachments/629202/)
Here is me attempting to line up the cloth (I deemed it "good enough" especially doing this alone)
View attachment 629204 (https://www.pokerchipforum.com/attachments/629204/)View attachment 629205 (https://www.pokerchipforum.com/attachments/629205/)
Finished product:
View attachment 629206 (https://www.pokerchipforum.com/attachments/629206/)
Super easy and fun project! I could not have done this without this forum, thank you all!!
Very nice! Did the same color.
PS if I can only find chairs like that now...
jcooper911Micro-Stakes Grinder15 posts
Posted Feb 5, 2021, 7:00 PM#463
Super easy and fun project! I could not have done this without this forum, thank you all
EPIC JOB - looks great.
jamesd57Newbie1 posts
Posted Feb 10, 2021, 3:21 AM#464
Out of curiosity, does anyone know if it is possible to add lights to the standard Barrington table by just attaching some underneath the rails while re-installing them? (So in between the felt and the rail)
tabletalker7Shark116 posts
Posted Feb 10, 2021, 3:59 AM#465
Out of curiosity, does anyone know if it is possible to add lights to the standard Barrington table by just attaching some underneath the rails while re-installing them? (So in between the felt and the rail)
You would need to add something between the table and the rail to hold up the rail so the lights can go under it. As is, the rail is flush with the table
TunnelMoneyMicro-Stakes Grinder15 posts
Posted Mar 4, 2021, 4:50 PM#466
I reached out to a few local tent/canvas/awning places to ask about potentially making a heavy duty carry bag with handles or straps. Would anyone be interested if we can get a multiple discount? What's a cost that would be appealing?
jonn1ecakesRegular25 posts
Posted Mar 4, 2021, 5:29 PM#467
Out of curiosity, does anyone know if it is possible to add lights to the standard Barrington table by just attaching some underneath the rails while re-installing them? (So in between the felt and the rail)
Some have attached the LED lights that go behind your TV underneath the table.
SixSpeedFuryRegular64 posts
Posted Mar 4, 2021, 11:59 PM#468
I reached out to a few local tent/canvas/awning places to ask about potentially making a heavy duty carry bag with handles or straps. Would anyone be interested if we can get a multiple discount? What's a cost that would be appealing?
This would be great as there's not much out there on the market.
Forty4Regular44 posts
Posted Mar 5, 2021, 1:35 AM#469
Would be interested depending on price.
JRald07Regular30 posts
Posted Mar 5, 2021, 1:39 AM#470
I reached out to a few local tent/canvas/awning places to ask about potentially making a heavy duty carry bag with handles or straps. Would anyone be interested if we can get a multiple discount? What's a cost that would be appealing?
I would be interested depending on price. I have two other friends that would be interested as well!
TunnelMoneyMicro-Stakes Grinder15 posts
Posted Mar 5, 2021, 2:56 AM#471
So the first quote I got was basically an F U quote, over $200. We’ll see if the other guys respond.
TunnelMoneyMicro-Stakes Grinder15 posts
Posted Mar 5, 2021, 2:58 AM#472

1 1/4” off each end of the leg support is the perfect length for the deeper cup holders.
SirFatalxMicro-Stakes Grinder7 posts
Posted Mar 5, 2021, 3:05 PM#473
My table seems to be defective when I first got it and I am afraid to take it apart because I don't know if I could get it back together because it's unaligned. Is it possible to buy a custom sized topper to place on top of the felt instead? I saw some on Amazon (https://www.amazon.com/?tag=amznpcfx-20) but they are not the same size as the poker table itself.
TX_Golf_N_PokerRegular48 posts
Posted Mar 5, 2021, 7:07 PM#474
My table seems to be defective when I first got it and I am afraid to take it apart because I don't know if I could get it back together because it's unaligned. Is it possible to buy a custom sized topper to place on top of the felt instead? I saw some on Amazon but they are not the same size as the poker table itself.
If the edges are going to be under the rail, you could buy something oversized and trim it where it needs to be.
SirFatalxMicro-Stakes Grinder7 posts
Posted Mar 5, 2021, 7:37 PM#475
If the edges are going to be under the rail, you could buy something oversized and trim it where it needs to be.
I was going to do that as well. I measured it to be 74" x 31.5" but most of the mats I see are 70"-72" long x 36"
TunnelMoneyMicro-Stakes Grinder15 posts
Posted Mar 8, 2021, 4:43 AM#476
Complete refurb completed.

Pretty happy with the fold alignment since I did it all solo.

It was a coin flip between the gold and bronze, but happy with the way this color turned out. I like the slightly brighter color but not overpowering. Midnight blue would have also been in the running if it was in stock.
Foam - I had originally purchased the YAT foam sample kit. Didn't want to do Volara as it was too hard for my tastes, and the issues with permanent indentation made it a no go. Sew foam wasn't bad, a touch soft. HD foam was going to be my choice, but when I went to purchase both the 1/3" and 1/4" were out of stock. Based on some of the recommendations on here I decided to try the 1/4" Ensolite. Incredibly happy with the way it feels. It's on the firmer side, but not too firm. I can stack 40 48mm chips with zero wobble, and still get a fingertip under the cards for card peek.
Highly recommend the 1/4" Ensolite if you're going to redo the foam.
jonn1ecakesRegular25 posts
Posted Mar 8, 2021, 2:31 PM#477
Complete refurb completed.
Pretty happy with the fold alignment since I did it all solo.
It was a coin flip between the gold and bronze, but happy with the way this color turned out. I like the slightly brighter color but not overpowering. Midnight blue would have also been in the running if it was in stock.
Foam - I had originally purchased the YAT foam sample kit. Didn't want to do Volara as it was too hard for my tastes, and the issues with permanent indentation made it a no go. Sew foam wasn't bad, a touch soft. HD foam was going to be my choice, but when I went to purchase both the 1/3" and 1/4" were out of stock. Based on some of the recommendations on here I decided to try the 1/4" Ensolite. Incredibly happy with the way it feels. It's on the firmer side, but not too firm. I can stack 40 48mm chips with zero wobble, and still get a fingertip under the cards for card peek.
Highly recommend the 1/4" Ensolite if you're going to redo the foam.
I did the same color change. Something about the bronze makes it look classy. Haha. Nice job
SirFatalxMicro-Stakes Grinder7 posts
SirFatalxMicro-Stakes Grinder7 posts
Posted Mar 13, 2021, 10:38 AM#479
This is the best I came up with without taking apart the table due to it being unaligned when I received it. I placed foam padding underneath the speed cloth and essentially made a mat to go on top of the table so it can be removed as well. For the most part the cloth is flat but it's not perfect by any means. Probably will buy a new better table or build one from scratch in the future.
PapiBlancoNewbie1 posts
Posted Mar 14, 2021, 5:46 PM#480
Right at $275 all in on this conversion, I'm happy with it, ended up taking the fold out so we didn't have a crease in the middle.


SirFatalxMicro-Stakes Grinder7 posts
PinkdanRegular36 posts
raynmanasRegular49 posts
Posted Mar 14, 2021, 7:39 PM#483
Does the table still fold?
PinkdanRegular36 posts
Posted Mar 14, 2021, 7:52 PM#484
To rephrase, the fold crease in the fabric is gone but will the table fold up? If I’m dumb for not fully understanding I apologize lol
raynmanasRegular49 posts
Posted Mar 14, 2021, 8:12 PM#485
To rephrase, the fold crease in the fabric is gone but will the table fold up? If I’m dumb for not fully understanding I apologize lol
oops, i edited out my response. these tables fold like like this with the table surface out, so no, this table must no longer fold. though i suppose with enough effort, you could get it to fold once. :ROFL: :ROFLMAO:

SixSpeedFuryRegular64 posts
Posted Mar 24, 2021, 4:19 AM#486
Never thought about asking when I made this thread. Request for sticky for easier access to new members?
SirFatalxMicro-Stakes Grinder7 posts
Posted Mar 24, 2021, 10:49 AM#487
TharonL64Newbie1 posts
Posted Mar 31, 2021, 7:28 PM#488
SixSpeedFuryRegular64 posts
BTGNewbie3 posts
Posted Apr 16, 2021, 3:35 PM#490
Complete refurb completed.
Pretty happy with the fold alignment since I did it all solo.
It was a coin flip between the gold and bronze, but happy with the way this color turned out. I like the slightly brighter color but not overpowering. Midnight blue would have also been in the running if it was in stock.
Foam - I had originally purchased the YAT foam sample kit. Didn't want to do Volara as it was too hard for my tastes, and the issues with permanent indentation made it a no go. Sew foam wasn't bad, a touch soft. HD foam was going to be my choice, but when I went to purchase both the 1/3" and 1/4" were out of stock. Based on some of the recommendations on here I decided to try the 1/4" Ensolite. Incredibly happy with the way it feels. It's on the firmer side, but not too firm. I can stack 40 48mm chips with zero wobble, and still get a fingertip under the cards for card peek.
Highly recommend the 1/4" Ensolite if you're going to redo the foam.
Great job. I'm trying to choose between 3/10" HD foam (YAT is out of the 1/4") and1/4" Ensolite. What kind of adhesive did you use with your Ensolite?
dmoneyRegular32 posts
Posted Apr 16, 2021, 3:43 PM#491
I want to upgrade mine also - but how have you and others managed the table legs underneath being in the way? Or is that not an issue?
JRald07Regular30 posts
Posted Apr 16, 2021, 3:55 PM#492
I want to upgrade mine also - but how have you and others managed the table legs underneath being in the way? Or is that not an issue?
I used a pipe cutter at 4 locations to shorten it where the deeper cupholders will go. Maybe an inch on each side.
BTGNewbie3 posts
TunnelMoneyMicro-Stakes Grinder15 posts
Posted Apr 16, 2021, 5:15 PM#494
Great job. I'm trying to choose between 3/10" HD foam (YAT is out of the 1/4") and1/4" Ensolite. What kind of adhesive did you use with your Ensolite?
3M 77 spray adhesive.
I want to upgrade mine also - but how have you and others managed the table legs underneath being in the way? Or is that not an issue?
I used a pipe cutter at 4 locations to shorten it where the deeper cupholders will go. Maybe an inch on each side.
This. Pipe cutter works perfect. Easy, smooth cut. No sparks. I already had one so it worked out. I have this (https://www.amazon.com/LENOX-21011TC138-Tubing-Cutters-8-Inch/dp/B0006BFP7Q?tag=amznpcfx-20), but there are many options out there.
Hairy_CrocodileMicro-Stakes Grinder7 posts
Posted May 5, 2021, 1:11 AM#495
How heavy are these tables? Anyone make a storage bag for traveling with these things for easier transport?
dmoneyRegular32 posts
Posted May 5, 2021, 2:25 AM#496
TunnelMoneyMicro-Stakes Grinder15 posts
The NutsMicro-Stakes Grinder14 posts
Posted May 11, 2021, 4:39 PM#498
I want to upgrade mine also - but how have you and others managed the table legs underneath being in the way? Or is that not an issue?
This was an issue... That I didn't realize until I finished my project lol.
For now I'm stuck with the original shallow cup holders in the corners until my bro can come by and chop off the extra metal

The NutsMicro-Stakes Grinder14 posts
Posted May 11, 2021, 4:44 PM#499
I just finished my refelting and it goofed but It's still better than it was originally. The first half of the table I didn't pull as taught as the 2nd half and as a result the betting line is noticably off. But the felt feels amazing so there's that. Also didn't realize the issue with the legs I mentioned in the last post until the very end.


Also betting line way further out than it looks when the cloth is full, def made for a much larger table.

OralSpecialistNewbie1 posts
Hairy_CrocodileMicro-Stakes Grinder7 posts
Posted May 21, 2021, 9:09 PM#501
How have you guys fixed tables with a very slight sag in the middle?
I just bought a used one that doesnt have an adjustable wire on the legs to keep it from wanting to fold the other way when its open
The NutsMicro-Stakes Grinder14 posts
Posted May 21, 2021, 9:44 PM#502
How have you guys fixed tables with a very slight sag in the middle?
I just bought a used one that doesnt have an adjustable wire on the legs to keep it from wanting to fold the other way when its open
Should prob buy some wire and put that back
Hairy_CrocodileMicro-Stakes Grinder7 posts
Posted May 21, 2021, 9:48 PM#503
Should prob buy some wire and put that back
I've never owned a folding table like this, do you have a picture of the wire itself and what makes it adjustable?
Hairy_CrocodileMicro-Stakes Grinder7 posts
Posted May 21, 2021, 9:58 PM#504
I dont think the table ever came with one, so I want to see how tables that have them look like and how I should be installing one to make it the most stable.
I also want to the the mechanism itself that makes the cable adjustable. Is it a special loop thing that you can adjust by hand? Is it a clamp you need a screwdriver for?
DodgerRegular46 posts
Posted May 21, 2021, 10:26 PM#505
I dont think the table ever came with one, so I want to see how tables that have them look like and how I should be installing one to make it the most stable.
I also want to the the mechanism itself that makes the cable adjustable. Is it a special loop thing that you can adjust by hand? Is it a clamp you need a screwdriver for?
I’m not sure the cable is adjustable. @anyone...????
Kind of tough to see, but if you go back to the original tutorial, you can see the wire in some of the photos - https://www.pokerchipforum.com/threads/barrington-poker-table-thread.30910/post-647297
BugeRegular53 posts
Posted May 21, 2021, 10:34 PM#506
The wire is not adjustable on the table. It’s fixed in its position and has tension on it once the table is opened. Do you have a picture of your sagging table? We may have suggestions after seeing it.
Hairy_CrocodileMicro-Stakes Grinder7 posts
Posted May 21, 2021, 10:46 PM#507
The wire is not adjustable on the table. It’s fixed in its position and has tension on it once the table is opened. Do you have a picture of your sagging table? We may have suggestions after seeing it.
I'll post one tomorrow once the family celebrations are over for my little sister. The "sag" isn't much, I may he overreacting, butnid love the security of a wire. Or maybe I could bulk it up when I take the table apart to refelt it.
Hairy_CrocodileMicro-Stakes Grinder7 posts
Posted May 25, 2021, 11:22 PM#508
Sorry for the wait, the "bow" is so slight, I dont think itll be too much of an issue
However, this table I bought looks like it's going to be a project to re-felt. There is no rail, just plastic with foam and vinyl. Based off of how the table is constructed, the rail doesnt pop off or is held with screws, its sewn into the felt. This means that I will have to play carpenter and build a rail for this table when I decide to rip it apart, pad it, and upholster it.
I plan on hopefully gutting it and fixing this up for a summer project.
-keeping the table padding and adding speed cloth. May have to replace the padding.
-fabricating rails and installing them
-adding deeper cup holders
-adding handles for easier handling when transporting
-adding a buckle of some sort to keep it closed when in storage/travel.
-potentially sewing a canvas storage bag for this thing to protect it better
I cut out the cloth on the underside of the table to see what the construction looked like already.


The NutsMicro-Stakes Grinder14 posts
Posted May 26, 2021, 12:07 AM#509
Sorry for the wait, the "bow" is so slight, I dont think itll be too much of an issue
However, this table I bought looks like it's going to be a project to re-felt. There is no rail, just plastic with foam and vinyl. Based off of how the table is constructed, the rail doesnt pop off or is held with screws, its sewn into the felt. This means that I will have to play carpenter and build a rail for this table when I decide to rip it apart, pad it, and upholster it.
I plan on hopefully gutting it and fixing this up for a summer project.
-keeping the table padding and adding speed cloth. May have to replace the padding.
-fabricating rails and installing them
-adding deeper cup holders
-adding handles for easier handling when transporting
-adding a buckle of some sort to keep it closed when in storage/travel.
-potentially sewing a canvas storage bag for this thing to protect it better
I cut out the cloth on the underside of the table to see what the construction looked like already.
View attachment 706013 (https://www.pokerchipforum.com/attachments/706013/)
View attachment 706014 (https://www.pokerchipforum.com/attachments/706014/)
View attachment 706015 (https://www.pokerchipforum.com/attachments/706015/)
View attachment 706016 (https://www.pokerchipforum.com/attachments/706016/)
View attachment 706017 (https://www.pokerchipforum.com/attachments/706017/)
View attachment 706022 (https://www.pokerchipforum.com/attachments/706022/)View attachment 706028 (https://www.pokerchipforum.com/attachments/706028/)
Ah yeah that's def a different brand of table, that's gonna be a lot more effort to refelt.
Hairy_CrocodileMicro-Stakes Grinder7 posts
Posted May 26, 2021, 12:16 AM#510
Ah yeah that's def a different brand of table, that's gonna be a lot more effort to refelt.
I'll probably make another post for when I continue with this table to show how to fix these ones up.
Figured I post it here since there is alot of modifications and such in this thread with lots of shared knowledge, and to show that not all folding tables people find are constructed like the barrington tables.
JRald07Regular30 posts
Posted May 26, 2021, 11:14 PM#511
Got this done yesterday:
View attachment 586021 (https://www.pokerchipforum.com/attachments/586021/)
Upgrades:
Black Suited Speed cloth
1/4" "Ensolite" playing surface
2 1/4" cup holders
All things considered it fits my needs at a price point I am more than comfortable with. Thanks for everyone's posts. Made this process much simpler for a beginner DIYer like myself!
I finally mustered up the courage to draw a betting line on my table...

It's not perfect, but I'm damn happy with how it turned out. Wish I would've done it sooner!
RegularjohnRegular30 posts
Posted Jun 16, 2021, 3:19 PM#512
going to be re-felting soon with some cloth i got from @T_Chan (https://www.pokerchipforum.com/members/71/) , but also wanted to replace the foam. where do you guys get your 1/4" Ensolite ?
JRald07Regular30 posts
RegularjohnRegular30 posts
Posted Jun 16, 2021, 3:36 PM#514
JRald07Regular30 posts
Posted Jun 16, 2021, 3:36 PM#515
awesome, what size?
Full sheet
raynmanasRegular49 posts
Posted Jun 16, 2021, 5:09 PM#516
I finally mustered up the courage to draw a betting line on my table...
View attachment 706732 (https://www.pokerchipforum.com/attachments/706732/)
It's not perfect, but I'm damn happy with how it turned out. Wish I would've done it sooner!
what did you draw the betting line with?
JRald07Regular30 posts
rjdev7Regular40 posts
Posted Jul 16, 2021, 2:33 PM#518
Got my table. Not crazy about the fold in the middle, so I contacted like a million custom gaming mouse pad manufacturers and found one that will do a full size rollout mat with custom art work. I'll keep this thread posted once I receive it and let you know how it works. My idea would be to cut it to precisely the dimensions of the playing area and put it down before every game (e.g. not re-felting the table) so we don't have the crease there.
Fingers crossed!
allforcharityRegular91 posts
Posted Jul 16, 2021, 7:42 PM#519
I contacted like a million custom gaming mouse pad manufacturers and found one that will do a full size rollout mat with custom art work. I'll keep this thread posted once I receive it and let you know how it works.
Yes, please keep us informed of your progress!
The NutsMicro-Stakes Grinder14 posts
Posted Jul 16, 2021, 10:12 PM#520
Got my table. Not crazy about the fold in the middle, so I contacted like a million custom gaming mouse pad manufacturers and found one that will do a full size rollout mat with custom art work. I'll keep this thread posted once I receive it and let you know how it works. My idea would be to cut it to precisely the dimensions of the playing area and put it down before every game (e.g. not re-felting the table) so we don't have the crease there.
Fingers crossed!
How much was the quote?
rjdev7Regular40 posts
Posted Jul 16, 2021, 10:22 PM#521
How much was the quote?
Haven't heard yet
TX_Golf_N_PokerRegular48 posts
Posted Jul 17, 2021, 12:39 AM#522
Got my table. Not crazy about the fold in the middle, so I contacted like a million custom gaming mouse pad manufacturers and found one that will do a full size rollout mat with custom art work. I'll keep this thread posted once I receive it and let you know how it works. My idea would be to cut it to precisely the dimensions of the playing area and put it down before every game (e.g. not re-felting the table) so we don't have the crease there.
Fingers crossed!
Looking forward to seeing how this turns out. I've tried to find out who make the PCF table toppers that we have GBs for here. I'd like to have several different custom ones made, then build a table that they would fit on so that I could change them out whenever I wanted to. If this one of yours isn't too expensive, I'd be interested in using them too.
rjdev7Regular40 posts
Posted Jul 17, 2021, 1:32 AM#523
Looking forward to seeing how this turns out. I've tried to find out who make the PCF table toppers that we have GBs for here. I'd like to have several different custom ones made, then build a table that they would fit on so that I could change them out whenever I wanted to. If this one of yours isn't too expensive, I'd be interested in using them too.
I'll let you all know once I hear back. I agree, being able to switch them in and out would be really cool.
rjdev7Regular40 posts
Posted Jul 20, 2021, 1:31 PM#524
Alright I have the quote back from a vendor in New Zealand. They're charging me $150 for 3mm rubber backed mouse pad (74" x 32") and $160 for 4mm. Both are full print custom artwork options and free shipping worldwide(!!!) I'm going to go with the 4mm option and will post more details here for you all then. Not providing the vendor info at this moment only because he was somewhat hesitant to do it to begin with and I want to make sure the quality is worth even recommending to you all as fellow chippers. If this works out, though, it could mean a lot more business for this guy lol. Pretty excited about this!
I'm just finalizing my artwork now, so I expect something more to share by ~ early August hopefully.
allforcharityRegular91 posts
Posted Jul 20, 2021, 7:48 PM#525
I can get behind free worldwide shipping
Moxie MikeRegular41 posts
Posted Jul 20, 2021, 9:41 PM#526
I can get behind free worldwide shipping
Yeah no shit!
I'm curious about this too... it's a cool idea if nothing else but I'm a little skeptical about playability and how it's going to hold up over time. Mousepads tend to wear over time and they're not designed to be stain resistant or anything (I don't think).
upNdownShark114 posts
Posted Jul 20, 2021, 10:00 PM#527
It’s a great idea, but the price seems sky high to me. I understand that one-offs are going to be expensive, but that’s almost 3x as much as the PCF mousepad tat or top mats, and those are a thicker pad. You can get a fully custom photo-quality replacement cloth for that price, which will almost certainly be a better quality and more durable playing surface.
it’s a creat idea. I love great ideas (I have plenty of great ideas; problem is most of them stink - Carlin.). And I am usually first in line to overpay for a crazy, great idea. So I get it. But just saying - this is not cheap.
rjdev7Regular40 posts
Posted Jul 20, 2021, 10:31 PM#528
The PCF mat is thicker than 4mm? I find that hard to believe, considering I have other poker mats that are < 2mm in thickness. If they are, that's outstanding and we should find out what manufacturer did them. Can you confirm?
DarsonMicro-Stakes Grinder20 posts
Posted Jul 20, 2021, 10:42 PM#529
The PCF topper is 6mm, the mousepad is 3mm.
BGinGAShark148 posts
Posted Jul 20, 2021, 11:32 PM#530
A cheaper solution might be to get a budget poker mat (around $40), cut it to size, and cover it with a custom cloth (using spray adhesive). Or just cut it to size (most are 72x36) and use it as-is on top of the Barrington.
TunnelMoneyMicro-Stakes Grinder15 posts
Posted Jul 20, 2021, 11:36 PM#531
A cheaper solution might be to get a budget poker mat (around $40), cut it to size, and cover it with a custom cloth (using spray adhesive).
I had often wondered how feasible it would be to get a decent foam like Ensolite and use a spray adhesive to attach speed cloth. I wonder how well it would roll up and store.
BGinGAShark148 posts
Posted Jul 20, 2021, 11:44 PM#532
I had often wondered how feasible it would be to get a decent foam like Ensolite and use a spray adhesive to attach speed cloth. I wonder how well it would roll up and store.
Speedcloth is pretty stiff; gaming cloth would both adhere and roll much better. I've done it with various store fabrics on 1/4" upholstery headliner foam.
SSC would probably be okay so long as you didn't roll it too tightly (minimu 8" to 10" diamater roll, etc.). Just need to make sure to use ample adhesive and let it thoroughly dry.
rjdev7Regular40 posts
Posted Jul 21, 2021, 2:29 AM#533
A cheaper solution might be to get a budget poker mat (around $40), cut it to size, and cover it with a custom cloth (using spray adhesive). Or just cut it to size (most are 72x36) and use it as-is on top of the Barrington.
Chanman custom felts are > $200 so I felt like $150 was a bargain considering they're claiming to be HD print and it comes with 4mm of rubber backing. If anyone knows where the PCF mats came from I am happy to investigate further.
BGinGAShark148 posts
TX_Golf_N_PokerRegular48 posts
Posted Jul 21, 2021, 5:23 AM#535
Lots of poker cloth options for well under $100. But do what you want.
Ask @Tommy (https://www.pokerchipforum.com/members/1/) about the source for the PCF mats.
Do you have links to any of these vendors who will do custom felts for under $100?
rjdev7Regular40 posts
Posted Aug 5, 2021, 10:49 PM#536
khpNewbie2 posts
Posted Aug 9, 2021, 1:41 PM#537
For those of you that have this table, how vexing is the fold in the playing area? Do cards ever get caught there?
Would you rather play on a nice dining table with the PCF topper or a stock barrington folding table? (Not a re-felted one)
tabletalker7Shark116 posts
Posted Aug 9, 2021, 2:30 PM#538
For those of you that have this table, how vexing is the fold in the playing area? Do cards ever get caught there?
Would you rather play on a nice dining table with the PCF topper or a stock barrington folding table? (Not a re-felted one)
I would take the PCF topper over a stock Barrington table, but I would take a refelted Barrington table over a PCF topper. The stock felt on the Barrington table is THAT BAD! Once you deal with that felt, the rest of the table is pretty decent.
rjdev7Regular40 posts
Posted Aug 9, 2021, 2:39 PM#539
+1 the felt on the barrington table is like playing on a flannel sheet. It's awful.
khpNewbie2 posts
Posted Aug 9, 2021, 2:41 PM#540
The fold in the table isn’t a bother?
rjdev7Regular40 posts
Posted Aug 9, 2021, 2:44 PM#541
The fold in the table isn’t a bother?
For me, personally, I hate the fold. Others don't mind it. I suspect that this variance in feedback is due to quality control standards for the barrington tables. Because they're "cheap" stock tables, I bet that some tables have folds that aren't perfectly even. For me, the cards were getting stuck passing over the fold constantly hence why I wanted to order the above table toppers. For others, I've heard that's not a big deal and the fold is "even".
Aside from performance, I personally think the fold looks terrible :). All this being said, the money was right for the Barrington and I don't regret getting it at all.
JRald07Regular30 posts
Posted Aug 9, 2021, 3:04 PM#542
For me, the cards were getting stuck passing over the fold constantly hence why I wanted to order the above table toppers
Did you try adjusting the tension of the cable underneath to make the table "even"? That's what I had to do when I received my table and no complaints since then.
Also...refelted Barrington > PCF table topper > stock Barrington.
rjdev7Regular40 posts
Posted Aug 9, 2021, 3:05 PM#543
Did you try adjusting the tension of the cable underneath to make the table "even"? That's what I had to do when I received my table and no complaints since then.
Also...refelted Barrington > PCF table topper > stock Barrington.
Yeah... Unfortunately couldn't get it to align. I think the wood underneath might be slightly warped. For $100 I couldn't justify the effort to send it back.
TwoHomieMicro-Stakes Grinder5 posts
Posted Aug 11, 2021, 5:27 AM#544

Scored TWO of these today for $100 each on FB marketplace. Seller even through in 1000 dice chips that’ll I’ll probably try and re-home.
Both have a few small nicks and tears in the vinyl, but nothing that some black tape couldn’t hide.
Is there a preferred type of tape to fix/repair torn rail vinyl?
Forty4Regular44 posts
Posted Aug 11, 2021, 11:34 AM#545
Is there a preferred type of tape to fix/repair torn rail vinyl?
Nice score worth it at $100 all day.
I used the 3M vinyl kit with decent success. Mine was a small blemish from glue getting on the rail and me pulling it off.
RegularjohnRegular30 posts
Posted Aug 24, 2021, 5:56 PM#546
got my new felt from @T_Chan (https://www.pokerchipforum.com/members/71/) and rubber to replace the padding.
this will be the 2nd time i'll be updating my table. first one was adding speed cloth, 2nd was adding deeper cup holders.
any tips/tricks when adding cloth from @T_Chan (https://www.pokerchipforum.com/members/71/) ? same with adding the new padding, im assuming you just spray the 3M adhesive and throw it on.
zshearinNewbie1 posts
Posted Aug 25, 2021, 12:16 AM#547
@Regularjohn (https://www.pokerchipforum.com/members/6445/) it looks like he has a video of him adding cloth to a table here:
I haven't actually done it myself (yet) but guessing this should help
tabletalker7Shark116 posts
Posted Aug 25, 2021, 12:19 AM#548
any tips/tricks when adding cloth from @T_Chan ? same with adding the new padding, im assuming you just spray the 3M adhesive and throw it on
For the padding, you need to cut the padding where the rails meet the playing surface. Padding under the rails will not let the rails go back on right.
Seeking Alpha Social ClubNewbie1 posts
Posted Aug 25, 2021, 1:09 AM#549
Just gonna throw my 2 cents in. These mofos are heavier than $hit!! I would avoid them like the plague. I picked one up to use as a portable table, but found that they suck compared to other options because they are so heavy. I have a table similar to the one below as well, and it is much easier to move around.

autoNewbie4 posts
Posted Aug 27, 2021, 3:24 AM#550
I have a few questions…
-
A few types of foams have been mentioned ( Ensolite, volera, neoprene, headliner, HD foam). Is there one specific foam that is the better?
-
Any tips from those who replaced the foam on cutting the new foam to the correct size?
If you replace the foam, make sure you cut the foam AT THE RAIL! I made the mistake of thinking the rails would go back on with new foam underneath the rail pieces, yeah, didn't work. Once I cut the foam to the size on the playing surface only, everything went back together great.
-
Since adhesive spray is used when laying down new foam, do you have to wait a certain amount of time before you start to laying down the felt over the new foam.
-
When installing the deeper cup holders, what is holding them in place?
-
For those that used a custom felt by @T_Chan (https://www.pokerchipforum.com/members/71/) ( @WhiteMamba1646 (https://www.pokerchipforum.com/members/4164/) @wonderpuddle (https://www.pokerchipforum.com/members/3167/) @JZPdub (https://www.pokerchipforum.com/members/8361/) ). Did you guys use an adhesive spray when laying down the felt?
-
What type of staple gun did you use?
Thanks
DodgerRegular46 posts
Posted Aug 27, 2021, 3:52 AM#551
I have a few questions…
-
A few types of foams have been mentioned ( Ensolite, volera, neoprene, headliner, HD foam). Is there one specific foam that is the better?
-
Any tips from those who replaced the foam on cutting the new foam to the correct size?
-
Since adhesive spray is used when laying down new foam, do you have to wait a certain amount of time before you start to laying down the felt over the new foam.
-
When installing the deeper cup holders, what is holding them in place?
-
For those that used a custom felt by @T_Chan (https://www.pokerchipforum.com/members/71/) ( @WhiteMamba1646 (https://www.pokerchipforum.com/members/4164/) @wonderpuddle (https://www.pokerchipforum.com/members/3167/) @JZPdub (https://www.pokerchipforum.com/members/8361/) ). Did you guys use an adhesive spray when laying down the felt?
-
What type of staple gun did you use?
Thanks
Can’t speak to the foam, but:
-
I did not add anything under the deeper cup holders and they stay in quite well. Most of the support comes from the snug fit in the newly cut holes and from the rail itself. (Some others have added an extra piece underneath for support.) My cup holders stay in when folding up for storage as well. So no issue there.
-
Standard staple gun.
MatthewTreeTreeMicro-Stakes Grinder14 posts
Posted Aug 27, 2021, 4:08 AM#552
I have a few questions…
-
A few types of foams have been mentioned ( Ensolite, volera, neoprene, headliner, HD foam). Is there one specific foam that is the better?
-
Any tips from those who replaced the foam on cutting the new foam to the correct size?
-
Since adhesive spray is used when laying down new foam, do you have to wait a certain amount of time before you start to laying down the felt over the new foam.
-
When installing the deeper cup holders, what is holding them in place?
-
For those that used a custom felt by @T_Chan (https://www.pokerchipforum.com/members/71/) ( @WhiteMamba1646 (https://www.pokerchipforum.com/members/4164/) @wonderpuddle (https://www.pokerchipforum.com/members/3167/) @JZPdub (https://www.pokerchipforum.com/members/8361/) ). Did you guys use an adhesive spray when laying down the felt?
-
What type of staple gun did you use?
Thanks
Take off the rails, spray adhesive where the existing foam is underneath.
Cut to size.
Lay speed cloth over the the foam. You’ll need to apply tension evenly so use some clamps to hold the speed foam and staple in into place.
Cut to size.
Re-install foam rails.
You’ll have to do this twice. Double check measurements. And wha-la
Put it back together and play.
Cup Holders: drill the correct size hole through, and simply set the cup holder in place. No need for a permanent adhesion. Sometimes people will drop something in the cup holder and wont be able to get the item out. (Herb grinders or whatever there is out there that fits perfectly lol)
JZPdubMicro-Stakes Grinder17 posts
wonderpuddleMicro-Stakes Grinder9 posts
Posted Aug 28, 2021, 3:29 PM#554
I have a few questions…
-
A few types of foams have been mentioned ( Ensolite, volera, neoprene, headliner, HD foam). Is there one specific foam that is the better?
-
Any tips from those who replaced the foam on cutting the new foam to the correct size?
-
Since adhesive spray is used when laying down new foam, do you have to wait a certain amount of time before you start to laying down the felt over the new foam.
-
When installing the deeper cup holders, what is holding them in place?
-
For those that used a custom felt by @T_Chan (https://www.pokerchipforum.com/members/71/) ( @WhiteMamba1646 (https://www.pokerchipforum.com/members/4164/) @wonderpuddle (https://www.pokerchipforum.com/members/3167/) @JZPdub (https://www.pokerchipforum.com/members/8361/) ). Did you guys use an adhesive spray when laying down the felt?
-
What type of staple gun did you use?
Thanks
On my barrington, I just re-used the cheap foam that was there. In retrospect, closed cell foam would have probably been better. But this was my first table and I didn’t know any better. It still works, but my round table top and my chanman feel better.
I lightly sprayed some fabric adhesive when I installed my felt. Not sure it was necessary but I did use some.
Hope this helps.
PinkdanRegular36 posts
Posted Aug 28, 2021, 6:14 PM#555
So what’s a good price these days for a barrington? I have a chance at one for $230 shipped
JRald07Regular30 posts
Posted Aug 28, 2021, 6:15 PM#556
So what’s a good price these days for a barrington? I have a chance at one for $230 shipped
At this point I would say buy it yesterday!
rjdev7Regular40 posts
Posted Aug 28, 2021, 6:27 PM#557
I got one at Walmart on sale a month ago for $99. So I think wait it out a bit
PinkdanRegular36 posts
Posted Aug 28, 2021, 6:28 PM#558
PinkdanRegular36 posts
Posted Aug 28, 2021, 6:28 PM#559
I got one at Walmart on sale a month ago for $99. So I think wait it out a bit
Dude! Did you post the deal here? Next time post it so we can get one too
rjdev7Regular40 posts
Posted Aug 28, 2021, 6:29 PM#560
Dude! Did you post the deal here? Next time post it so we can get one too
It was in person in northeast PA, when I went online it was the $230 one they currently have. I actually wonder if it was a mistake in the store
PinkdanRegular36 posts
Posted Aug 28, 2021, 6:30 PM#561
It was in person in northeast PA, when I went online it was the $230 one they currently have. I actually wonder if it was a mistake in the store
Woah, you should have cleaned them out haha
PinkdanRegular36 posts
Posted Aug 28, 2021, 6:34 PM#562
rjdev7Regular40 posts
Posted Aug 28, 2021, 6:54 PM#563
Woah, you should have cleaned them out haha
I did! I took their last remaining one lol
nostanNewbie4 posts
Posted Aug 29, 2021, 8:41 AM#564
What's the size of the (padded) rail? Any difference between the Barrington versions?
MatthewTreeTreeMicro-Stakes Grinder14 posts
Posted Aug 29, 2021, 9:02 AM#565
What's the size of the (padded) rail? Any difference between the Barrington versions?
No different
Edit: brown rails are the same as the regular and ESPN table.
ESPN table has a slightly higher rail and a simple switch underneath that you’d have to work around. But it’s only higher up to accommodate the LED strip
nostanNewbie4 posts
Posted Aug 29, 2021, 9:54 AM#566
Thanks. And what's the height from the felt?
MatthewTreeTreeMicro-Stakes Grinder14 posts
Posted Aug 29, 2021, 10:03 AM#567
Thanks. And what's the height from the felt?
For which style
nostanNewbie4 posts
Posted Aug 29, 2021, 10:11 AM#568
For which style
MatthewTreeTreeMicro-Stakes Grinder14 posts
Posted Aug 29, 2021, 10:23 AM#569
1 1/8th inch
i would take pics but it’s folded stored away in a whack spot
MatthewTreeTreeMicro-Stakes Grinder14 posts
Posted Aug 29, 2021, 10:23 AM#570
1 1/8th inch
i would take pics but it’s folded stored away in a whack spot
that’s also after velora foam and speed cloth, and the way that the rails screw into it makes zero difference in height/depth from stock
rjdev7Regular40 posts
nostanNewbie4 posts
Posted Sep 7, 2021, 7:37 PM#572
What's the sizes of cupholders?
TheBigTaterRegular48 posts
Posted Sep 7, 2021, 10:32 PM#573
Got an email from WallyWorld about these being on sale for $201.60. They had been out of stock for a long time so they must have found some in a warehouse. Kinda doubt they are every going to be much cheaper at the retail level again. The days of the $100 price may only be found used and/or second hand anymore.
rjdev7Regular40 posts
Posted Sep 7, 2021, 10:41 PM#574
Mine was $100 at Walmart 2 months ago, but it was in Wilkes barre, PA and I feel like it might have been an error. Last one in stock too, sorry :(
$200 is a no brainer honestly. Do it!
MatthewTreeTreeMicro-Stakes Grinder14 posts
Posted Sep 8, 2021, 2:58 AM#575
It is worth every penny of $200
djfayzeMicro-Stakes Grinder23 posts
Posted Sep 8, 2021, 11:35 AM#576
It is worth every penny of $200
Agreed. Mines held up to 30-40 games with at least one a week like a champ.
MatthewTreeTreeMicro-Stakes Grinder14 posts
Posted Sep 8, 2021, 12:05 PM#577
Agreed. Mines held up to 30-40 games with at least one a week like a champ.
Yeah man, mine is solid. Even after the re-finish.
Recently saw pics from the Havana Card Room labor day party/meet-up... that table is holding like... hundreds of pounds of chips...
JRald07Regular30 posts
PinkdanRegular36 posts
Posted Sep 10, 2021, 1:09 AM#579
Currently at $181.50 (lowest price I have seen in the past year):
View attachment 774091 (https://www.pokerchipforum.com/attachments/774091/)
Just ordered, thanks for the heads up. I’ve been waiting for a deal and this looks like the best I’m gonna get
DarthBubba615Micro-Stakes Grinder8 posts
Posted Sep 11, 2021, 12:49 PM#580
Just ordered, thanks for the heads up. I’ve been waiting for a deal and this looks like the best I’m gonna get
Same here...
DarthBubba615Micro-Stakes Grinder8 posts
Posted Sep 11, 2021, 1:02 PM#581
Inspired by this thread, I refitted two tables for a buddy of mine this summer. Both of these involved drilling for deeper cupholders, and replacing not only felt, but foam underneath and replacing the vinyl on the rails with pleather (which wound up being the most time consuming aspect of the project).
First up was the blue table. At some point, I'll need to revisit this one, the client and I had a miscommunication and it turned out that he wanted jumbo sized cupholders. When I re-refit this one, I might also raise the rail and add lights.
DarthBubba615Micro-Stakes Grinder8 posts
Posted Sep 11, 2021, 1:08 PM#582
Inspired by this thread, I refitted two tables for a buddy of mine this summer. Both of these involved drilling for deeper cupholders, and replacing not only felt, but foam underneath and replacing the vinyl on the rails with pleather (which wound up being the most time consuming aspect of the project).
The second (red) table started out as the ESPN lighted table. When I did this refit, I went ahead and drilled for jumbo cupholders, and replaced the lights, along with felt, foam, and pleather. He was very pleased with how this turned out, and had custom bags made as carrying cases for these tables. If there's interest, I can get specific info from him on those carrying bags.
PinkdanRegular36 posts
Posted Sep 11, 2021, 1:31 PM#583
Inspired by this thread, I refitted two tables for a buddy of mine this summer. Both of these involved drilling for deeper cupholders, and replacing not only felt, but foam underneath and replacing the vinyl on the rails with pleather (which wound up being the most time consuming aspect of the project).
The second (red) table started out as the ESPN lighted table. When I did this refit, I went ahead and drilled for jumbo cupholders, and replaced the lights, along with felt, foam, and pleather. He was very pleased with how this turned out, and had custom bags made as carrying cases for these tables. If there's interest, I can get specific info from him on those carrying bags.
Nice work on these. I’ve heard people complain that the lights are too bright on the espn table. Did you have to install a dimmer? Also what foam did you use during the replacement?
DarthBubba615Micro-Stakes Grinder8 posts
PinkdanRegular36 posts
TunnelMoneyMicro-Stakes Grinder15 posts
Posted Sep 12, 2021, 1:44 AM#586
He was very pleased with how this turned out, and had custom bags made as carrying cases for these tables. If there's interest, I can get specific info from him on those carrying bags.
I'd be interested in hearing more about the carry bag.
TonZagaRegular76 posts
Posted Sep 17, 2021, 3:55 PM#587
Every time I look back at this thread, makes me want to get custom felt from Chanman but then I'm conflicted on just building a non-folding custom table with the custom felt....
DodgerRegular46 posts
Posted Sep 17, 2021, 4:13 PM#588
Every time I look back at this thread, makes me want to get custom felt from Chanman but then I'm conflicted on just building a non-folding custom table with the custom felt....

TonZagaRegular76 posts
ThinkingFoldMicro-Stakes Grinder9 posts
Posted Sep 17, 2021, 4:20 PM#590
Every time I look back at this thread, makes me want to get custom felt from Chanman but then I'm conflicted on just building a non-folding custom table with the custom felt....
You find yourself wondering that. Originally got the Barrington because I found it second hand for under $100 and figured a folding table would be great for storage. Since then I have replaced the felt, expanded the cup holders, and can't remember the last time I folded it up for storage.
So while the table still works great, I sometimes wonder why I didn't just build a fully custom table.

TonZagaRegular76 posts
Posted Sep 17, 2021, 4:36 PM#591
You find yourself wondering that. Originally got the Barrington because I found it second hand for under $100 and figured a folding table would be great for storage. Since then I have replaced the felt, expanded the cup holders, and can't remember the last time I folded it up for storage.
So while the table still works great, I sometimes wonder why I didn't just build a fully custom table.
View attachment 779195 (https://www.pokerchipforum.com/attachments/779195/)
Yeah, I modded mine out with help of this thread. Even put USB chargers under rail for every seat and never fold my table up. Contemplating just making it one solid piece of wood on top, padding, felting and calling it a day
OfficerLovejoyMicro-Stakes Grinder16 posts
TonZagaRegular76 posts
Posted Sep 18, 2021, 6:46 PM#593
Yikes didn’t notice that thread was a thing. And honestly, glad I didn’t pull the trigger on a full dealer table from Gorilla. Won’t be buying from them. just my 2¢
OfficerLovejoyMicro-Stakes Grinder16 posts
Posted Sep 18, 2021, 6:52 PM#594
Yikes didn’t notice that thread was a thing. And honestly, glad I didn’t pull the trigger on a full dealer table from Gorilla. Won’t be buying from them. just my 2¢
I like to spread awareness about this disgraceful event in PCF history for this exact reason.
Everybody can order from whomever they want but I think more people should be aware of who exactly they are dealing with.
DarthBubba615Micro-Stakes Grinder8 posts
Posted Sep 24, 2021, 3:01 AM#595
I'd be interested in hearing more about the carry bag.
I'm attempting to find out more. He gave me the name of the place that did it for him, I've called and left messages in hopes of getting a quote. Stay tuned...
pnwpoker8Newbie1 posts
Posted Nov 4, 2021, 10:11 PM#596
Sharing my build. Thank you to the contributors of this thread - definitely simplified the process! Some call-outs:
-
yourautotrim royal blue mini SSC was sold out, so I swapped to burgundy and am very pleased (yay samples)
-
I only had 4 clamps, a manual Phillips screwdriver, T50 1/4 inch staples. I spent about 10 combined hours from start to finish. I was able to do this in a tiny Seattle apartment.
-
I did not initially read the comment about using a blow dryer to loosen the glue under the railings, and I ended up cracking one of my rails. Luckily the damage was not visible once the table was reassembled.
-
I used a silver color oil based marker for the bet line. The best tool I had for the curves was a frying pan, and you can definetly see the imperfections if you look for it.
rjdev7Regular40 posts
Posted Nov 7, 2021, 1:42 AM#597
Just hosted for the first time with my Super Poker World (Mario) themed table topper. Very happy with how it fits in the barrington. Felt like actual speed cloth!


mtzgrNewbie2 posts
rjdev7Regular40 posts
mtzgrNewbie2 posts
rjdev7Regular40 posts
Posted Nov 12, 2021, 8:55 PM#601
If I did go the route of custom cards, I would probably have to make some new artwork for Jacks through Aces as mario characters :) Sigh... too much work.
2Chips1chairNewbie4 posts
Posted Nov 23, 2021, 9:45 AM#602
I got a lot of help from this forum on redoing mine so I wanted to spread the wealth on those who have the ESPN table.
Tips:
The only difference is there is a layer of plyboard underneath the arm rests, but this affects how you will build it.
Bring the foam padding under the plywood that the front quarter rests on it. this will give it a slight slant upwards which will create a deeper ring affect, and will also allow you to use LED's still.
If you are drilling out cup holders, do not go bigger than 2.75", otherwise you will eat through the entire LED plywood sheet. Because of this extra depth you also do not need to cut the legs of the table unless your cup depth is over 2.5"
You should absolutely replace the foam under the felt. IT IS GARBAGE. since you'll already have most of the work done, spend the extra $30 and get some good foam. I used elmers adhesive spray because I already had it, otherwise i'd use 3M. Elmers worked fine for me.
Replace the LED's. We all know that the ones they originally use are too bright, and the inability to change the color is annoying.
https://www.amazon.com/gp/product/B08JH5M6N3/ref=ppx_yo_dt_b_asin_title_o00_s00?ie=UTF8&th=1 (https://www.amazon.com/gp/product/B08JH5M6N3/ref=ppx_yo_dt_b_asin_title_o00_s00?ie=UTF8&th=1&tag=amznpcfx-20)
That is what I used and they look great for the price!
Total cost:
$136 for new speed cloth and foam from TPS
$30 set of 10 2.75" diameter, 2.5" depth cup drop ins.
$16 multicolored LED's
$22 for clamps and hole cutter (I already had the rest of the tools)
I am generally a handy guy, but have little woodworking experience. From start to finish it took me about 8 hours.
Pics


MarhaultMicro-Stakes Grinder12 posts
Posted Nov 23, 2021, 8:26 PM#603
The brown version is $153.90 right now on Walmart.com with free shipping. I decided to go ahead and pick one up for a revamp.
MarhaultMicro-Stakes Grinder12 posts
Posted Nov 23, 2021, 10:11 PM#604
Question for those of you that replaced the pad as well as the cloth. Do you wrap the pad completely over the fold in the middle and staple underneath? I've always used the spray glue for pads just wondering how it all works with the fold in the table.
JRald07Regular30 posts
Posted Nov 23, 2021, 10:25 PM#605
Do you wrap the pad completely over the fold in the middle and staple underneath?
I ran the pad to the edge of the fold.
tabletalker7Shark116 posts
Posted Nov 23, 2021, 10:30 PM#606
Question for those of you that replaced the pad as well as the cloth. Do you wrap the pad completely over the fold in the middle and staple underneath? I've always used the spray glue for pads just wondering how it all works with the fold in the table.
I literally disassembled the table, ripped off the old felt and old foam, reassembled the bare table, glued down the new foam, and cut the foam at the fold. Then I took it back apart to do the felt
MarhaultMicro-Stakes Grinder12 posts
Posted Nov 23, 2021, 10:45 PM#607
I literally disassembled the table, ripped off the old felt and old foam, reassembled the bare table, glued down the new foam, and cut the foam at the fold. Then I took it back apart to do the felt
That's the plan is to completely disassemble it when I get it. A couple guys in our league have the exact tables and the felt and pad are terrible. I have leftover stuff from another table I'm gonna put a new pad and speed cloth on it. Might do the cup holder upgrade if I can find a good price on those.
TwoHomieMicro-Stakes Grinder5 posts
Posted Nov 25, 2021, 10:17 PM#608
Just started working on my two tables today, and here’s my contribution/discovery to this thread.
When drilling out the cup holders, I found that flipping the hole drill bit upside down and marking the center was the easiest way to make sure the newly drilled holes lined up with the old holes in the rail/vinyl.
The holes drilled in the rail are way bigger than needed, and I was too worried about ripping the vinyl in the rail if I tried to drill with the rails still attached.
Updates to follow!
TwoHomieMicro-Stakes Grinder5 posts
Posted Nov 26, 2021, 5:38 AM#609
PinkdanRegular36 posts
Posted Nov 26, 2021, 11:21 PM#610
Walmart had the table on sale for $153.90 right now
MarhaultMicro-Stakes Grinder12 posts
Posted Nov 26, 2021, 11:23 PM#611
Walmart had the table on sale for $153.90 right now
Been the same price since I posted it Tuesday. Mine just came in today like 10 minutes ago.

Next project is to disect it next weekend.
rjbf65Micro-Stakes Grinder13 posts
Posted Nov 26, 2021, 11:31 PM#612
Don't know why they don't just make these with decent SSC to save us all the trouble. Would sell much better I would think.
jonn1ecakesRegular25 posts
Posted Nov 27, 2021, 3:07 AM#613
I actually didn’t mind the DIY project. I’d be afraid if they upgraded felt the price would skyrocket.
tabletalker7Shark116 posts
Posted Nov 27, 2021, 4:37 AM#614
Don't know why they don't just make these with decent SSC to save us all the trouble. Would sell much better I would think.
Not only would that increase price, but if something happens during delivery and their cheap tablecloth rips, well, I won't care cause I am replacing it anyway. If SSC ripped, now there is a problem.
2Chips1chairNewbie4 posts
Posted Nov 30, 2021, 3:48 AM#615
PinkdanRegular36 posts
Posted Nov 30, 2021, 5:11 AM#616
MarhaultMicro-Stakes Grinder12 posts
Posted Nov 30, 2021, 5:33 AM#617
Nice! Which table do people generally prefer? I’ve heard these lights can be too bright
I think they're all constructed the same so I'd imagine it's just a preference for the lights or color scheme I guess
PinkdanRegular36 posts
Posted Nov 30, 2021, 3:37 PM#618
Does anyone know if the cup holders on the ESPN table are deeper than the normal barrington?
JRald07Regular30 posts
Posted Nov 30, 2021, 3:55 PM#619
Does anyone know if the cup holders on the ESPN table are deeper than the normal barrington?
I don't believe so. Should be the same depth.
PinkdanRegular36 posts
Posted Nov 30, 2021, 3:59 PM#620
I don't believe so. Should be the same depth.
Thanks. The description on the website said “deep” - got my hopes up
NasatikNewbie1 posts
Posted Nov 30, 2021, 6:46 PM#621
Bought a Barrington table on Black Friday, hopefully, I will be joining the refelting club soon! :cool
2Chips1chairNewbie4 posts
Posted Dec 2, 2021, 7:08 AM#622
Has anyone tried to make a commit line using an iron on vinyl? If so, how'd it turn out for you?
MarhaultMicro-Stakes Grinder12 posts
Posted Dec 3, 2021, 3:51 PM#623
So I don't have any pics yet but my hole saw jumped on me out of one of the holes and put some idiot marks on my rail. Any of you guys had success recovering the rail at all? If so what materials and any "how to" instructions would be great lol.
Also, couple of things. My cup holders seem slightly loose in the hole. Could just be a slightly different cup or my hole saw might have made the hole slightly wider, either way, any suggestions on how to fix that? My initial plan is to just throw a couple wraps of like duck tape around the cup holder to add some girth.
My rails in a couple places the screws were stripped at the factory it seems. When I went to unscrew them they wouldn't come out of the hole. Anyone had any luck using larger or longer screws? Not sure which is the better option.
2Chips1chairNewbie4 posts
Posted Dec 4, 2021, 2:01 AM#624
Has anyone tried to make a commit line using an iron on vinyl? If so, how'd it turn out for you?
So I tried to use an iron on for some scrap pieces I have. It will melt the foam underneath even on the lowest setting. I do not advise.
TwoHomieMicro-Stakes Grinder5 posts
Posted Dec 4, 2021, 3:11 AM#625
So I don't have any pics yet but my hole saw jumped on me out of one of the holes and put some idiot marks on my rail. Any of you guys had success recovering the rail at all? If so what materials and any "how to" instructions would be great lol.
Also, couple of things. My cup holders seem slightly loose in the hole. Could just be a slightly different cup or my hole saw might have made the hole slightly wider, either way, any suggestions on how to fix that? My initial plan is to just throw a couple wraps of like duck tape around the cup holder to add some girth.
My rails in a couple places the screws were stripped at the factory it seems. When I went to unscrew them they wouldn't come out of the hole. Anyone had any luck using larger or longer screws? Not sure which is the better option.
For the cup holders, I applied a religious amount of hot glue on the underside of the table, attempting to get some up between the cup holder and the bottom piece of wood/table.
Wrapping the cup holders in tape would also work and maybe be a bit less messy (I absolutely got hot glue on my forehead…)
For rail screws, I had a few that stripped out and then a few of the hinge screws that had the same thing happen. Went up to a slightly larger in diameter screw and didn’t have an issue. Pre-drill a small hole in the back side of the rail though so that the screw catches and pulls through.
TunnelMoneyMicro-Stakes Grinder15 posts
Posted Dec 9, 2021, 2:05 AM#626
My cup holders seem slightly loose in the hole. Could just be a slightly different cup or my hole saw might have made the hole slightly wider, either way, any suggestions on how to fix that? My initial plan is to just throw a couple wraps of like duck tape around the cup holder to add some girth.
When I refelted, I didn't completely cut out the new felt over the cup holder hole. Just made an "X" cut, the excess felt in the hole snugged up the cup holders quite well.
MarhaultMicro-Stakes Grinder12 posts
Posted Dec 9, 2021, 2:07 AM#627
When I refelted, I didn't completely cut out the new felt over the cup holder hole. Just made an "X" cut, the excess felt in the hole snugged up the cup holders quite well.
I did the same but I think my holes and cup holders I got might be slightly different in size. I went with some cheap ones on eBay (https://www.ebay.com/?mkcid=1&mkrid=711-53200-19255-0&siteid=0&campid=5338995683&customid=&toolid=10001&mkevt=1). I'm gonna get it back out tomorrow so I can take pics of my finished product and put some tape around the cup holders to add some girth lol.
I do need to figure out about recovering the rail to fix my idiot mark.
dkellerdMicro-Stakes Grinder8 posts
Posted Dec 9, 2021, 3:37 AM#628
I was able to keep the legs attached when I upgraded mine…may have saved me some time, idk. I put in a new pad too, but no pics of that I guess.


rjbf65Micro-Stakes Grinder13 posts
Posted Dec 9, 2021, 2:44 PM#629
I'm curious how big of a difference the new hinge makes in strength? Is it pretty noticeable?
I was able to keep the legs attached when I upgraded mine…may have saved me some time, idk. I put in a new pad too, but no pics of that I guess.
View attachment 824938 (https://www.pokerchipforum.com/attachments/824938/)
dkellerdMicro-Stakes Grinder8 posts
Posted Dec 9, 2021, 4:44 PM#630
I'm curious how big of a difference the new hinge makes in strength? Is it pretty noticeable?
Yes, very noticeable. Huge improvement and highly recommended.
bullett0Newbie1 posts
Posted Dec 24, 2021, 7:06 AM#631
Thanks. Toying with the idea of making some custom rails down the road so it would be 1 piece on each side instead of 3. Would make them taller with better cup holders also.
Any problem removing the cupholders when removing the borders? Mine are glued down quite strongly. How did you remove yours?
tabletalker7Shark116 posts
Posted Dec 24, 2021, 11:03 AM#632
Any problem removing the cupholders when removing the borders? Mine are glued down quite strongly. How did you remove yours?
Use a heat gun (hell you could probably use the wife's hair dryer) on the cup holders.
dkellerdMicro-Stakes Grinder8 posts
Posted Dec 24, 2021, 1:54 PM#633
Any problem removing the cupholders when removing the borders? Mine are glued down quite strongly. How did you remove yours?
Yeah, hair dryer takes the cup holders out easily after about 10 secs of heat.
JZPdubMicro-Stakes Grinder17 posts
Posted Dec 24, 2021, 2:01 PM#634
Yeah, hair dryer takes the cup holders out easily after about 10 secs of heat.
Exactly. Aim the hair dryer directly into the cup holder and then while you’re doing that use a screwdriver underneath the cup holder to start prying it up. After about 30 seconds of the hair dryer will start to come up easy.
TwoHomieMicro-Stakes Grinder5 posts
Posted Dec 26, 2021, 9:38 PM#635

Fun pro tip: if you decide to replace the cup holders, the old ones make wonderful little targets for a .22 or BB gun. Fun for the whole family!
ATLarchipMicro-Stakes Grinder15 posts
Posted Dec 28, 2021, 12:54 AM#636
Are they still selling these tables? I haven’t seen them lately.
BigSlick4523Newbie2 posts
Posted Dec 28, 2021, 1:07 AM#637
Are they still selling these tables? I haven’t seen them lately.
they do sell these tables but they are expensive you have to wait till u can catch them on sale like they had the espn on walmart maybe a month - 1.5months ago it was like $190 now its $400 lol
BonScotRegular61 posts
Posted Jan 6, 2022, 9:07 PM#638
No use to me as the shipping costs would be mental but this might be worthwhile for you guys…

JRald07Regular30 posts
dkellerdMicro-Stakes Grinder8 posts
dkellerdMicro-Stakes Grinder8 posts
Posted Jan 6, 2022, 9:41 PM#641
No use to me as the shipping costs would be mental but this might be worthwhile for you guys…
View attachment 842057 (https://www.pokerchipforum.com/attachments/842057/)
$99 with free shipping…seems too good to be true…but a helluva deal!
raynmanasRegular49 posts
Posted Jan 6, 2022, 9:58 PM#642
No use to me as the shipping costs would be mental but this might be worthwhile for you guys…
View attachment 842057 (https://www.pokerchipforum.com/attachments/842057/)
that website just reeks of scam. but hey, i guess if you're willing to try with a credit card and request a chargeback if you get screwed.
BonScotRegular61 posts
Posted Jan 6, 2022, 10:04 PM#643
that website just reeks of scam. but hey, i guess if you're willing to try with a credit card and request a chargeback if you get screwed.
It popped up when I was looking at Facebook marketplace as a sponsor. Not that it means it’s genuine or safe.
NotDunricNewbie1 posts
Posted Jan 6, 2022, 10:55 PM#644
Yeah, I'd encourage everyone to steer wayyyy clear of that site with the $99 table. A cursory google search of their domain name led me to another site with more of the same items, but completely and unabashedly pretending to be Costco's website. Major scam nonsense going on there.
rjdev7Regular40 posts
Posted Jan 6, 2022, 11:02 PM#645
lewanNewbie1 posts
Posted Jan 7, 2022, 6:28 PM#646
only just saw this thread.. really didnt like the original barrington felt so credit for repurposing this with suited speed cloth. looks pretty good!
postmanpeteNewbie2 posts
Posted Jan 28, 2022, 9:19 PM#647
I was hoping to pick up a Barrington or ESPN table but most things are I see are minimum of $270 now. Walmart has the ESPN table for 270 according to their website.
Also - maybe this should be another topic, but speed cloth.... Adam Savage's build of his table referred to using Pool Table cloth for the felt. I used to be a pretty avid pool player - we call it 'cloth' not 'felt'. So Adam made me think he was using Simonis (or a competitor like Granito). Of course it doesn't have the card suits in it. I can get my hands on Simonis 860 from a friend who re-covers tables but it's pretty expensive. Have you guys ever tried pool table cloth?
Honestly the work you guys have shown here look great and I'd probably just stick with that. I really appreciate all the time and effort it takes for you all to post pictures and lists of what you did. Super helpful.
If you have thoughts on where to find a table cheaper than walmart, or about using pool table cloth, feel free to reply!
Thanks!
MandosMicro-Stakes Grinder7 posts
Posted Jan 31, 2022, 10:08 PM#648
I'm also curious if anyone has found any of these for less than 250 or so in the last months. Seems like all the Barrington listings are in the 400s now which is pretty crazy. ESPN table for 270 seems to be the best price at the moment.
makemake78Newbie1 posts
Posted Feb 2, 2022, 10:45 PM#649
Yep, we got the ESPN table last week from walmart and it was delivered in 2 days. Cheapest we could find.
BPTDirectorRegular47 posts
Posted Feb 2, 2022, 11:15 PM#650
I have Simonis 860 cloth on my pool table downstairs and it does not compare to suited speed cloth when talking card glide. It is badass pool table cloth though.
raynmanasRegular49 posts
Posted Feb 2, 2022, 11:33 PM#651
Also - maybe this should be another topic, but speed cloth.... Adam Savage's build of his table referred to using Pool Table cloth for the felt. I used to be a pretty avid pool player - we call it 'cloth' not 'felt'. So Adam made me think he was using Simonis (or a competitor like Granito). Of course it doesn't have the card suits in it. I can get my hands on Simonis 860 from a friend who re-covers tables but it's pretty expensive. Have you guys ever tried pool table cloth?
I used pool table cloth on a build once just because I had some. Granted it probably wasn't a high end brand, but from that experience, I do not recommend it for poker. If you don't like speed cloth (some people don't, but I personally don't understand why - it just feels right for cards), there are still better options. Pool table cloth is ideal for pool tables.
However, I have a friend who re-felted an old octagon with some random cheap felt he found at the fabric store, and it pilled so quickly it was absolutely impossible to deal on within a few games. Pool table felt is definitely better than that!
postmanpeteNewbie2 posts
Posted Feb 3, 2022, 2:33 AM#652
Thanks for the thoughts on pool table cloth! I'll just stick with the cloth you guys have tried and liked.
I was looking again for tables and hit this website that seemed a little shady, but no harm in me sending an email:
https://www.yoybuy.com/pd/3HEwfHQBglQUd0j4AbVM.html
I told them I'd be interested in 10 tables to see if they can get me a wholesaler price. Unfortunately no response and it's been a couple of days.
Not sure what the point of that site is.
I thought, if we could get a few of us together, maybe we could get like 10 tables at wholesale and order all the parts to do the customary upgrades. Then we meet at some central spot for a weekend and upgrade them and everybody takes one or two home. Sounds kinda fun.
RjchangoNewbie4 posts
Posted Feb 11, 2022, 4:57 PM#653
What is the right size hole saw for the deeper D Vinci cup holders that were posted here? Is it 2.75 in?
JRald07Regular30 posts
Posted Feb 27, 2022, 6:33 PM#654
Re-re-felted and re-padded my table with the new, and limited, reverse midnight navy SSC! (Before and after)


CptainCanuckMicro-Stakes Grinder9 posts
Posted Feb 27, 2022, 8:03 PM#655
Wonder if these tables are ever going to come back in stock on Walmart.
Forty4Regular44 posts
Posted Feb 27, 2022, 8:23 PM#656
Wonder if these tables are ever going to come back in stock on Walmart.
They do. They come and go and the price moves accordingly. I actually saw them for $160ish not too long ago.
CptainCanuckMicro-Stakes Grinder9 posts
Posted Feb 27, 2022, 8:53 PM#657
They do. They come and go and the price moves accordingly. I actually saw them for $160ish not too long ago.
Ahh, guess I'll need to check more often - they've been showing out of stock every time I look every few weeks.
ATLarchipMicro-Stakes Grinder15 posts
upNdownShark114 posts
Posted Feb 27, 2022, 10:23 PM#659
How did you get the betting line?
Right? I’ve often wanted to put one on my speedcloth, but I don’t have the guts
JRald07Regular30 posts
Posted Feb 27, 2022, 10:47 PM#660
How did you get the betting line?
Right? I’ve often wanted to put one on my speedcloth, but I don’t have the guts
Permanent marker, masking tape, long straight edge, and a lot of measuring...
I start with the lines parallel to the long rail, then use my ruler as a jig to create the semi-circles at the ends. Masking tape keeps the lines neat when you join the semi-circles to the parallel line.
PinkdanRegular36 posts
Posted Feb 27, 2022, 11:17 PM#661
Permanent marker, masking tape, long straight edge, and a lot of measuring...
I start with the lines parallel to the long rail, then use my ruler as a jig to create the semi-circles at the ends. Masking tape keeps the lines neat when you join the semi-circles to the parallel line.
Great work!
SaltLakeGamblerNewbie1 posts
dkellerdMicro-Stakes Grinder8 posts
Posted Feb 28, 2022, 10:59 PM#663
Permanent marker, masking tape, long straight edge, and a lot of measuring...
I start with the lines parallel to the long rail, then use my ruler as a jig to create the semi-circles at the ends. Masking tape keeps the lines neat when you join the semi-circles to the parallel line.
Can we see a closeup pic of the line?
JRald07Regular30 posts
Posted Mar 1, 2022, 12:42 AM#664
Can we see a closeup pic of the line?


louBdubMicro-Stakes Grinder17 posts
Posted Mar 7, 2022, 11:38 PM#665
World…. Why are you - the way that you are….?
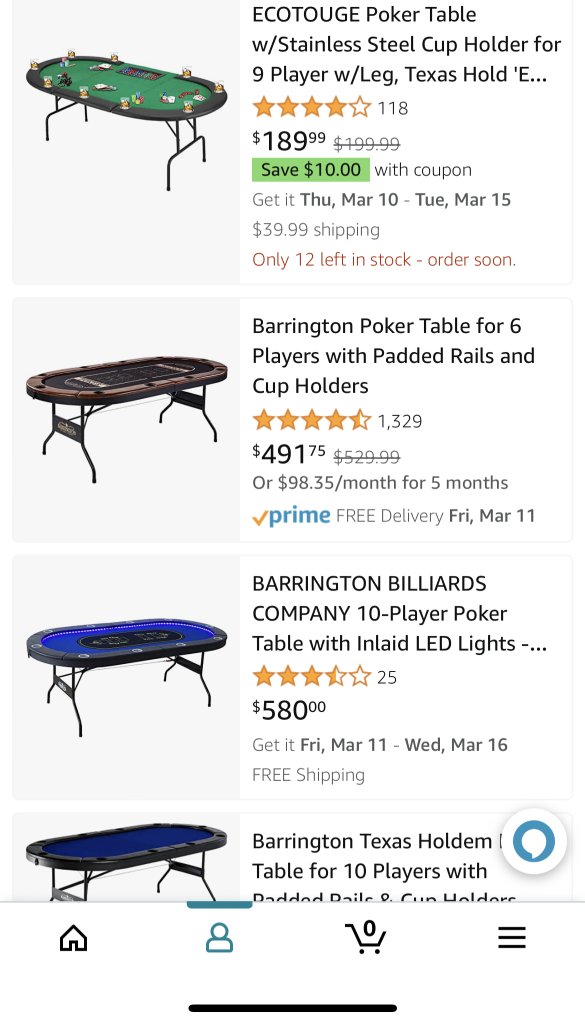
dmoneyRegular32 posts
Posted Mar 12, 2022, 2:14 AM#666
Adding a betting line, day one. Thanks to @JRald07 (https://www.pokerchipforum.com/members/8077/) for the inspiration and tips.
I put a pin in the felt 8.5” from the rail to line things up. Worked on some geometry with @SJFCPK18 (https://www.pokerchipforum.com/members/8241/) to land on the correct radius and “live bet” area.
The high point of the day was fashioning a compass with a set of pliers, putting a pin in one end and the felt marker in the other to make tracing the arc easier!
Hoping to finish up over the weekend!
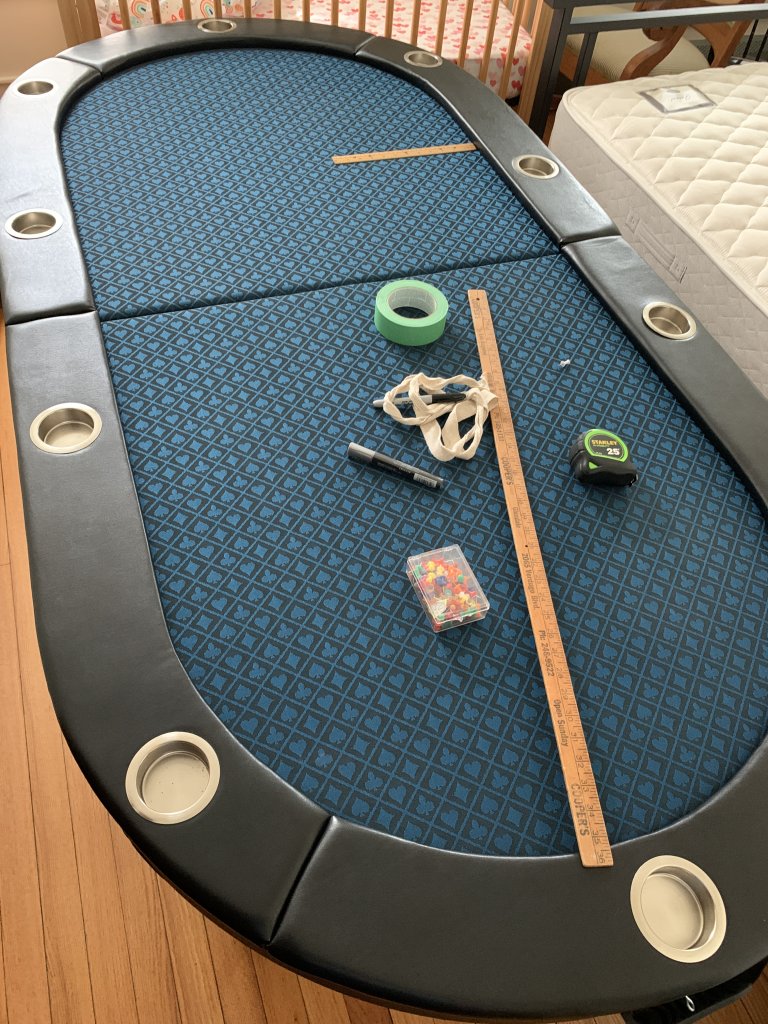
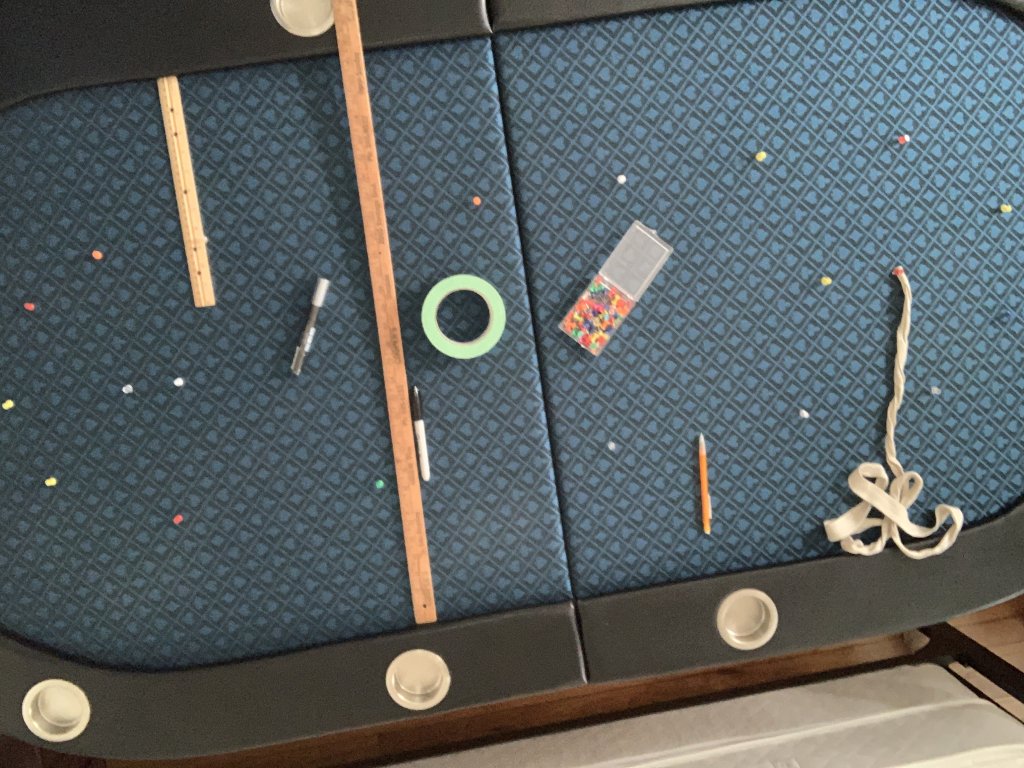
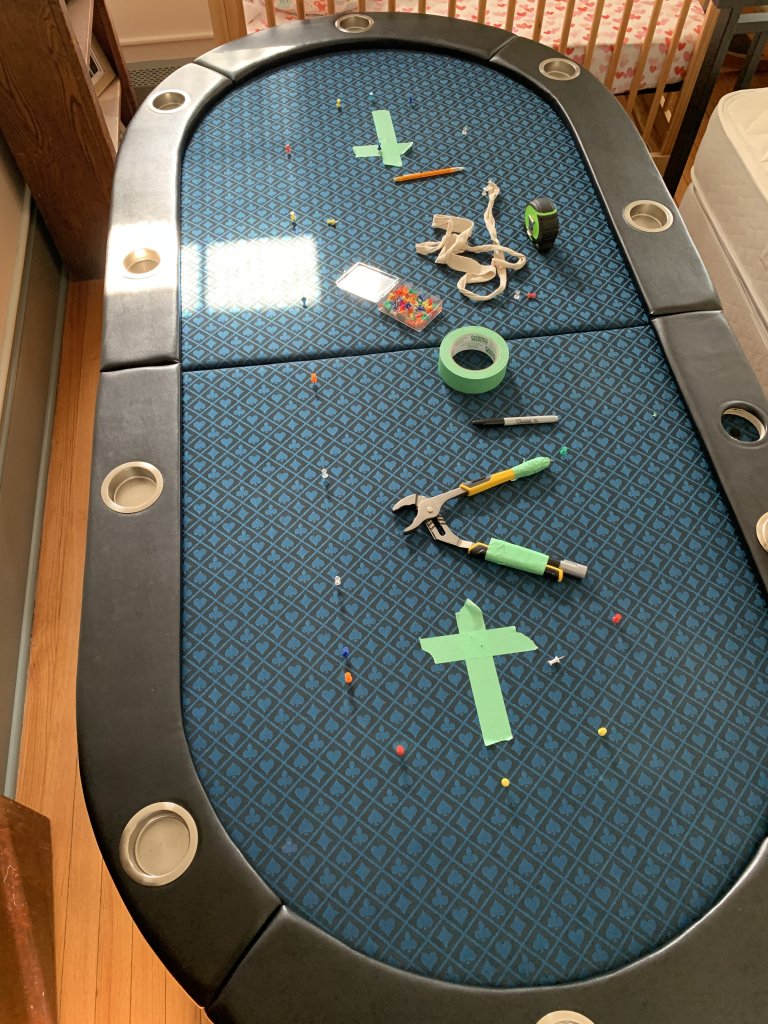
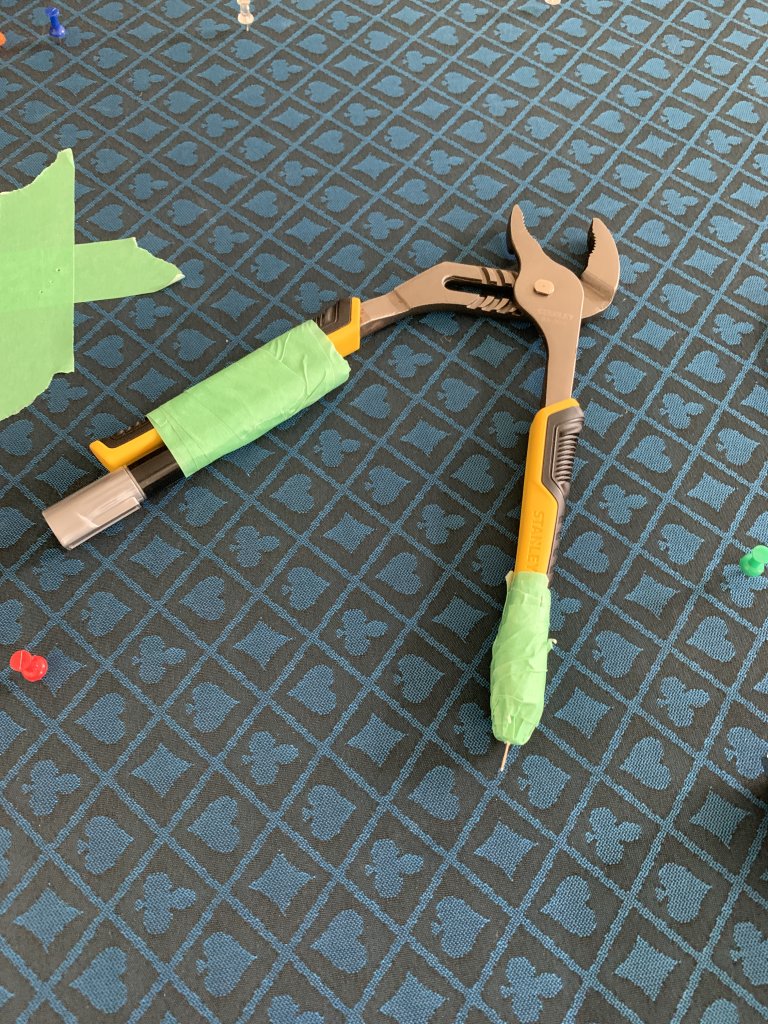
dmoneyRegular32 posts
JRald07Regular30 posts
dmoneyRegular32 posts
upNdownShark114 posts
Posted Mar 15, 2022, 1:37 AM#670
Could you have just cut a stick to 8.5 inches, put one end against the rail, put a pen on the other end, and just push the stick all the way around the table, following the rail? I guess you'd have to be careful to always keep he stick straight out at a 90 degree angle, but wouldn't that work?
dmoneyRegular32 posts
Posted Mar 15, 2022, 1:48 AM#671
Could you have just cut a stick to 8.5 inches, put one end against the rail, put a pen on the other end, and just push the stick all the way around the table, following the rail? I guess you'd have to be careful to always keep he stick straight out at a 90 degree angle, but wouldn't that work?
I measured 8.5” from the rail and put pins in the felt - I wasn’t exactly sure how the shape of the live bet area would turn out/be centered, and you really only get one chance to put the fabric paint on.
I think the arcs at the end would be the most difficult to do with your proposed stick method. Possible, I think, but I’m happy with the process I went through, deliberate/tedious as it may have been.
I had the pins, then lightly traced the line with the compass, then traced that line with the “final” fabric marker, then touched up a few spots.
WillpassNewbie4 posts
Posted Mar 15, 2022, 3:26 AM#672
Has anyone every considered the shuffle tech flush mount on a Barrington? would there be enough space with the folding legs?
tabletalker7Shark116 posts
Posted Mar 15, 2022, 4:42 AM#673
Has anyone every considered the shuffle tech flush mount on a Barrington? would there be enough space with the folding legs?
You would have to take the shuffler out to fold up the table. At that point just mount the shuffler in a side cart.
TX_Golf_N_PokerRegular48 posts
Posted Mar 15, 2022, 4:45 AM#674
Could you have just cut a stick to 8.5 inches, put one end against the rail, put a pen on the other end, and just push the stick all the way around the table, following the rail? I guess you'd have to be careful to always keep he stick straight out at a 90 degree angle, but wouldn't that work?
I think that's a disaster waiting to happen. Might work, or might end up looking like crap. Why chance it.
TonZagaRegular76 posts
Posted Mar 15, 2022, 1:26 PM#675
Has anyone every considered the shuffle tech flush mount on a Barrington? would there be enough space with the folding legs?
I've thought about it as I never fold mine up but eventually decided against an $800 shuffler in a $150 table for now.
WillpassNewbie4 posts
Posted Mar 15, 2022, 4:05 PM#676
You would have to take the shuffler out to fold up the table. At that point just mount the shuffler in a side cart.
I get that. But if it’s folded, I’m not using it so removing the shuffler would be fine. Seems very removable
WillpassNewbie4 posts
Posted Mar 15, 2022, 4:05 PM#677
I've thought about it as I never fold mine up but eventually decided against an $800 shuffler in a $150 table for now.
WillpassNewbie4 posts
Posted Mar 15, 2022, 4:06 PM#678
I’ve never not been tempted to put an expensive stereo in a beater.
tabletalker7Shark116 posts
Posted Mar 15, 2022, 4:22 PM#679
TonZagaRegular76 posts
Posted Mar 15, 2022, 4:35 PM#680
tabletalker7Shark116 posts
Posted Mar 15, 2022, 5:13 PM#681
upNdownShark114 posts
Posted Mar 15, 2022, 5:15 PM#682
rjdev7Regular40 posts
Posted Mar 15, 2022, 5:22 PM#683
tabletalker7Shark116 posts
Posted Mar 15, 2022, 5:41 PM#684
Damn it, now I need one of these.
Be warned. It only comes with one shelf. I cut a second one out of lumber I had left over from other crap I was doing at the time.
rjdev7Regular40 posts
Posted Mar 15, 2022, 6:59 PM#685
Be warned. It only comes with one shelf. I cut a second one out of lumber I had left over from other crap I was doing at the time.
I have grand visions in my head of making a much smaller version of my cabinet, with a cutout for the shuffler, so that they match.

"But honey it's not to hold more chips, it's to make it quicker to shuffle cards so I can get the players out of our apartment faster!"
dmoneyRegular32 posts
TX_Golf_N_PokerRegular48 posts
kizerman86Newbie3 posts
Posted Mar 17, 2022, 8:25 PM#688
I’m waiting for my ESPN table to be delivered, and am hoping to get some insight from someone with experience modding that version.
I have a game coming up this weekend so I don’t have time to replace the felt yet, but would love to tackle a couple easier mods ASAP before the first game.
Cupholders
I plan on using a hair dryer to remove the cupholders, then using a hole saw (without removing the rail) to cut holes for the deeper cupholders (those Da Vinci cupholders from the Amazon (https://www.amazon.com/?tag=amznpcfx-20) links in this thread, to be exact)
Is this process any different for the ESPN table, since it has the LEDs and a slightly different rail? Or can I just remove the stock cupholders, drill a deeper hole with the hole saw and drop the new cupholders in like others have discussed for the non-ESPN version?
LED Diffuser
Any ideas on a cheap and/or easy way to diffuse the lights, without much cutting/modification? I’m terribly un-handy, and am nervous about messing up the table/rail.
I saw someone mention hot glue sticks, but couldn’t find any photos of that. Any other cheap/easy diffusers that work for the ESPN table?
rjdev7Regular40 posts
Posted Mar 18, 2022, 12:08 PM#689
I’m waiting for my ESPN table to be delivered, and am hoping to get some insight from someone with experience modding that version.
I have a game coming up this weekend so I don’t have time to replace the felt yet, but would love to tackle a couple easier mods ASAP before the first game.
Cupholders
I plan on using a hair dryer to remove the cupholders, then using a hole saw (without removing the rail) to cut holes for the deeper cupholders (those Da Vinci cupholders from the Amazon links in this thread, to be exact)
Is this process any different for the ESPN table, since it has the LEDs and a slightly different rail? Or can I just remove the stock cupholders, drill a deeper hole with the hole saw and drop the new cupholders in like others have discussed for the non-ESPN version?
LED Diffuser
Any ideas on a cheap and/or easy way to diffuse the lights, without much cutting/modification? I’m terribly un-handy, and am nervous about messing up the table/rail.
I saw someone mention hot glue sticks, but couldn’t find any photos of that. Any other cheap/easy diffusers that work for the ESPN table?
Where’d you get your espn?
kizerman86Newbie3 posts
Posted Mar 18, 2022, 2:36 PM#690
Where’d you get your espn?
Amazon (https://www.amazon.com/?tag=amznpcfx-20). It dropped down to $250ish for like 5 minutes so I grabbed it, then it was immediately back up to $400.
I've been looking at craigslist, FB Marketplace, Amazon (https://www.amazon.com/?tag=amznpcfx-20), etc... for over a month and that felt like the best deal I could find knowing it could be modded pretty easily.
RowlettTexasChipGuyMicro-Stakes Grinder12 posts
Posted Mar 31, 2022, 12:48 AM#691
HELP.....
anyone that has done the modifications on one of the Barrington tables, DID YOU ADD NEW PADDING, if you did what did you use?
thanks
JRald07Regular30 posts
Posted Mar 31, 2022, 12:58 AM#692
HELP.....
anyone that has done the modifications on one of the Barrington tables, DID YOU ADD NEW PADDING, if you did what did you use?
thanks
Yes! My first time I used 1/4" ensolite from foambymail
2nd and last time I did it, I got 1/3" open cell from TPS. Highly recommend!
JRald07Regular30 posts
Posted Mar 31, 2022, 1:19 AM#693
Yes! My first time I used 1/4" ensolite from foambymail
2nd and last time I did it, I got 1/3" open cell from TPS. Highly recommend!
@RowlettTexasChipGuy (https://www.pokerchipforum.com/members/8118/) Correction: yourautotrim is where I got the 1/3" foam from
tabletalker7Shark116 posts
Posted Mar 31, 2022, 1:26 AM#694
HELP.....
anyone that has done the modifications on one of the Barrington tables, DID YOU ADD NEW PADDING, if you did what did you use?
thanks
I got 1/4" closed cell foam on Amazon (https://www.amazon.com/?tag=amznpcfx-20). Worked great. Just remember to cut the foam where the rails attach.
Forty4Regular44 posts
Posted Mar 31, 2022, 1:02 PM#695
HELP.....
anyone that has done the modifications on one of the Barrington tables, DID YOU ADD NEW PADDING, if you did what did you use?
thanks
I did the close cell foam with a thin neoprene pad over it.
dmoneyRegular32 posts
Posted Mar 31, 2022, 1:40 PM#696
HELP.....
anyone that has done the modifications on one of the Barrington tables, DID YOU ADD NEW PADDING, if you did what did you use?
thanks
I put my speedcloth directly over the old felt when I redid the table.

dkellerdMicro-Stakes Grinder8 posts
Posted Mar 31, 2022, 1:59 PM#697
HELP.....
anyone that has done the modifications on one of the Barrington tables, DID YOU ADD NEW PADDING, if you did what did you use?
thanks
I also did 1/4” gym rubber from foambymail…I wish it was a little softer…and I wish I could use slide under cup holders with it. But it was a HUGE upgrade from stock and everyone loves it.
raynmanasRegular49 posts
Posted Mar 31, 2022, 2:45 PM#698
HELP.....
anyone that has done the modifications on one of the Barrington tables, DID YOU ADD NEW PADDING, if you did what did you use?
thanks
i did not, but if i did it again i would. the stock padding is fine i guess, but could be much better.
fortysixandtwoMicro-Stakes Grinder11 posts
Posted Apr 3, 2022, 12:26 PM#699
Does anyone make a topper or mat that fits right onto the barrington table dimensions instead of changing out the cloth?
kizerman86Newbie3 posts
TheBigTaterRegular48 posts
DarthBubba615Micro-Stakes Grinder8 posts
Posted Apr 3, 2022, 5:51 PM#702
HELP.....
anyone that has done the modifications on one of the Barrington tables, DID YOU ADD NEW PADDING, if you did what did you use?
thanks
I've refitted two folding tables so far, on each I've used this to replace the existing padding, and been quite pleased with the results.
https://www.amazon.com/gp/product/B076XNL217 (https://www.amazon.com/gp/product/B076XNL217?tag=amznpcfx-20)
See my posts earlier in this thread for photos of the two I've done. Last fall I picked another one up when Wally World had a sale, and will refit it this summer.
fortysixandtwoMicro-Stakes Grinder11 posts
Posted Apr 10, 2022, 2:22 PM#703
rjdev7Regular40 posts
Posted Apr 10, 2022, 9:48 PM#704
Check it out, I built a new folding table in the same dimensions as a Barrington, but with a few improvements:
6 inch rail
Jumbo brass cup holders
Whisper vinyl
Foam playing surface
1/4” raised rail so the barrington sized table toppers I started selling fit so the edges tuck underneath the rails giving it the appearance of a fully installed felt surface


Just need to add the hinges and the legs and we’re good to go!
BottomPair7Newbie4 posts
Posted Apr 10, 2022, 10:41 PM#705
Check it out, I built a new folding table in the same dimensions as a Barrington, but with a few improvements:
6 inch rail
Jumbo brass cup holders
Whisper vinyl
Foam playing surface
1/4” raised rail so the barrington sized table toppers I started selling fit so the edges tuck underneath the rails giving it the appearance of a fully installed felt surface
View attachment 893757 (https://www.pokerchipforum.com/attachments/893757/)
View attachment 893758 (https://www.pokerchipforum.com/attachments/893758/)
Just need to add the hinges and the legs and we’re good to go!
That looks amazing!
CptainCanuckMicro-Stakes Grinder9 posts
Posted Apr 10, 2022, 10:48 PM#706
Check it out, I built a new folding table in the same dimensions as a Barrington, but with a few improvements:
6 inch rail
Jumbo brass cup holders
Whisper vinyl
Foam playing surface
1/4” raised rail so the barrington sized table toppers I started selling fit so the edges tuck underneath the rails giving it the appearance of a fully installed felt surface
View attachment 893757 (https://www.pokerchipforum.com/attachments/893757/)
View attachment 893758 (https://www.pokerchipforum.com/attachments/893758/)
Just need to add the hinges and the legs and we’re good to go!
I need the plans / progress pics of that build, looks amazing. Also how do you get your felt so flat? My Mario one still has so many wrinkles.
rjdev7Regular40 posts
Posted Apr 10, 2022, 11:26 PM#707
I need the plans / progress pics of that build, looks amazing. Also how do you get your felt so flat? My Mario one still has so many wrinkles.
Unfortunately didn’t take many progress pics this time, but I do have the plans I could share.
To flatten the table toppers I do this:
-
reverse roll the mat tightly so that the outside of the roll is the back/rubbery part of the mat. Put like 5 rubber bands around it and leave it rolled like that for a week.
-
roll out the topper and put a towel or sheet over it if there are still wrinkles and use a medium temperature iron on it with no steam.
That worked for me
CptainCanuckMicro-Stakes Grinder9 posts
Posted Apr 10, 2022, 11:28 PM#708
Unfortunately didn’t take many progress pics this time, but I do have the plans I could share.
To flatten the table toppers I do this:
-
reverse roll the mat tightly so that the outside of the roll is the back/rubbery part of the mat. Put like 5 rubber bands around it and leave it rolled like that for a week.
-
roll out the topper and put a towel or sheet over it if there are still wrinkles and use a medium temperature iron on it with no steam.
That worked for me
Would definitely take plans if you have them - and good idea on the iron, I'll give that a shot in a few weeks.
dmoneyRegular32 posts
Posted Apr 10, 2022, 11:45 PM#709
Unfortunately didn’t take many progress pics this time, but I do have the plans I could share.
To flatten the table toppers I do this:
-
reverse roll the mat tightly so that the outside of the roll is the back/rubbery part of the mat. Put like 5 rubber bands around it and leave it rolled like that for a week.
-
roll out the topper and put a towel or sheet over it if there are still wrinkles and use a medium temperature iron on it with no steam.
That worked for me
I’d be interested in the plans too. Would gorilla gaming legs work on a table that folds like this? Could you put a speedcloth base down with a seam in the middle and the topper over it? Like the topper could be the main playing surface but if you needed a second table just remove the topper for that and play on the felt beneath?
rjdev7Regular40 posts
PinkdanRegular36 posts
Posted May 26, 2022, 12:51 PM#711
TonZagaRegular76 posts
PinkdanRegular36 posts
Posted May 26, 2022, 1:24 PM#713
Shipping is more than the table :ROFL: :ROFLMAO: :ROFL: :ROFLMAO:
Didn’t see that yikes
ChrisTotNewbie1 posts
Posted May 31, 2022, 12:55 AM#714
Probably a dumb question, but has anyone tried buying cup holder inserts for the cup holders rather than the DIY replacements in this thread?
PinkdanRegular36 posts
Posted May 31, 2022, 1:03 AM#715
Probably a dumb question, but has anyone tried buying cup holder inserts for the cup holders rather than the DIY replacements in this thread?
Good idea. Just might not look as clean
CptainCanuckMicro-Stakes Grinder9 posts
Posted Jun 1, 2022, 2:32 AM#716
Unfortunately didn’t take many progress pics this time, but I do have the plans I could share.
Can you shoot the plans over?
TheMatadorNewbie4 posts
Posted Jul 5, 2022, 5:26 PM#717
The glue they use is stronger than the Hulk and will take pieces/layers of compressed wood with it. I got a tiny crack in the first rail using my hands alone, the rest of them I lined up a paint scraper between the cupholder/wood (right where the glue is), got a hammer, and literally chiseled it Through. Saved the railpieces and some of the wood for sure.
I got my SSC on Amazon (does the trick in spades) but a lot of people swear by YourAutoTrim
For the foam,see post 306 (https://www.pokerchipforum.com/threads/barrington-poker-table-thread.30910/page-11#post-1166152) I swear by neoprene and got a perfect sized piece from a great eBay vendor
Yes incredibly easy no effort required to remove the crappy Barrington foam
How did you guys go about laying your new foam to make sure it's inside the rail but there isn't a huge gap between the rail and the padded playing surface?
TheMatadorNewbie4 posts
Posted Jul 7, 2022, 1:10 PM#718
I used a pipe cutter at 4 locations to shorten it where the deeper cupholders will go. Maybe an inch on each side.
Does anyone have an exact measurement on this cut? I don't see one in the threads and am about there on my table. Would be nice to have so I can cut with the legs off the table.
If not, I'll get the measurement and post it here when I do it later this week.
TheMatadorNewbie4 posts
Posted Jul 9, 2022, 12:37 AM#719
Anyone know of a good cover to protect this while it's folded up, especially in transport?
Got one of these and it fits perfectly.
Handheld World Poker Table Bag for Folding Poker Table Storage or Carry, Poker Table Cover 600D Heavy Duty Oxford Fabric Poker Table Accessories Black https://a.co/d/4c5iZa6 (https://a.co/d/4c5iZa6?tag=amznpcfx-20)
TheMatadorNewbie4 posts
Posted Jul 13, 2022, 12:15 AM#720
Does anyone have an exact measurement on this cut? I don't see one in the threads and am about there on my table. Would be nice to have so I can cut with the legs off the table.
If not, I'll get the measurement and post it here when I do it later this week.
1 inch seems to work just fine. I took mine in to about 1 1/4.

calfdemonMicro-Stakes Grinder9 posts
Posted Jul 22, 2022, 6:07 AM#721
I just wanted to thank all the contributors to this thread. I bought the brown Barrington last year used for $100 from offer up and the felt and foam were terrible from day one and have only gotten worse. After our monthly neighborhood game last weekend, I decided I would not play another hand on that crappy loose surface. Searching for replacement techniques led me to this forum and thread which I am now registered.
I spent the day reading everything and ordering. I have midnight blue suited speed cloth and new Volara foam coming from TPS along with the deeper cupholders from Amazon (https://www.amazon.com/?tag=amznpcfx-20). I tore the table apart this evening and will get it all done once the purchases show up.
If I am able to post pictures when done, I will but just wanted to say what a great help you all have been with your guides, photos, and links in this thread!
JZPdubMicro-Stakes Grinder17 posts
Posted Jul 22, 2022, 1:27 PM#722
I just wanted to thank all the contributors to this thread. I bought the brown Barrington last year used for $100 from offer up and the felt and foam were terrible from day one and have only gotten worse. After our monthly neighborhood game last weekend, I decided I would not play another hand on that crappy loose surface. Searching for replacement techniques led me to this forum and thread which I am now registered.
I spent the day reading everything and ordering. I have midnight blue suited speed cloth and new Volara foam coming from TPS along with the deeper cupholders from Amazon. I tore the table apart this evening and will get it all done once the purchases show up.
If I am able to post pictures when done, I will but just wanted to say what a great help you all have been with your guides, photos, and links in this thread!
Welcome - this is exactly how I got started here as well. Good luck with finishing the table.
TaghkanicRegular51 posts
Posted Jul 22, 2022, 6:39 PM#723
I’ve never owned a folding table, but I have certainly played on them. The seam down the middle tilts me, and as these tables age often becomes a point where cards stick.
If I did have one, I would probably make a roll-up insert that fit snugly within the table’s interior dimensions (i.e, one piece from rail-to-rail).
Since the table is already padded, this could just be speedcloth or felt adhered to a thin piece of foam. That way you bridge the seam, without making the rail too much more shallow.
Anyone done this?
UPDATE: I see that at least one of you has done this for a non-Barrington folding table:
https://www.pokerchipforum.com/threads/barrington-poker-table-thread.30910/post-1814589
tabletalker7Shark116 posts
Posted Jul 22, 2022, 6:44 PM#724
I’ve never owned a folding table, but I have certainly played on them. The seam down the middle tilts me, and as these tables age often becomes a point where cards stick.
If I did have one, I would probably make a roll-up insert that fit snugly within the table’s interior dimensions (i.e, one piece from rail-to-rail).
Since the table is already padded, this could just be speedcloth or felt adhered to a thin piece of foam. That way you bridge the seam, without making the rail too much more shallow.
Anyone done this?
UPDATE: I see that at least one of you has done this for a non-Barrington folding table:
https://www.pokerchipforum.com/threads/barrington-poker-table-thread.30910/post-1814589
People here have done group buys for Barrington table sized mats.
https://www.pokerchipforum.com/threads/pre-order-custom-table-toppers.87826/
TX_Golf_N_PokerRegular48 posts
tabletalker7Shark116 posts
Posted Jul 22, 2022, 7:43 PM#726
This is the easy, no fuss solution. A fitted mat.
I'm surprised none of the buyers from that GB have posted pics in here yet...
Better solution. You can refelt and replace the foam by just removing the rails. One piece closed cell volara for the whole table and refelt it whole. Granted it wont fold up again but no more seam.
MandosMicro-Stakes Grinder7 posts
Posted Jul 22, 2022, 7:47 PM#727
Better solution. You can reflect and replace the foam by just removing the rails. One piece closed cell volara for the whole table and refelt it whole. Granted it wont fold up again but no more seam.
But being able to fold the table is essential if you need it to be portable. I love having the topper to get rid of the fold, and in a pinch I can use the toppers alone on another table if I don't bring the whole table.
rjbf65Micro-Stakes Grinder13 posts
Posted Jul 22, 2022, 7:50 PM#728
Better solution. You can refelt and replace the foam by just removing the rails. One piece closed cell volara for the whole table and refelt it whole. Granted it wont fold up again but no more seam.
I've played many games on a folded table. (Pit Boss brand). The fold in the middle is just a cosmetic thing really. We have never had a card get stopped from that seam. But yet, no seam > than having a seam. I personally must have my table be portable. The topper is a nice option.
raynmanasRegular49 posts
Posted Jul 22, 2022, 8:36 PM#729
Better solution. You can refelt and replace the foam by just removing the rails. One piece closed cell volara for the whole table and refelt it whole. Granted it wont fold up again but no more seam.
that largely defeats the purpose of buying a folding table. i need to be able to fit mine in a closet when not in use.
the seam is obviously not cosmetically ideal, but it has never been a problem functionally for me.
RegularjohnRegular30 posts
Posted Jul 26, 2022, 8:18 PM#730
ok, it seems my games are back... so that means i should probably make some barrington upgrades ive been putting off. i already have new felt from @T_Chan (https://www.pokerchipforum.com/members/71/) and have the rubber to replace the mat. here are my questions ive probably asked before.
replacing the rubber mat, what am i using for glue?
when i replaced the felt last time, it seemed screwing the rails back in some of the wood was holes got too big. I read that its best to use plastic wood to fix this?
any general tips installing felt from @T_Chan (https://www.pokerchipforum.com/members/71/) ?
its been some years since I did this, so not sure if people have any addition tips/tricks. especially for the new mat since I havent done that before.
thanks!
tabletalker7Shark116 posts
Posted Jul 26, 2022, 8:26 PM#731
Cut the mat to end at the start of the rail. You can't get the rails back on right if you have the mat under them
MandosMicro-Stakes Grinder7 posts
Posted Jul 26, 2022, 8:38 PM#732
calfdemonMicro-Stakes Grinder9 posts
Posted Jul 27, 2022, 5:10 AM#733
Well, most of the stuff I ordered to redo my table showed up and I got the majority of it done today when I got home from work. I did not take any before pictures. You all know what the brown Barrington table looks like.. so imagine that, but a lot worse. The foam and felt were bubbled and wrinkled up. There were cigarette burns and holes in the felt and foam (previous owner).
Here are a few after putting the new foam and speedcloth on it. My piano hinge has not showed up yet, so I was unable to completely finish, and it is sitting on a makeshift workbench right now. But Ill throw a couple up when it is completely done as well. I am VERY happy with how it turned out. I spent quite a bit of time lining up the cloth at the table fold, and got it pretty close. I did not take a picture of how it lines up as it is sitting high in the middle while on the workbench. Once I have the hinge on it and legs back on, I will show how it lines up better. For a $100 table and another $150 in parts, I am pretty happy with the outcome. Thank you again to everyone in this thread that led the way and shared their experiences.
By the way, drilling out the cup holder holes first was a great idea (forget who suggested that) as then I was able to use those with the cup holders in, to line up the lean pads for marking and cutting the foam, and getting everything lined up easily for screwing it all back down.
calfdemonMicro-Stakes Grinder9 posts
RjchangoNewbie4 posts
Posted Jul 27, 2022, 10:48 PM#735
Ok everyone, I finally got my table finished. The ESPN version. Added blue speed cloth, replaced the LED’s, deep cup holders. On the ESPN version you don’t need to cut the legs due to the added depth from the lights. I don’t think it came out perfect, but I did it alone and in between a lot of work and travel. Having the right tools and space helps, I did it in an extra living room basically which doubles as my home office and catbox area lol. But all in all I’m super happy with the look. I just order a battery to connect the led’s so I don’t have to plug them in. And my wife or maid (one of them but no one is owning up) accidentally threw out the piano hinge so I have to re order it. Thanks to everyone for all the help in this thread!!!

upNdownShark114 posts
DarthBubba615Micro-Stakes Grinder8 posts
ectocoolerMicro-Stakes Grinder6 posts
Posted Sep 1, 2022, 12:13 PM#738
Last October I was looking for a table. Found a barrington that has minor damage for $180 shipped. Slight tear in the vinyl. Was happy with the table, so were the fishes. We were playing cash, but some of us wanted to started playing tourneys once or twice a month. I came HERE to find a tourney set but while looking , I noticed what people were doing to the very table I had.
I decided on a complete overhaul. I had a 3/4” sheet of ply already, wife works in a foam factory so she had access to ANY type of foam imaginable, they scrap 200 tables worth of foam a night, so I got it free. All I had to do was buy the vinyl, the cup holders, the LEDs and the diffusers. I found the diffusers cheap from a place called TAP plastics. I wanted a cool table, I didn’t need it to fold in the first place, so we’re doing away with that. I set out to make it as sick as possible for as cheap as possible. All I did here was raise the original armrest by 3/4” with a 1 riser. I nailed and glued each individual arm rest section to my riser and wrapped it in black whisper. Stuck my leds to the edge of the riser. Routed a grove in the table with router, stuck the diffusers in there and put it together. Tony Chan sent me this sick ass felt, Thankyou brother! This is my very first table ever, I don’t have wood working skills and don’t have a lot of money but if you’re willing to put in the time and labor you can make a really bad ass table for reasonably cheap.
Also huge shoutout to Bill from pplpokertables, this man let me pick his brain along the way and I appreciate it very much, very nice guy. Btw, again, this was my first table, it’s full of flaws I forgot about the measure twice cut once rule. Also I had issues that I didn’t see coming with the table not being perfectly level on both sides due to it being a folder up. So it’s far from perfect but it Still came out sick and my fish are going to looooooove getting fried on this bad boy. The next once WILL be perfect and also 96”, can’t wait, this was fun!
TonZagaRegular76 posts
Posted Sep 1, 2022, 1:22 PM#739
Last October I was looking for a table. Found a barrington that has minor damage for $180 shipped. Slight tear in the vinyl. Was happy with the table, so were the fishes. We were playing cash, but some of us wanted to started playing tourneys once or twice a month. I came HERE to find a tourney set but while looking , I noticed what people were doing to the very table I had.
I decided on a complete overhaul. I had a 3/4” sheet of ply already, wife works in a foam factory so she had access to ANY type of foam imaginable, they scrap 200 tables worth of foam a night, so I got it free. All I had to do was buy the vinyl, the cup holders, the LEDs and the diffusers. I found the diffusers cheap from a place called TAP plastics. I wanted a cool table, I didn’t need it to fold in the first place, so we’re doing away with that. I set out to make it as sick as possible for as cheap as possible. All I did here was raise the original armrest by 3/4” with a 1 riser. I nailed and glued each individual arm rest section to my riser and wrapped it in black whisper. Stuck my leds to the edge of the riser. Routed a grove in the table with router, stuck the diffusers in there and put it together. Tony Chan sent me this sick ass felt, Thankyou brother! This is my very first table ever, I don’t have wood working skills and don’t have a lot of money but if you’re willing to put in the time and labor you can make a really bad ass table for reasonably cheap.
Also huge shoutout to Bill from pplpokertables, this man let me pick his brain along the way and I appreciate it very much, very nice guy. Btw, again, this was my first table, it’s full of flaws I forgot about the measure twice cut once rule. Also I had issues that I didn’t see coming with the table not being perfectly level on both sides due to it being a folder up. So it’s far from perfect but it Still came out sick and my fish are going to looooooove getting fried on this bad boy. The next once WILL be perfect and also 96”, can’t wait, this was fun!
Well, found my next upgrade.....
Rooster410Micro-Stakes Grinder12 posts
Posted Sep 12, 2022, 3:16 PM#740
The price for these tables now....WOW..crazy
rjbf65Micro-Stakes Grinder13 posts
Posted Sep 12, 2022, 3:20 PM#741
The price for these tables now....WOW..crazy
Yikes. Glad I bought mine when I did.
ekricketRegular68 posts
ATLarchipMicro-Stakes Grinder15 posts
Posted Oct 10, 2022, 3:03 AM#743
The brown and ESPN tables have been listed as $299 and out of stock for a while now on Walmarts website. Any thoughts on when/if it’ll be back in stock? And any thought in if we’ll ever see under $150 on these tables?
dmoneyRegular32 posts
Posted Oct 10, 2022, 3:05 AM#744
The brown and ESPN tables have been listed as $299 and out of stock for a while now on Walmarts website. Any thoughts on when/if it’ll be back in stock? And any thought in if we’ll ever see under $150 on these tables?
Found a brand new one on FB for $95 that I picked up for @SJFCPK18 (https://www.pokerchipforum.com/members/8241/) last week :cool
liftapintMicro-Stakes Grinder15 posts
Posted Oct 10, 2022, 3:06 AM#745
I need to find one of these too, for that sweet craps topper that is en route :)
MandosMicro-Stakes Grinder7 posts
Posted Oct 10, 2022, 1:25 PM#746
The brown and ESPN tables have been listed as $299 and out of stock for a while now on Walmarts website. Any thoughts on when/if it’ll be back in stock? And any thought in if we’ll ever see under $150 on these tables?
I highly doubt it, at least not anytime soon. I'd say anything under $275 is a pretty good deal on these right now.
umbkcshahNewbie2 posts
dmoneyRegular32 posts
Posted Oct 12, 2022, 1:25 PM#748
Nice. I saw that one and thought about messaging you.
Much appreciated! Guy lives like 5 blocks away and used to play poker every Friday night with some friends, some of whom have died or moved away. He’s now on my invite list next time I host!
RowlettTexasChipGuyMicro-Stakes Grinder12 posts
Posted Oct 12, 2022, 1:38 PM#749
If you can wait, every year they price goes down around Christmas, can't say how low it will go but it will go on sale
ATLarchipMicro-Stakes Grinder15 posts
Posted Oct 13, 2022, 6:43 PM#750
Just picked this up on Facebook marketplace for $200, brand new in the box. Kicking myself for not pulling the trigger last Christmas on the brown version for $140. But oh well. Cup holders are the next upgrade.


umbkcshahNewbie2 posts
Posted Oct 30, 2022, 12:51 AM#751
MandosMicro-Stakes Grinder7 posts
Posted Nov 9, 2022, 4:09 PM#752
TonZagaRegular76 posts
Posted Nov 14, 2022, 2:20 AM#753
Thinking about remaking armrests with no cup holders and better foam. Should I make it in two halves or rewrap the sections individually?
BTGNewbie3 posts
TX_Golf_N_PokerRegular48 posts
ATLarchipMicro-Stakes Grinder15 posts
Posted Dec 22, 2022, 6:13 PM#756
Has anybody installed jumbo cup holders, and have pictures of finished product? Are they too deep to allow table to be folded back up?
TonZagaRegular76 posts
Posted Feb 2, 2023, 3:25 AM#757
I did:
-
to edge of the rail and not under it. The foam armrests will not sit correctly with larger foam
-
just to the edge of the table, not into the crease
Photo below...I was sloppy with tucking the vinyl on that rail piece but the foam under the playing surface came out really well
View attachment 499146 (https://www.pokerchipforum.com/attachments/499146/)
Did you rewrap two halves of railing? Any more pictures/tips as I want to add padding but remove that cup holders
FrogzillaRegular30 posts
Posted Feb 2, 2023, 2:38 PM#758
Did you rewrap two halves of railing? Any more pictures/tips as I want to add padding but remove that cup holders
I rewrapped annd refoamed all 6 railing pieces individually. I didn’t bother to fill in cup holders….just foamed over them as if they weren’t there, it turned out fine.
Last tip is to get one of those neoprene toppers, (it’s on my list to acquire before DiD) and it takes the table from good to excellent

Riddler409Micro-Stakes Grinder17 posts
TommyRegular51 posts
Posted Feb 22, 2023, 4:01 PM#760
Chile85Newbie4 posts
Posted Feb 22, 2023, 4:02 PM#761
Hey ya'll...im looking at buying my first table and I found what looks like a couple year old barrington on the local marketplace for $100... it looks like this type (see link) ...is it worth it for temporary use then to upgrade?
https://www.truegether.com/listing.html?id=USER.1c1cbc51-e7f8-4b1d-ac25-0a03b3b8c6d5
It depends on how quickly you want to get it. I believe I paid $150 for my table when it went on sale. That's a brand new one. Prices on them are closer to $350 right now, so $100 doesn't seem horrible if it's in good shape and you need it now.
Riddler409Micro-Stakes Grinder17 posts
Posted Feb 22, 2023, 4:09 PM#762
It depends on how quickly you want to get it. I believe I paid $150 for my table when it went on sale. That's a brand new one. Prices on them are closer to $350 right now, so $100 doesn't seem horrible if it's in good shape and you need it now.
I dont need it. Its convenient and comes with a cheap 500 piece chip set...from the pictures its in great shape. Ill probably ask if he could go down to 75.
I will replace the chip set with something from discount poker store in the near future. I'm new so just getting my baby steps going.
shleepytimeNewbie3 posts
TonZagaRegular76 posts
Posted Feb 22, 2023, 4:41 PM#764
I dont need it. Its convenient and comes with a cheap 500 piece chip set...from the pictures its in great shape. Ill probably ask if he could go down to 75.
I will replace the chip set with something from discount poker store in the near future. I'm new so just getting my baby steps going.
If you don't, I might LOL. Modded mine into a pretty good looking budget table
upNdownShark114 posts
Posted Feb 22, 2023, 4:44 PM#765
Hey ya'll...im looking at buying my first table and I found what looks like a couple year old barrington on the local marketplace for $100... it looks like this type (see link) ...is it worth it for temporary use then to upgrade?
https://www.truegether.com/listing.html?id=USER.1c1cbc51-e7f8-4b1d-ac25-0a03b3b8c6d5
I’ve played on a barrington and they're fine. Stable enough, and honestly the stock felt and padding are fine. Adequate at least. The only real problem with them in my eyes is the stock cupholders. They’re so shallow, they’ll never prevent a spill - if you hit your drink, it’s going over. But spilling a drink on a hundred dollar table probably isn’t the end of the world. So for a hundred bucks, yeah grab it.
Riddler409Micro-Stakes Grinder17 posts
Posted Feb 22, 2023, 4:58 PM#766
If you don't, I might LOL. Modded mine into a pretty good looking budget table
I’m messaging the guy now. If my wife smacks me down I’ll pick it up for ya and we can just grab a beer sometime and get you another table ;)
Riddler409Micro-Stakes Grinder17 posts
djfayzeMicro-Stakes Grinder23 posts
Posted Feb 22, 2023, 7:33 PM#768
TX_Golf_N_PokerRegular48 posts
Posted Feb 22, 2023, 7:39 PM#769
TonZagaRegular76 posts
Posted Feb 22, 2023, 7:40 PM#770
10 man Barrington unfolded dimensions: 84"L x 42"W x 30"H.
upNdownShark114 posts
Posted Feb 22, 2023, 7:53 PM#771
Is 71" standard length for a Barrington? I was thinking they were bigger than that.
Good to know it’s an option though - good for smaller rooms. Though 35.5 seems narrow.
DodgerRegular46 posts
Riddler409Micro-Stakes Grinder17 posts
Posted Feb 23, 2023, 1:08 AM#773
It happened… $100 on FB marketplace

djfayzeMicro-Stakes Grinder23 posts
Posted Feb 23, 2023, 1:34 AM#774
Different table. "Traditional" Barrington tables usually discussed here are the 10-person, 84" version.
This table is great, but is an 8-person at 71". Just a heads up for anyone comparing the two.
Appreciate the clarification - I saw the look of it and figured it was the same but I should have checked the measurements. I kinda want a smaller one now…
Riddler409Micro-Stakes Grinder17 posts
Posted Feb 24, 2023, 11:53 PM#775
Riddler409Micro-Stakes Grinder17 posts
ATLarchipMicro-Stakes Grinder15 posts
Posted Mar 12, 2023, 2:46 PM#777
How many yards of SSC from YAT is needed to refelt the Barringron table?
TonZagaRegular76 posts
Posted Mar 12, 2023, 3:31 PM#778
How many yards of SSC from YAT is needed to refelt the Barringron table?
3 yd or 9 ft should suffice
jcooper911Micro-Stakes Grinder15 posts
Posted Mar 12, 2023, 3:32 PM#779
How many yards of SSC from YAT is needed to refelt the Barringron table?
3, 4 if you arent as good at cutting .
RomeMicro-Stakes Grinder6 posts
dmoneyRegular32 posts
TonZagaRegular76 posts
Posted Mar 17, 2023, 7:00 PM#782
Just arrived: a Barrington table carry bag found by @MrBoosh (https://www.pokerchipforum.com/members/13672/)! Tracking down a bag that makes a Barrington easier to move around has been on my radar for a while. With this bag, it was pretty easy to slip my arm through the handles and carry the table on my hip - much better than even the handles I installed on the end of the table.
tl;dr if you have a Barrington that you move around when not in play, this could be a GREAT option!

Need the link!
dmoneyRegular32 posts
Posted Mar 17, 2023, 7:01 PM#783
MrBooshRegular32 posts
Posted Mar 17, 2023, 7:12 PM#784
Just arrived: a Barrington table carry bag (https://www.amazon.com/dp/B09W8R8N8Z?psc=1&ref=ppx_yo2ov_dt_b_product_details&tag=amznpcfx-20) found by @MrBoosh (https://www.pokerchipforum.com/members/13672/)! Tracking down a bag that makes a Barrington easier to move around has been on my radar for a while. With this bag, it was pretty easy to slip my arm through the handles and carry the table on my hip - much better than even the handles I installed on the end of the table.
tl;dr if you have a Barrington that you move around when not in play, this could be a GREAT option!
This bag works great for regular sized Barrington tables but the ESPN tables are a little thicker when closed due to the LED lights and they will not fit in this bag unfortunately.
Hot NutsShark105 posts
Posted Mar 17, 2023, 7:21 PM#785
Good to know it’s an option though - good for smaller rooms. Though 35.5 seems narrow.
This is the 84" version
https://www.wayfair.com/furniture/pdp/kulamoon-84-10-player-poker-table-tser1150.html
There are some other versions, that like a little different than Barrington and upon further inspection they are junk. Be careful.
If I had to buy another one, I'd go with the ESPN version at Walmart online for $299.
Riddler409Micro-Stakes Grinder17 posts
Posted Mar 17, 2023, 7:56 PM#786
Have y’all trie carrying them with furniture straps? Much easier
TonZagaRegular76 posts
Posted Mar 17, 2023, 8:00 PM#787
Have y’all trie carrying them with furniture straps? Much easier
I like that it's a storage bag because currently, we're in my dirty garage and want to keep the table as clean as possible
Riddler409Micro-Stakes Grinder17 posts
Posted Mar 17, 2023, 8:23 PM#788
I like that it's a storage bag because currently, we're in my dirty garage and want to keep the table as clean as possible
Makes sense if that’s where it’s being stored. It would be nice to keep dust/dirt off for sure
travisy915Newbie3 posts
Posted Mar 18, 2023, 2:20 PM#789
This bag works great for regular sized Barrington tables but the ESPN tables are a little thicker when closed due to the LED lights and they will not fit in this bag unfortunately.
This bag works great for regular sized Barrington tables but the ESPN tables are a little thicker when closed due to the LED lights and they will not fit in this bag unfortunately.
Will it fit in the bag button really tightly or will it not even go in the bag? The ESPN table
Thanks
MrBooshRegular32 posts
Posted Mar 18, 2023, 3:03 PM#790
Will it fit in the bag button really tightly or will it not even go in the bag? The ESPN table
Thanks
@Rome (https://www.pokerchipforum.com/members/781/) had purchased one of the bags for his ESPN table and was unable to get it into the bag. The measurements on a standard Barrington when closed is about 5.5 inches.

An ESPN table is just a little wider probably due to the LED lights added to the design of the table. So it will not fit in the bag. The ESPN table graphics on their ads show it is 5 inches when closed but this is not true.

travisy915Newbie3 posts
Posted Mar 18, 2023, 3:17 PM#791
@Rome (https://www.pokerchipforum.com/members/781/) had purchased one of the bags for his ESPN table and was unable to get it into the bag. The measurements on a standard Barrington when closed is about 5.5 inches.
View attachment 1101806 (https://www.pokerchipforum.com/attachments/1101806/)
An ESPN table is just a little wider probably due to the LED lights added to the design of the table. So it will not fit in the bag. The ESPN table graphics on their ads show it is 5 inches when closed but this is not true.
View attachment 1101807 (https://www.pokerchipforum.com/attachments/1101807/)
Thanks for the reply I bought one of those bags but the espn table is at someone else’s house so I was just going to return it
travisy915Newbie3 posts
Posted Mar 18, 2023, 3:24 PM#792
Have y’all trie carrying them with furniture straps? Much easier
Which ones do you use?
RomeMicro-Stakes Grinder6 posts
Posted Mar 18, 2023, 5:56 PM#793
@Rome (https://www.pokerchipforum.com/members/781/) had purchased one of the bags for his ESPN table and was unable to get it into the bag. The measurements on a standard Barrington when closed is about 5.5 inches.
An ESPN table is just a little wider probably due to the LED lights added to the design of the table. So it will not fit in the bag. The ESPN table graphics on their ads show it is 5 inches when closed but this is not true.
View attachment 1101807 (https://www.pokerchipforum.com/attachments/1101807/)
It is weird that it has incorrect dimensions listed. I measured again and without compressing the rails its 6.5" thick. The bag idea is perfect because yes it helps carrying but also adds storage protection. I have searched for a couple hours to find another option and none seem to exist for folding poker tables but this one bag unfortunately.
PokerDogDocRegular37 posts
Hot NutsShark105 posts
Riddler409Micro-Stakes Grinder17 posts
Posted Apr 1, 2023, 6:48 PM#796
If you haven’t used a heat gun for the cup holder removal…give it a shot…the cups came out in less than 30 seconds with minimal effort.
Bill_Man618Micro-Stakes Grinder15 posts
Posted Apr 2, 2023, 5:36 PM#797
Does anyone have links for how to upgrade the padding and the felt?
dpeks13Micro-Stakes Grinder13 posts
Posted Apr 2, 2023, 9:19 PM#798
I have a feeling this thread is going to be a lot busier in the next few weeks
dpeks13Micro-Stakes Grinder13 posts
Posted Apr 2, 2023, 9:23 PM#799
I guess I should start reading the 27 pages now lol
Rooster410Micro-Stakes Grinder12 posts
Posted Apr 2, 2023, 10:21 PM#800
Littleluck55Regular25 posts
shleepytimeNewbie3 posts
Posted Apr 14, 2023, 1:23 AM#802
I just switched out the default cupholders with deeper cupholders. (Dang, those old ones are sharp!) Has anyone found a use for the shallow ones?
DodgerRegular46 posts
Posted Apr 14, 2023, 1:35 AM#803
I just switched out the default cupholders with deeper cupholders. (Dang, those old ones are sharp!) Has anyone found a use for the shallow ones?
Skeet shooting.
Kyuss421Newbie1 posts
Posted Apr 22, 2023, 4:29 AM#804
Just saw the deal and got the table and I’m super excited!
gravyNewbie1 posts
Posted Apr 26, 2023, 8:31 AM#805
I've redone a couple of those table types for friends, and it's a real PITA. Easiest way to get a new playing surface is to make a fitted insert (1/4" MDF) with padding/felt and just set it in place on top of the existing table (inside the rail circumference). You lose rail depth, but trying to do anything else is usually much more than you bargained for.
The construction techniques used on those tables are typically designed to be quick and very inexpensive (aka often shoddy), making disassembly extremely difficult and almost impossible to do without destroying something. Often the outer edge of the rail covering is stapled/glued to the underside of the table, and then wrapped up, over, and back under the rail top and is also stapled/glued to the table top under the rail, if that makes sense (and actually constructed in reverse order). Some rails aren't even really fully wrapped at all, but just have vinyl on two sides with the playing surface glued on top of the vinyl (which is glued/stapled to the table). Difficult to describe without corresponding pics, but once you discover how they're done during disassembly, it's a combination of OMG and WTF. Bottom line: the rail generally doesn't come off of the table unless you destroy it, so easily getting down to just the playing surface felt isn't feasible.
After repairing the second one, I decided it's not worth the effort/cost. I just consider them disposable tables -- cheap, functional for awhile, and when they break or need repair, just throw 'em away. Similar to War Games, the only winning move is not to play buy.
glad i came across this post
dpeks13Micro-Stakes Grinder13 posts
Posted Apr 26, 2023, 11:53 AM#806
Mine still has yet to be broken in. Need to fix that
BeakertwangRegular79 posts
Posted Apr 26, 2023, 11:55 AM#807
G.G.SpoonsNewbie3 posts
Posted Apr 28, 2023, 2:29 AM#808
Got my Barrington yesterday (full price from Amazon (https://www.amazon.com/?tag=amznpcfx-20), not Wayfair☹️). I've searched through dozens of pages of Barrington and topper threads, but wanted answers to 2 specific questions.
I laid my @rjdev7 (https://www.pokerchipforum.com/members/1014/) topper (thicker one from last fall group buy) directly on the stock felt and noticed there's lots of give underneath. To the point the topper bunches up if you press and drag too hard. I would imagine it's even worse with a thinner topper. Has anyone removed the felt and padding and placed the topper directly on the table surface? How about removal and replacement with some other padding? Thoughts on this?
My other question is about the cup holders. Does anyone have a link or a site you purchased from. I want to keep the same diameter but go deeper. It sounds like there are some that are basically flush with the underside of the table after using a hole saw to cut through. That's what I'm looking for.
Thanks for any feedback.
Riddler409Micro-Stakes Grinder17 posts
Posted Apr 28, 2023, 12:18 PM#809
Got my Barrington yesterday (full price from Amazon, not Wayfair☹️). I've searched through dozens of pages of Barrington and topper threads, but wanted answers to 2 specific questions.
I laid my @rjdev7 (https://www.pokerchipforum.com/members/1014/) topper (thicker one from last fall group buy) directly on the stock felt and noticed there's lots of give underneath. To the point the topper bunches up if you press and drag too hard. I would imagine it's even worse with a thinner topper. Has anyone removed the felt and padding and placed the topper directly on the table surface? How about removal and replacement with some other padding? Thoughts on this?
My other question is about the cup holders. Does anyone have a link or a site you purchased from. I want to keep the same diameter but go deeper. It sounds like there are some that are basically flush with the underside of the table after using a hole saw to cut through. That's what I'm looking for.
Thanks for any feedback.
I bought these cups and they were a yuuuuge improvement. Fits tumblers, most rocks glasses and others. These are a wider diameter. I used the hole saw then used a rubber mallet and wood block to seat them since the hole was an exact fit.
Yuanhe 10 Jumbo Stainless Steel... https://www.amazon.com/dp/B0789HG6NW?ref=ppx_pop_mob_ap_share (https://www.amazon.com/dp/B0789HG6NW?ref=ppx_pop_mob_ap_share&tag=amznpcfx-20)
G.G.SpoonsNewbie3 posts
shleepytimeNewbie3 posts
Riddler409Micro-Stakes Grinder17 posts
Posted Apr 28, 2023, 3:41 PM#812
It sounds like the tight fit keeps them in place? No need to glue in?
None at all. I cut holes with a hole saw kit I got from Amazon (https://www.amazon.com/?tag=amznpcfx-20)…real crappy one that takes forever…but it worked
rjbf65Micro-Stakes Grinder13 posts
Posted Apr 28, 2023, 4:15 PM#813
I put the deeper cup holders in mine and I do have a few that fall out when transporting the table. I plan to use some glue.
YMMV
ATLarchipMicro-Stakes Grinder15 posts
Posted Apr 28, 2023, 6:44 PM#814
I installed the larger cup holders. They weren’t snug, so I wrapped the cup holders with some painters tape to give it extra thickness. Holds snug now and looks great.
rjbf65Micro-Stakes Grinder13 posts
Posted Apr 28, 2023, 7:02 PM#815
I installed the larger cup holders. They weren’t snug, so I wrapped the cup holders with some painters tape to give it extra thickness. Holds snug now and looks great.
I'll give that a try. Good idea.
TonZagaRegular76 posts
Posted May 11, 2023, 5:42 PM#816
Does anyone think I could get away with using a 9” wide roll of foam vs. an entire sheet to replace rail padding on the 6 individual sections?
tabletalker7Shark116 posts
Posted May 11, 2023, 9:42 PM#817
Does anyone think I could get away with using a 9” wide roll of foam vs. an entire sheet to replace rail padding on the 6 individual sections?
I don't know if 9 inches is wide enough for the 2 rounded end pieces. It should work fine for the other four.
dmoneyRegular32 posts
Riddler409Micro-Stakes Grinder17 posts
Posted May 22, 2023, 3:19 PM#819
Could someone link me to the best tutorial/how to for upgrading to the jumbo cup holders? I’m considering a Memorial Day weekend project.
I think these are the correct cup holders (https://www.amazon.com/dp/B0789HG6NW?ref_=cm_sw_r_apin_dp_17K1WRCSBRQ81W0EWC1E_1 (https://www.amazon.com/dp/B0789HG6NW?ref_=cm_sw_r_apin_dp_17K1WRCSBRQ81W0EWC1E_1&tag=amznpcfx-20)), but recommendations for the drill bit, saw (if needed for trimming the leg brace underneath?), and best method for the replacement would be great!
I used these (I think it is the same link...but just in case) https://www.amazon.com/dp/B0789HG6NW?ref=ppx_pop_mob_ap_share&tag=pokchifor0d-20 (https://www.amazon.com/dp/B0789HG6NW?ref=ppx_pop_mob_ap_share&tag=amznpcfx-20)
previous page, you will see I used a heat gun to soften the glue. constant movement so you dont burn any of the fake leather touching it. they came out in about 30 seconds to a min of heating.
I used a cheap hole saw set I got on amazon (https://www.amazon.com/?tag=amznpcfx-20). I wont even link it because it sucked so bad. I drained three dewalt batteries cutting the holes, so if you have a corded drill...then buy a cheap hole saw set I guess
I used a 3.5 hole saw for it. very tight fit. I had to use scarp 2x4 and a rubber mallet to set them in place.
to start, I took the legs off and did some measurements to trim the leg supports down. I think i trimmed off about 1-1.5" off each end and it worked perfect.
Once the cup was out, I took the saw bit and pressed it onto the faux leather to give me an approx location on what extra material/foam to cut out....then I trimmed back the excess. I also took my shop knife and trimmed back any table cloth that was intruding into where the hole would be.
Now, I cut holes.
Once the holes were cut, thats when I started gently pounding the new cups holders into place.
reassemble legs, vacuum your mess and done.
dmoneyRegular32 posts
Posted May 22, 2023, 4:00 PM#820
I used these (I think it is the same link...but just in case) https://www.amazon.com/dp/B0789HG6NW?ref=ppx_pop_mob_ap_share&tag=pokchifor0d-20 (https://www.amazon.com/dp/B0789HG6NW?ref=ppx_pop_mob_ap_share&tag=amznpcfx-20)
previous page, you will see I used a heat gun to soften the glue. constant movement so you dont burn any of the fake leather touching it. they came out in about 30 seconds to a min of heating.
I used a cheap hole saw set I got on amazon. I wont even link it because it sucked so bad. I drained three dewalt batteries cutting the holes, so if you have a corded drill...then buy a cheap hole saw set I guess
I used a 3.5 hole saw for it. very tight fit. I had to use scarp 2x4 and a rubber mallet to set them in place.
to start, I took the legs off and did some measurements to trim the leg supports down. I think i trimmed off about 1-1.5" off each end and it worked perfect.
Once the cup was out, I took the saw bit and pressed it onto the faux leather to give me an approx location on what extra material/foam to cut out....then I trimmed back the excess. I also took my shop knife and trimmed back any table cloth that was intruding into where the hole would be.
Now, I cut holes.
Once the holes were cut, thats when I started gently pounding the new cups holders into place.
reassemble legs, vacuum your mess and done.
Thanks for this! About how long did it take you?
I used a heat gun to soften the glue
I already have mine out - I used a small patch of Velcro on the cup and speed cloth to keep them together.
so if you have a corded drill...then buy a cheap hole saw set I guess
I used a 3.5 hole saw for it. very tight fit. I had to use scarp 2x4 and a rubber mallet to set them in place.
this 3 5/8 (92mm) hole saw seems like it would work? https://www.amazon.com/dp/B08YJFNQR7?ref_=cm_sw_r_apin_dp_6WN1XW2VEWS5EK9M6N6J (https://www.amazon.com/dp/B08YJFNQR7?ref_=cm_sw_r_apin_dp_6WN1XW2VEWS5EK9M6N6J&tag=amznpcfx-20)
ATLarchipMicro-Stakes Grinder15 posts
Posted May 22, 2023, 5:36 PM#821
Could someone link me to the best tutorial/how to for upgrading to the jumbo cup holders? I’m considering a Memorial Day weekend project.
I think these are the correct cup holders (https://www.amazon.com/dp/B0789HG6NW?ref_=cm_sw_r_apin_dp_17K1WRCSBRQ81W0EWC1E_1 (https://www.amazon.com/dp/B0789HG6NW?ref_=cm_sw_r_apin_dp_17K1WRCSBRQ81W0EWC1E_1&tag=amznpcfx-20)), but recommendations for the drill bit, saw (if needed for trimming the leg brace underneath?), and best method for the replacement would be great!
I used this thread for cup holders and instructions. But I just cut 4 slits at the pleather in order to get the drill saw into the hole with the pleather around the saw bit, then drilled down through the padding then wood. I didn’t replace the felt.
https://www.pokerchipforum.com/threads/barringtonc-poker-table-upgrade.95367/
Drill bits used below. Make sure to lengthen the pilot bit so that it bites into the wood before the saw bit. The 5/8 would probably be fine, the 3/4 left the hole a little bigger than the cup holder, but I just taped painters tape around the cup holder to give it extra thickness. Now it’s snug.
https://www.homedepot.com/p/Milwaukee-2-3-4-in-Hole-Dozer-Hole-Saw-49-56-9635/202327755
https://www.homedepot.com/p/Milwauk...-Arbor-W-Pilot-Drill-Bit-49-56-7250/202256264 (https://www.homedepot.com/p/Milwaukee-3-8-in-Quick-Change-Large-Hole-Saw-Arbor-W-Pilot-Drill-Bit-49-56-7250/202256264)
Took the legs off and cut about 1” off the ends with the pipe cutter. About 4-5 spins and it comes right off pretty clean. When putting legs back on, I moved the support brackets inward to get fresh wood for the screw to bite on
https://www.homedepot.com/p/RIDGID-...-Cutter-Multi-Use-Tubing-Tool-40617/100075014 (https://www.homedepot.com/p/RIDGID-1-4-in-to-1-1-8-in-101-Close-Quarters-Copper-Aluminum-Brass-and-Plastic-Tubing-Cutter-Multi-Use-Tubing-Tool-40617/100075014)
Took about 2-3 hours. If I can do it, anyone can do it. Good luck!
Riddler409Micro-Stakes Grinder17 posts
Teach42Regular39 posts
Riddler409Micro-Stakes Grinder17 posts
Teach42Regular39 posts
Posted May 22, 2023, 8:03 PM#825
these are not jumbo size correct? so they really only fit bottles and cans?
Correct. They won't fit anything like a Yeti water bottle and such. But bottles and cans, pint glasses, Soda fast food cups and such all fit great.
Riddler409Micro-Stakes Grinder17 posts
Posted May 22, 2023, 8:04 PM#826
Correct. They won't fit anything like a Yeti water bottle and such. But bottles and cans, pint glasses, Soda fast food cups and such all fit great.
gotcha, I went the jumbo route because we have a lot of bourbon drinkers so most of our slots are filled with tumblers or rocks glasses.
dmoneyRegular32 posts
Posted May 23, 2023, 7:31 PM#827
Incoming!

upNdownShark114 posts
Posted May 23, 2023, 7:35 PM#828
I used a 3.5 hole saw for it. very tight fit. I had to use scarp 2x4 and a rubber mallet to set them in place.
I wonder if you stuck the cupholders in the freezer for a bit, if that would shrink them enough to make the job easier?
dmoneyRegular32 posts
Posted May 23, 2023, 7:38 PM#829
I used a 3.5 hole saw for it. very tight fit. I had to use scarp 2x4 and a rubber mallet to set them in place.
I wonder if you stuck the cupholders in the freezer for a bit
I ordered a 3 5/8” hole saw, I’m hopeful that’s perfect.
dmoneyRegular32 posts
Posted May 24, 2023, 6:54 PM#830
Update!

and picked up one of these today to trim the leg braces.

If all goes well, I hope to start and finish tomorrow (Thursday) afternoon!
dmoneyRegular32 posts
Posted May 25, 2023, 8:31 PM#831
Got started. Holders away from the table supports are pretty easy, but I ripped the rail on both…might do some pre cutting on the next 8.


New cups are much better.

dinosaurNewbie1 posts
dmoneyRegular32 posts
dmoneyRegular32 posts
Posted May 26, 2023, 1:26 AM#834
The pleather on the rail keeps tearing…I’m going to try to cover with some painters tape for the next one. 3 cups done.
TonZagaRegular76 posts
Posted May 26, 2023, 2:23 AM#835
The pleather on the rail keeps tearing…I’m going to try to cover with some painters tape for the next one. 3 cups done.
Don’t start the drill full speed until you’re inside the cut out in the pleather. I only made that mistake once
ATLarchipMicro-Stakes Grinder15 posts
Posted May 26, 2023, 3:01 AM#836
The pleather on the rail keeps tearing…I’m going to try to cover with some painters tape for the next one. 3 cups done.
Cut some 4 slits in the pleather first (perpendicular to the hole), then that gives enough relief to the hole to allow you to wrap the pleather around the saw bit. Then start to drill. The saw bit should not cut the pleather. I wrapped the saw bit with painters tape so that the pleather didn’t catch in the side walls of the saw bit.
G.G.SpoonsNewbie3 posts
Posted May 26, 2023, 3:08 AM#837
Drill a pilot hole in the cup holder space from the top side then use that to line up your cut from the underside. Much harder to cut/tear the vinyl unless you blast through too fast.
dmoneyRegular32 posts
Posted May 26, 2023, 3:12 AM#838
Don’t start the drill full speed until you’re inside the cut out in the pleather
Cut some 4 slits in the pleather first (perpendicular to the hole), then that gives enough relief to the hole to allow you to wrap the pleather around the saw bit. Then start to drill. The saw bit should not cut the pleather.
One issue I see is that the lip of the new cup is much shallower than the old cup ie less room to “hide” the relief cuts underneath, making it harder.
Drill a pilot hole in the cup holder space from the top side then use that to line up your cut from the underside. Much harder to cut/tear the vinyl unless you blast through too fast.
Definitely going to try this, especially the four cups closest to the braces
dmoneyRegular32 posts
Posted May 26, 2023, 1:07 PM#839
SOOOOO much better to drill pilot hole from the top, flip the table, and drill the hole from the bottom.

dpeks13Micro-Stakes Grinder13 posts
Posted May 26, 2023, 1:12 PM#840
First time we used the Wayfair special from a while back. Someone knocked over a beer that was in the tiny cupholder within the first hour. This is definitely going to be an upcoming project for me
dmoneyRegular32 posts
Posted May 26, 2023, 2:51 PM#841
All done! Pretty straightforward after some lessons learned on day 1 - most notably to drill the pilot hole from the top, and the hole from the bottom. Big improvement for about $60 including cup holders, hole saw, and pipe cutter.
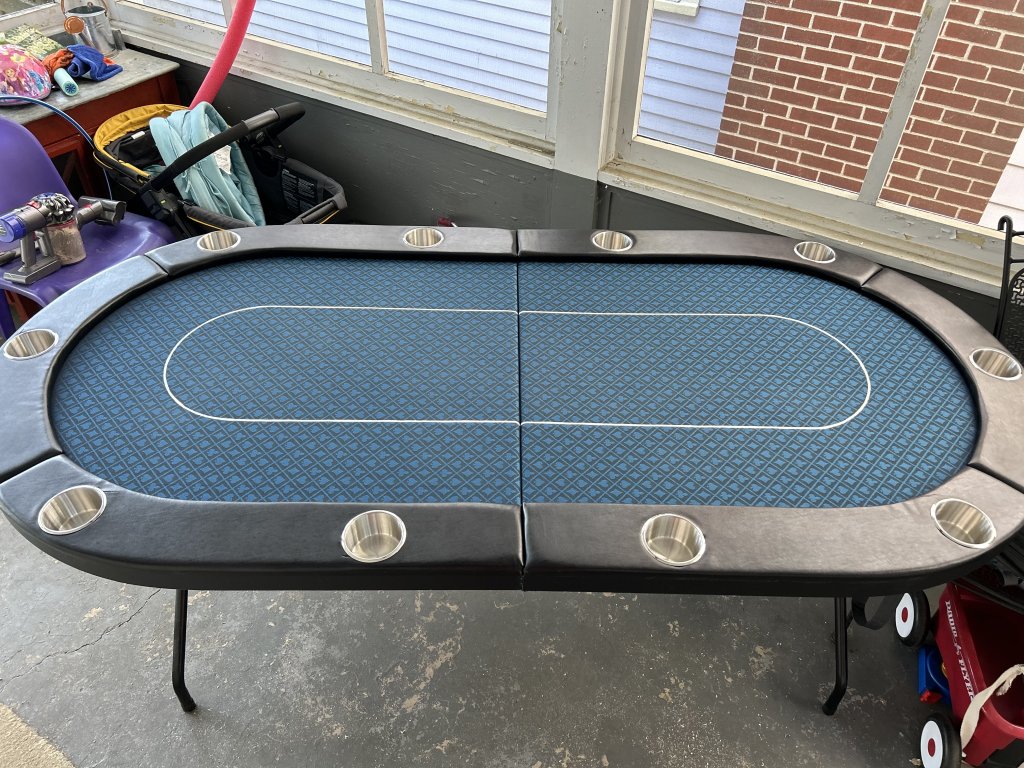

dmoneyRegular32 posts
Posted May 28, 2023, 3:41 PM#842
Does anyone have a use for, or want my old cupholders? Maybe could be used as ashtrays?
ngmcs8203Regular49 posts
Posted Jun 20, 2023, 9:39 PM#843
Wow glad I found this thread. Went searching through offerup and facebook marketplace and found a few for sale around $100-150. Hopefully I can get one soon and go deeper into the modification portion of this thread.
ngmcs8203Regular49 posts
Posted Jun 21, 2023, 7:30 AM#844
I got a lot of help from this forum on redoing mine so I wanted to spread the wealth on those who have the ESPN table.
Tips:
The only difference is there is a layer of plyboard underneath the arm rests, but this affects how you will build it.
Bring the foam padding under the plywood that the front quarter rests on it. this will give it a slight slant upwards which will create a deeper ring affect, and will also allow you to use LED's still.
If you are drilling out cup holders, do not go bigger than 2.75", otherwise you will eat through the entire LED plywood sheet. Because of this extra depth you also do not need to cut the legs of the table unless your cup depth is over 2.5"
You should absolutely replace the foam under the felt. IT IS GARBAGE. since you'll already have most of the work done, spend the extra $30 and get some good foam. I used elmers adhesive spray because I already had it, otherwise i'd use 3M. Elmers worked fine for me.
Replace the LED's. We all know that the ones they originally use are too bright, and the inability to change the color is annoying.
https://www.amazon.com/gp/product/B08JH5M6N3/ref=ppx_yo_dt_b_asin_title_o00_s00?ie=UTF8&th=1 (https://www.amazon.com/gp/product/B08JH5M6N3/ref=ppx_yo_dt_b_asin_title_o00_s00?ie=UTF8&th=1&tag=amznpcfx-20)
That is what I used and they look great for the price!
Total cost:
$136 for new speed cloth and foam from TPS
$30 set of 10 2.75" diameter, 2.5" depth cup drop ins.
$16 multicolored LED's
$22 for clamps and hole cutter (I already had the rest of the tools)
I am generally a handy guy, but have little woodworking experience. From start to finish it took me about 8 hours.
PicsView attachment 815575 (https://www.pokerchipforum.com/attachments/815575/)View attachment 815577 (https://www.pokerchipforum.com/attachments/815577/)View attachment 815578 (https://www.pokerchipforum.com/attachments/815578/)View attachment 815580 (https://www.pokerchipforum.com/attachments/815580/)
Do you think the lights could have ben replaced without taking off the arm rest?
ngmcs8203Regular49 posts
Posted Jun 21, 2023, 7:53 AM#845
Wow, 29 pages. This thread was great. I now have my shopping list. $325 for the table, topper, cup holders, carrying handles and replacement hinge. Not bad considering a brand new one is running about $300 these days.
jcooper911Micro-Stakes Grinder15 posts
Posted Jun 21, 2023, 12:54 PM#846
ngmcs8203Regular49 posts
ngmcs8203Regular49 posts
Posted Jul 15, 2023, 4:23 PM#848
PokerJoe747Newbie2 posts
Posted Jul 19, 2023, 2:56 AM#849
rjbf65Micro-Stakes Grinder13 posts
Posted Jul 19, 2023, 1:14 PM#850
How have the handles held up??
How have these handles held up?
I installed the 2nd ones just recently. Can't speak to how they will hold up but they feel secure on there and if not moving the table around very often should last a long time.
Another thing I did recently was put duct tape around my jumbo cup holders so they wouldn't fall out when in transport. Works like a charm. Those things are in there tight now.
The last thing I'd like to do is install the underneath bracket that runs along the entire table to give it more strength in the middle.
The table has certainly been an easy enough project overall and it should serve me well for a while. The next step is to get to actually play some poker on it on a semi regular basis.
Teach42Regular39 posts
Posted Jul 20, 2023, 9:01 PM#851
How have the handles held up??
Really well. No issues from the handles at all. It is a little akward carrying it via the handles up at the top, but other than that, they're peachy.
ngmcs8203Regular49 posts
Posted Jul 20, 2023, 10:49 PM#852
Confirmed! The ESPN table fits in this bag!!
PokerJoe747Newbie2 posts
Posted Jul 20, 2023, 10:50 PM#853
Confirmed! The ESPN table fits in this bag!!
Which bag is this? Can u provide the link?
ngmcs8203Regular49 posts
Posted Jul 20, 2023, 11:11 PM#854
gkar197Micro-Stakes Grinder10 posts
Posted Jul 23, 2023, 6:10 PM#855
Just wanted to say thank you to this thread. It's been super helpful in my Barrington purchase as well as refurbish.
Where it started...

Phase 1.... New speed cloth, drilled out new same diameter deeper cup holders.

Phase 2... New vinyl and larger diameter cup holders.


Phase 3 maybe will be to raise side the rail and add LED lighting.
Not sure I'm gonna do it yet.
Thank you all for your shares of builds instructions etc.
It's super appreciated.
MrBooshRegular32 posts
ngmcs8203Regular49 posts
Posted Jul 23, 2023, 7:08 PM#857
I’m wondering how many I should sit at this table. 10 seems like 10 skinny kids. Should I cap my game at 8?
Rooster410Micro-Stakes Grinder12 posts
gkar197Micro-Stakes Grinder10 posts
Posted Jul 23, 2023, 7:18 PM#859
Very nice! Did you put the new vinyl over the existing? Or remove and then put on?
Removed and put the new on to make it as clean as possible.
ngmcs8203Regular49 posts
Posted Jul 23, 2023, 8:05 PM#860
Removed and put the new on to make it as clean as possible.
Did you change the padding on the rail or on the table or re-use what was there?
ngmcs8203Regular49 posts
gkar197Micro-Stakes Grinder10 posts
Posted Jul 24, 2023, 4:19 AM#862
Did you change the padding on the rail or on the table or re-use what was there?
Just re-used what was there... The thicker vinyl.. (almost 3x thicker I think) makes the rail more curved rather than square that it used to be.
gkar197Micro-Stakes Grinder10 posts
Posted Jul 24, 2023, 4:21 AM#863
Just a heads-up for those of you following this thread. The standard 2-3/4 is just wide enough for a beer bottle, pint can and a tom collins glass. It will not fit an old fashioned/rocks glass.
Correct... I used deeper original size ones at first... Then used these 3.5 inch diameter ones in my phase 2.
Yuanhe 10 Jumbo Stainless Steel https://a.co/d/7K7ZLxb (https://a.co/d/7K7ZLxb?tag=amznpcfx-20)
SixSpeedFuryRegular64 posts
Posted Jul 24, 2023, 6:24 AM#864
I’m wondering how many I should sit at this table. 10 seems like 10 skinny kids. Should I cap my game at 8?
10 definitely is a tight fit. 9 would be the max.
tabletalker7Shark116 posts
Posted Jul 24, 2023, 6:44 AM#865
10 definitely is a tight fit. 9 would be the max.
I don't think 9 fat guys (aka ME) fit. I limit mine to 8.
TonZagaRegular76 posts
Posted Jul 24, 2023, 11:19 AM#866
I'm the playing dealer and also cap mine at 8
BugeRegular53 posts
Posted Jul 25, 2023, 5:13 PM#867
Added a shuffler to my Barrington today for travel games. I like the idea of upgrading the vinyl. I will put it on the list!

DodgerRegular46 posts
Posted Jul 25, 2023, 5:19 PM#868
Added a shuffler to my Barrington today for travel games. I like the idea of upgrading the vinyl. I will put it on the list!
View attachment 1169097 (https://www.pokerchipforum.com/attachments/1169097/)
Whoa! How does this affect foldability and portability of the table? Any issues?
ngmcs8203Regular49 posts
Posted Jul 25, 2023, 5:19 PM#869
Added a shuffler to my Barrington today for travel games. I like the idea of upgrading the vinyl. I will put it on the list!
View attachment 1169097 (https://www.pokerchipforum.com/attachments/1169097/)
Cards won’t get misdealt if slid over the top of it?
gkar197Micro-Stakes Grinder10 posts
BugeRegular53 posts
Posted Jul 25, 2023, 5:27 PM#871
Whoa! How does this affect foldability and portability of the table? Any issues?
Made it a little lighter ;)
The shuffler just slides in and out so no issues folding or moving the table around
BugeRegular53 posts
Posted Jul 25, 2023, 5:28 PM#872
Cards won’t get misdealt if slid over the top of it?
Nah, they will slide right over the top. The shuffler is pretty heavy so the cards shouldn’t slide underneath the lip of it. They haven’t slipped under on my other table yet
gkar197Micro-Stakes Grinder10 posts
Posted Jul 25, 2023, 5:30 PM#873
Added a shuffler to my Barrington today for travel games. I like the idea of upgrading the vinyl. I will put it on the list!
View attachment 1169097 (https://www.pokerchipforum.com/attachments/1169097/)
Awesome upgrade... I just wish I could afford one :P
BugeRegular53 posts
gkar197Micro-Stakes Grinder10 posts
Posted Jul 26, 2023, 3:31 AM#875
How many yards of vinyl did you need to redo the rails?
I ordered 3 yards but might have only used 2. I have a lot left.
w0ngNewbie1 posts
Posted Aug 2, 2023, 9:12 AM#876
jamesjkimRegular42 posts
NotRealNameNoSirRegular73 posts
jamesjkimRegular42 posts
Posted Aug 2, 2023, 6:14 PM#879
Is it just me or did Barrington change out the vinyl on newer tables? This is the one I just got and doesn’t appear as shiny as ones posted in this thread. Maybe it’s one of the reasons for prices going up (perhaps as a result of supply shortages)?

BugeRegular53 posts
Posted Aug 2, 2023, 6:52 PM#880
Is it just me or did Barrington change out the vinyl on newer tables? This is the one I just got and doesn’t appear as shiny as ones posted in this thread. Maybe it’s one of the reasons for prices going up (perhaps as a result of supply shortages)?
View attachment 1173364 (https://www.pokerchipforum.com/attachments/1173364/)
It looks much nicer than the old vinyl. Also looks like it has better foam in the armrest.
almondjoyceNewbie2 posts
almondjoyceNewbie2 posts
Posted Aug 2, 2023, 7:16 PM#882
Also, I do see why people upgrade the cup holders to deeper ones since the ones it comes with are pretty shallow. Hopefully a project in the future with all the tutorials provided by everyone.
doublebooyah85Regular87 posts
Posted Aug 2, 2023, 7:20 PM#883
Is it just me or did Barrington change out the vinyl on newer tables? This is the one I just got and doesn’t appear as shiny as ones posted in this thread. Maybe it’s one of the reasons for prices going up (perhaps as a result of supply shortages)?
View attachment 1173364 (https://www.pokerchipforum.com/attachments/1173364/)
Wow that armrest looks much better…
ngmcs8203Regular49 posts
Posted Aug 2, 2023, 7:21 PM#884
Also, I do see why people upgrade the cup holders to deeper ones since the ones it comes with are pretty shallow. Hopefully a project in the future with all the tutorials provided by everyone.
Once you have the circular saw bit for your drill, it’s pretty easy. If I get another of these I will do the wider cup holders.
jamesjkimRegular42 posts
Posted Aug 2, 2023, 7:34 PM#885
Has anyone put locking caster wheels on their table? Found these that should fit the 1" legs. I put some felt pads under for now to slide the table around without damaging my floor but found it slides a bit too easily and can be knocked/nudged during games.
https://a.co/d/cB4qBpg (https://a.co/d/cB4qBpg?tag=amznpcfx-20)
ngmcs8203Regular49 posts
Posted Aug 2, 2023, 7:41 PM#886
The rollerblade style wheels would be nice. Once opened though, I wouldn't really need to move it around.
doublebooyah85Regular87 posts
Posted Aug 6, 2023, 4:03 PM#887
The new vinyl rail is awesome

MrBooshRegular32 posts
OKChipsNewbie1 posts
Posted Aug 12, 2023, 10:54 PM#889
jamesjkimRegular42 posts
Posted Aug 12, 2023, 10:58 PM#890
I got the second one (global storage) and it’s a not a super tight fit which makes putting the table in a bit easier. No issues and is curved on one side matching the table’s profile.
NotRealNameNoSirRegular73 posts
Posted Aug 12, 2023, 10:58 PM#891
MrBooshRegular32 posts
Posted Aug 12, 2023, 11:39 PM#892
ngmcs8203Regular49 posts
Posted Aug 13, 2023, 12:14 AM#893
I have the Global bag. It works great for a standard Barrington table. I believe the Hengme bag is wide enough for the ESPN Barrington tables though.
Yup the hengme is the one for the ESPN
springboxMicro-Stakes Grinder10 posts
Posted Sep 1, 2023, 7:55 PM#894
I have a 72x36 mat that perfectly fits my dining table, but I'm moving into an apartment with less space so the table probably has to go... I was hoping to get a folding table the mat would fit, Barrington surface is 74x32 right? I'm thinking I'm just SOL finding a table to fit the mat but was wondering if anyone has fit off-sized mats to their tables somehow.
ngmcs8203Regular49 posts
Posted Sep 1, 2023, 7:56 PM#895
I have a 72x36 mat that perfectly fits my dining table, but I'm moving into an apartment with less space so the table probably has to go... I was hoping to get a folding table the mat would fit, Barrington surface is 74x32 right? I'm thinking I'm just SOL finding a table to fit the mat but was wondering if anyone has fit off-sized mats to their tables somehow.
You’re way better off finding a table and then customizing a mat for it.
jamesjkimRegular42 posts
Posted Sep 1, 2023, 7:57 PM#896
I have a 72x36 mat that perfectly fits my dining table, but I'm moving into an apartment with less space so the table probably has to go... I was hoping to get a folding table the mat would fit, Barrington surface is 74x32 right? I'm thinking I'm just SOL finding a table to fit the mat but was wondering if anyone has fit off-sized mats to their tables somehow.
You’re correct. “Standard” sold on Amazon (https://www.amazon.com/?tag=amznpcfx-20) etc are too short length wise and too long width.
Hit up @rjdev7 (https://www.pokerchipforum.com/members/1014/) for a custom mat!
springboxMicro-Stakes Grinder10 posts
Posted Sep 1, 2023, 7:59 PM#897
You’re correct. “Standard” sold on Amazon etc are too short length wise and too long width.
Hit up @rjdev7 (https://www.pokerchipforum.com/members/1014/) for a custom mat!
You’re way better off finding a table and then customizing a mat for it.
Yeah, I figured, wishing I'd gone for a folding table in the first place, because that's easier to bring with when moving than a dining table.
tabletalker7Shark116 posts
Posted Sep 1, 2023, 9:26 PM#898
I have a 72x36 mat that perfectly fits my dining table, but I'm moving into an apartment with less space so the table probably has to go... I was hoping to get a folding table the mat would fit, Barrington surface is 74x32 right? I'm thinking I'm just SOL finding a table to fit the mat but was wondering if anyone has fit off-sized mats to their tables somehow.
Have you considered donating the mat to one of your players so they could host once in a while? Might be helpful to have another host while you go through the moving process
springboxMicro-Stakes Grinder10 posts
Posted Sep 1, 2023, 9:52 PM#899
Have you considered donating the mat to one of your players so they could host once in a while? Might be helpful to have another host while you go through the moving process
Haha, I wish. If I weren't hosting only ~2 others in the group would ever play poker, and even they probably wouldn't host.
raynmanasRegular49 posts
Posted Sep 1, 2023, 9:57 PM#900
Is it just me or did Barrington change out the vinyl on newer tables? This is the one I just got and doesn’t appear as shiny as ones posted in this thread. Maybe it’s one of the reasons for prices going up (perhaps as a result of supply shortages)?
View attachment 1173364 (https://www.pokerchipforum.com/attachments/1173364/)
wow that looks SO much better. damnit.
JeepologyOffroadMicro-Stakes Grinder23 posts
Posted Sep 1, 2023, 10:00 PM#901
Can confirm new rail vinyl. I don’t think it’s any more comfortable, but it looks like a legit table now
NotRealNameNoSirRegular73 posts
Posted Sep 1, 2023, 10:03 PM#902
Aight, very jealous of the improvements. Cant exactly complain at my price point but damn, looks better.
doublebooyah85Regular87 posts
Posted Sep 1, 2023, 10:08 PM#903
Aight, very jealous of the improvements. Cant exactly complain at my price point but damn, looks better.
With a topper it’s all you need. And I have a premium table.
The railing looks legit and it’s an understatement the benefit it folds up.
Hosts rejoice!!!
NotRealNameNoSirRegular73 posts
Posted Sep 1, 2023, 10:11 PM#904
With a topper it’s all you need. And I have a premium table.
The railing looks legit and it’s a understatement the benefit jt folds up.
Hosts rejoice!!!
I got the old one so I straight up hate the shallow cupholders but you're right, already getting the topper and Im psyched.
JeepologyOffroadMicro-Stakes Grinder23 posts
Posted Sep 1, 2023, 10:11 PM#905
If you’re shopping for anything other than a custom table these new barringtons are tough, if not impossible, to beat imo. Dumping all my extra tables and replacing with these. Wish they offered a round at a similar price point.
warewulfMicro-Stakes Grinder13 posts
Posted Sep 2, 2023, 2:54 AM#906
I'm going to get one of these soon. The new rail looks good!
Next thing they should change is the felt design. I don't really like the flop and board theme. It just bugs my OCD for some reason. That won't stop me from buying one though, might get a mat for it.
MandosMicro-Stakes Grinder7 posts
Posted Sep 2, 2023, 2:57 PM#907
Does anyone have a custom solution for keeping the table closed when folded up? The buckle that hold the straps together broke on mine and I'm trying to think of the best replacement (ignore the residue from trying to see what duck tape could do). It's not a big deal but it's much easier to carry and transport if it can't open up spontaneously. I guess I could also just get a carrying case but I'm worried it will try to open inside that and put pressure on the case and tear it.

DoubleEagleShark192 posts
PreditorMicro-Stakes Grinder13 posts
Posted Sep 2, 2023, 11:28 PM#909
Found a Barrington in my area for $200. Photos seem to show some creases in the felt though. Owner says it’s from being in storage for so long, but assured me there are no tears in the fabric.
What do you guys think? Never actually seen one of these in person. Is this something that can be smoothed out? If so how? An iron?
Goal is to eventually get a topper. But would hope go play on the table sooner. And not really handy enough to re-felt it outright.
rjbf65Micro-Stakes Grinder13 posts
Posted Sep 3, 2023, 12:09 AM#910
Found a Barrington in my area for $200. Photos seem to show some creases in the felt though. Owner says it’s from being in storage for so long, but assured me there are no tears in the fabric.
What do you guys think? Never actually seen one of these in person. Is this something that can be smoother out? If so how? An iron?
Goal is to eventually get a topper. But would hope go play on the table sooner. And not really handy enough to re-felt it outright.
I think it will be playable for a few games until you upgrade it. That’s a decent price these days IMO.
PreditorMicro-Stakes Grinder13 posts
Posted Sep 3, 2023, 12:37 AM#911
I think it will be playable for a few games until you upgrade it. That’s a decent price these days IMO.
Let's just say the creases weren't able to come out. Do you think it would affect the smoothness of a topper? Again, never personally seen one of these, nor a high end topper like they sell on here.
rjbf65Micro-Stakes Grinder13 posts
Posted Sep 3, 2023, 12:39 AM#912
I can’t speak to the topper as I did the SSC upgrade to mine.
ngmcs8203Regular49 posts
Posted Sep 3, 2023, 1:54 AM#913
I got the old one so I straight up hate the shallow cupholders but you're right, already getting the topper and Im psyched.
That’s why you replace them!
ngmcs8203Regular49 posts
Posted Sep 3, 2023, 1:57 AM#914
Do
Let's just say the creases weren't able to come out. Do you think it would affect the smoothness of a topper? Again, never personally seen one of these, nor a high end topper like they sell on here.
Unless there are lumps of padding creating those ripples, a topper should not be affected by them. It’s heavy enough to weigh down any fabric creases from that original cloth.
ngmcs8203Regular49 posts
Posted Sep 3, 2023, 1:59 AM#915
Let's just say the creases weren't able to come out. Do you think it would affect the smoothness of a topper? Again, never personally seen one of these, nor a high end topper like they sell on here.
Unless there are lumps of padding creating those ripples, a topper should not be affected by them. It’s heavy enough to weigh down any fabric creases from that original cloth.
tabletalker7Shark116 posts
jamesjkimRegular42 posts
Posted Sep 15, 2023, 4:38 PM#917
Just bored out the holes for deeper cup holders (same Da Vinci ones linked in this thread) and found that, let's call it, the V2 table does NOT require cutting the leg pipes. Seems Barrington is watching us and making improvements. :)


SaoliverRegular51 posts
Posted Sep 15, 2023, 4:49 PM#918
Just bored out the holes for deeper cup holders (same Da Vinci ones linked in this thread) and found that, let's call it, the V2 table does NOT require cutting the leg pipes. Seems Barrington is watching us and making improvements. :)
View attachment 1195713 (https://www.pokerchipforum.com/attachments/1195713/)
View attachment 1195714 (https://www.pokerchipforum.com/attachments/1195714/)
I need to do this but I'm an idiot. Does someone have a "how-to" video that I can reference? :wtf:
jamesjkimRegular42 posts
Posted Sep 15, 2023, 4:59 PM#919
Buy a 2 3/4” hole saw from wherever.
Attach it to your drill.
Heat/remove existing cup holders.
Drill hole.
I’m still waiting for my new cup holders to arrive today so can’t comment on the “installation”.
rjbf65Micro-Stakes Grinder13 posts
Posted Sep 15, 2023, 5:01 PM#920
Buy a 2 3/4” hole saw from wherever.
Attach it to your drill.
Heat/remove existing cup holders.
Drill hole.
I’m still waiting for my new cup holders to arrive today so can’t comment on the “installation”.
Duct tape around the new cup holders so they fit snuggly. Mine would fall out in transport until I did that extremely simple upgrade.
ngmcs8203Regular49 posts
Posted Sep 15, 2023, 5:06 PM#921
Just bored out the holes for deeper cup holders (same Da Vinci ones linked in this thread) and found that, let's call it, the V2 table does NOT require cutting the leg pipes. Seems Barrington is watching us and making improvements. :)
View attachment 1195713 (https://www.pokerchipforum.com/attachments/1195713/)
View attachment 1195714 (https://www.pokerchipforum.com/attachments/1195714/)
Your holes are so much cleaner than mine. I nearly started a fire on each one and the smell was not pleasant.
jamesjkimRegular42 posts
Posted Sep 15, 2023, 5:31 PM#922
Your holes are so much cleaner than mine. I nearly started a fire on each one and the smell was not pleasant.
I went high speed but mm at a time frequently backing out. Added a tad more time but was very smooth and no smoking/charring.
ngmcs8203Regular49 posts
Posted Sep 15, 2023, 5:35 PM#923
I went high speed but mm at a time frequently backing out. Added a tad more time but was very smooth and no smoking/charring.
Patience. That’s what I was missing!
jamesjkimRegular42 posts
Posted Sep 15, 2023, 10:10 PM#924
Cup holders arrived. Thanks @rjbf65 (https://www.pokerchipforum.com/members/2004/) for the tip on duct tape. I didn’t have any and used masking tape instead. Worked just fine with 3-4 wraps (or should I say orbits) per holder. Fits very snug, tight even. Without the tape the cup holders would definitely slip out rather easily. I should mention the lip on the new cup holders are smaller so you can see the old cup holder indent. Not a big deal for me and I’ll just think of it as a design element.


PreditorMicro-Stakes Grinder13 posts
Posted Sep 26, 2023, 10:51 PM#925
dmoneyRegular32 posts
Posted Sep 26, 2023, 11:05 PM#926
rjdev7Regular40 posts
Posted Sep 26, 2023, 11:13 PM#927
Tony_MMicro-Stakes Grinder17 posts
Posted Oct 3, 2023, 9:38 PM#928
73.5" x 31.5"
My Barrington arrived today and the exact inner dimensions on mine are 74" x 32"
Tony_MMicro-Stakes Grinder17 posts
Posted Oct 3, 2023, 9:48 PM#929
Got my Barrington today! $229 from Walmart. Maybe not the best deal but better than the $460 on Amazon (https://www.amazon.com/?tag=amznpcfx-20). Impressed with the quality for the money. Love the matte vinyl as opposed to what the old pics look like. Should work out great for now but can't wait to rip er apart. Of course I'm already thinking of thicker padding, real leather for the rail and replacing or eliminating the cup holders. Now I just need to settle on a what chips to get.

ngmcs8203Regular49 posts
Posted Oct 3, 2023, 10:26 PM#930
Got my Barrington today! $229 from Walmart. Maybe not the best deal but better than the $460 on Amazon. Impressed with the quality for the money. Love the matte vinyl as opposed to what the old pics look like. Should work out great for now but can't wait to rip er apart. Of course I'm already thinking of thicker padding, real leather for the rail and replacing or eliminating the cup holders. Now I just need to settle on a what chips to get.
View attachment 1204929 (https://www.pokerchipforum.com/attachments/1204929/)
highly recommend you replace or cover the cup holders first. They are asking to have spilled drinks. Also get a table topper.
Tony_MMicro-Stakes Grinder17 posts
Posted Oct 3, 2023, 11:37 PM#931
highly recommend you replace or cover the cup holders first. They are asking to have spilled drinks. Also get a table topper.
They look more like ashtrays than cup holders.
ngmcs8203Regular49 posts
Posted Oct 4, 2023, 1:27 AM#932
They look more like ashtrays than cup holders.
Yup. A big waste. If you can get the table for $250 or less it’s worth investing the money you save in some upgrades. Cup holders, new felt/topper, chairs.
MongooseMicro-Stakes Grinder21 posts
Posted Oct 4, 2023, 1:31 AM#933
Got my Barrington today! $229 from Walmart. Maybe not the best deal but better than the $460 on Amazon. Impressed with the quality for the money. Love the matte vinyl as opposed to what the old pics look like. Should work out great for now but can't wait to rip er apart. Of course I'm already thinking of thicker padding, real leather for the rail and replacing or eliminating the cup holders. Now I just need to settle on a what chips to get.
View attachment 1204929 (https://www.pokerchipforum.com/attachments/1204929/)
@Tony (https://www.pokerchipforum.com/members/2929/)-m $229 is a great deal these days
jpoppaaaMicro-Stakes Grinder21 posts
Posted Oct 4, 2023, 11:18 PM#934
Just finished the speed cloth upgrade. Pretty easy- about two hours of work. Next to add a betting line.

jamesjkimRegular42 posts
Posted Oct 4, 2023, 11:39 PM#935
Just finished the speed cloth upgrade. Pretty easy- about two hours of work. Next to add a betting line. View attachment 1205390 (https://www.pokerchipforum.com/attachments/1205390/)
Where did you get your speed cloth? How do you like it?
jpoppaaaMicro-Stakes Grinder21 posts
Posted Oct 4, 2023, 11:42 PM#936
Where did you get your speed cloth? How do you like it?
Amazon (https://www.amazon.com/?tag=amznpcfx-20). Came folded so hopefully the creases will relax over time and the durability is tbd. Otherwise seems like a pretty good value.
aurumityMicro-Stakes Grinder9 posts
Posted Oct 4, 2023, 11:57 PM#937
Just finished the speed cloth upgrade. Pretty easy- about two hours of work. Next to add a betting line. View attachment 1205390 (https://www.pokerchipforum.com/attachments/1205390/)
Probably a dumb question, but how are you going to add a betting line after you've already installed the speed cloth?
jpoppaaaMicro-Stakes Grinder21 posts
Posted Oct 5, 2023, 12:40 AM#938
Probably a dumb question, but how are you going to add a betting line after you've already installed the speed cloth?
Draw it! Couple posts in the thread as an example.
exodusMicro-Stakes Grinder10 posts
Posted Oct 5, 2023, 1:00 AM#939
Probably a dumb question, but how are you going to add a betting line after you've already installed the speed cloth?
Most likely he will measure, outline, and then paint one on the cloth.
FreeBop59Micro-Stakes Grinder5 posts
Posted Oct 5, 2023, 5:42 AM#940
Got my Barrington today! $229 from Walmart. Maybe not the best deal but better than the $460 on Amazon. Impressed with the quality for the money. Love the matte vinyl as opposed to what the old pics look like. Should work out great for now but can't wait to rip er apart. Of course I'm already thinking of thicker padding, real leather for the rail and replacing or eliminating the cup holders. Now I just need to settle on a what chips to get.
View attachment 1204929 (https://www.pokerchipforum.com/attachments/1204929/)
Thanks for the photo, @Tony_M (https://www.pokerchipforum.com/members/16516/) :
It looks like these newer brown felt tables also have the updated vinyl rails like the blue felt tables from amazon (https://www.amazon.com/?tag=amznpcfx-20) :tup:
LiveCashGuyNewbie1 posts
ngmcs8203Regular49 posts
Posted Oct 19, 2023, 2:32 AM#942
Any advice on upgrading the Barrington cupholders? Just ordered the blue version on Amazon for $241. Thank you.
Go slow with your saw bit. If you want anything larger than a solo cup get the X-Large ones.
Tony_MMicro-Stakes Grinder17 posts
Posted Oct 19, 2023, 2:57 AM#943
Any advice on upgrading the Barrington cupholders? Just ordered the blue version on Amazon for $241. Thank you.
I opted to go with these: Amarine Made 10 Pack of Stainless Steel Drop-in Cup Holders (https://www.amazon.com/dp/B07SK296PL?tag=amznpcfx-20)
You can get whichever size you think will work best for you. What I most found available were 3.5" (usually called "jumbo"), the 3.5" "dual bottom" like what I went for, and the 2.75" diameter which is the size that Barrington used. 2.75 is perfect for mostly beer and soda cans/bottles. If you want to use rock glasses or wider bottles go for the jumbo or "dual" size.
To install it's fairly easy procedure but here's a few tips:
Wait till you get your cup holders so you can measure them exactly. You'll need to get a hole saw WITH ARBOR that matches or is just slightly bigger than the outside diameter of your cupholders.
Use a heat gun or hair dryer on high to heat up the bottom of the cups while you apply gentle pressure upwards with a screwdriver or other such lever. The heat will soften the glue and it will come up easily after about 30 seconds.
If you're going with the 2.75" you might be able to just drill straight down from the top. If you go for the larger size you'll need to locate the center of the existing hole. What I would do is make a paper circle the size of the existing hole, pierce the center of the paper circle and use that as a template to mark the center point with a pencil. Next you'll want to drill a pilot hole as straight as you can at the center mark through the table. Then mount the hole saw in your drill and drill from the bottom of the table. You'll want to go slow and steady. The pilot hole should help guide you but try to keep the hole saw straight and keep it from wobbling around or it could jam and cause the drill to yank.
Next you just pop in the new cup holders and you're done! If they're a little loose put some tape around them to tighten them up. If they are too tight (I only had a 3.5" hole saw which was not large enough) you can either sand/file the holes larger or, what I did was ream the sides of the hole with the hole saw by purposely AND VERY CAREFULLY running the hole saw up and down at a slight angle in multiple directions to widen the hole just enough to get a nice fit.
Hope any of that made sense.
aurumityMicro-Stakes Grinder9 posts
Posted Oct 25, 2023, 2:29 AM#944
Any advice on upgrading the Barrington cupholders? Just ordered the blue version on Amazon for $241. Thank you.
Thanks for saying how much you bought this for. I just checked it out and noticed it was on sale and picked one up for myself!
TX_Golf_N_PokerRegular48 posts
Posted Oct 25, 2023, 5:27 PM#945
aurumityMicro-Stakes Grinder9 posts
Posted Oct 26, 2023, 11:45 PM#946
Just got mine. It came in a day and a half, I am shocked.
This is the first poker table I've ever owned, and I have to say that I am very happy with it. Obviously the flop/turn/river felt is very cheesy, but the blue felt doesn't look bad. Either way, I plan on grabbing a custom topper.
The table is sturdy and the arm rest is comfortable.
The only drawback is that it is incredibly awkward to carry by yourself. It's not egregiously heavy, but unless you are 6 foot+ with a long arm span, it's pretty difficult to carry since there's no natural way to carry it.
Edit: I know everybody knows what it looks like. I just wanted to share how mine came packaged and my thoughts on it as a new PCF'er/poker player. I found nothing wrong with it.


jamesjkimRegular42 posts
Posted Oct 27, 2023, 12:02 AM#947
Nice! There’s a third party carrying case you can buy. Makes it infinitely easier to move around when folded.
NotRealNameNoSirRegular73 posts
Posted Oct 27, 2023, 12:18 AM#948
Look at that new raaaaiillll, I've got a barrington, havent even used it and here I am pining for one of theeeeesseee.
ngmcs8203Regular49 posts
Posted Oct 27, 2023, 12:19 AM#949
You can also put handles on it. I did that and got the bag for my table. Still heavy and awkward but I can carry it up and down two flights of stairs.
rjdev7Regular40 posts
Posted Oct 27, 2023, 12:19 AM#950
Just got mine. It came in a day and a half, I am shocked.
This is the first poker table I've ever owned, and I have to say that I am very happy with it. Obviously the flop/turn/river felt is very cheesy, but the blue felt doesn't look bad. Either way, I plan on grabbing a custom topper.
The table is sturdy and the arm rest is comfortable.
The only drawback is that it is incredibly awkward to carry by yourself. It's not egregiously heavy, but unless you are 6 foot+ with a long arm span, it's pretty difficult to carry since there's no natural way to carry it.
Edit: I know everybody knows what it looks like. I just wanted to share how mine came packaged and my thoughts on it as a new PCF'er/poker player. I found nothing wrong with it.
View attachment 1215764 (https://www.pokerchipforum.com/attachments/1215764/)View attachment 1215762 (https://www.pokerchipforum.com/attachments/1215762/)View attachment 1215765 (https://www.pokerchipforum.com/attachments/1215765/)
If you want to fix the "flop, turn, river" cheesiness, I've got the solution here for you: https://www.pokerchipforum.com/threads/made-to-order-custom-table-toppers.96993/ :)
MrBooshRegular32 posts
Posted Oct 27, 2023, 12:27 AM#951
The only drawback is that it is incredibly awkward to carry by yourself. It's not egregiously heavy, but unless you are 6 foot+ with a long arm span, it's pretty difficult to carry since there's no natural way to carry it.
Pick up a bag for it from Amazon (https://www.amazon.com/?tag=amznpcfx-20). You can put the handle over your shoulder and it is much easier to move around!
Global Storage Folding Poker Table Bag for 71" and 84"-Oval Poker Table,Two Sizes https://a.co/d/fY47YpU (https://a.co/d/fY47YpU?tag=amznpcfx-20)
aurumityMicro-Stakes Grinder9 posts
rambiezelNewbie3 posts
Posted Oct 27, 2023, 3:06 AM#953
Is there a difference between the brown and blue felt top tables besides the color?
MrBooshRegular32 posts
Posted Oct 27, 2023, 4:08 AM#954
Is there a difference between the brown and blue felt top tables besides the color?
No, just the color.
TX_Golf_N_PokerRegular48 posts
Posted Oct 28, 2023, 4:56 AM#955
No, just the color.
Are you sure? I was looking at both of them the other day. The legs looked different on the brown, and they market it as "premium."
rambiezelNewbie3 posts
Tony_MMicro-Stakes Grinder17 posts
Posted Oct 28, 2023, 5:35 AM#957
Are you sure? I was looking at both of them the other day. The legs looked different on the brown, and they market it as "premium."
I have the brown felt version and it is the same as the blue one. They also sell a "premium" version that has brown pleather rails and supposedly heavier duty legs and plywood base but I haven't seen it in person. Frankly, the regular version is pretty well built and I can't see needing to get anything heavier.
MrBooshRegular32 posts
Posted Oct 28, 2023, 4:19 PM#958
There are quite a few variations on the Barrington table. Many different colors. Some with slightly different features.


There are even a ton more versions I have seen out there while paroozing FB marketplace. Most are very similar.
The brown rail is supposed to be the premium version. I have not seen one of these live. The ESPN has the lights and is also slightly larger for the playing surface and when you fold it up. It will not fit in a standard bag if you purchase one from Amazon (https://www.amazon.com/?tag=amznpcfx-20). There is a bag on Amazon (https://www.amazon.com/?tag=amznpcfx-20) that will fit it. I just don't have the link on hand. One better feature that the newer tables have, is the adjustable tension on the wire below the table. Also the newer tables have a matte finished rail.
BLK21JKMicro-Stakes Grinder6 posts
Posted Oct 28, 2023, 4:39 PM#959
I went down this more-confusing-than-it-should-be Barrington rabbit hole 2 weeks ago, and ended up with a "Premium" LED non-ESPN-branded version, from Walmart for $299. Black matte rails, and the playing surface (for custom topper purposes) seems a bit larger than the standard Barrington dimensions - pics below. (I believe I've read the same regarding the ESPN-branded LED table.)
See: Barrington 10-Player Poker Table with In-laid LED Lights, Brown and Black (https://www.walmart.com/ip/Barrington-10-Player-Poker-Table-with-In-laid-LED-Lights-Brown-and-Black/3963393753)
For the $70 difference over the non-LED "Classic" it felt like a good buy, though LEDs likely won't get much use. (Having said that... I've already attached a rechargeable battery pack and dimmer to the bottom of the table.)
As @Tony_M (https://www.pokerchipforum.com/members/16516/) mentioned the "Premium" (also apparently formerly called "Charleston") has a thicker "playfield," larger-diameter legs, larger cross panel/leg brace things, and apparently the cup holders are just over 1/8" deeper. Most retailers don't list them as "Premium" or "Classic" though - the easiest way to differentiate them in pics is that taller cross panel/leg brace.


MrBooshRegular32 posts
Posted Oct 28, 2023, 4:53 PM#960
I went down this more-confusing-than-it-should-be Barrington rabbit hole 2 weeks ago, and ended up with a "Premium" LED non-ESPN-branded version, from Walmart for $299. Black matte rails, and the playing surface (for custom topper purposes) seems a bit larger than the standard Barrington dimensions - pics below. (I believe I've read the same regarding the ESPN-branded LED table.)
See: Barrington 10-Player Poker Table with In-laid LED Lights, Brown and Black (https://www.walmart.com/ip/Barrington-10-Player-Poker-Table-with-In-laid-LED-Lights-Brown-and-Black/3963393753)
For the $70 difference over the non-LED "Classic" it felt like a good buy, though LEDs likely won't get much use. (Having said that... I've already attached a rechargeable battery pack and dimmer to the bottom of the table.)
As @Tony_M (https://www.pokerchipforum.com/members/16516/) mentioned the "Premium" (also apparently formerly called "Charleston") has a thicker "playfield," larger-diameter legs, larger cross panel/leg brace things, and apparently the cup holders are just over 1/8" deeper. Most retailers don't list them as "Premium" or "Classic" though - the easiest way to differentiate them in pics is that taller cross panel/leg brace.
View attachment 1216485 (https://www.pokerchipforum.com/attachments/1216485/)
View attachment 1216493 (https://www.pokerchipforum.com/attachments/1216493/)
View attachment 1216494 (https://www.pokerchipforum.com/attachments/1216494/)
View attachment 1216496 (https://www.pokerchipforum.com/attachments/1216496/)
View attachment 1216497 (https://www.pokerchipforum.com/attachments/1216497/)
I have not seen that version. I like it! Black or darker felt is nice if you are going to use a topper with it. That way, it won't be as noticeable if the topper doesn't reach all the way to the edge.
ngmcs8203Regular49 posts
warewulfMicro-Stakes Grinder13 posts
Posted Oct 29, 2023, 12:07 AM#962
Another difference is weight. The brown one for $229 is 82 lbs. The $299 table is 100 lbs. I do like the look of the black felt. Though I'd be tempted to re-felt it with suited speed cloth.
SalmonblasterMicro-Stakes Grinder11 posts
ngmcs8203Regular49 posts
Posted Oct 30, 2023, 12:41 AM#964
The one that fits the dimensions. 43x43
fortysixandtwoMicro-Stakes Grinder11 posts
Posted Nov 2, 2023, 11:04 PM#965
I picked up a 2nd table, and the new one from Walmart is on the left. I have the original? Order of topper and can confirm the new table is just a little bigger..if I measured right the new table is 32x74 surface. Does that sound right to others with new table?


inapinchNewbie4 posts
Posted Nov 2, 2023, 11:11 PM#966
I’m digging that new armrest
ngmcs8203Regular49 posts
BruceWayneMicro-Stakes Grinder10 posts
inapinchNewbie4 posts
Hot NutsShark105 posts
Posted Nov 3, 2023, 2:17 AM#970
Hadn't seen the old rail in the same pic with the new rail. I want one. I do have one table still in the box. I'll use up my one time!
Rooster410Micro-Stakes Grinder12 posts
Posted Nov 3, 2023, 2:22 AM#971
Maybe the new and better rail is the reason wayfair was selling the old model for $90 shipped a few months ago lol.
Hot NutsShark105 posts
Posted Nov 3, 2023, 2:29 AM#972
Maybe the new and better rail is the reason wayfair was selling the old model for $90 shipped a few months ago lol.
I hope not or I used up my one time. I kind of doubt it. Pricing screw up I'd bet. They could have moved them for quite a bit more.
aurumityMicro-Stakes Grinder9 posts
Posted Nov 3, 2023, 4:02 AM#973
Maybe the new and better rail is the reason wayfair was selling the old model for $90 shipped a few months ago lol.
that would still be an insane deal if anyone managed to scoop that up
Hot NutsShark105 posts
Posted Nov 3, 2023, 4:39 AM#974
that would still be an insane deal if anyone managed to scoop that up
Can confirm
SalmonblasterMicro-Stakes Grinder11 posts
Posted Nov 3, 2023, 4:46 AM#975

Just bought a new one of these from walmart that got delivered today. Finally going to be able to crack it open tomorrow, excited and interested to see if it has the new rail or the old rail...
fortysixandtwoMicro-Stakes Grinder11 posts
Posted Nov 3, 2023, 12:39 PM#976
Good luck! They would have a home run if they just upgraded the cups
BLK21JKMicro-Stakes Grinder6 posts
warewulfMicro-Stakes Grinder13 posts
Posted Nov 3, 2023, 5:50 PM#978
Good luck! They would have a home run if they just upgraded the cups
And maybe get away from always having the flop as part of the felt. That bugs my OCD. I will buy one soon, probably change the felt because of that.
aurumityMicro-Stakes Grinder9 posts
Posted Nov 4, 2023, 4:51 PM#979
I’m digging that new armrest
Just played on my barrington with the new armrest on it for the first time. It looks good in person and is super comfortable. We played & I dealt for 6 1/2 hours. I found it very comfortable the entire time. Also as a side note - we had 8 people and fit perfectly on the 84" table. I dealt the entire time and hardly had to stretch to reach chips or anything as a person who is 5'9. I am a little concerned about size when I move back home. The group that I will be playing with will be around 9 deep, but almost everyone is larger there. Not sure if the barrington will hold up then, but we'll see!
SalmonblasterMicro-Stakes Grinder11 posts
Posted Nov 5, 2023, 11:05 PM#980
That will have new rail. That's the one I grabbed a few weeks ago, see https://www.pokerchipforum.com/threads/barrington-poker-table-thread.30910/page-32#post-2302704
Really happy with mine so far after the first game on it, as were my players.
Finally got it set up today (forgot to take pictures, I'm such a dummy) and it is a great table! Armrests are very comfortable, dealt nicely, barely have to reach for anything from the middle of the table dealer seat. Can't wait to show it off to the players I'm hosting in a couple of weeks!
Tony_MMicro-Stakes Grinder17 posts
Posted Nov 7, 2023, 7:41 PM#981
I picked up a 2nd table, and the new one from Walmart is on the left. I have the original? Order of topper and can confirm the new table is just a little bigger..if I measured right the new table is 32x74 surface. Does that sound right to others with new table
Can confirm, my new table (brown felt) inner dimensions were exactly that.
jpoppaaaMicro-Stakes Grinder21 posts
Posted Nov 9, 2023, 12:35 AM#982
First section of the rail is done with burgundy marine vinyl. What do y’all think?
Brass cup holders are on order.

NotRealNameNoSirRegular73 posts
Posted Nov 9, 2023, 12:40 AM#983
First section of the rail is done with burgundy marine vinyl. What do y’all think?
Brass cup holders are on order. View attachment 1221941 (https://www.pokerchipforum.com/attachments/1221941/)
WOW fantastic job. Love that red!
NotRealNameNoSirRegular73 posts
Posted Nov 9, 2023, 12:41 AM#984
that would still be an insane deal if anyone managed to scoop that up
Lol, we flooded it. Sold out very quickly.
rjdev7Regular40 posts
Posted Nov 9, 2023, 12:46 AM#985
First section of the rail is done with burgundy marine vinyl. What do y’all think?
Brass cup holders are on order. View attachment 1221941 (https://www.pokerchipforum.com/attachments/1221941/)
I’m kind of into this red and black mixed table look
Tony_MMicro-Stakes Grinder17 posts
jpoppaaaMicro-Stakes Grinder21 posts
Posted Nov 9, 2023, 1:02 AM#987
I’m kind of into this red and black mixed table look
I was thinking of alternating red/black. But decided on all red. Burgundy from Joann to be exact lol
ngmcs8203Regular49 posts
Posted Nov 9, 2023, 1:04 AM#988
First section of the rail is done with burgundy marine vinyl. What do y’all think?
Brass cup holders are on order. View attachment 1221941 (https://www.pokerchipforum.com/attachments/1221941/)
Are you using a guide to help you? I’m thinking about it replacing the pleather and padding on my octagon and then my Barrington.
jpoppaaaMicro-Stakes Grinder21 posts
Posted Nov 9, 2023, 1:20 AM#989
Are you using a guide to help you? I’m thinking about it replacing the pleather and padding on my octagon and then my Barrington.
Not really. Honestly I took the old rails and covered right over them. I’ve been lurking on these threads long enough to have a small amount of information which was enough. Supposedly the marine vinyl is hard to work with but wasn’t too bad. Take your time, use a lot of staples and hope you have good grip strength.
NymorMicro-Stakes Grinder18 posts
Posted Nov 9, 2023, 9:52 AM#990
First section of the rail is done with burgundy marine vinyl. What do y’all think?
Brass cup holders are on order. View attachment 1221941 (https://www.pokerchipforum.com/attachments/1221941/)
Very nice - good job :cool
I was thinking of alternating red/black. But decided on all red. Burgundy from Joann to be exact lol
You don't know what you're missing :D
Maroon but close enough.

(not a Barrington but ...)
jpoppaaaMicro-Stakes Grinder21 posts
Posted Nov 9, 2023, 1:12 PM#991
Very nice - good job :cool
You don't know what you're missing :D
Maroon but close enough.
(not a Barrington but ...)
Maybe I need to rethink the color scheme! That looks real good.
SalmonblasterMicro-Stakes Grinder11 posts
Posted Nov 9, 2023, 7:32 PM#992
If it's been asked earlier in the thread I apologize, but for the ESPN style tables with the led lights, how easy of a project is it to swap the blue led lights that come with the table to a multicolor set from Amazon (https://www.amazon.com/?tag=amznpcfx-20)? How would you install the new ones? Any help and guidance is always appreciated.
warewulfMicro-Stakes Grinder13 posts
Posted Nov 9, 2023, 10:41 PM#993
If it's been asked earlier in the thread I apologize, but for the ESPN style tables with the led lights, how easy of a project is it to swap the blue led lights that come with the table to a multicolor set from Amazon? How would you install the new ones? Any help and guidance is always appreciated.
Probably about the same amount of work as buying a table without lights and just adding them.
jpoppaaaMicro-Stakes Grinder21 posts
Posted Nov 9, 2023, 11:04 PM#994
More progress tonight! Cupholders will be here tomorrow and I need some more vinyl to finish before hosting tomorrow night.
DrumstricksNewbie1 posts
Posted Nov 11, 2023, 2:46 AM#995
I changed out the cupholders, the new ones are 3.5" wide, and fit full sized yetis (see picture). I drilled a pilot hole for the hole saw arbor by measuring the middle of the old cup holder holes, and then drilled with a harbor freight hole saw from underneath so that I wouldn't mess up the padding/cloth on top. It was really straight forward. I sanded the holes after they were cut until the cupholders fit perfectly! haven't even glued them in and I'm not sure that I need to. I did have to cut the leg frame for the 4 cupholders nearest to them.
ngmcs8203Regular49 posts
Posted Nov 11, 2023, 3:11 AM#996
If it's been asked earlier in the thread I apologize, but for the ESPN style tables with the led lights, how easy of a project is it to swap the blue led lights that come with the table to a multicolor set from Amazon? How would you install the new ones? Any help and guidance is always appreciated.
I need to do it. I think someone else on here made a post about the process. If I remember correctly you just have to take the rail off and there isn’t much afterward but when you do you have to be careful to not tear the felt, unless you are replacing.
I think I’m just going to replace my felt even though I have a topper. I like the diffuser that I’ve seen on some tables that chanman made for some of his builds.
jpoppaaaMicro-Stakes Grinder21 posts
Posted Nov 11, 2023, 1:46 PM#997
Done! For now. New Barrington in the background will get emerald green ssc and brown leather rail.


gkar197Micro-Stakes Grinder10 posts
Posted Nov 13, 2023, 11:07 PM#998
Just upgraded a Barrington for a buddy. He saw mine and wanted his to get the same treatment. Also got a custom table topper for him as a gift because he deals Black Jack after tourneys sometimes.
jpoppaaaMicro-Stakes Grinder21 posts
Posted Nov 13, 2023, 11:45 PM#999
Just upgraded a Barrington for a buddy. He saw mine and wanted his to get the same treatment. Also got a custom table topper for him as a gift because he deals Black Jack after tourneys sometimes.
Nice! Is that new vinyl on the rail? I just did mine and the red with brass looks classy. Nice job!
gkar197Micro-Stakes Grinder10 posts
Posted Nov 14, 2023, 12:30 AM#1000
Nice! Is that new vinyl on the rail? I just did mine and the red with brass looks classy. Nice job!
Yup new whisper vinyl from Joann.
esapigaoMicro-Stakes Grinder5 posts
Posted Nov 16, 2023, 10:32 PM#1001
malovizMicro-Stakes Grinder7 posts
esapigaoMicro-Stakes Grinder5 posts
gkar197Micro-Stakes Grinder10 posts
Posted Nov 17, 2023, 8:59 PM#1004
jpoppaaaMicro-Stakes Grinder21 posts
Posted Nov 17, 2023, 10:13 PM#1005
What cupholders are those? Brybelly small ?
@gkar197 (https://www.pokerchipforum.com/members/15953/) . Same question to you.
Which ones do you guys prefer
These are brass from Texas poker supply. Fit cans bottles and solo cups. Most ppl at my game drink cans or bottles which these are best for
warewulfMicro-Stakes Grinder13 posts
Posted Nov 22, 2023, 5:11 PM#1006
malovizMicro-Stakes Grinder7 posts
Posted Nov 22, 2023, 5:19 PM#1007
springboxMicro-Stakes Grinder10 posts
Posted Nov 22, 2023, 6:16 PM#1008
Looks like the old model which I think has different cup holders and leather. Still a good deal though
Just ordered one of these a few weeks ago (at $230, damnit) and I believe it has the new rail. See pic below.
I picked up a 2nd table, and the new one from Walmart is on the left. I have the original? Order of topper and can confirm the new table is just a little bigger..if I measured right the new table is 32x74 surface. Does that sound right to others with new table?
View attachment 1219065 (https://www.pokerchipforum.com/attachments/1219065/)
malovizMicro-Stakes Grinder7 posts
Posted Nov 22, 2023, 6:20 PM#1009
Just ordered one of these a few weeks ago (at $230, damnit) and I believe it has the new rail. See pic below.
Gotcha. Maybe just an outdated photo then.
BugeRegular53 posts
Posted Nov 22, 2023, 7:59 PM#1010
Most likely just using the older photo
esapigaoMicro-Stakes Grinder5 posts
Posted Nov 23, 2023, 1:21 PM#1011
Just upgraded a Barrington for a buddy. He saw mine and wanted his to get the same treatment. Also got a custom table topper for him as a gift because he deals Black Jack after tourneys sometimes.
Beautiful upgrades. Just gave me some inspiration to upgrade mine.
esapigaoMicro-Stakes Grinder5 posts
jpoppaaaMicro-Stakes Grinder21 posts
Posted Nov 23, 2023, 2:20 PM#1013
Did you put foam under the speed cloth?
Used the foam that was there. It’s fine for now. In the future I’d swap it out.
esapigaoMicro-Stakes Grinder5 posts
Posted Nov 23, 2023, 2:21 PM#1014
Used the foam that was there. It’s fine for now. In the future I’d swap it out.
Thanks for the tip. I may replace the foam while I’m replacing the cloth.
jamesjkimRegular42 posts
Posted Nov 23, 2023, 3:24 PM#1015
Thanks for the tip. I may replace the foam while I’m replacing the cloth.
I just put new cloth on top of the existing one. Didn’t think it was necessary to replace anything and still feels great.
NotRealNameNoSirRegular73 posts
dmoneyRegular32 posts
Posted Nov 28, 2023, 3:16 AM#1017
These hold a normal rocks glass fine?
Yep
malovizMicro-Stakes Grinder7 posts
doublebooyah85Regular87 posts
Posted Nov 28, 2023, 2:44 PM#1019
I can confirm that @rjdev7 (https://www.pokerchipforum.com/members/1014/) toppers don't fit the new version of the table perfectly. I have the same ring around the entire table. It doesn't really make a difference in play but it is slightly annoying to see.
Ahh bummer! Haven’t tried mine. Easy fix. Glad you brought it to their attention!
These toppers making dealing so much easier!
Didn’t someone just share a link to buy the bags for carrying the toppers? Need to pull the trigger on those.
malovizMicro-Stakes Grinder7 posts
Posted Nov 28, 2023, 2:46 PM#1020
Didn’t someone just share a link to buy the bags for carrying the toppers? Need to pull the trigger on those.
Oh really? I might need to grab one of those. I've been using the box it was shipped in for months lol
rjdev7Regular40 posts
Posted Nov 28, 2023, 2:48 PM#1021
I can confirm that @rjdev7 (https://www.pokerchipforum.com/members/1014/) toppers don't fit the new version of the table perfectly. I have the same ring around the entire table. It doesn't really make a difference in play but it is slightly annoying to see.
I don't think this is a fair statement to make as all of my toppers are made custom to your order specifications. If the new tables are slightly different in size, any new order will fit them just like the older Barrington tables.
If you're saying that an order you placed for the older style no longer fits the newer Barrington tables, then that's probably true if the dimensions of the tables changed with the new model.
In general, I tell everyone, measure your table before placing an order. Some folks are ok risking it and using "standard" 73.5 x 31.5" dimensions but the new line of Barringtons makes this even more important now.
malovizMicro-Stakes Grinder7 posts
Posted Nov 28, 2023, 2:51 PM#1022
I don't think this is a fair statement to make as all of my toppers are made custom to your order specifications. If the new tables are slightly different in size, any new order will fit them just like the older Barrington tables.
If you're saying that an order you placed for the older style no longer fits the newer Barrington tables, then that's probably true if the dimensions of the tables changed with the new model.
In general, I tell everyone, measure your table before placing an order. Some folks are ok risking it and using "standard" 73.5 x 31.5" dimensions but the new line of Barringtons makes this even more important now.
You're right. I apologize. I didn't mean to bash your product, I love my topper and use it every game. But it is important to know that the "standard" 73.5 x 31.5" toppers that people already own may not fit perfectly on a new table.
It is 100% my fault for not double checking my own measurements though.
malovizMicro-Stakes Grinder7 posts
ngmcs8203Regular49 posts
rjbf65Micro-Stakes Grinder13 posts
Posted Dec 7, 2023, 9:28 PM#1025
warewulfMicro-Stakes Grinder13 posts
Posted Dec 7, 2023, 9:31 PM#1026
rjdev7Regular40 posts
Posted Dec 7, 2023, 9:34 PM#1027
warewulfMicro-Stakes Grinder13 posts
Posted Dec 7, 2023, 9:37 PM#1028
Such a good deal.
Yeah, crazy good prices. I had planned to wait a few months, but couldn't resist for $150.
Tony_MMicro-Stakes Grinder17 posts
Posted Dec 7, 2023, 9:49 PM#1029
And here I thought I had a good deal when I got mine at $229.... those bast*rds! :mad::mad::mad: If only I had room for a second table. LOL
Anyone who was on the fence at getting one of these better scoop it up now!
ngmcs8203Regular49 posts
Posted Dec 7, 2023, 10:03 PM#1030
And here I thought I had a good deal when I got mine at $229.... those bast*rds! :mad::mad::mad: If only I had room for a second table. LOL
Anyone who was on the fence at getting one of these better scoop it up now!
I am thinking about picking one up just because and I got my ESPN for $150!
djfayzeMicro-Stakes Grinder23 posts
Posted Dec 7, 2023, 10:45 PM#1031
Whelp I didn’t plan on buying a new Barrington today but here we are. Snagged the LED version to replace my OG one that I’ve had for 3 years and is starting to show its age from being set up and taken down 100 times. Stoked to hear there is a near armrest material. I could look back through this thread but does anyone know the easiest solution to diffusing the LEDs?
MrRossKeysMicro-Stakes Grinder7 posts
Posted Dec 7, 2023, 10:59 PM#1032
And here I thought I had a good deal when I got mine at $229.... those bast*rds! :mad::mad::mad: If only I had room for a second table. LOL
Anyone who was on the fence at getting one of these better scoop it up now!
Me too! I just bought mine for $199 like 2 weeks ago. HAHA they played us.
ngmcs8203Regular49 posts
Rooster410Micro-Stakes Grinder12 posts
Posted Dec 8, 2023, 2:16 AM#1034
Nothing will ever beat the $85 sale on Wayfair that we wiped out in a matter of minutes. That was legendary :)

MrRossKeysMicro-Stakes Grinder7 posts
Posted Dec 8, 2023, 2:19 AM#1035
Nothing will ever beat the $85 sale on Wayfair that we wiped out in a matter or minutes. That was legendary :)
View attachment 1236345 (https://www.pokerchipforum.com/attachments/1236345/)
I'm still pissed at myself for this. I was one of the first to see it, put it in my cart, and ..... instead of pulling the trigger, I walked away from the computer to find my phone so I could text a buddy and convince him to buy one too. 7 minutes later they were sold out and I missed out. Even my wife was upset I didn't instantly pull the trigger.
FlopalopagusMicro-Stakes Grinder12 posts
Posted Dec 9, 2023, 7:19 PM#1036
What’s the real difference between the Barrington poker tables: brown felt, blue felt, green felt?
FlopalopagusMicro-Stakes Grinder12 posts
Posted Dec 9, 2023, 7:20 PM#1037
What’s the real difference between the Barrington poker tables: brown felt, blue felt, green felt?
i should have said meaningful difference…
warewulfMicro-Stakes Grinder13 posts
Posted Dec 10, 2023, 2:27 AM#1038
What’s the real difference between the Barrington poker tables: brown felt, blue felt, green felt?
The black felt is on the slightly more expensive table that has lights. It's also a little larger and thicker legs, 100lbs.
I believe the brown and blue are the same, a little smaller and lighter than the black, 80lbs.
I'm not familiar with a green one. Just look at the weight. If it's 80lbs or 100.
I went with the brown because it will be a second table and I wanted it to be smaller and lighter. If it was going to be my only table, I probably would've gotten the black. I would prefer the blue felt, but that one isn't on sale.
FlopalopagusMicro-Stakes Grinder12 posts
Posted Dec 10, 2023, 2:31 AM#1039
Correct. I was just trying to figure if there was a significant difference. The spec are a touch different and I think the quality of the felt, but I’m trying to figure out why the $150 or more difference between the “low end” and the “high end” (premium)
MrBooshRegular32 posts
Posted Dec 10, 2023, 3:22 AM#1040
Correct. I was just trying to figure if there was a significant difference. The spec are a touch different and I think the quality of the felt, but I’m trying to figure out why the $150 or more difference between the “low end” and the “high end” (premium)
Post in thread 'PSA: Barrington table $149 at Walmart ($169 if you want the lighted version)' https://www.pokerchipforum.com/thre...-want-the-lighted-version.113075/post-2330326 (https://www.pokerchipforum.com/threads/psa-barrington-table-149-at-walmart-169-if-you-want-the-lighted-version.113075/post-2330326)
Here is a review of a new LED Barrington table that I just received today. The ESPN and the new Barrington LED are just a touch larger on the playing surface and the width when folded closed. I think it is because there is slightly more height to the rail due to the LED's. The cup holders on the new LED tables are a nice improvement to be just a bit deeper. The legs are a bit sturdier and thicker on the new LED table. Those are really the only differences from the classic table. And the 20 lbs of weight difference. The general quality of the newer tables are much better than the older style of Barringtons. New matte finish rail and better padding and more secure felt. The felt and padding on the old tables just didn't feel as tight. The new ones have a slight feeling more like a memory foam padding compared to a cheap thin piece of foam under the old ones.
I personally prefer the minor upgrades on the new black felt LED tables.
FlopalopagusMicro-Stakes Grinder12 posts
Posted Dec 11, 2023, 2:01 AM#1041
Mine is the mail and should be here tomorrow. :)
ColquhounRegular82 posts
Posted Dec 11, 2023, 3:13 AM#1042
Post in thread 'PSA: Barrington table $149 at Walmart ($169 if you want the lighted version)' https://www.pokerchipforum.com/thre...-want-the-lighted-version.113075/post-2330326 (https://www.pokerchipforum.com/threads/psa-barrington-table-149-at-walmart-169-if-you-want-the-lighted-version.113075/post-2330326)
Here is a review of a new LED Barrington table that I just received today. The ESPN and the new Barrington LED are just a touch larger on the playing surface and the width when folded closed. I think it is because there is slightly more height to the rail due to the LED's. The cup holders on the new LED tables are a nice improvement to be just a bit deeper. The legs are a bit sturdier and thicker on the new LED table. Those are really the only differences from the classic table. And the 20 lbs of weight difference. The general quality of the newer tables are much better than the older style of Barringtons. New matte finish rail and better padding and more secure felt. The felt and padding on the old tables just didn't feel as tight. The new ones have a slight feeling more like a memory foam padding compared to a cheap thin piece of foam under the old ones.
I personally prefer the minor upgrades on the new black felt LED tables.
The LED one boasts a 5/8” thick deck, but the classic one makes no claim about thickness. Could the 20lb. difference also be a thicker deck?
warewulfMicro-Stakes Grinder13 posts
Posted Dec 11, 2023, 3:52 AM#1043
The LED one boasts a 5/8” thick deck, but the classic one makes no claim about thickness. Could the 20lb. difference also be a thicker deck?
I believe someone said earlier that the LED table is MDF and the classic is plywood. So that's probably most of the 20lbs. The thicker legs are going to weigh a bit more as well.
I ended up ordering the LED table tonight figuring I like everything about it other than it's heavier. So going to return the classic.
ngmcs8203Regular49 posts
Posted Dec 11, 2023, 3:55 AM#1044
Just get the bag and install some handles and it should be fine. Without those two, it is such a PITA to move and put away.
warewulfMicro-Stakes Grinder13 posts
Posted Dec 11, 2023, 3:57 AM#1045
Just get the bag and install some handles and it should be fine. Without those two, it is such a PITA to move and put away.
Getting the bag for Christmas. Keep it clean in the garage.
ngmcs8203Regular49 posts
Posted Dec 11, 2023, 3:58 AM#1046
Getting the bag for Christmas. Keep it clean in the garage.
Nice. Doing the guitar amp handle modification helps as well. My fingers are less likely to get smushed with the handles installed.
MrRossKeysMicro-Stakes Grinder7 posts
Posted Dec 11, 2023, 4:50 AM#1047
Nice. Doing the guitar amp handle modification helps as well. My fingers are less likely to get smushed with the handles installed.
What is this sorcery?
Seriously, what is the guitar amp handle modification?
MrBooshRegular32 posts
Posted Dec 11, 2023, 4:51 AM#1048
The LED one boasts a 5/8” thick deck, but the classic one makes no claim about thickness. Could the 20lb. difference also be a thicker deck?
It looks like there is a decent amount of extra wood compared to an older classic Barrington.


ngmcs8203Regular49 posts
Posted Dec 11, 2023, 4:53 AM#1049
RedDirtBoNewbie1 posts
Posted Dec 11, 2023, 12:57 PM#1050
This is from Walmart.com, on the LED table page. The turn and river triggered me. I know the people that take these photos usually don't know anything about the subject of the picture they are taking, but still.

ColquhounRegular82 posts
Posted Dec 11, 2023, 1:09 PM#1051
This is from Walmart.com, on the LED table page. The turn and river triggered me. I know the people that take these photos usually don't know anything about the subject of the picture they are taking, but still.
View attachment 1238361 (https://www.pokerchipforum.com/attachments/1238361/)
You don’t deal out all the streets face down, then flip them over when you need to? :ROFL: :ROFLMAO:
NVFlipNewbie2 posts
Posted Dec 11, 2023, 2:27 PM#1052
This is from Walmart.com, on the LED table page. The turn and river triggered me. I know the people that take these photos usually don't know anything about the subject of the picture they are taking, but still.
View attachment 1238361 (https://www.pokerchipforum.com/attachments/1238361/)
As a former dealer, that stub still triggers me and I haven't dealt in over 13 years. lol And where's the cut card. "FLOOOOOR!!!"
ColquhounRegular82 posts
Posted Dec 11, 2023, 3:55 PM#1053
As a former dealer, that stub still triggers me and I haven't dealt in over 13 years. lol And where's the cut card. "FLOOOOOR!!!"
Yeah, but dont you fan out the stub once all streets have been dealt? :ROFL: :ROFLMAO:
rjdev7Regular40 posts
Posted Dec 11, 2023, 4:23 PM#1054
I fully endorse Barrington continuing to make their stock felts like this. The tackier the better! :ROFL: :ROFLMAO:
ColquhounRegular82 posts
Posted Dec 11, 2023, 4:27 PM#1055
Just got the LED version from then Walmart sale. I learned how thin the vinyl is…
After removing the plastic cover, I set it on the floor standing up, with the flat, folded edge on the floor. In this position, the corners of the rail are the first contact with the floor.
I moved it slightly, on a berber carpet without lifting it entirely off the floor. Bad idea, rug burn:

It’s mostly hidden when the table is open, but this is a good argument for the table bag, even for storage.
ngmcs8203Regular49 posts
Posted Dec 11, 2023, 4:28 PM#1056
Yeah, but dont you fan out the stub once all streets have been dealt? :ROFL: :ROFLMAO:
You don’t? I thought we were supposed to do that to make sure there are still 52 in the deck.
jamesjkimRegular42 posts
Posted Dec 11, 2023, 4:29 PM#1057
Just got the LED version from then Walmart sale. I learned how thin the vinyl is…
After removing the plastic cover, I set it on the floor standing up, with the flat, folded edge on the floor. In this position, the corners of the rail are the first contact with the floor.
I moved it slightly, on a berber carpet without lifting it entirely off the floor. Bad idea, rug burn:
View attachment 1238434 (https://www.pokerchipforum.com/attachments/1238434/)
It’s mostly hidden when the table is open, but this is a good argument for the table bag, even for storage.
Sharpies are your friends
djfayzeMicro-Stakes Grinder23 posts
Posted Dec 11, 2023, 5:40 PM#1058
Definitely an upgrade over my 3-year old classic Barrington!

ngmcs8203Regular49 posts
djfayzeMicro-Stakes Grinder23 posts
Posted Dec 11, 2023, 7:32 PM#1060
Did you replace the cup holders?
Nope, those are what come with it! That’s fresh out of the box.
ColquhounRegular82 posts
Posted Dec 11, 2023, 7:40 PM#1061
Nope, those are what come with it! That’s fresh out of the box.
Yeah it looks like the LED version, since it’s a little taller with the LEDs, can accommodate a little taller cup holder, so that’s what they put in. It’s not much, but it’s better than nothing!
ngmcs8203Regular49 posts
Posted Dec 11, 2023, 7:40 PM#1062
Nope, those are what come with it! That’s fresh out of the box.
How deep are the new cup holders?
ColquhounRegular82 posts
Posted Dec 11, 2023, 7:44 PM#1063
How deep are the new cup holders?
1 3/16” to 1 1/4”…ish

ngmcs8203Regular49 posts
ColquhounRegular82 posts
Posted Dec 11, 2023, 7:51 PM#1065
Ah so still gotta replace them if you want to try and prevent spills.
Yeah, it sure looks that way. I’m surprised they don’t make holes in the bottom deck like the mods that members here have done, and put in proper holders. It’s really not that much more work.
And clearly they understand how shallow the original ones are, or they wouldn’t have gone through the trouble of making new ones specific to the LED and ESPN tables.
ngmcs8203Regular49 posts
Posted Dec 11, 2023, 8:18 PM#1066
Yeah it sure
Yeah, it sure looks that way. I’m surprised they don’t make holes in the bottom deck like the mods that members here have done, and put in proper holders. It’s really not that much more work.
And clearly they understand how shallow the original ones are, or they wouldn’t have gone through the trouble of making new ones specific to the LED and ESPN tables.
I just assume they see a shallow cup holder glued to the wood as more important than a useful cupholder that is deep enough to hold normal beverages.
jamesjkimRegular42 posts
Posted Dec 11, 2023, 8:20 PM#1067
If I could go back, I would get the jumbo cup holders from the get go. It’s slightly tilting that I can’t put my phone in it. :cautious:
ngmcs8203Regular49 posts
Posted Dec 11, 2023, 8:22 PM#1068
If I could go back, I would get the jumbo cup holders from the get go. It’s slightly tilting that I can’t put my phone in it. :cautious:
Yea, same. I think my fear with the jumbos is having to do the extra cutting and getting it perfect center. Other than that, yea, jumbos all the way.
Schmendr1ckRegular99 posts
Posted Dec 11, 2023, 11:16 PM#1069
I decided to return the two I bought and purchase the LED version instead.
I don't actually care about the LEDs, but getting sturdier plywood and legs is worth the extra $20.
pmcdaniel15Newbie1 posts
Posted Dec 12, 2023, 12:18 PM#1070
Just bought the LED version. Are the cup holders really that bad? We use a 20 year old foldable table at the moment that just has a little cut out for cups. Even with that we haven't had an issue and this seems like a massive upgrade.
BLK21JKMicro-Stakes Grinder6 posts
Posted Dec 12, 2023, 4:18 PM#1071
Just bought the LED version. Are the cup holders really that bad? We use a 20 year old foldable table at the moment that just has a little cut out for cups. Even with that we haven't had an issue and this seems like a massive upgrade.
They're fine for cans but just "OK" for bottles (kinda shallow.) Rocks glasses, hydroflasks and 40's aren't going to fly, though, because of the diameter.
I've found that most players will sit dead-center behind their cupholder even on a less-than-full table, so inevitably drinks get smacked every couple of orbits on a shuffle or an overly-excited shove. No spills yet, but I'll probably end up replacing mine soon just for the extra depth.
ngmcs8203Regular49 posts
Posted Dec 12, 2023, 4:30 PM#1072
Just bought the LED version. Are the cup holders really that bad? We use a 20 year old foldable table at the moment that just has a little cut out for cups. Even with that we haven't had an issue and this seems like a massive upgrade.
I knock over my chip stacks multiple times during a self dealt game and usually brush my pint at least once with my hand when it is in the holder in front of me. If I didn’t put the deeper cup holders in, I’d spill a beer at least once a night.
MrRossKeysMicro-Stakes Grinder7 posts
Posted Dec 12, 2023, 4:59 PM#1073
They're fine for cans but just "OK" for bottles (kinda shallow.) Rocks glasses, hydroflasks and 40's aren't going to fly, though, because of the diameter.
I've found that most players will sit dead-center behind their cupholder even on a less-than-full table, so inevitably drinks get smacked every couple of orbits on a shuffle or an overly-excited shove. No spills yet, but I'll probably end up replacing mine soon just for the extra depth.
I try hard to get players to sit between the cup holders. I personally hate sitting behind a cup holder, but I think that’s what everyone is used to.
warewulfMicro-Stakes Grinder13 posts
Posted Dec 12, 2023, 5:19 PM#1074
I try hard to get players to sit between the cup holders. I personally hate sitting behind a cup holder, but I think that’s what everyone is used to.
The problem is that people end up trying to take up more room than they're supposed to, and other players are cramped. If it's a full table and I see that happening, I will tell people they should have the cup holder centered in front of them.
AKA: Move over dumbass!
NymorMicro-Stakes Grinder18 posts
Posted Dec 12, 2023, 6:46 PM#1075
The problem is that people end up trying to take up more room than they're supposed to, and other players are cramped.
There are a few things that can wind me up when playing poker and that is pretty much the top of my list. I hate being squashed and it was one of the most important considerations when building my table.

No space hogging at my (8 max) game :p
MrRossKeysMicro-Stakes Grinder7 posts
Posted Dec 12, 2023, 9:01 PM#1076
The problem is that people end up trying to take up more room than they're supposed to, and other players are cramped. If it's a full table and I see that happening, I will tell people they should have the cup holder centered in front of them.
AKA: Move over dumbass!
Well........................
Theoretically, if 10 players set directly between the cup holders they take up the exact same amount of space as if they sat in front of the cup holder.
I used to enforce this at my game, but it's definitely harder to enforce/explain than just telling people to sit in front of their cup holder.
Schmendr1ckRegular99 posts
Posted Dec 13, 2023, 3:08 AM#1077
LED tables arrived today and I opened one.
It is noticeably heavier and sturdier then the base model. I'm very glad I returned the others and got these instead.

Nickpom34Newbie1 posts
Posted Dec 14, 2023, 1:05 AM#1078
Just picked one of these up because Walmart was selling them for crazy cheap. Not a bad table.
Taking it upstairs by myself was fun considering the table weighs almost as much as me haha
MouseBatNewbie1 posts
Posted Dec 14, 2023, 10:50 PM#1079
LED tables arrived today and I opened one.
It is noticeably heavier and sturdier then the base model. I'm very glad I returned the others and got these instead.
Nice! May I ask how are the LED lights powered? Is there a battery pack or does it plug in? I'd like to get one but would prefer not having a wire.
ColquhounRegular82 posts
ngmcs8203Regular49 posts
Posted Dec 15, 2023, 3:17 AM#1081
Schmendr1ckRegular99 posts
Posted Dec 15, 2023, 10:37 PM#1082
What they said.
The adapter that comes with it has a very short cord, so a battery pack is the only really practical option.
But I bought it for the bump in build quality, so I probably won't use the lights often if at all.
bigdaddyNewbie2 posts
Posted Dec 17, 2023, 9:57 AM#1083
I just bought an old style one - looking at toppers now, very exciting.
Lord_FoldemortMicro-Stakes Grinder6 posts
aurumityMicro-Stakes Grinder9 posts
Posted Dec 17, 2023, 5:16 PM#1085
Just sold my original blue felt table to my friend. Used that to buy the $160 LED Barrington table. Thanks for putting me on that
NopalCoastalMicro-Stakes Grinder10 posts
Posted Dec 18, 2023, 1:58 AM#1086
Hello, I am considering replacing the cupholders on my barrington. Were you able to drill holes for the spots in the corners? I notice that it runs very close to the bar on the underside. Did you face any issues?
jamesjkimRegular42 posts
Posted Dec 18, 2023, 2:22 AM#1087
Hello, I am considering replacing the cupholders on my barrington. Were you able to drill holes for the spots in the corners? I notice that it runs very close to the bar on the underside. Did you face any issues?
New version with same size cup holders, no issue.
New version with jumbo cup holders, you’ll need to measure as I imagine it’ll be very close.
Old version with any, you need to cut the pipe down.
NopalCoastalMicro-Stakes Grinder10 posts
Posted Dec 18, 2023, 2:40 AM#1088
New version with same size cup holders, no issue.
New version with jumbo cup holders, you’ll need to measure as I imagine it’ll be very close.
Old version with any, you need to cut the pipe down.
amazing, thank you. I read a concern someone on this thread had about the cupholder possibly falling through the bottom. Do you know how likely this is to happen? Do I need to make a cradle like someone else did?
jamesjkimRegular42 posts
Posted Dec 18, 2023, 2:42 AM#1089
amazing, thank you. I read a concern someone on this thread had about the cupholder possibly falling through the bottom. Do you know how likely this is to happen? Do I need to make a cradle like someone else did?
Wrap the bottom of the cup holder with masking/painters tape. I did between 3 and 4 wraps depending on how loose it was. It provides enough thickness that the cup holder is semi-permanent without the chance of falling out.
NopalCoastalMicro-Stakes Grinder10 posts
Posted Dec 18, 2023, 2:43 AM#1090
Wrap the bottom of the cup holder with masking/painters tape. I did between 3 and 4 wraps depending on how loose it was. It provides enough thickness that the cup holder is semi-permanent without the chance of falling out.
Awesome. Will provide updates on how it goes.
NopalCoastalMicro-Stakes Grinder10 posts
Posted Dec 18, 2023, 3:22 AM#1091
Anyone have any hole saw recommendations? I read about people having bought ones that arent so good. Im looking to install regular sized cupholders
Lord_FoldemortMicro-Stakes Grinder6 posts
Posted Dec 18, 2023, 4:23 AM#1092
Hello, I am considering replacing the cupholders on my barrington. Were you able to drill holes for the spots in the corners? I notice that it runs very close to the bar on the underside. Did you face any issues?
Yeah so I didn't end up needing to cut the bar when replacing with the jumbo cupholders (But I think that was more dumb luck than good planning). However, there was more than enough space on the bars outside of the where its fastened to cut off with a hacksaw if necessary. Additionally, you will also need a special bit for your drill in in order to use whatever hole saw you get.
IamtheLoraxNewbie2 posts
Posted Dec 18, 2023, 4:36 AM#1093
I ordered a regular one, it came in and sat in a box and I read some of these replies about the LED ones being sturdier, so I ordered it. Walmart took back the first one when I hauled it in to customer service. The LED ones are much heavier, which probably means sturdier.
NopalCoastalMicro-Stakes Grinder10 posts
Posted Dec 18, 2023, 4:44 AM#1094
I ordered a regular one, it came in and sat in a box and I read some of these replies about the LED ones being sturdier, so I ordered it. Walmart took back the first one when I hauled it in to customer service. The LED ones are much heavier, which probably means sturdier.
I dont really associate heavy with sturdy. Idk, the regular feels pretty study to me. I do think however the thinkness might help with how loud the table can be when someone bangs on it
NopalCoastalMicro-Stakes Grinder10 posts
shocksimNewbie1 posts
Posted Dec 22, 2023, 9:16 AM#1096
I just bought an old style one - looking at toppers now, very exciting.
Same! I just picked up an LED table. Also looking at those toppers and cup holders. So stoked that this'll make my home game even better.
Hopefully I wont run into any issues with the feet hitting the larger cup holders and it'll keep the foldability.
chipinlaRegular37 posts
Posted Dec 22, 2023, 7:09 PM#1097
I joined the $169 Walmart special crowd. Can’t beat the price. Free shipping. $180.83 with tax, 48 hours from order to delivery. Kind of insane actually.
The lights are super bright so I have a dimmer on the way as well.


aurumityMicro-Stakes Grinder9 posts
Posted Dec 23, 2023, 2:44 AM#1098
I joined the $169 Walmart special crowd. Can’t beat the price. Free shipping. $180.83 with tax, 48 hours from order to delivery. Kind of insane actually.
The lights are super bright so I have a dimmer on the way as well.
View attachment 1243972 (https://www.pokerchipforum.com/attachments/1243972/)View attachment 1243973 (https://www.pokerchipforum.com/attachments/1243973/)
Have you found the lights to be too bright when looking at your cards as well? I got the table a week ago and had it shipped to a friends house so I havent been able to test it yet.
NopalCoastalMicro-Stakes Grinder10 posts
Posted Dec 23, 2023, 4:42 PM#1099
After reading through almost every page of this thread, I am glad to say I successfully have upgraded my game. I sold my old Barrington and hopped on that sale. With the money I made from the sale of the old Barrington I bought the cup holders recommended on here. I bought the hole saw from Home Depot and returned it right after saving me $45. I couldn’t have done it without the help of everyone on here. Special thanks to @shleepytime (https://www.pokerchipforum.com/members/579/) who was a more than useful resource.
greedyinternRegular46 posts
Posted Jan 3, 2024, 1:34 AM#1100
I'm in the middle of upgrading cup holders. I got one done but what'd you guys do on the ends with the buckle strap?? I feel like once I drill through the wood it's barely going to be hanging on.

jamesjkimRegular42 posts
Posted Jan 3, 2024, 1:43 AM#1101
I'm in the middle of upgrading cup holders. I got one done but what'd you guys do on the ends with the buckle strap?? I feel like once I drill through the wood it's barely going to be hanging on.
View attachment 1249200 (https://www.pokerchipforum.com/attachments/1249200/)
I cut the hole straight through it then added staples to what was left under the rail (while I was adding new felt). Haven’t had any issues.
PreditorMicro-Stakes Grinder13 posts
Posted Jan 3, 2024, 2:01 AM#1102
With all of this cupholder talk, I wish Barrington just made a version sans any cupholders, and we get people to use drink carts instead.
greedyinternRegular46 posts
Posted Jan 3, 2024, 2:41 AM#1103
I cut the hole straight through it then added staples to what was left under the rail (while I was adding new felt). Haven’t had any issues.
Yeah was trying to avoid taking the rail off. Was planning on just cupholders and a topper (for now). Thanks!
ColquhounRegular82 posts
Posted Jan 3, 2024, 2:54 AM#1104
That strap isn’t taking too much stress anyways, it doesn’t need major reinforcement. It’s only keeping the table from flopping open when folded.
Tony_MMicro-Stakes Grinder17 posts
Posted Jan 3, 2024, 4:05 AM#1105
I'm in the middle of upgrading cup holders. I got one done but what'd you guys do on the ends with the buckle strap?? I feel like once I drill through the wood it's barely going to be hanging on.
View attachment 1249200 (https://www.pokerchipforum.com/attachments/1249200/)
I drilled right through mine. Not an issue. No need to remove rails either. Just drill from below if going jumbo sized
greedyinternRegular46 posts
Posted Jan 3, 2024, 5:07 AM#1106
Was able to remove the strap, cut the hole and reattach it with a screw to the side. Worked out well. Thanks.

theriverMicro-Stakes Grinder7 posts
Posted Jan 7, 2024, 4:41 PM#1107
I'm in the middle of upgrading cup holders. I got one done but what'd you guys do on the ends with the buckle strap?? I feel like once I drill through the wood it's barely going to be hanging on.
View attachment 1249200 (https://www.pokerchipforum.com/attachments/1249200/)
Are the old cup holders just glued in? Do I just pry them out?
BruceWayneMicro-Stakes Grinder10 posts
Posted Jan 7, 2024, 5:08 PM#1108
Are the old cup holders just glued in? Do I just pry them out?
Yes... Heat with a hair dryer for around 30 seconds to loosen the glue, then use a screwdriver to pry out
They will come out very easy this way
theriverMicro-Stakes Grinder7 posts
BruceWayneMicro-Stakes Grinder10 posts
Nyrhockey094Newbie3 posts
Posted Jan 8, 2024, 1:47 AM#1111

Just got my Barrington LED delivered today. Didn't get the $169 special but did get $199.
Are there any cup holder upgrades that don't require sawing? This is my first real table and I am not the most handy person in the world!
BugeRegular53 posts
Posted Jan 8, 2024, 2:21 AM#1112
View attachment 1252095 (https://www.pokerchipforum.com/attachments/1252095/)
Just got my Barrington LED delivered today. Didn't get the $169 special but did get $199.
Are there any cup holder upgrades that don't require sawing? This is my first real table and I am not the most handy person in the world!
If you want deeper cup holders you will have to saw through the table unfortunately. Super easy upgrade and well worth it! Congrats on the table
Nyrhockey094Newbie3 posts
Posted Jan 8, 2024, 2:26 AM#1113
If you want deeper cup holders you will have to saw through the table unfortunately. Super easy upgrade and well worth it! Congrats on the table
Thank you. If it is that easy maybe I give it a shot!
Working on getting a custom topper for it. Any other easy improvements that I'm missing?
JAFONewbie2 posts
TX_Golf_N_PokerRegular48 posts
Posted Jan 8, 2024, 10:01 PM#1115
Just played on my barrington with the new armrest on it for the first time. It looks good in person and is super comfortable. We played & I dealt for 6 1/2 hours. I found it very comfortable the entire time. Also as a side note - we had 8 people and fit perfectly on the 84" table. I dealt the entire time and hardly had to stretch to reach chips or anything as a person who is 5'9. I am a little concerned about size when I move back home. The group that I will be playing with will be around 9 deep, but almost everyone is larger there. Not sure if the barrington will hold up then, but we'll see!
I've also been wondering about table capacity and comfort. I'm hosting my first game on my new Barrington in about two weeks. Was thinking of limiting invites to 9 or even 8 players. What do you guys think? Anybody had 9 or 10 normal sized guys on one of these tables? Was it miserable?
97destroyerNewbie4 posts
Posted Jan 8, 2024, 10:25 PM#1116
I’ve had 9 for MTT and it is a squeeze for those of us with higher BMIs. We would typically only have that many for a couple/few hours until people got knocked out. I think it helps to have chairs that slide/roll up to and away from table easily. Would I like a bigger table, sure, but we use the Barrington size all the time because it doesn’t take up a bunch of storage space. So in the end, worth it.
aurumityMicro-Stakes Grinder9 posts
Posted Jan 8, 2024, 10:33 PM#1117
I've also been wondering about table capacity and comfort. I'm hosting my first game on my new Barrington in about two weeks. Was thinking of limiting invites to 9 or even 8 players. What do you guys think? Anybody had 9 or 10 normal sized guys on one of these tables? Was it miserable?
I've hosted with 9 people since this post. My group was all military so we were all relatively skinny. It was pretty tight but manageable.
golobosMicro-Stakes Grinder12 posts
Rooster410Micro-Stakes Grinder12 posts
Posted Jan 8, 2024, 11:27 PM#1119
I’ve had 9 for MTT and it is a squeeze for those of us with higher BMIs. We would typically only have that many for a couple/few hours until people got knocked out. I think it helps to have chairs that slide/roll up to and away from table easily. Would I like a bigger table, sure, but we use the Barrington size all the time because it doesn’t take up a bunch of storage space. So in the end, worth it.
9 is absolutely doable but 8 is the best.
TonZagaRegular76 posts
Posted Jan 9, 2024, 12:17 AM#1120
I usually cap at 8 on mine (I'm playing dealer with auto shuffler on cart) but 9 is very doable.
Littleluck55Regular25 posts
Posted Jan 9, 2024, 5:57 AM#1121
I've also been wondering about table capacity and comfort. I'm hosting my first game on my new Barrington in about two weeks. Was thinking of limiting invites to 9 or even 8 players. What do you guys think? Anybody had 9 or 10 normal sized guys on one of these tables? Was it miserable?
We played 10 once and it was miserable. Most had to kind of sit sideways. We’ve played 9 and it is tight. If you aren’t fast food challenged, it’s doable. 8 is the perfect number.
Lord_FoldemortMicro-Stakes Grinder6 posts
Posted Jan 9, 2024, 2:39 PM#1122
fast food challenged
As someone who is fast food challenged, I can confirm 9/10 is tight, 8 is definitely the sweet spot. :ROFL: :ROFLMAO:
doublebooyah85Regular87 posts
Posted Jan 9, 2024, 2:57 PM#1123
I've also been wondering about table capacity and comfort. I'm hosting my first game on my new Barrington in about two weeks. Was thinking of limiting invites to 9 or even 8 players. What do you guys think? Anybody had 9 or 10 normal sized guys on one of these tables? Was it miserable?
9 is totally manageable.
We do 8 + a dealer.
Def not 10.
Rooster410Micro-Stakes Grinder12 posts
Posted Jan 9, 2024, 3:15 PM#1124
“Doable” doesn’t mean comfortable though


ColquhounRegular82 posts
Rooster410Micro-Stakes Grinder12 posts
Posted Jan 9, 2024, 3:42 PM#1126
For the authentic “playing in a submarine” vibe? :ROFL: :ROFLMAO:
Its the all in light! I like the submarine analogy more though lol "I'm going down"
JDPokerMicro-Stakes Grinder10 posts
Posted Jan 9, 2024, 6:18 PM#1127
doublebooyah85Regular87 posts
Posted Jan 9, 2024, 6:54 PM#1128
Littleluck55Regular25 posts
rrobyrrrobyNewbie2 posts
Rooster410Micro-Stakes Grinder12 posts
Posted Jan 9, 2024, 8:26 PM#1131
11 players?!? :eek:
It was awful…. Had 9 confirmed and 2 maybes who ended up showing. I gave in and let them play after they sat on the couch for 30 minutes.
Never again.
greedyinternRegular46 posts
Posted Jan 9, 2024, 9:05 PM#1132
So I finished my Barrington mods (for now) but still need to order a topper.
New LEDs, Dimmer, AA Battery Pack, and Jumbo Cupholders
COB LEDs
I wasn't the biggest fan of the blue LEDs and didn't like how they were so spaced out. I saw someone talk about the COB LEDs and how they are amost diffused already and ordered the warm white and couldn't be happier. The LEDs are very close together so you don't need to put something in front of them to diffuse them like I was trying to do with the old LEDs. Instead of ripping out the old LEDs, I actually just wedged the new LEDs right on top of the current ones. It worked out great.
I did have to cut the light strip and attach another tail end. Very easy to do but measure accurately before you cut! You don't have much leeway with the 16.4ft strip. And then used the Y connector that also came with the COB connector package.
Screwed and glued on some velcro, glued velcro to the battery pack, then buttoned up everything else. Happy with it.
COB LED Lights (https://www.amazon.com/dp/B0BVR755VK?tag=amznpcfx-20)
COB Connector Package (https://www.amazon.com/dp/B0C2CVFGL8?tag=amznpcfx-20)
Dimmer (https://www.amazon.com/weideer-Lights-Dimmer-DC12V-24V-K-018-BK/dp/B092HX9435?tag=amznpcfx-20)
Battery Pack (https://www.amazon.com/gp/product/B09131Y9L8?tag=amznpcfx-20)
Jumbo Cupholders
I went with the jumbos after reading recommendations. Pried off the old ones with a vise grip, drilled a center hole down with a standard bit, then drilled from the bottom up with the 3 5/8in hole saw starting it the pre drilled hole. I got them all done but it was a bit of a struggle with the hole saw I bought. If I would do it again, I would get one that was deeper. This one barely made it through both pieces of wood.
Jumbo Cupholders (https://www.amazon.com/gp/product/B0789HG6NW?tag=amznpcfx-20)
Hole Saw (buy a deeper one) (https://www.amazon.com/gp/product/B0C6MN14B1?tag=amznpcfx-20)

Rooster410Micro-Stakes Grinder12 posts
Posted Jan 9, 2024, 10:00 PM#1133
So I finished my Barrington mods (for now) but still need to order a topper.
New LEDs, Dimmer, AA Battery Pack, and Jumbo Cupholders
COB LEDs
I wasn't the biggest fan of the blue LEDs and didn't like how they were so spaced out. I saw someone talk about the COB LEDs and how they are amost diffused already and ordered the warm white and couldn't be happier. The LEDs are very close together so you don't need to put something in front of them to diffuse them like I was trying to do with the old LEDs. Instead of ripping out the old LEDs, I actually just wedged the new LEDs right on top of the current ones. It worked out great.
I did have to cut the light strip and attach another tail end. Very easy to do but measure accurately before you cut! You don't have much leeway with the 16.4ft strip. And then used the Y connector that also came with the COB connector package.
Screwed and glued on some velcro, glued velcro to the battery pack, then buttoned up everything else. Happy with it.
COB LED Lights (https://www.amazon.com/dp/B0BVR755VK?tag=amznpcfx-20)
COB Connector Package (https://www.amazon.com/dp/B0C2CVFGL8?tag=amznpcfx-20)
Dimmer (https://www.amazon.com/weideer-Lights-Dimmer-DC12V-24V-K-018-BK/dp/B092HX9435?tag=amznpcfx-20)
Battery Pack (https://www.amazon.com/gp/product/B09131Y9L8?tag=amznpcfx-20)
Jumbo Cupholders
I went with the jumbos after reading recommendations. Pried off the old ones with a vise grip, drilled a center hole down with a standard bit, then drilled from the bottom up with the 3 5/8in hole saw starting it the pre drilled hole. I got them all done but it was a bit of a struggle with the hole saw I bought. If I would do it again, I would get one that was deeper. This one barely made it through both pieces of wood.
Jumbo Cupholders (https://www.amazon.com/gp/product/B0789HG6NW?tag=amznpcfx-20)
Hole Saw (buy a deeper one) (https://www.amazon.com/gp/product/B0C6MN14B1?tag=amznpcfx-20)
View attachment 1252914 (https://www.pokerchipforum.com/attachments/1252914/)
Very nice! All you need now is a topper
ColquhounRegular82 posts
Posted Jan 9, 2024, 11:39 PM#1134
So I finished my Barrington mods (for now) but still need to order a topper.
New LEDs, Dimmer, AA Battery Pack, and Jumbo Cupholders
COB LEDs
I wasn't the biggest fan of the blue LEDs and didn't like how they were so spaced out. I saw someone talk about the COB LEDs and how they are amost diffused already and ordered the warm white and couldn't be happier. The LEDs are very close together so you don't need to put something in front of them to diffuse them like I was trying to do with the old LEDs. Instead of ripping out the old LEDs, I actually just wedged the new LEDs right on top of the current ones. It worked out great.
I did have to cut the light strip and attach another tail end. Very easy to do but measure accurately before you cut! You don't have much leeway with the 16.4ft strip. And then used the Y connector that also came with the COB connector package.
Screwed and glued on some velcro, glued velcro to the battery pack, then buttoned up everything else. Happy with it.
COB LED Lights (https://www.amazon.com/dp/B0BVR755VK?tag=amznpcfx-20)
COB Connector Package (https://www.amazon.com/dp/B0C2CVFGL8?tag=amznpcfx-20)
Dimmer (https://www.amazon.com/weideer-Lights-Dimmer-DC12V-24V-K-018-BK/dp/B092HX9435?tag=amznpcfx-20)
Battery Pack (https://www.amazon.com/gp/product/B09131Y9L8?tag=amznpcfx-20)
Jumbo Cupholders
I went with the jumbos after reading recommendations. Pried off the old ones with a vise grip, drilled a center hole down with a standard bit, then drilled from the bottom up with the 3 5/8in hole saw starting it the pre drilled hole. I got them all done but it was a bit of a struggle with the hole saw I bought. If I would do it again, I would get one that was deeper. This one barely made it through both pieces of wood.
Jumbo Cupholders (https://www.amazon.com/gp/product/B0789HG6NW?tag=amznpcfx-20)
Hole Saw (buy a deeper one) (https://www.amazon.com/gp/product/B0C6MN14B1?tag=amznpcfx-20)
View attachment 1252914 (https://www.pokerchipforum.com/attachments/1252914/)
These are just the improvements I want to make, thanks for posting.
After you make the hole through from underneath, do you need to cut slices in the edge of the vinyl/foam so the larger cup holder will drop in?
greedyinternRegular46 posts
Posted Jan 10, 2024, 1:09 AM#1135
These are just the improvements I want to make, thanks for posting.
After you make the hole through from underneath, do you need to cut slices in the edge of the vinyl/foam so the larger cup holder will drop in?
I gently ripped out the foam, pretty much in-line with the hole saw. I did not cut the vinyl at all, I didn't want to in fear that over time a small slit could lead to a tear with use (people leaning on it, etc). The vinyl will stretch without issue when you put the jumbo cup holders in.
In a few spots the foam ripped out a little too much, causing a void that you could kind of feel around the edge of the cup holder. I just took the cup holder back out and jammed in a piece of foam and reseated the cup holder and it seemed to work well.
greedyinternRegular46 posts
Posted Jan 10, 2024, 1:37 AM#1136
Also, be careful with the hole saw, you don't want to be pushing too hard when you reach the end of the wood and tear through the vinyl. The one I bought was barely deep enough (looking back maybe a positive) and I pushed through too hard on one of them and tore the vinyl. A little scary but it didn't do too much damage thankfully.
djfayzeMicro-Stakes Grinder23 posts
Posted Jan 10, 2024, 7:29 PM#1137
So I finished my Barrington mods (for now) but still need to order a topper.
New LEDs, Dimmer, AA Battery Pack, and Jumbo Cupholders
COB LEDs
I wasn't the biggest fan of the blue LEDs and didn't like how they were so spaced out. I saw someone talk about the COB LEDs and how they are amost diffused already and ordered the warm white and couldn't be happier. The LEDs are very close together so you don't need to put something in front of them to diffuse them like I was trying to do with the old LEDs. Instead of ripping out the old LEDs, I actually just wedged the new LEDs right on top of the current ones. It worked out great.
I did have to cut the light strip and attach another tail end. Very easy to do but measure accurately before you cut! You don't have much leeway with the 16.4ft strip. And then used the Y connector that also came with the COB connector package.
Screwed and glued on some velcro, glued velcro to the battery pack, then buttoned up everything else. Happy with it.
COB LED Lights (https://www.amazon.com/dp/B0BVR755VK?tag=amznpcfx-20)
COB Connector Package (https://www.amazon.com/dp/B0C2CVFGL8?tag=amznpcfx-20)
Dimmer (https://www.amazon.com/weideer-Lights-Dimmer-DC12V-24V-K-018-BK/dp/B092HX9435?tag=amznpcfx-20)
Battery Pack (https://www.amazon.com/gp/product/B09131Y9L8?tag=amznpcfx-20)
Jumbo Cupholders
I went with the jumbos after reading recommendations. Pried off the old ones with a vise grip, drilled a center hole down with a standard bit, then drilled from the bottom up with the 3 5/8in hole saw starting it the pre drilled hole. I got them all done but it was a bit of a struggle with the hole saw I bought. If I would do it again, I would get one that was deeper. This one barely made it through both pieces of wood.
Jumbo Cupholders (https://www.amazon.com/gp/product/B0789HG6NW?tag=amznpcfx-20)
Hole Saw (buy a deeper one) (https://www.amazon.com/gp/product/B0C6MN14B1?tag=amznpcfx-20)
View attachment 1252914 (https://www.pokerchipforum.com/attachments/1252914/)
I didn’t know these LEDs existed, those are fantastic! Could should shoot a couple close up pics with them on and off? Would love to see how they look wedged in there.
TX_Golf_N_PokerRegular48 posts
Posted Jan 10, 2024, 11:05 PM#1138
So I finished my Barrington mods (for now) but still need to order a topper.
New LEDs, Dimmer, AA Battery Pack, and Jumbo Cupholders
COB LEDs
I wasn't the biggest fan of the blue LEDs and didn't like how they were so spaced out. I saw someone talk about the COB LEDs and how they are amost diffused already and ordered the warm white and couldn't be happier. The LEDs are very close together so you don't need to put something in front of them to diffuse them like I was trying to do with the old LEDs. Instead of ripping out the old LEDs, I actually just wedged the new LEDs right on top of the current ones. It worked out great.
I did have to cut the light strip and attach another tail end. Very easy to do but measure accurately before you cut! You don't have much leeway with the 16.4ft strip. And then used the Y connector that also came with the COB connector package.
Screwed and glued on some velcro, glued velcro to the battery pack, then buttoned up everything else. Happy with it.
COB LED Lights (https://www.amazon.com/dp/B0BVR755VK?tag=amznpcfx-20)
COB Connector Package (https://www.amazon.com/dp/B0C2CVFGL8?tag=amznpcfx-20)
Dimmer (https://www.amazon.com/weideer-Lights-Dimmer-DC12V-24V-K-018-BK/dp/B092HX9435?tag=amznpcfx-20)
Battery Pack (https://www.amazon.com/gp/product/B09131Y9L8?tag=amznpcfx-20)
Jumbo Cupholders
I went with the jumbos after reading recommendations. Pried off the old ones with a vise grip, drilled a center hole down with a standard bit, then drilled from the bottom up with the 3 5/8in hole saw starting it the pre drilled hole. I got them all done but it was a bit of a struggle with the hole saw I bought. If I would do it again, I would get one that was deeper. This one barely made it through both pieces of wood.
Jumbo Cupholders (https://www.amazon.com/gp/product/B0789HG6NW?tag=amznpcfx-20)
Hole Saw (buy a deeper one) (https://www.amazon.com/gp/product/B0C6MN14B1?tag=amznpcfx-20)
View attachment 1252914 (https://www.pokerchipforum.com/attachments/1252914/)
Fantastic mods. I'll definitely plan on doing some of these down the road. I do have a couple of questions.
You mention pre drilling a hole prior to using the hole saw. This one has me scratching my head... How do you drill a hole in air!? Are you drilling it in the old cupholder? I don't think so since you also mentioned old cupholder removal.
Do the old LEDs come out pretty easily? Any tips on the process?
Thanks!
NymorMicro-Stakes Grinder18 posts
Posted Jan 10, 2024, 11:43 PM#1139
Nice job!
warm white
My general feeling with poker table LEDs is that anything other than warm white is a mistake, especially RGB.
Do the old LEDs come out pretty easily? Any tips on the process?
Instead of ripping out the old LEDs, I actually just wedged the new LEDs right on top of the current ones. It worked out great.
greedyinternRegular46 posts
Posted Jan 11, 2024, 1:27 AM#1140
Fantastic mods. I'll definitely plan on doing some of these down the road. I do have a couple of questions.
You mention pre drilling a hole prior to using the hole saw. This one has me scratching my head... How do you drill a hole in air!? Are you drilling it in the old cupholder? I don't think so since you also mentioned old cupholder removal.
Do the old LEDs come out pretty easily? Any tips on the process?
Thanks!
Thanks!
Pre-drilling
What I meant by pre-drilling is just drilling a pilot hole through the wood as close to the center as you can get after you pull out the old cup holder. If anything just a hair closer to the playing field, not closer to the seating area (to avoid hitting the inside edge with your hole saw).

Then, after you have your pilot hole drilled, you know exactly where you need to start drilling with your hole saw from the other side by matching up the center drill bit of your hole saw with the hole you just made.

Go slow and try to recognize how deep you are so you know when you are close. You are going through 2 pieces of wood.

Removing LEDs
I did not remove the old LEDs. I just threw the new COB LEDs over the top of the originals to "see what they look like" but they fit so nice I just left them there. Kept the adhesive backing intact, but I did peel back about 4 inches on the ends exposing the adhesive since that does need to be attached securely at the table divide, and stuck it right to the current LEDs.
greedyinternRegular46 posts
Posted Jan 11, 2024, 2:00 AM#1141
I didn’t know these LEDs existed, those are fantastic! Could should shoot a couple close up pics with them on and off? Would love to see how they look wedged in there.
Thanks! I was excited when I found them also. And I really liked that they were waterproof, not for the risk of spilling or anything, but because it meant that they would have a silicon rubber covering that would work perfect when wedged in.

Close Up of COB LEDs
Here are some close up pics. When you dim them down and look right at them you can see the individual LEDs still, but it is waaaay better than standard LED strips that have an inch or two space between each light.


Should still see plenty of light once I get a topper ordered also.

TX_Golf_N_PokerRegular48 posts
Posted Jan 11, 2024, 6:37 AM#1142
Thanks!
Pre-drilling
What I meant by pre-drilling is just drilling a pilot hole through the wood as close to the center as you can get after you pull out the old cup holder. If anything just a hair closer to the playing field, not closer to the seating area (to avoid hitting the inside edge with your hole saw).
View attachment 1253630 (https://www.pokerchipforum.com/attachments/1253630/)
Then, after you have your pilot hole drilled, you know exactly where you need to start drilling with your hole saw from the other side by matching up the center drill bit of your hole saw with the hole you just made.
View attachment 1253631 (https://www.pokerchipforum.com/attachments/1253631/)
Go slow and try to recognize how deep you are so you know when you are close. You are going through 2 pieces of wood.
View attachment 1253634 (https://www.pokerchipforum.com/attachments/1253634/)
Removing LEDs
I did not remove the old LEDs. I just threw the new COB LEDs over the top of the originals to "see what they look like" but they fit so nice I just left them there. Kept the adhesive backing intact I did peel back about 4 inches on the ends exposing the adhesive since that does need to be attached securely at the table divide, and stuck it right to the current LEDs.
Thank you. I'm officially a dumbass... I didn't realize there was wood under the cupholders... I guess I didn't pay much attention when I had mine out of the box - which was only for about an hour just to make sure there was no damage.
golobosMicro-Stakes Grinder12 posts
Posted Jan 11, 2024, 5:36 PM#1143
Can’t decide on speed cloth color, anyone passionate about a specific color and mind sharing some pics?
chipinlaRegular37 posts
dmoneyRegular32 posts
Posted Jan 11, 2024, 5:54 PM#1145
rjdev7Regular40 posts
Posted Jan 11, 2024, 5:57 PM#1146
Is this stock or a custom design?
This is available for reprint
golobosMicro-Stakes Grinder12 posts
Posted Jan 11, 2024, 6:00 PM#1147
This is available for reprint
Is it just a drop in insert?
golobosMicro-Stakes Grinder12 posts
Posted Jan 11, 2024, 7:15 PM#1148
Can’t decide on speed cloth color, anyone passionate about a specific color and mind sharing some pics?
F*ck it, went black on black. I’ll report back on my build asap.
TX_Golf_N_PokerRegular48 posts
rjdev7Regular40 posts
Posted Jan 11, 2024, 9:37 PM#1150
Is it just a drop in insert?
Yes. So for those of us chip degenerates with a sickness :ROFL: :ROFLMAO: , it allows you to own 5 different "felts" and match them to your different sets.
Like this


ColquhounRegular82 posts
BruceWayneMicro-Stakes Grinder10 posts
greedyinternRegular46 posts
Posted Jan 12, 2024, 12:01 AM#1153
I’m curious if the both pieces were glued together? If not, is it possible to drill through the first layer, remove the wood from the hole saw, then continue through the second layer?
Yes, and this actually happened on two or three of the holes that I drilled. The hole saw was heating up the table so much that the glue will melt and get sticky and then as I was kind of rocking the hole saw back and forth a little the top part came off (which is the solid wood) and then the lower portion is just the extra ring that the cup holder sat in (that you are currently expanding for jumbos)
DodgerRegular46 posts
Posted Jan 12, 2024, 6:24 AM#1154
BruceWayneMicro-Stakes Grinder10 posts
Posted Jan 14, 2024, 10:18 PM#1155
Table mods were a success... players loved the changes

golobosMicro-Stakes Grinder12 posts
Posted Jan 15, 2024, 3:24 AM#1156
Has anyone tried to put electrical tape or something similar over the leds to diffuse them a bit? They are way too fuckin bright.
MrBooshRegular32 posts
Posted Jan 15, 2024, 3:47 AM#1157
Has anyone tried to put electrical tape or something similar over the leds to diffuse them a bit? They are way too fuckin bright.
Get a dimmer switch for them. If you are going to use the lights, a dimmer is a must!
golobosMicro-Stakes Grinder12 posts
Posted Jan 15, 2024, 4:01 AM#1158
Get a dimmer switch for them. If you are going to use the lights, a dimmer is a must!
I got one that was suggested on this thread and it barely makes a difference. Might try to black em out or just give up on em all together.
MrBooshRegular32 posts
Posted Jan 15, 2024, 5:12 AM#1159
I got one that was suggested on this thread and it barely makes a difference. Might try to black em out or just give up on em all together.
I would respectfully disagree that it barely makes a difference. Turning the dimmer down to the lowest setting makes a huge difference from the unusable brightness of the full on LED's.
golobosMicro-Stakes Grinder12 posts
Posted Jan 15, 2024, 11:17 AM#1160
I would respectfully disagree that it barely makes a difference. Turning the dimmer down to the lowest setting makes a huge difference from the unusable brightness of the full on LED's.
Interesting. Perhaps I hooked it up wrong, I’ll give it another shot.
golobosMicro-Stakes Grinder12 posts
Posted Jan 17, 2024, 12:44 AM#1161
Interesting. Perhaps I hooked it up wrong, I’ll give it another shot.
Tried it again and the dimmer works wonderfully when plugged in using the included wall plug but makes almost no difference at all when using the battery pack that was suggested in this thread. Is there a trick that I am missing?
jpoppaaaMicro-Stakes Grinder21 posts
Posted Jan 17, 2024, 1:18 AM#1162
Can’t decide on speed cloth color, anyone passionate about a specific color and mind sharing some pics?
I have black and burgundy. Like the burgundy better.
golobosMicro-Stakes Grinder12 posts
Nyrhockey094Newbie3 posts
Posted Jan 18, 2024, 1:24 PM#1164
So I finished my Barrington mods (for now) but still need to order a topper.
New LEDs, Dimmer, AA Battery Pack, and Jumbo Cupholders
COB LEDs
I wasn't the biggest fan of the blue LEDs and didn't like how they were so spaced out. I saw someone talk about the COB LEDs and how they are amost diffused already and ordered the warm white and couldn't be happier. The LEDs are very close together so you don't need to put something in front of them to diffuse them like I was trying to do with the old LEDs. Instead of ripping out the old LEDs, I actually just wedged the new LEDs right on top of the current ones. It worked out great.
I did have to cut the light strip and attach another tail end. Very easy to do but measure accurately before you cut! You don't have much leeway with the 16.4ft strip. And then used the Y connector that also came with the COB connector package.
Screwed and glued on some velcro, glued velcro to the battery pack, then buttoned up everything else. Happy with it.
COB LED Lights (https://www.amazon.com/dp/B0BVR755VK?tag=amznpcfx-20)
COB Connector Package (https://www.amazon.com/dp/B0C2CVFGL8?tag=amznpcfx-20)
Dimmer (https://www.amazon.com/weideer-Lights-Dimmer-DC12V-24V-K-018-BK/dp/B092HX9435?tag=amznpcfx-20)
Battery Pack (https://www.amazon.com/gp/product/B09131Y9L8?tag=amznpcfx-20)
Jumbo Cupholders
I went with the jumbos after reading recommendations. Pried off the old ones with a vise grip, drilled a center hole down with a standard bit, then drilled from the bottom up with the 3 5/8in hole saw starting it the pre drilled hole. I got them all done but it was a bit of a struggle with the hole saw I bought. If I would do it again, I would get one that was deeper. This one barely made it through both pieces of wood.
Jumbo Cupholders (https://www.amazon.com/gp/product/B0789HG6NW?tag=amznpcfx-20)
Hole Saw (buy a deeper one) (https://www.amazon.com/gp/product/B0C6MN14B1?tag=amznpcfx-20)
View attachment 1252914 (https://www.pokerchipforum.com/attachments/1252914/)
So I've ordered the hole saw. Should be here tomorrow. To do this properly, I need to fully saw through the wood? And did you start top down or from the bottom and does it matter?
Do I need to remove the rails to do this?
greedyinternRegular46 posts
Posted Jan 18, 2024, 1:42 PM#1165
So I've ordered the hole saw. Should be here tomorrow. To do this properly, I need to fully saw through the wood? And did you start top down or from the bottom and does it matter?
Do I need to remove the rails to do this?
Yes, you need to saw through the wood. And no, you don't need to take off the rails.
More details here in a later post
https://www.pokerchipforum.com/threads/barrington-poker-table-thread.30910/post-2353631
theriverMicro-Stakes Grinder7 posts
Posted Jan 18, 2024, 1:45 PM#1166
So I've ordered the hole saw. Should be here tomorrow. To do this properly, I need to fully saw through the wood? And did you start top down or from the bottom and does it matter?
Do I need to remove the rails to do this?
I just finished mine last night with the guidance of this amazing group.
-
Remove the cup. I used a heat gun and it loosened up the glue and the cup just slid right out.
-
Find the middle of the cup and move a hair towards the table and drill a pilot from the top. No need to remove rail.
-
From the bottom, use your hole saw to cut through the wood.
-
Go easy as you will be cutting through 2 pieces of wood. I stopped after the first piece and then vacuumed out the dust to see where I was. Just so I didn’t saw all the way to the vinyl. The second piece of the wood is glued to the foam.
-
When I loosened the second piece of the wood I used a box cutter to trim the foam and be careful to not cut the vinyl.
-
I replaced some of the cut foam back to give it more cushion around the cup holder.
-
Pushed the cup holder into place and boom. Done!
I’m assuming you went with the 3-5/8” hole saw and jumbo replacement cup holders.
Hope this helps.
JAFONewbie2 posts
Posted Jan 19, 2024, 1:34 AM#1167
How did you get these two to work together? The dimmer works great when plugged into the wall with the provided plug that comes with the table but when using the battery pack and dimmer it doesn’t work at all. How and what are you using to hooking the 3 together? I just be missing something. Any help would be great.
Perhaps you could post a photo of what you’ve done? If it isn’t working for you, perhaps the battery pack is dead? You are using the rechargeable one or the one with AAs?
greedyinternRegular46 posts
Posted Jan 19, 2024, 1:35 AM#1168
I just finished mine last night with the guidance of this amazing group.
-
Remove the cup. I used a heat gun and it loosened up the glue and the cup just slid right out.
-
Find the middle of the cup and move a hair towards the table and drill a pilot from the top. No need to remove rail.
-
From the bottom, use your hole saw to cut through the wood.
-
Go easy as you will be cutting through 2 pieces of wood. I stopped after the first piece and then vacuumed out the dust to see where I was. Just so I didn’t saw all the way to the vinyl. The second piece of the wood is glued to the foam.
-
When I loosened the second piece of the wood I used a box cutter to trim the foam and be careful to not cut the vinyl.
-
I replaced some of the cut foam back to give it more cushion around the cup holder.
-
Pushed the cup holder into place and boom. Done!
I’m assuming you went with the 3-5/8” hole saw and jumbo replacement cup holders.
Hope this helps.
Well done!!
BLK21JKMicro-Stakes Grinder6 posts
Posted Jan 19, 2024, 7:05 PM#1169
How did you get these two to work together? The dimmer works great when plugged into the wall with the provided plug that comes with the table but when using the battery pack and dimmer it doesn’t work at all. How and what are you using to hooking the 3 together? I just be missing something. Any help would be great.
Those PWM rotary dimmers for LEDs are not bi-directional - you have to have the “input” pigtail connected to your battery pack and the “output” pigtail to the LEDs.
Easy to miss and not a big deal, unless your battery and/or LED strip has a M connector where you want a F connector - then you’ll need an adapter or need to cut/splice a connector or two.
I encountered this with the rechargeable battery pack that I’m using, but it came with a Y-connector cable with both M and F plugs so I shoved that in the chain and all was good.
TX_Golf_N_PokerRegular48 posts
Posted Jan 19, 2024, 11:30 PM#1170
First game tonight on the new Barrington. No mods yet, and I will NOT be using the LEDs! LOL.
I will be working on a custom topper in the very near future. And the damn cup holder SUCK!

theriverMicro-Stakes Grinder7 posts
Posted Jan 19, 2024, 11:54 PM#1171
First game tonight on the new Barrington. No mods yet, and I will NOT be using the LEDs! LOL.
I will be working on a custom topper in the very near future. And the damn cup holder SUCK!
View attachment 1258556 (https://www.pokerchipforum.com/attachments/1258556/)
Have a great time. My inaugural game is tomorrow night. UPGRADE THE CUPHOLDERS!!!!!!
theriverMicro-Stakes Grinder7 posts
Posted Jan 19, 2024, 11:56 PM#1172
I like the LED’s. The dimmer helps a lot.

golobosMicro-Stakes Grinder12 posts
Posted Jan 20, 2024, 1:09 AM#1173
Those PWM rotary dimmers for LEDs are not bi-directional - you have to have the “input” pigtail connected to your battery pack and the “output” pigtail to the LEDs.
Easy to miss and not a big deal, unless your battery and/or LED strip has a M connector where you want a F connector - then you’ll need an adapter or need to cut/splice a connector or two.
I encountered this with the rechargeable battery pack that I’m using, but it came with a Y-connector cable with both M and F plugs so I shoved that in the chain and all was good.
You are totally correct. Switched the plugs around and it works great. No idea why I didn’t try that before. Thanks man!
jpoppaaaMicro-Stakes Grinder21 posts
theriverMicro-Stakes Grinder7 posts
Posted Jan 20, 2024, 1:46 AM#1175
Nice setup! You don’t actually use the blind buttons though right!?
no. It came with the dealer button. Thank you. Topper and I may change out to those Cob LED’s. Does anyone know of ones that can change colors?
ColquhounRegular82 posts
bigdaddyNewbie2 posts
Posted Jan 20, 2024, 3:53 AM#1177
With all of this cupholder talk, I wish Barrington just made a version sans any cupholders, and we get people to use drink carts instead.
Agreed the cupholders are annoying, would be cleaner without
abwchrisNewbie2 posts
Posted Jan 21, 2024, 6:14 PM#1178
I have the newer, larger version of the Barrington and I find the cup holders to be acceptable in my opinion. The lights were awful until I added the dimmer though.
SaucyAussieNewbie3 posts
Posted Jan 23, 2024, 10:32 PM#1179
I see currently Walmart has regular table for $169 and the LED version for $199.
Apart from the LEDs, is there any difference? Is it worth getting the LED table if I don't plan on using them?
ColquhounRegular82 posts
Posted Jan 23, 2024, 10:44 PM#1180
I see currently Walmart has regular table for $169 and the LED version for $199.
Apart from the LEDs, is there any difference? Is it worth getting the LED table if I don't plan on using them?
Thicker hardware (heavier metal tubing) for the legs, and a thicker wood for the main deck. Even if you never use the LED lights, I think the other differences make the $30 bump worth it.
abwchrisNewbie2 posts
Posted Jan 23, 2024, 11:25 PM#1181
I see currently Walmart has regular table for $169 and the LED version for $199.
Apart from the LEDs, is there any difference? Is it worth getting the LED table if I don't plan on using them?
The cupholders are a bit deeper too, I find them to work fine with cans.
NopalCoastalMicro-Stakes Grinder10 posts
Posted Jan 29, 2024, 5:58 PM#1182
Yes! My first time I used 1/4" ensolite from foambymail
2nd and last time I did it, I got 1/3" open cell from TPS. Highly recommend!
What made you go for a thicker foam, and did you add the thicker foam on the standard version or on the espn version?
JRald07Regular30 posts
Posted Jan 29, 2024, 6:02 PM#1183
What made you go for a thicker foam, and did you add the thicker foam on the standard version or on the espn version?
I think it was due to availability at the time, 1/4" open cell was always sold out then. 1/3" was the next best option. All done on the standard pre-2023 barrington table.
SaucyAussieNewbie3 posts
Posted Jan 30, 2024, 6:22 PM#1184
Thanks to the advice above, I was able to do the cupholder upgrade, very happy with the finished product. Dimmer arrives tomorrow to settle down those LEDs.
As someone who is not handy at all, it was a little tougher than I expected, so here are my thoughts from that perspective.
-
Removing old cupholders - took a good 2 minutes with my travel hair dryer to soften up the glue. Fortunately this coincided with the overheat cutoff so that gave me a good indicator that it was done. Some of them seemed to have too much glue in them which made it quite messy and this spilled over onto the vinyl requiring some cleanup.
-
Cutting holes - definitely need the right tools for this job. I tried with the $15 Amazon (https://www.amazon.com/?tag=amznpcfx-20) hole cutter and it busted after 3 holes. Stuck mid project, my only option was a Milwaukee hole cutter at Ace for $60. By far the most expensive part of the project, but I am set for life for 3-5/8" holes. You'll also want a drill with a handle to keep it steady. Mine flew out of my hands a couple of times tearing the crap out of the underside of the table and leaving me with a few bruises.
-
New cupholders. First I tried not removing any foam and just forcing it in. This created a nice tight fit but did leave a minor crease in the vinyl that I would notice. Next I tried trimming away some of the foam as mentioned by others. This worked well, although not as tight and it was hard to recover from removing too much foam. Finally I tried cutting small slits around the foam about half an inch apart. This allowed the foam to bend downwards without creating a crease. A very tight fit, I even need a rubber mallet to get one of them in.
As an aside, my table arrived slightly damaged, just some cosmetic blemishes on the wood under the rail. When I called Walmart to process the return, they gave me a refund but told me to keep the table. So I really felt like I was playing with house money even if I completely effed it up.
I will need to get a slightly larger topper from @rjdev7 (https://www.pokerchipforum.com/members/1014/).

greedyinternRegular46 posts
Posted Jan 30, 2024, 6:25 PM#1185
"When I called Walmart to process the return, they gave me a refund but told me to keep the table."
Well done
theriverMicro-Stakes Grinder7 posts
Posted Jan 30, 2024, 7:18 PM#1186
Thanks to the advice above, I was able to do the cupholder upgrade, very happy with the finished product. Dimmer arrives tomorrow to settle down those LEDs.
As someone who is not handy at all, it was a little tougher than I expected, so here are my thoughts from that perspective.
-
Removing old cupholders - took a good 2 minutes with my travel hair dryer to soften up the glue. Fortunately this coincided with the overheat cutoff so that gave me a good indicator that it was done. Some of them seemed to have too much glue in them which made it quite messy and this spilled over onto the vinyl requiring some cleanup.
-
Cutting holes - definitely need the right tools for this job. I tried with the $15 Amazon hole cutter and it busted after 3 holes. Stuck mid project, my only option was a Milwaukee hole cutter at Ace for $60. By far the most expensive part of the project, but I am set for life for 3-5/8" holes. You'll also want a drill with a handle to keep it steady. Mine flew out of my hands a couple of times tearing the crap out of the underside of the table and leaving me with a few bruises.
-
New cupholders. First I tried not removing any foam and just forcing it in. This created a nice tight fit but did leave a minor crease in the vinyl that I would notice. Next I tried trimming away some of the foam as mentioned by others. This worked well, although not as tight and it was hard to recover from removing too much foam. Finally I tried cutting small slits around the foam about half an inch apart. This allowed the foam to bend downwards without creating a crease. A very tight fit, I even need a rubber mallet to get one of them in.
As an aside, my table arrived slightly damaged, just some cosmetic blemishes on the wood under the rail. When I called Walmart to process the return, they gave me a refund but told me to keep the table. So I really felt like I was playing with house money even if I completely effed it up.
I will need to get a slightly larger topper from @rjdev7 (https://www.pokerchipforum.com/members/1014/).
View attachment 1264475 (https://www.pokerchipforum.com/attachments/1264475/)
Did the topper you ordered too small? Just wanted to make because I’m getting ready to order as well and just wanted to make sure I selected the right size.
Thanks
ngmcs8203Regular49 posts
Posted Jan 30, 2024, 7:21 PM#1187
Did the topper you ordered too small? Just wanted to make because I’m getting ready to order as well and just wanted to make sure I selected the right size.
Thanks
As long as you measured your table and didn't rely on what someone else told you, it will be cut to your exact table's dimensions.
SaucyAussieNewbie3 posts
Posted Jan 30, 2024, 8:04 PM#1188
Did the topper you ordered too small? Just wanted to make because I’m getting ready to order as well and just wanted to make sure I selected the right size.
Thanks
No this is my old topper that I use on a smaller table. For my next topper I plan to order size 74.25" x 32.25" recommended in @rjdev7 (https://www.pokerchipforum.com/members/1014/) topper thread.
TX_Golf_N_PokerRegular48 posts
Posted Jan 31, 2024, 5:08 AM#1189
I have the newer, larger version of the Barrington and I find the cup holders to be acceptable in my opinion. The lights were awful until I added the dimmer though.
What do you mean "larger version?" Which model? I've never seen a Barrington that holds anything bigger than a 12 oz can. I need something that will hold my rocks glasses or my insulated cup.
ColquhounRegular82 posts
Posted Jan 31, 2024, 5:32 AM#1190
What do you mean "larger version?" Which model? I've never seen a Barrington that holds anything bigger than a 12 oz can. I need something that will hold my rocks glasses or my insulated cup.
The LED version is slightly larger play area, and is a little deeper. The cup holders are a bit deeper as well, but it’s really minimal difference…like 1/2”.
Getting the wider, deeper cup holders from Amazon (https://www.amazon.com/?tag=amznpcfx-20) and doing the modification with a hole saw is definitely the way to go. I have the cup holders and looking forward to finding time to do the mod.
TX_Golf_N_PokerRegular48 posts
Posted Jan 31, 2024, 5:59 AM#1191
The LED version is slightly larger play area, and is a little deeper. The cup holders are a bit deeper as well, but it’s really minimal difference…like 1/2”.
Getting the wider, deeper cup holders from Amazon and doing the modification with a hole saw is definitely the way to go. I have the cup holders and looking forward to finding time to do the mod.
I have the LED version. I've just never before heard anyone say they were satisfied with the stock cup holders.
Hot NutsShark105 posts
Posted Jan 31, 2024, 4:00 PM#1192
I find the cup holders usable, but would prefer bigger ones. Solo cups for beer fits fine and for whiskey I use rock glasses that come with holiday bourbon box packages. The bigger glasses like Woodford don't fit, but ones like the Knob Creek are a perfect fit. I also put tray tables to the side for those with larger cups.
I don't have the equipment to upgrade the cup holders, nor the patience. Plus I'm lazy and would probably mess something up. It's not a biggie since I make it work.
I think pretty much all of these style cup holders end up looking pretty rough. My stock Barrington ones did after like 5 uses. Think I'm going to get some thin coasters for them.

NopalCoastalMicro-Stakes Grinder10 posts
Posted Jan 31, 2024, 5:09 PM#1193
Yes, very noticeable. Huge improvement and highly recommended.
What difference does it make exactly?
thebwitMicro-Stakes Grinder5 posts
Posted Jan 31, 2024, 10:50 PM#1194
So what's the recommended cup holder size for replacing the stupid small ones on the Barrington tables?
ColquhounRegular82 posts
dkellerdMicro-Stakes Grinder8 posts
Posted Feb 1, 2024, 12:50 AM#1196
What difference does it make exactly?
If I was talking about the upgraded hinge…it made the table much more stable, it fixed the breakable, cheap feeling of the stock hinges. And folded up much smoother too.
kmack402Micro-Stakes Grinder5 posts
Posted Feb 7, 2024, 5:29 PM#1197
If I was talking about the upgraded hinge…it made the table much more stable, it fixed the breakable, cheap feeling of the stock hinges. And folded up much smoother too.
@dkellerd (https://www.pokerchipforum.com/members/5486/) - Is there a link or thread explaining this more?
jamesjkimRegular42 posts
Posted Feb 7, 2024, 5:36 PM#1198
thebwitMicro-Stakes Grinder5 posts
Posted Feb 8, 2024, 2:58 AM#1199
Anyone get one recently and does your’s lean towards one leg? I feel like my new Barrington table has one side that’s taller than the other
SpaceMonkey420Newbie3 posts
Posted Feb 8, 2024, 2:59 AM#1200
Anyone get one recently and does your’s lean towards one leg? I feel like my new Barrington table has one side that’s taller than the other
Mines level. Might consider sticking a level on the floor and table top to check.
thebwitMicro-Stakes Grinder5 posts
Posted Feb 8, 2024, 3:20 AM#1201
Mines level. Might consider sticking a level on the floor and table top to check.
My 3 others are level. The new is definitely not. One end is about 1° slope where the other half is level.
Tony_MMicro-Stakes Grinder17 posts
Posted Feb 8, 2024, 9:27 PM#1202
My 3 others are level. The new is definitely not. One end is about 1° slope where the other half is level.
Not sure if this is your issue, but have you tried adjusting the tension wire under the table? It is there to adjust the angle between the two halves of the table.
JDPokerMicro-Stakes Grinder10 posts
Posted Feb 10, 2024, 5:50 PM#1203
When I'm drilling the holes from the bottom of the table, the hole saw keeps hitting small nails coming in from the outer edge of the table. Has anyone else had this problem?
thebwitMicro-Stakes Grinder5 posts
Posted Feb 10, 2024, 6:01 PM#1204
When I'm drilling the holes from the bottom of the table, the hole saw keeps hitting small nails coming in from the outer edge of the table. Has anyone else had this problem?
I did not and just did this with 4 tables. Biggest issues were the legs getting in the way and I needed a pipe cutter and then the drill itself would seize and go spinning into my calf (I have a huge bruise from it lol). My suggestion is go slow and don't put a lot of downward pressure on the drill, let the weight of it and the hole saw do all the work.
JDPokerMicro-Stakes Grinder10 posts
Posted Feb 10, 2024, 6:42 PM#1205
My suggestion is go slow and don't put a lot of downward pressure on the drill, let the weight of it and the ho
Yeah, I moved my center holes a half inch toward the middle of the table and solved the first problem, but probably was using too much pressure and may have burned out my drill (which started smoking). I'll let it cool off and try again.
digiratiRegular33 posts
Posted Feb 14, 2024, 6:28 AM#1206
the 3.5" "dual bottom" like what I went for
Does the dual bottom version you went with fit a beer/Coke can so it goes all the way to the bottom? Looking at what Amazon (https://www.amazon.com/?tag=amznpcfx-20) shows as the dimensions it seems it might be a little too narrow.
digiratiRegular33 posts
Posted Feb 14, 2024, 6:30 AM#1207
I went with the jumbos after reading recommendations.
Did the folding legs or anything get in the way of the new cup holders? I saw where someone said they had to drill into a leg or rail; something like that. Unfortunately I forgot to bookmark it.
Tony_MMicro-Stakes Grinder17 posts
Posted Feb 14, 2024, 6:43 AM#1208
Does the dual bottom version you went with fit a beer/Coke can so it goes all the way to the bottom? Looking at what Amazon shows as the dimensions it seems it might be a little too narrow.
Yes, standard bottles/cans fit in the narrower section. Rock glasses will sit on the wider section albeit the ones I have are a little bit wobbly. I solved this by getting rubber 3.5" coasters that can be inserted to bridge the gap and make my rock glasses sit steady.
As for the legs, the newer version of the table does not have the issue you read about. No worries about the legs in the way of drilling either sized cup holder.
greedyinternRegular46 posts
Posted Feb 14, 2024, 2:04 PM#1209
Did the folding legs or anything get in the way of the new cup holders? I saw where someone said they had to drill into a leg or rail; something like that. Unfortunately I forgot to bookmark it.
I read that somewhere too, but didn't have an issue. Like @Tony_M (https://www.pokerchipforum.com/members/16516/) mentioned, I believe the issue is resolved if it's one of the newer tables
thebwitMicro-Stakes Grinder5 posts
Posted Feb 14, 2024, 2:58 PM#1210
I read that somewhere too, but didn't have an issue. Like @Tony_M (https://www.pokerchipforum.com/members/16516/) mentioned, I believe the issue is resolved if it's one of the newer tables
The newer tables the legs are placed in a better spot. The older ones, just get a pipe cutter. I got the RIDGID 1/4 in. to 1-1/8 in. 101 Close Quarters Copper, Aluminum, Brass, and Plastic Tubing Cutter, Multi-Use Tubing Tool from Home Depot. I took the legs off, drilled the new holes, then put the legs roughly back on to see where I needed to cut, then removed anywhere from .5 to 1.5 off the legs.
Aggie930Newbie1 posts
kmack402Micro-Stakes Grinder5 posts
Posted Feb 14, 2024, 3:29 PM#1212
After removing the cupholders and drilling the pilot holes, did you flip the table over to use the holesaw from the bottom side?
greedyinternRegular46 posts
Posted Feb 14, 2024, 3:29 PM#1213
After removing the cupholders and drilling the pilot holes, did you flip the table over to use the holesaw from the bottom side?
Yes. Do not try to do it from the top
kmack402Micro-Stakes Grinder5 posts
Posted Feb 14, 2024, 3:31 PM#1214
Yes. Do not try to do it from the top
But do you actually flip the table to the felt side? May be a dumb question, but I'm trying to find the best way
greedyinternRegular46 posts
Posted Feb 14, 2024, 3:34 PM#1215
But do you actually flip the table to the felt side? May be a dumb question, but I'm trying to find the best way
Yes, flip it over face down. If you need some space like I did towards the end I put a 2x4 with a towel over it to prop it up a little bit so that my drill wouldn't hit the floor.
And be CAREFUL when you finally break through the wood that you don't push down too far and cut your rail!


kmack402Micro-Stakes Grinder5 posts
Posted Feb 14, 2024, 3:35 PM#1216
jamesjkimRegular42 posts
Posted Feb 14, 2024, 3:40 PM#1217
I did it from the top without any issues.
greedyinternRegular46 posts
Posted Feb 14, 2024, 3:43 PM#1218
I did it from the top without any issues.
With jumbo cup holders? How?
jamesjkimRegular42 posts
Posted Feb 14, 2024, 3:51 PM#1219
Tony_MMicro-Stakes Grinder17 posts
Posted Feb 14, 2024, 6:01 PM#1220
But do you actually flip the table to the felt side? May be a dumb question, but I'm trying to find the best way
I did it with the table upright from below but if you're not used to doing these sort of things it's best to flip it over like @greedyintern (https://www.pokerchipforum.com/members/17235/) says. Definitely put something underneath if you prefer your floor to not have random holes in it.
greedyinternRegular46 posts
Posted Feb 14, 2024, 6:12 PM#1221
Also @Tony_M (https://www.pokerchipforum.com/members/16516/) , I just bought your same cupholders with the dual level. Going to see how I like them compared to my current jumbos. The rubber coaster that you mentioned earlier, where'd you get it?
kmack402Micro-Stakes Grinder5 posts
Posted Feb 14, 2024, 6:23 PM#1222
3 holes down!

Tony_MMicro-Stakes Grinder17 posts
KristanGNewbie3 posts
JDPokerMicro-Stakes Grinder10 posts
Posted Feb 18, 2024, 7:08 PM#1225
https://www.finn.no/bap/webstore/ad.html?finnkode=327997047&ci=4
This seems to be really similar to the $169 walmart barrington table.
Only difference is in Norway it retails for $899, but with a discount it's available for "only" $499.
I can't read any text, but it looks like the prior version (1-2 years ago) of the Barrington. The only difference is the lettering on my Barrington is yellow...the one in the ad looks grey.
NuffintodoNewbie1 posts
Posted Feb 20, 2024, 3:49 AM#1226
Thanks! I was excited when I found them also. And I really liked that they were waterproof, not for the risk of spilling or anything, but because it meant that they would have a silicon rubber covering that would work perfect when wedged in.
View attachment 1253641 (https://www.pokerchipforum.com/attachments/1253641/)
Close Up of COB LEDs
Here are some close up pics. When you dim them down and look right at them you can see the individual LEDs still, but it is waaaay better than standard LED strips that have an inch or two space between each light.
View attachment 1253642 (https://www.pokerchipforum.com/attachments/1253642/) View attachment 1253643 (https://www.pokerchipforum.com/attachments/1253643/)
Should still see plenty of light once I get a topper ordered also.
View attachment 1253644 (https://www.pokerchipforum.com/attachments/1253644/)
Thanks for sharing the in depth info. Have you come across any led strips that were capable of changing colors? I picked up a Govee rope led (the one for desks) the other day but unfortunately it is too tall and sits flush with the rail. I haven't been able to track down a similar style with such a low profile.
greedyinternRegular46 posts
Posted Feb 20, 2024, 4:09 AM#1227
Thanks for sharing the in depth info. Have you come across any led strips that were capable of changing colors? I picked up a Govee rope led (the one for desks) the other day but unfortunately it is too tall and sits flush with the rail. I haven't been able to track down a similar style with such a low profile.
Sadly I did not find any COB RGB ones that were 8mm. Majority were 12mm. You could try it, it might work? The 8mm fit so snug on my first attempt though, I wasn't going to press my luck with anything else.
But if you really want the RGB, give it a go. Try to find something with free returns if it doesn't work out. I'll circle back if I find anything.
TX_Golf_N_PokerRegular48 posts
Posted Feb 20, 2024, 6:49 AM#1228
Anyone get one recently and does your’s lean towards one leg? I feel like my new Barrington table has one side that’s taller than the other
You know that the tension wire can be adjusted, right? When I first set mine up, I thought I was going to have to send it back because it was so unlevel. Then I looked at the manual and realized I just needed to adjust the wire. Now it's perfect.
ZeroCoolNewbie2 posts
Posted Mar 9, 2024, 12:22 AM#1229
Hey new member here who soaked up a ton of great tips from you guys. thanks! I figured I would wait for my first post until I had goodies so here is pics of my upgrade including a deep rail conversion.
View attachment 1288802 (https://www.pokerchipforum.com/attachments/1288802/)
original got from walmart for $168 and my old
chips

I won’t post all my pictures because some are the basic teardown that I’ve seen here so nothing new but haven’t seen much rail picture help. so here’s my contribution if you want to upgrade the rails. I decided to go no cupholders and use drink tables for personal preference


I bought a roll of 1” foam and fake leather from Joann fabric. the roll was enough for all the rail pieces and 40 filler circles for the cupholder holes (personal pref I saw a couple people say they left the holes and didn’t notice much) I also got 3yd unsuited speed cloth II from YAT


for the covering size I went with one pack of Luckys around the rail pieces redneck engineering I know

finished product


NopalCoastalMicro-Stakes Grinder10 posts
Posted Mar 9, 2024, 12:38 AM#1230
Looks great but no cup holders? You would’ve won the upgrade in my book
ZeroCoolNewbie2 posts
Posted Mar 9, 2024, 1:56 AM#1231
Looks great but no cup holders? You would’ve won the upgrade in my book
thank you. yeah decided against cupholders I’m not a huge fan of them and prefer more arm area and small drink tables to keep drinks below table level. but I see the benefits either way
RadicusScoutRegular28 posts
Posted Mar 10, 2024, 3:58 AM#1232
I recently upgraded my cup holders after a couple of close calls of having drinks spilled onto the playing surface. The cup holders that come with the table are a joke (a very cruel and sad joke). If you're on the fence about upgrading yours, don't delay. Get them upgraded. They're a huge improvement.

I was really encouraged by the posts by @dmoney (https://www.pokerchipforum.com/members/3698/) and @greedyintern (https://www.pokerchipforum.com/members/17235/). Huge shout out to them and their guides. Those helped tremendously. This is dedicated to @Saoliver (https://www.pokerchipforum.com/members/1603/) who asked for a video (in the thread - not to me personally) but this is as close to a video I could muster. I hope this is helpful. :)
Items/tools:

Replacement cup holders (https://www.amazon.com/YH-Poker-Jumbo-Stainless-Holders/dp/B0789HG6NW/?tag=amznpcfx-20)
Gloves
Eye protection
Auto trim removal tool (https://www.amazon.com/dp/B0C6V39SVH?tag=amznpcfx-20)
Screwdriver
Hole saw (3 5/8") (https://www.amazon.com/dp/B01987566S?tag=amznpcfx-20) - (In retrospect, I would have used a different hole saw. Maybe the Milwaukee one)
Tape measure
Cardboard sheet
Hole saw arbor
1/4" drill bit
1/8" drill bit
Screw
Drill
Hair dryer (not pictured)
Step 1: Remove original cup holders
This step is pretty simple. Set the hairdryer on high heat and keep it approximately 1 inch away from the cup holder for about a minute. Most of the cup holders will only require a minute for the glue to loosen up. I only had a couple that needed more time. For those, I did it again for another minute.

After the hairdryer, use the auto trim tool to pry the cup holder away from the loose glue. Work the tool around the cup holder while gently pulling the cup and glue apart.

A couple of things to keep in mind when you remove the cup holder from the table:
The cup holder will be hot from the hairdryer so wear your gloves.
The glue will be very sticky so pull directly up and not to the side. Try not to get any on your the table/padding.

Step 2: Mark the drill hole
Before you move onto this step, make sure all the glue has completely cooled off and dried.
This step is relatively easy but requires some concentration. The exactness of this step will ensure your new cup holders will be where you want them to be.
The original cup holders on my Barrington is measured at 3 1/2" across. You should double check yours if you're going to follow this step of my guide.

The new cup holders measure 4" across.

Since the size difference between the 2 cup holders is 1/2", we will need to mark the new center hole 1/4" away from the original center.
Here is a reference on how I calculated my center hole. I started the measure from the outer edge of the original cup holder. The idea is to mark the new center at the 2" mark.

Here is a better visualization of this. The new center hole has to be 1/4" closer to the table and yet remain in center of the left/right side edges.

I tried using a marker on the glue but found it difficult to accurately mark the exact location of the new hole. I decided to use a screw instead and that worked much better. The good thing about this is that I could move the screw easily to make fine adjustments as much as I needed. Once I've double (tripled!) checked my measurement I screwed in the screw to make a pilot hole. I didn't drill too deep - just deep enough to make a visible hole.

Ultimately, I ended up with this outcome. I then took my 1/8" drill bit and drilled through the table using the pilot hole as a guide.

Step 3: Drill out the new holes (from the bottom)
Flip the table upside down.
Before I drilled the hole with my hole saw, I drilled through the existing hole using the 1/4" drill bit. The reason for this is that the drill arbor is 1/4" so I wanted to make sure the arbor was aligned exactly to the new center. In retrospect, I suspect I could have used the 1/4" bit instead of the 1/8" bit in Step 2 and saved a step.
Drilling the hole was the worst part (for me). The hardest part was intentionally going slow and not hurry the process. The thing to note here is to stop drilling immediately after you've broken through to the foam. I was a nervous wreck trying not to over drill.
As you can see below, the foam is glued to the wood so I had to carefully separate the foam after I had drilled through the wood. Try to retain as much foam as you can in the original hole. This will help with the snugness of the new cup holder.

Here is an "in progress" picture of the process. I really wanted to see the new cup holder put in so I did that one right away (it's rad). I was also doubting I did the math properly in Step 2 so I wanted to quadruple check it was right (it was). TRUST THE MATH!
I also wanted to show the new Barringtons have clearance for the holes without sawing any of the posts.
Please ignore my monstrosity of a drill. The nerds over at r/tools will ban me if they ever saw that thing.

Step 4: Insert new cup holders and ENJOY
This step is easy and the most enjoyable. The new cup holders will be very snug (tight) in the new opening. I used a cardboard sheet to help me evenly apply pressure and knead the cup holder in. Think flattening pizza dough - same idea and motion.
Others mentioned having to tape their new cup holders with masking / duct tape to make them snug but I didn't have to do that. The foam and vinyl were enough to keep these cup holders very tight and snug. Oh, speaking of foam, trim away the excess foam that will be sticking out of the bottom after you're all done.
That's it! Enjoy your new rad cup holders!
Don't yell at me about my chairs. They're next to be upgraded!

dmoneyRegular32 posts
Posted Mar 10, 2024, 4:33 AM#1233
I recently upgraded my cup holders after a couple of close calls of having drinks spilled onto the playing surface. The cup holders that come with the table are a joke (a very cruel and sad joke). If you're on the fence about upgrading yours, don't delay. Get them upgraded. They're a huge improvement.
View attachment 1289094 (https://www.pokerchipforum.com/attachments/1289094/)
I was really encouraged by the posts by @dmoney (https://www.pokerchipforum.com/members/3698/) and @greedyintern (https://www.pokerchipforum.com/members/17235/). Huge shout out to them and their guides. Those helped tremendously. This is dedicated to @Saoliver (https://www.pokerchipforum.com/members/1603/) who asked for a video (in the thread - not to me personally) but this is as close to a video I could muster. I hope this is helpful. :)
Items/tools:
View attachment 1289142 (https://www.pokerchipforum.com/attachments/1289142/)
Replacement cup holders (https://www.amazon.com/YH-Poker-Jumbo-Stainless-Holders/dp/B0789HG6NW/?tag=amznpcfx-20)
Gloves
Eye protection
Auto trim removal tool (https://www.amazon.com/dp/B0C6V39SVH?tag=amznpcfx-20)
Screwdriver
Hole saw (3 5/8") (https://www.amazon.com/dp/B01987566S?tag=amznpcfx-20)
Tape measure
Cardboard sheet
Hole saw arbor
1/4" drill bit
1/8" drill bit
Screw
Drill
Hair dryer (not pictured)
Step 1: Remove original cup holders
This step is pretty simple. Set the hairdryer on high heat and keep it approximately 1 inch away from the cup holder for about a minute. Most of the cup holders will only require a minute for the glue to loosen up. I only had a couple that needed more time. For those, I did it again for another minute.
View attachment 1289155 (https://www.pokerchipforum.com/attachments/1289155/)
After the hairdryer, use the auto trim tool to pry the cup holder away from the loose glue. Work the tool around the cup holder while gently pulling the cup and glue apart.
View attachment 1289156 (https://www.pokerchipforum.com/attachments/1289156/)
A couple of things to keep in mind when you remove the cup holder from the table:
The cup holder will be hot from the hairdryer so wear your gloves.
The glue will be very sticky so pull directly up and not to the side. Try not to get any on your the table/padding.
View attachment 1289157 (https://www.pokerchipforum.com/attachments/1289157/)
Step 2: Mark the drill hole
This step is relatively easy but requires some concentration. The exactness of this step will ensure your new cup holders will be where you want them to be.
The original cup holders on my Barrington is measured at 3 1/2" across. You should double check yours if you're going to follow this step of my guide.
View attachment 1289168 (https://www.pokerchipforum.com/attachments/1289168/)
The new cup holders measure 4" across.
View attachment 1289169 (https://www.pokerchipforum.com/attachments/1289169/)
Since the size difference between the 2 cup holders is 1/2", we will need to mark the new center hole 1/4" away from the original center.
Here is a reference on how I calculated my center hole. I started the measure from the outer edge of the original cup holder. The idea is to mark the new center at the 2" mark.
View attachment 1289453 (https://www.pokerchipforum.com/attachments/1289453/)
Here is a better visualization of this. The new center hole has to be 1/4" closer to the table and yet remain in center of the left/right side edges.
View attachment 1289461 (https://www.pokerchipforum.com/attachments/1289461/)
I tried using a marker on the glue but found it difficult to accurately mark the exact location of the new hole. I decided to use a screw instead and that worked much better. The good thing about this is that I could move the screw easily to make fine adjustments as much as I needed. Once I've double (tripled!) checked my measurement I screwed in the screw to make a pilot hole. I didn't drill too deep - just deep enough to make a visible hole.
View attachment 1289462 (https://www.pokerchipforum.com/attachments/1289462/)
Ultimately, I ended up with this outcome. I then took my 1/8" drill bit and drilled through the table using the pilot hole as a guide.
View attachment 1289471 (https://www.pokerchipforum.com/attachments/1289471/)
Step 3: Drill out the new holes
Before I drilled the hole, I drilled through the existing hole using the 1/4" drill bit. The reason for this is that the drill arbor is 1/4" so I wanted to make sure the arbor was aligned exactly to the new center. In retrospect, I suspect I could have used the 1/4" bit instead of the 1/8" bit in Step 2 and saved a step.
Drilling the hole was the worst part (for me). The hardest part was intentionally going slow and not hurry the process. The thing to note here is to stop drilling immediately after you've broken through to the foam. I was a nervous wreck trying not to over drill.
As you can see below, the foam is glued to the wood so I had to carefully separate the foam after I had drilled through the wood. Try to retain as much foam as you can in the original hole. This will help with the snugness of the new cup holder.
View attachment 1289474 (https://www.pokerchipforum.com/attachments/1289474/)
Here is an "in progress" picture of the process. I really wanted to see the new cup holder put in so I did that one right away (it's rad). I was also doubting I did the math properly in Step 2 so I wanted to quadruple check it was right (it was). TRUST THE MATH!
I also wanted to show the new Barringtons have clearance for the holes without sawing any of the posts.
Please ignore my monstrosity of a drill. The nerds over at r/tools will ban me if they ever saw that thing.
View attachment 1289481 (https://www.pokerchipforum.com/attachments/1289481/)
Step 4: Insert new cup holders and ENJOY
This step is easy and the most enjoyable. The new cup holders will be very snug (tight) in the new opening. I used a cardboard sheet to help me evenly apply pressure and knead the cup holder in. Think flattening pizza dough - same idea and motion.
Others mentioned having to tape their new cup holders with masking / duct tape to make them snug but I didn't have to do that. The foam and vinyl were enough to keep these cup holders very tight snug. Oh, speaking of foam, trim away the excess foam that will be sticking out of the bottom after you're all done.
That's it! Enjoy your new rad cup holders!
Don't yell at me about my chairs. They're next to be upgraded!
View attachment 1289497 (https://www.pokerchipforum.com/attachments/1289497/)
So glad my posts were helpful! Well done.
NotRealNameNoSirRegular73 posts
Posted Mar 10, 2024, 4:37 AM#1234
I recently upgraded my cup holders after a couple of close calls of having drinks spilled onto the playing surface. The cup holders that come with the table are a joke (a very cruel and sad joke). If you're on the fence about upgrading yours, don't delay. Get them upgraded. They're a huge improvement.
View attachment 1289094 (https://www.pokerchipforum.com/attachments/1289094/)
I was really encouraged by the posts by @dmoney (https://www.pokerchipforum.com/members/3698/) and @greedyintern (https://www.pokerchipforum.com/members/17235/). Huge shout out to them and their guides. Those helped tremendously. This is dedicated to @Saoliver (https://www.pokerchipforum.com/members/1603/) who asked for a video (in the thread - not to me personally) but this is as close to a video I could muster. I hope this is helpful. :)
Items/tools:
View attachment 1289142 (https://www.pokerchipforum.com/attachments/1289142/)
Replacement cup holders (https://www.amazon.com/YH-Poker-Jumbo-Stainless-Holders/dp/B0789HG6NW/?tag=amznpcfx-20)
Gloves
Eye protection
Auto trim removal tool (https://www.amazon.com/dp/B0C6V39SVH?tag=amznpcfx-20)
Screwdriver
Hole saw (3 5/8") (https://www.amazon.com/dp/B01987566S?tag=amznpcfx-20)
Tape measure
Cardboard sheet
Hole saw arbor
1/4" drill bit
1/8" drill bit
Screw
Drill
Hair dryer (not pictured)
Step 1: Remove original cup holders
This step is pretty simple. Set the hairdryer on high heat and keep it approximately 1 inch away from the cup holder for about a minute. Most of the cup holders will only require a minute for the glue to loosen up. I only had a couple that needed more time. For those, I did it again for another minute.
View attachment 1289155 (https://www.pokerchipforum.com/attachments/1289155/)
After the hairdryer, use the auto trim tool to pry the cup holder away from the loose glue. Work the tool around the cup holder while gently pulling the cup and glue apart.
View attachment 1289156 (https://www.pokerchipforum.com/attachments/1289156/)
A couple of things to keep in mind when you remove the cup holder from the table:
The cup holder will be hot from the hairdryer so wear your gloves.
The glue will be very sticky so pull directly up and not to the side. Try not to get any on your the table/padding.
View attachment 1289157 (https://www.pokerchipforum.com/attachments/1289157/)
Step 2: Mark the drill hole
This step is relatively easy but requires some concentration. The exactness of this step will ensure your new cup holders will be where you want them to be.
The original cup holders on my Barrington is measured at 3 1/2" across. You should double check yours if you're going to follow this step of my guide.
View attachment 1289168 (https://www.pokerchipforum.com/attachments/1289168/)
The new cup holders measure 4" across.
View attachment 1289169 (https://www.pokerchipforum.com/attachments/1289169/)
Since the size difference between the 2 cup holders is 1/2", we will need to mark the new center hole 1/4" away from the original center.
Here is a reference on how I calculated my center hole. I started the measure from the outer edge of the original cup holder. The idea is to mark the new center at the 2" mark.
View attachment 1289453 (https://www.pokerchipforum.com/attachments/1289453/)
Here is a better visualization of this. The new center hole has to be 1/4" closer to the table and yet remain in center of the left/right side edges.
View attachment 1289461 (https://www.pokerchipforum.com/attachments/1289461/)
I tried using a marker on the glue but found it difficult to accurately mark the exact location of the new hole. I decided to use a screw instead and that worked much better. The good thing about this is that I could move the screw easily to make fine adjustments as much as I needed. Once I've double (tripled!) checked my measurement I screwed in the screw to make a pilot hole. I didn't drill too deep - just deep enough to make a visible hole.
View attachment 1289462 (https://www.pokerchipforum.com/attachments/1289462/)
Ultimately, I ended up with this outcome. I then took my 1/8" drill bit and drilled through the table using the pilot hole as a guide.
View attachment 1289471 (https://www.pokerchipforum.com/attachments/1289471/)
Step 3: Drill out the new holes
Before I drilled the hole, I drilled through the existing hole using the 1/4" drill bit. The reason for this is that the drill arbor is 1/4" so I wanted to make sure the arbor was aligned exactly to the new center. In retrospect, I suspect I could have used the 1/4" bit instead of the 1/8" bit in Step 2 and saved a step.
Drilling the hole was the worst part (for me). The hardest part was intentionally going slow and not hurry the process. The thing to note here is to stop drilling immediately after you've broken through to the foam. I was a nervous wreck trying not to over drill.
As you can see below, the foam is glued to the wood so I had to carefully separate the foam after I had drilled through the wood. Try to retain as much foam as you can in the original hole. This will help with the snugness of the new cup holder.
View attachment 1289474 (https://www.pokerchipforum.com/attachments/1289474/)
Here is an "in progress" picture of the process. I really wanted to see the new cup holder put in so I did that one right away (it's rad). I was also doubting I did the math properly in Step 2 so I wanted to quadruple check it was right (it was). TRUST THE MATH!
I also wanted to show the new Barringtons have clearance for the holes without sawing any of the posts.
Please ignore my monstrosity of a drill. The nerds over at r/tools will ban me if they ever saw that thing.
View attachment 1289481 (https://www.pokerchipforum.com/attachments/1289481/)
Step 4: Insert new cup holders and ENJOY
This step is easy and the most enjoyable. The new cup holders will be very snug (tight) in the new opening. I used a cardboard sheet to help me evenly apply pressure and knead the cup holder in. Think flattening pizza dough - same idea and motion.
Others mentioned having to tape their new cup holders with masking / duct tape to make them snug but I didn't have to do that. The foam and vinyl were enough to keep these cup holders very tight snug. Oh, speaking of foam, trim away the excess foam that will be sticking out of the bottom after you're all done.
That's it! Enjoy your new rad cup holders!
Don't yell at me about my chairs. They're next to be upgraded!
View attachment 1289497 (https://www.pokerchipforum.com/attachments/1289497/)
Noting this to come back to it tomorrow, great tutorial, thanks
digiratiRegular33 posts
Posted Mar 10, 2024, 2:46 PM#1235
Since the size difference between the 2 cup holders is 1/2", we will need to mark the new center hole 1/4" away from the original center.
Is there a reason why you couldn’t just use the center of the original hole to drill the pilot hole? Wouldn’t the hole saw then evenly expand the hole for the new cup holders? I’m assuming the original cup holders were already centered on the rail.
embiggensRegular32 posts
Posted Mar 10, 2024, 3:04 PM#1236
Is there a reason why you couldn’t just use the center of the original hole to drill the pilot hole? Wouldn’t the hole saw then evenly expand the hole for the new cup holders? I’m assuming the original cup holders were already centered on the rail.
One possible reason is the metal support tube underneath the table. Looks like @RadicusScout (https://www.pokerchipforum.com/members/10148/) is using the jumbo, wider cup holders. Others have mentioned that you need to shorten the support tube to allow jumbo cup holders to fit, or shift the hole away from the tube. Maybe that is what @RadicusScout (https://www.pokerchipforum.com/members/10148/) is doing. That only applies to four of the cup holders though.
ColquhounRegular82 posts
Posted Mar 10, 2024, 3:30 PM#1237
One possible reason is the metal support tube underneath the table. Looks like @RadicusScout (https://www.pokerchipforum.com/members/10148/) is using the jumbo, wider cup holders. Others have mentioned that you need to shorten the support tube to allow jumbo cup holders to fit, or shift the hole away from the tube. Maybe that is what @RadicusScout (https://www.pokerchipforum.com/members/10148/) is doing. That only applies to four of the cup holders though.
I've read the metal tubes were longer on earlier versions of the Barringtons, so cutting of them is no longer required. In fact, by moving the center of the hole, it's getting even closer to the tubes.
I think moving the center keeps the larger hole from running into the sides of the table. You can see how close the hole is to the sides in this photo:

RadicusScoutRegular28 posts
Posted Mar 10, 2024, 4:16 PM#1238
Is there a reason why you couldn’t just use the center of the original hole to drill the pilot hole? Wouldn’t the hole saw then evenly expand the hole for the new cup holders? I’m assuming the original cup holders were already centered on the rail.
Great question. If you are using the same size cup holders as the original, you can and should use the original center to drill your pilot hole. However, if you're upgrading to a bigger size cup holder, you should calculate your new center hole. The reason is twofold:
You want to maintain an equal distance between the table and the outer edge. You don't want too little/too much padding on either side.
You may not be able to drill a bigger hole at the original center hole without compromising the structural integrity of the table.
Here's what I mean by Point 1: You can see how I tried to make sure there was equal padding between the outer edge and the table. Had I drilled at the original center hole, the new cup holders would be a lot closer to the outer edge and would appear very uneven and lopsided.

@Colquhoun (https://www.pokerchipforum.com/members/7696/) calls out Point 2: It may be a little unclear to see but had I used the original center hole, I would have drilled away a part of the side wall of the table. I certainly didn't want to do that.
I've read the metal tubes were longer on earlier versions of the Barringtons, so cutting of them is no longer required. In fact, by moving the center of the hole, it's getting even closer to the tubes.
I think moving the center keeps the larger hole from running into the sides of the table. You can see how close the hole is to the sides in this photo:
View attachment 1289672 (https://www.pokerchipforum.com/attachments/1289672/)
RadicusScoutRegular28 posts
Posted Mar 10, 2024, 4:25 PM#1239
One possible reason is the metal support tube underneath the table. Looks like @RadicusScout (https://www.pokerchipforum.com/members/10148/) is using the jumbo, wider cup holders. Others have mentioned that you need to shorten the support tube to allow jumbo cup holders to fit, or shift the hole away from the tube. Maybe that is what @RadicusScout (https://www.pokerchipforum.com/members/10148/) is doing. That only applies to four of the cup holders though.
I didn't have to shorten any support tubes. You can see in my last picture of Step 3.
The new Barringtons (or at least the version I have) have shorter tubes to make this a lot easier than the previous version.
digiratiRegular33 posts
Posted Mar 10, 2024, 4:49 PM#1240
If you are using the same size cup holders as the original, you can and should use the original center to drill your pilot hole.
Yep, I’m probably going to buy deeper cup holders, not wider ones. Thanks for clarifying things!
RadicusScoutRegular28 posts
Posted Mar 10, 2024, 4:51 PM#1241
Yep, I’m probably going to buy deeper cup holders, not wider ones. Thanks for clarifying things!
That should make things a lot simpler. Have fun with your upgrade!
Oh, and to really clarify - you want to use a smaller hole saw than the one I used. I know you know this but I wanted to say it - just in case. ;)
JDPokerMicro-Stakes Grinder10 posts
Posted Mar 10, 2024, 5:14 PM#1242
Is there a reason why you couldn’t just use the center of the original hole to drill the pilot hole? Wouldn’t the hole saw then evenly expand the hole for the new cup holders? I’m assuming the original cup holders were already centered on the rail.
I mistakenly used the center of the original hole at first, and my hole cutter kept hitting small nails or staples that were in the wood along the edge of the table. It's definitely better to move the center hole 1/4 inch to the middle of the table.
digiratiRegular33 posts
Posted Mar 10, 2024, 5:38 PM#1243
I mistakenly used the center of the original hole at first, and my hole cutter kept hitting small nails or staples that were in the wood along the edge of the table. It's definitely better to move the center hole 1/4 inch to the middle of the table.
Did you have the new LED version of the Barrington table, or a different one?
JDPokerMicro-Stakes Grinder10 posts
Posted Mar 10, 2024, 6:06 PM#1244
Did you have the new LED version of the Barrington table, or a different one?
I have the old version without LEDs (I had to cut the leg tubes).
SalmonblasterMicro-Stakes Grinder11 posts
Posted Mar 13, 2024, 7:51 PM#1245
So I finished my Barrington mods (for now) but still need to order a topper.
New LEDs, Dimmer, AA Battery Pack, and Jumbo Cupholders
COB LEDs
I wasn't the biggest fan of the blue LEDs and didn't like how they were so spaced out. I saw someone talk about the COB LEDs and how they are amost diffused already and ordered the warm white and couldn't be happier. The LEDs are very close together so you don't need to put something in front of them to diffuse them like I was trying to do with the old LEDs. Instead of ripping out the old LEDs, I actually just wedged the new LEDs right on top of the current ones. It worked out great.
I did have to cut the light strip and attach another tail end. Very easy to do but measure accurately before you cut! You don't have much leeway with the 16.4ft strip. And then used the Y connector that also came with the COB connector package.
Screwed and glued on some velcro, glued velcro to the battery pack, then buttoned up everything else. Happy with it.
COB LED Lights (https://www.amazon.com/dp/B0BVR755VK?tag=amznpcfx-20)
COB Connector Package (https://www.amazon.com/dp/B0C2CVFGL8?tag=amznpcfx-20)
Dimmer (https://www.amazon.com/weideer-Lights-Dimmer-DC12V-24V-K-018-BK/dp/B092HX9435?tag=amznpcfx-20)
Battery Pack (https://www.amazon.com/gp/product/B09131Y9L8?tag=amznpcfx-20)
Jumbo Cupholders
I went with the jumbos after reading recommendations. Pried off the old ones with a vise grip, drilled a center hole down with a standard bit, then drilled from the bottom up with the 3 5/8in hole saw starting it the pre drilled hole. I got them all done but it was a bit of a struggle with the hole saw I bought. If I would do it again, I would get one that was deeper. This one barely made it through both pieces of wood.
Jumbo Cupholders (https://www.amazon.com/gp/product/B0789HG6NW?tag=amznpcfx-20)
Hole Saw (buy a deeper one) (https://www.amazon.com/gp/product/B0C6MN14B1?tag=amznpcfx-20)
View attachment 1252914 (https://www.pokerchipforum.com/attachments/1252914/)
Ordered all of the stuff to do the lights for my table upgrade (a bit too chicken to do the cupholders just yet). Most of it came today and when I ordered everything I thought to myself "I shouldn't need the dimmer, it should be fine..."
Plugged those sunsabishes in and went immediately almost blind....

.....the dimmer gets here on Friday....
digiratiRegular33 posts
Posted Mar 17, 2024, 8:55 PM#1246
You want to maintain an equal distance between the table and the outer edge. You don't want too little/too much padding on either side.
From the photos it seems like the cup holders might be a little closer to the inside of the table than the outside, but I can't tell for sure. Do you feel the cup holders are centered on the rail, or are they slightly to one side? They look great, just curios.
I mistakenly used the center of the original hole at first, and my hole cutter kept hitting small nails or staples that were in the wood along the edge of the table. It's definitely better to move the center hole 1/4 inch to the middle of the table.
Were the cup holders you used the ones that are 4" lip to lip, or did you use a different size.
I can't find ANY cup holders that are 3.5" lip to lip (like the originals), but deeper than the originals.
JDPokerMicro-Stakes Grinder10 posts
Posted Mar 17, 2024, 9:36 PM#1247
Were the cup holders you used the ones that are 4" lip to lip, or did you use a different size.
I can't find ANY cup holders that are 3.5" lip to lip (like the originals), but deeper than the originals.
I used the Jumbos with a 3 5/8th hole saw. It's been a while since I looked, but I definitely remember there being an option to keep the existing size (but deeper).
digiratiRegular33 posts
Posted Mar 17, 2024, 10:11 PM#1248
JDPokerMicro-Stakes Grinder10 posts
Posted Mar 17, 2024, 10:28 PM#1249
RadicusScoutRegular28 posts
Posted Mar 18, 2024, 2:06 AM#1250
From the photos it seems like the cup holders might be a little closer to the inside of the table than the outside, but I can't tell for sure. Do you feel the cup holders are centered on the rail, or are they slightly to one side? They look great, just curios.
Good eye. ;) Only one of the cup holders looks way off center (now you're going to give me a complex about it). I think that's the very first hole I lined up when I started measuring.

Others mostly look like this:

digiratiRegular33 posts
Posted Mar 18, 2024, 2:10 AM#1251
Good eye. ;) Only one of the cup holders looks way off center. I think that's the very first hole I lined up when I started measuring.
View attachment 1294537 (https://www.pokerchipforum.com/attachments/1294537/)
Others mostly look like this:
View attachment 1294538 (https://www.pokerchipforum.com/attachments/1294538/)
Thanks for the reply. I've went back and froth on getting the 4" wide ones or a smaller one (3.5"+) but I'm think I'm just going to follow your lead and go with the 4". The deciding factor was bourbon! To use a standard old fashioned glass you really need that extra width space.. Thanks for such a great post....you've given us all a great roadmap.
RadicusScoutRegular28 posts
Posted Mar 18, 2024, 2:13 AM#1252
Thanks for the reply. I've went back and froth on getting the 4" wide ones or a smaller one (3.5"+) but I'm think I'm just going to follow your lead and go with the 4". The deciding factor was bourbon! To use a standard old fashioned glass you really need that extra width space.. Thanks for such a great post....you've given us all a great roadmap.
That was my deciding factor as well. My rocks glass wouldn't fit in the old cup holders so I knew I had to upgrade.
You won't regret the decision. It's a great improvement.
Have fun!
Hot NutsShark105 posts
Posted Mar 18, 2024, 3:30 AM#1253
These fit perfectly.

My players are mainly bourbon drinkers so I'm not bothering to upgrade. Solo cups for beer fit too. Glasses are free with bourbon purchases around November.

That's extra cost and time to upgrade the cup holders. It's easier to get glasses and cups to fit the cup holders that come with the table.
ctestbMicro-Stakes Grinder8 posts
Posted Mar 21, 2024, 2:19 AM#1254
I recently upgraded my cup holders after a couple of close calls of having drinks spilled onto the playing surface. The cup holders that come with the table are a joke (a very cruel and sad joke). If you're on the fence about upgrading yours, don't delay. Get them upgraded. They're a huge improvement.
View attachment 1289094 (https://www.pokerchipforum.com/attachments/1289094/)
I was really encouraged by the posts by @dmoney (https://www.pokerchipforum.com/members/3698/) and @greedyintern (https://www.pokerchipforum.com/members/17235/). Huge shout out to them and their guides. Those helped tremendously. This is dedicated to @Saoliver (https://www.pokerchipforum.com/members/1603/) who asked for a video (in the thread - not to me personally) but this is as close to a video I could muster. I hope this is helpful. :)
Items/tools:
View attachment 1289142 (https://www.pokerchipforum.com/attachments/1289142/)
Replacement cup holders (https://www.amazon.com/YH-Poker-Jumbo-Stainless-Holders/dp/B0789HG6NW/?tag=amznpcfx-20)
Gloves
Eye protection
Auto trim removal tool (https://www.amazon.com/dp/B0C6V39SVH?tag=amznpcfx-20)
Screwdriver
Hole saw (3 5/8") (https://www.amazon.com/dp/B01987566S?tag=amznpcfx-20) - (In retrospect, I would have used a different hole saw. Maybe the Milwaukee one)
Tape measure
Cardboard sheet
Hole saw arbor
1/4" drill bit
1/8" drill bit
Screw
Drill
Hair dryer (not pictured)
Step 1: Remove original cup holders
This step is pretty simple. Set the hairdryer on high heat and keep it approximately 1 inch away from the cup holder for about a minute. Most of the cup holders will only require a minute for the glue to loosen up. I only had a couple that needed more time. For those, I did it again for another minute.
View attachment 1289155 (https://www.pokerchipforum.com/attachments/1289155/)
After the hairdryer, use the auto trim tool to pry the cup holder away from the loose glue. Work the tool around the cup holder while gently pulling the cup and glue apart.
View attachment 1289156 (https://www.pokerchipforum.com/attachments/1289156/)
A couple of things to keep in mind when you remove the cup holder from the table:
The cup holder will be hot from the hairdryer so wear your gloves.
The glue will be very sticky so pull directly up and not to the side. Try not to get any on your the table/padding.
View attachment 1289157 (https://www.pokerchipforum.com/attachments/1289157/)
Step 2: Mark the drill hole
Before you move onto this step, make sure all the glue has completely cooled off and dried.
This step is relatively easy but requires some concentration. The exactness of this step will ensure your new cup holders will be where you want them to be.
The original cup holders on my Barrington is measured at 3 1/2" across. You should double check yours if you're going to follow this step of my guide.
View attachment 1289168 (https://www.pokerchipforum.com/attachments/1289168/)
The new cup holders measure 4" across.
View attachment 1289169 (https://www.pokerchipforum.com/attachments/1289169/)
Since the size difference between the 2 cup holders is 1/2", we will need to mark the new center hole 1/4" away from the original center.
Here is a reference on how I calculated my center hole. I started the measure from the outer edge of the original cup holder. The idea is to mark the new center at the 2" mark.
View attachment 1289453 (https://www.pokerchipforum.com/attachments/1289453/)
Here is a better visualization of this. The new center hole has to be 1/4" closer to the table and yet remain in center of the left/right side edges.
View attachment 1289461 (https://www.pokerchipforum.com/attachments/1289461/)
I tried using a marker on the glue but found it difficult to accurately mark the exact location of the new hole. I decided to use a screw instead and that worked much better. The good thing about this is that I could move the screw easily to make fine adjustments as much as I needed. Once I've double (tripled!) checked my measurement I screwed in the screw to make a pilot hole. I didn't drill too deep - just deep enough to make a visible hole.
View attachment 1289462 (https://www.pokerchipforum.com/attachments/1289462/)
Ultimately, I ended up with this outcome. I then took my 1/8" drill bit and drilled through the table using the pilot hole as a guide.
View attachment 1289471 (https://www.pokerchipforum.com/attachments/1289471/)
Step 3: Drill out the new holes (from the bottom)
Flip the table upside down.
Before I drilled the hole with my hole saw, I drilled through the existing hole using the 1/4" drill bit. The reason for this is that the drill arbor is 1/4" so I wanted to make sure the arbor was aligned exactly to the new center. In retrospect, I suspect I could have used the 1/4" bit instead of the 1/8" bit in Step 2 and saved a step.
Drilling the hole was the worst part (for me). The hardest part was intentionally going slow and not hurry the process. The thing to note here is to stop drilling immediately after you've broken through to the foam. I was a nervous wreck trying not to over drill.
As you can see below, the foam is glued to the wood so I had to carefully separate the foam after I had drilled through the wood. Try to retain as much foam as you can in the original hole. This will help with the snugness of the new cup holder.
View attachment 1289474 (https://www.pokerchipforum.com/attachments/1289474/)
Here is an "in progress" picture of the process. I really wanted to see the new cup holder put in so I did that one right away (it's rad). I was also doubting I did the math properly in Step 2 so I wanted to quadruple check it was right (it was). TRUST THE MATH!
I also wanted to show the new Barringtons have clearance for the holes without sawing any of the posts.
Please ignore my monstrosity of a drill. The nerds over at r/tools will ban me if they ever saw that thing.
View attachment 1289481 (https://www.pokerchipforum.com/attachments/1289481/)
Step 4: Insert new cup holders and ENJOY
This step is easy and the most enjoyable. The new cup holders will be very snug (tight) in the new opening. I used a cardboard sheet to help me evenly apply pressure and knead the cup holder in. Think flattening pizza dough - same idea and motion.
Others mentioned having to tape their new cup holders with masking / duct tape to make them snug but I didn't have to do that. The foam and vinyl were enough to keep these cup holders very tight and snug. Oh, speaking of foam, trim away the excess foam that will be sticking out of the bottom after you're all done.
That's it! Enjoy your new rad cup holders!
Don't yell at me about my chairs. They're next to be upgraded!
View attachment 1289497 (https://www.pokerchipforum.com/attachments/1289497/)
Im attempting this, this weekend. Any other advice to give? Really appreciate the post it's super helpfuL!
RadicusScoutRegular28 posts
Posted Mar 21, 2024, 2:27 AM#1255
Im attempting this, this weekend. Any other advice to give? Really appreciate the post it's super helpfuL!
Have fun!
The only other advice is to take it slow. In retrospect, I wish I had used a different hole saw. The hole saw I used was a bit big and didn't allow for my arbor to properly get into the table before the saw started doing its thing. Because of that, the hole wasn't as perfect (or more close to perfect) than I would have liked.
Overall the cup holder upgrade is a pretty simple procedure. Take it slow, double check your measurements, and don't hurry your sawing. Enjoy your new cup holders!
ctestbMicro-Stakes Grinder8 posts
Posted Mar 21, 2024, 2:35 AM#1256
Have fun!
The only other advice is to take it slow. In retrospect, I wish I had used a different hole saw. The hole saw I used was a bit big and didn't allow for my arbor to properly get into the table before the saw started doing its thing. Because of that, the hole wasn't as perfect (or more close to perfect) than I would have liked.
Overall the cup holder upgrade a pretty simple procedure. Take it slow, double check your measurements, and don't hurry your sawing. Enjoy your new cup holders!
I ordered a 3 5/8 hole saw with the arbor attached so I plan on taking it slow and you can usually when (if you take it slow) you cut through a certain surface so I plan on taking it super slow. So you just push it through the original leather hole?
RadicusScoutRegular28 posts
Posted Mar 21, 2024, 2:39 AM#1257
I ordered a 3 5/8 hole saw with the arbor attached so I plan on taking it slow and you can usually when (if you take it slow) you cut through a certain surface so I plan on taking it super slow. So you just push it through the original leather hole?
Remember to saw from the bottom of the table (flip your table upside down). This way you won't rip the foam nor vinyl.
So you just push it through the original leather hole?
You mean the new cup holders, right? Yes - you push them (knead them) in through the original hole.
davesilver88Micro-Stakes Grinder15 posts
Posted Mar 24, 2024, 9:04 PM#1258
While upgrading my cup holders, 3 holes in and the hole saw breaks!
Good news - 3 successful upgraded cup holders.
Bad news - 7 more to go and gotta wait for a new hole saw.
ColquhounRegular82 posts
Posted Mar 24, 2024, 9:11 PM#1259
I bought the Lenox hole saw at Lowe’s. The saw is $20 and you’ll need to get a separate arbor, but this thing is a beast.

TronicityNewbie1 posts
Posted Mar 26, 2024, 2:35 AM#1260
I recently upgraded my cup holders after a couple of close calls of having drinks spilled onto the playing surface. The cup holders that come with the table are a joke (a very cruel and sad joke). If you're on the fence about upgrading yours, don't delay. Get them upgraded. They're a huge improvement.
View attachment 1289094 (https://www.pokerchipforum.com/attachments/1289094/)
I was really encouraged by the posts by @dmoney (https://www.pokerchipforum.com/members/3698/) and @greedyintern (https://www.pokerchipforum.com/members/17235/). Huge shout out to them and their guides. Those helped tremendously. This is dedicated to @Saoliver (https://www.pokerchipforum.com/members/1603/) who asked for a video (in the thread - not to me personally) but this is as close to a video I could muster. I hope this is helpful. :)
Items/tools:
View attachment 1289142 (https://www.pokerchipforum.com/attachments/1289142/)
Replacement cup holders (https://www.amazon.com/YH-Poker-Jumbo-Stainless-Holders/dp/B0789HG6NW/?tag=amznpcfx-20)
Gloves
Eye protection
Auto trim removal tool (https://www.amazon.com/dp/B0C6V39SVH?tag=amznpcfx-20)
Screwdriver
Hole saw (3 5/8") (https://www.amazon.com/dp/B01987566S?tag=amznpcfx-20) - (In retrospect, I would have used a different hole saw. Maybe the Milwaukee one)
Tape measure
Cardboard sheet
Hole saw arbor
1/4" drill bit
1/8" drill bit
Screw
Drill
Hair dryer (not pictured)
Step 1: Remove original cup holders
This step is pretty simple. Set the hairdryer on high heat and keep it approximately 1 inch away from the cup holder for about a minute. Most of the cup holders will only require a minute for the glue to loosen up. I only had a couple that needed more time. For those, I did it again for another minute.
View attachment 1289155 (https://www.pokerchipforum.com/attachments/1289155/)
After the hairdryer, use the auto trim tool to pry the cup holder away from the loose glue. Work the tool around the cup holder while gently pulling the cup and glue apart.
View attachment 1289156 (https://www.pokerchipforum.com/attachments/1289156/)
A couple of things to keep in mind when you remove the cup holder from the table:
The cup holder will be hot from the hairdryer so wear your gloves.
The glue will be very sticky so pull directly up and not to the side. Try not to get any on your the table/padding.
View attachment 1289157 (https://www.pokerchipforum.com/attachments/1289157/)
Step 2: Mark the drill hole
Before you move onto this step, make sure all the glue has completely cooled off and dried.
This step is relatively easy but requires some concentration. The exactness of this step will ensure your new cup holders will be where you want them to be.
The original cup holders on my Barrington is measured at 3 1/2" across. You should double check yours if you're going to follow this step of my guide.
View attachment 1289168 (https://www.pokerchipforum.com/attachments/1289168/)
The new cup holders measure 4" across.
View attachment 1289169 (https://www.pokerchipforum.com/attachments/1289169/)
Since the size difference between the 2 cup holders is 1/2", we will need to mark the new center hole 1/4" away from the original center.
Here is a reference on how I calculated my center hole. I started the measure from the outer edge of the original cup holder. The idea is to mark the new center at the 2" mark.
View attachment 1289453 (https://www.pokerchipforum.com/attachments/1289453/)
Here is a better visualization of this. The new center hole has to be 1/4" closer to the table and yet remain in center of the left/right side edges.
View attachment 1289461 (https://www.pokerchipforum.com/attachments/1289461/)
I tried using a marker on the glue but found it difficult to accurately mark the exact location of the new hole. I decided to use a screw instead and that worked much better. The good thing about this is that I could move the screw easily to make fine adjustments as much as I needed. Once I've double (tripled!) checked my measurement I screwed in the screw to make a pilot hole. I didn't drill too deep - just deep enough to make a visible hole.
View attachment 1289462 (https://www.pokerchipforum.com/attachments/1289462/)
Ultimately, I ended up with this outcome. I then took my 1/8" drill bit and drilled through the table using the pilot hole as a guide.
View attachment 1289471 (https://www.pokerchipforum.com/attachments/1289471/)
Step 3: Drill out the new holes (from the bottom)
Flip the table upside down.
Before I drilled the hole with my hole saw, I drilled through the existing hole using the 1/4" drill bit. The reason for this is that the drill arbor is 1/4" so I wanted to make sure the arbor was aligned exactly to the new center. In retrospect, I suspect I could have used the 1/4" bit instead of the 1/8" bit in Step 2 and saved a step.
Drilling the hole was the worst part (for me). The hardest part was intentionally going slow and not hurry the process. The thing to note here is to stop drilling immediately after you've broken through to the foam. I was a nervous wreck trying not to over drill.
As you can see below, the foam is glued to the wood so I had to carefully separate the foam after I had drilled through the wood. Try to retain as much foam as you can in the original hole. This will help with the snugness of the new cup holder.
View attachment 1289474 (https://www.pokerchipforum.com/attachments/1289474/)
Here is an "in progress" picture of the process. I really wanted to see the new cup holder put in so I did that one right away (it's rad). I was also doubting I did the math properly in Step 2 so I wanted to quadruple check it was right (it was). TRUST THE MATH!
I also wanted to show the new Barringtons have clearance for the holes without sawing any of the posts.
Please ignore my monstrosity of a drill. The nerds over at r/tools will ban me if they ever saw that thing.
View attachment 1289481 (https://www.pokerchipforum.com/attachments/1289481/)
Step 4: Insert new cup holders and ENJOY
This step is easy and the most enjoyable. The new cup holders will be very snug (tight) in the new opening. I used a cardboard sheet to help me evenly apply pressure and knead the cup holder in. Think flattening pizza dough - same idea and motion.
Others mentioned having to tape their new cup holders with masking / duct tape to make them snug but I didn't have to do that. The foam and vinyl were enough to keep these cup holders very tight and snug. Oh, speaking of foam, trim away the excess foam that will be sticking out of the bottom after you're all done.
That's it! Enjoy your new rad cup holders!
AwwDon't yell at me about my chairs. They're next to be upgraded!
View attachment 1289497 (https://www.pokerchipforum.com/attachments/1289497/)
Can this be folded with those cup holders?
greedyinternRegular46 posts
Posted Mar 26, 2024, 2:47 AM#1261
Can this be folded with those cup holders?
Yup, no issues!
extreme517Micro-Stakes Grinder17 posts
Posted Mar 26, 2024, 5:59 AM#1262
Okay, I'm pretty close to picking up a table like this. A couple questions:
-
Are there are deeper cup holders people have used/can recommend that don't require cutting? Same diameter? Just heat up the existing holders to loosen up the glue and straight swap out?
-
Rather than doing speed cloth I think I will just go for a custom topper from @rjdev7 (https://www.pokerchipforum.com/members/1014/). That seems an easy enough approach and looks nice.
a) Am I correct that if I get this sized right it will just lay in the interior of the table? No reason to secure and no reason to overthink this?
b) I am presuming I will want to get my table first and take exact measurements...any guidelines for how to size to just snug up under the rail?
rjdev7Regular40 posts
Posted Mar 26, 2024, 12:37 PM#1263
Okay, I'm pretty close to picking up a table like this. A couple questions:
-
Are there are deeper cup holders people have used/can recommend that don't require cutting? Same diameter? Just heat up the existing holders to loosen up the glue and straight swap out?
-
Rather than doing speed cloth I think I will just go for a custom topper from @rjdev7 (https://www.pokerchipforum.com/members/1014/). That seems an easy enough approach and looks nice.
a) Am I correct that if I get this sized right it will just lay in the interior of the table? No reason to secure and no reason to overthink this?
b) I am presuming I will want to get my table first and take exact measurements...any guidelines for how to size to just snug up under the rail?
2a) correct
2b) correct
davesilver88Micro-Stakes Grinder15 posts
Posted Mar 26, 2024, 12:49 PM#1264
Okay, I'm pretty close to picking up a table like this. A couple questions:
-
Are there are deeper cup holders people have used/can recommend that don't require cutting? Same diameter? Just heat up the existing holders to loosen up the glue and straight swap out?
-
Rather than doing speed cloth I think I will just go for a custom topper from @rjdev7 (https://www.pokerchipforum.com/members/1014/). That seems an easy enough approach and looks nice.
a) Am I correct that if I get this sized right it will just lay in the interior of the table? No reason to secure and no reason to overthink this?
b) I am presuming I will want to get my table first and take exact measurements...any guidelines for how to size to just snug up under the rail?
Regarding 1 - I don't think so. I'm mid project (cut 3 holes, but the drill bit in my hole saw snapped during hole 4). I don't think it's possible to add deeper cup holders without cutting because the base of the current cup holders are glued to the first layer of wood. There isn't any room deeper cup holders without cutting.
Also, regarding 2b - I sent the link of the exact table I bought to rjdev7 and he was able to set me up. Granted this was just last week and I haven't received my topper yet, but I'm certain it'll be fine. But yes, I'm sure measuring it and providing those measurements to rjdev7 will let him know which size is right.
RadicusScoutRegular28 posts
Posted Mar 26, 2024, 3:46 PM#1265
Okay, I'm pretty close to picking up a table like this. A couple questions:
- Are there are deeper cup holders people have used/can recommend that don't require cutting? Same diameter? Just heat up the existing holders to loosen up the glue and straight swap out?
Regarding 1 - I don't think so. I'm mid project (cut 3 holes, but the drill bit in my hole saw snapped during hole 4). I don't think it's possible to add deeper cup holders without cutting because the base of the current cup holders are glued to the first layer of wood. There isn't any room deeper cup holders without cutting.
@davesilver88 (https://www.pokerchipforum.com/members/14497/) is right. There is no more depth past the original cup holders. If you want deeper cup holders you will need to drill the new depth.
extreme517Micro-Stakes Grinder17 posts
Posted Mar 26, 2024, 5:37 PM#1266
digiratiRegular33 posts
Posted Mar 26, 2024, 7:18 PM#1267
OK, I have bought everything for all the mods, except the hole saw. I've read comments about hole saws breaking and wishing people had bought a different one. Can you guys recommend a 3 5/8" hole saw/arbor that WAS deep enough and that you WERE very happy with so I can get the right one and avoid any headaches?
Thanks in advance!
ColquhounRegular82 posts
Posted Mar 26, 2024, 7:30 PM#1268
I mentioned a number of posts back about the Lenox one from Lowe’s ...it’s a beast. Saw is $20 and you need an arbor which is an additional $17-$20.

Tony_MMicro-Stakes Grinder17 posts
Posted Mar 26, 2024, 7:33 PM#1269
I mentioned a number of posts back about the Lenox one from Lowe’s ...it’s a beast. Saw is $20 and you need an arbor which is an additional $17-$20.
View attachment 1299558 (https://www.pokerchipforum.com/attachments/1299558/)
This is the way
digiratiRegular33 posts
Posted Mar 26, 2024, 7:34 PM#1270
ColquhounRegular82 posts
Posted Mar 26, 2024, 7:40 PM#1271
digiratiRegular33 posts
Posted Mar 26, 2024, 7:42 PM#1272
I’m not convinced that ships with an arbor.
I see what you mean! That could be a carefully crafted listing but no arbor.
ColquhounRegular82 posts
Posted Mar 26, 2024, 7:48 PM#1273
I see what you mean! That could be a carefully crafted listing but no arbor.
Yeah, if it had an arbor, it would say whether it was a 3/8" or 1/2" shank. I ended up getting the the 1/2" Lenox one at Lowe's because I liked the large locking nut, but if you choose to get this one, make sure your drill chuck can handle 1/2" shanks.
https://www.lowes.com/pd/LENOX-1-2-in-Steel-Hole-Saw-Arbor/5013098097
elemenoNewbie4 posts
Posted Mar 26, 2024, 7:52 PM#1274
Are the table’s cup holders THAT bad? Is there a solution where one can just put another, deeper cup holder in the existing ones?
Littleluck55Regular25 posts
Posted Mar 26, 2024, 7:56 PM#1275
Are the table’s cup holders THAT bad? Is there a solution where one can just put another, deeper cup holder in the existing ones?
It’s the equivalent of putting your drink on a coaster. They are not preventing spills. As mentioned above, the only way to go deeper is to drill the second board out creating a hole.
ColquhounRegular82 posts
Posted Mar 26, 2024, 7:59 PM#1276
Are the table’s cup holders THAT bad? Is there a solution where one can just put another, deeper cup holder in the existing ones?
They’re crazy shallow, in my opinion. You could go without it, but with a depth of just a little over an inch, any bump of a beer bottle and it’s tipping over and pouring on your playing surface.

The problem is that there’s a wood base below the cup holder, so there’s no way to replace them with a larger holder without drilling a hole to make room.
digiratiRegular33 posts
Posted Mar 26, 2024, 8:00 PM#1277
It’s the equivalent of putting your drink on a coaster.
^^^ This is the perfect analogy. They are VERY shallow.
extreme517Micro-Stakes Grinder17 posts
Posted Mar 26, 2024, 8:02 PM#1278
digiratiRegular33 posts
Posted Mar 26, 2024, 8:10 PM#1279
elemenoNewbie4 posts
Posted Mar 26, 2024, 8:16 PM#1280
It’s the equivalent of putting your drink on a coaster. They are not preventing spills. As mentioned above, the only way to go deeper is to drill the second board out creating a hole.
They’re crazy shallow, in my opinion. You could go without it, but with a depth of just a little over an inch, any bump of a beer bottle and it’s tipping over and pouring on your playing surface. View attachment 1299568 (https://www.pokerchipforum.com/attachments/1299568/)
The problem is that there’s a wood base below the cup holder, so there’s no way to replace them with a larger holder without drilling a hole to make room.
Thanks for the info. Out of curiosity, what’s the inside diameter of the cup holder? I tried looking it up but couldn’t find it.
But, in doing so, looks like the LED version is on sale again:
https://www.walmart.com/ip/Barringt...In-laid-LED-Lights-Brown-and-Black/3963393753 (https://www.walmart.com/ip/Barrington-10-Player-Poker-Table-with-In-laid-LED-Lights-Brown-and-Black/3963393753)
upNdownShark114 posts
Posted Mar 26, 2024, 8:24 PM#1281
Are the table’s cup holders THAT bad? Is there a solution where one can just put another, deeper cup holder in the existing ones?
They're useless. I'm very comfortable playing on an unmodified first generation Barrington unless I have a drink.
extreme517Micro-Stakes Grinder17 posts
Posted Mar 26, 2024, 8:49 PM#1282
No. That table weighs 88lbs and the Barrington one weighs about 100lbs.
According to the details on Walmart's site the Barrington is 82 lb.

I really think these are essentially the same table, but the Pexmor has 2.4" deep cup holders and brown rails.

digiratiRegular33 posts
Posted Mar 26, 2024, 9:07 PM#1283
According to the details on Walmart's site the Barrington is 82 lb.
View attachment 1299613 (https://www.pokerchipforum.com/attachments/1299613/)
I really think these are essentially the same table, but the Pexmor has 2.4" deep cup holders and brown rails.
I have the LED version which I believe is beefier.
ColquhounRegular82 posts
extreme517Micro-Stakes Grinder17 posts
Posted Mar 26, 2024, 9:32 PM#1285
The LED one is 20lbs heavier. It has thicker tubes in the hardware and a thicker plywood base for the playing surface.
Would you recommend it for those reasons alone if not planning to use the LEDs?
ColquhounRegular82 posts
Posted Mar 26, 2024, 9:36 PM#1286
Would you recommend it for those reasons alone if not planning to use the LEDs?
I bought the regular version and exchanged it to the LED version for just those reasons. I never plan on using the LED's but the heavier deck is definitely a plus.
Be warned...the folded table is HEAVY. I bought the bag for it and it's better, but two people makes getting it set up much easier.
SalmonblasterMicro-Stakes Grinder11 posts
Posted Mar 26, 2024, 9:41 PM#1287
I bought the regular version and exchanged it to the LED version for just those reasons. I never plan on using the LED's but the heavier deck is definitely a plus.
Be warned...the folded table is HEAVY. I bought the bag for it and it's better, but two people makes getting it set up much easier.
I will admit I was totally not expecting the LED table to have the heft that it did. Definitely a two-person job for my setup, but it also pays to have strapping young sons that want to show off their muscles...

RadicusScoutRegular28 posts
Posted Mar 26, 2024, 10:06 PM#1288
Are the table’s cup holders THAT bad?
You know, when I originally bought the table, I didn't think I'd want to upgrade my cup holders. I thought my crew and I would be able to manage around it and I didn't see the need. On the first night of play I noticed one of my players lean in to scoop up chips and his leg pushed up against his drink and practically knocked it over onto the table. I made a motion for it and he mentioned the drink was almost empty. Whew.
I then realized I needed to upgrade.
Here's what a regular Coke can looks like in an upgraded cup holder. The lean you see here is the most it will ever tip over. At worst, there will be some splash on the table but most will collect in the cup holder.

Here is the same Coke can in the original cup holder. As you can see, the can will easily tip over onto the playing field.

TL;DR - Yes, it's THAT bad (for me and my crew).
elemenoNewbie4 posts
Posted Mar 26, 2024, 10:08 PM#1289
Yea looks pretty bad. I was hoping I could buy a smaller, deeper cup holder to place/glue into the existing ones, but from the looks of it, if I did that, regular sized cans wouldn’t fit.
RadicusScoutRegular28 posts
Posted Mar 26, 2024, 10:11 PM#1290
Yea looks pretty bad. I was hoping I could buy a smaller, deeper cup holder to place/glue into the existing ones, but from the looks of it, if I did that, regular sized cans wouldn’t fit.
If you just buy deeper cup holders, regular sized cans should fit just fine.
greedyinternRegular46 posts
Posted Mar 26, 2024, 10:21 PM#1291
Would you recommend it for those reasons alone if not planning to use the LEDs?
You might not plan to use the LEDs, but I highly recommend it. Getting the warm white COB LEDs and dimmer is a game changer.
LEDs off:

Warm white COB LEDs at about 30%:

RadicusScoutRegular28 posts
TonZagaRegular76 posts
greedyinternRegular46 posts
TonZagaRegular76 posts
Posted Mar 26, 2024, 10:47 PM#1295
I have the OG, non-LED Barrington 10 player table but like how those COB LED strips look. I'm intrigued enough to rush some parts to get this going before my game Saturday night :LOL: :laugh:
greedyinternRegular46 posts
Posted Mar 26, 2024, 10:51 PM#1296
I have the OG, non-LED Barrington 10 player table but like how those COB LED strips look. I'm intrigued enough to rush some parts to get this going before my game Saturday night :LOL: :laugh:

inapinchNewbie4 posts
Posted Mar 27, 2024, 3:25 AM#1297
Tonight is a record breaker for us — 13 ppl seated at the Barrington. Yikes.

davesilver88Micro-Stakes Grinder15 posts
Posted Mar 27, 2024, 2:26 PM#1298
I received my new hole saw and finished the remaining 7 holes this morning.
Unfortunately, I ripped the vinyl a bit. For now I put some black gorilla tape over it. I’m not pleased with my self, but it could be much worse. Definitely happy I decided to do this, you’re upgrading from coasters to cup holders.
RadicusScoutRegular28 posts
Posted Mar 27, 2024, 2:48 PM#1299
Congrats on your new cup holder! Bummer what happened to the vinyl. What happened? Did you just punch through it?
Don’t worry - with a drink or two, no one will even notice. ;)
davesilver88Micro-Stakes Grinder15 posts
Posted Mar 27, 2024, 6:36 PM#1300
Yea, I just went a tad too far with my saw on that one cup. 9 out of 10 isn’t bad, and the dmg is pretty minimal relative to the work.
RadicusScoutRegular28 posts
Posted Mar 27, 2024, 10:29 PM#1301
Show us the entire table!
davesilver88Micro-Stakes Grinder15 posts
Posted Mar 28, 2024, 11:17 AM#1302
Haha, will send a pic when I also receive my custom table top!
TheBigTaterRegular48 posts
Posted Mar 28, 2024, 1:25 PM#1303
13 ppl seated at the Barrington
:vomit: 13 handed hold em???

davesilver88Micro-Stakes Grinder15 posts
Posted Mar 28, 2024, 2:34 PM#1304
Alright here is a pic of the finished work, upgraded jumbo cup holders. Shout out to all who have posted guides, pics, and recommended tools / cup holders. Very pumped for my next game Apr 12.
greedyinternRegular46 posts
Posted Mar 28, 2024, 2:55 PM#1305
Alright here is a pic of the finished work, upgraded jumbo cup holders. Shout out to all who have posted guides, pics, and recommended tools / cup holders. Very pumped for my next game Apr 12.
Looks nice! Now make sure to just sit AT that spot with the rip and you'll never see it. Out of sight, out of mind. It blends right in.
davesilver88Micro-Stakes Grinder15 posts
Posted Mar 28, 2024, 2:59 PM#1306
Haha exactly. I mean, it’s a fold up table- it’s gonna get banged up. I of course wanna keep it in the best possible condition, but I also realize that due to the natural of it being foldable and moving around , it’s not gonna stay perfect. I think the bruise on my thigh from using the drill is worse than the rip in the vinyl lol
digiratiRegular33 posts
Posted Mar 31, 2024, 3:12 AM#1307
I ended up buying this hole saw that includes the arbor for just $26 off Amazon (https://www.amazon.com/?tag=amznpcfx-20). I'm five holes in and everything is going great. The arbor sticks out enough to hit the wood placed underneath the table as I'm cutting, so when I finally get through the wood of the table it provides a stop before cutting through the vinyl armrest. I'm still taking my time and not pushing down too hard, so I don't tear the vinyl by mistake, but since the arbor sticks out a bit it does add a little extra protection if you will.
https://a.co/d/5W8KIDV (https://a.co/d/5W8KIDV?tag=amznpcfx-20)

rainy_trailsMicro-Stakes Grinder11 posts
Posted Mar 31, 2024, 6:30 AM#1308
So I finished my Barrington mods (for now) but still need to order a topper.
New LEDs, Dimmer, AA Battery Pack, and Jumbo Cupholders
COB LEDs
I wasn't the biggest fan of the blue LEDs and didn't like how they were so spaced out. I saw someone talk about the COB LEDs and how they are amost diffused already and ordered the warm white and couldn't be happier. The LEDs are very close together so you don't need to put something in front of them to diffuse them like I was trying to do with the old LEDs. Instead of ripping out the old LEDs, I actually just wedged the new LEDs right on top of the current ones. It worked out great.
I did have to cut the light strip and attach another tail end. Very easy to do but measure accurately before you cut! You don't have much leeway with the 16.4ft strip. And then used the Y connector that also came with the COB connector package.
Screwed and glued on some velcro, glued velcro to the battery pack, then buttoned up everything else. Happy with it.
COB LED Lights (https://www.amazon.com/dp/B0BVR755VK?tag=amznpcfx-20)
COB Connector Package (https://www.amazon.com/dp/B0C2CVFGL8?tag=amznpcfx-20)
Dimmer (https://www.amazon.com/weideer-Lights-Dimmer-DC12V-24V-K-018-BK/dp/B092HX9435?tag=amznpcfx-20)
Battery Pack (https://www.amazon.com/gp/product/B09131Y9L8?tag=amznpcfx-20)
Jumbo Cupholders
I went with the jumbos after reading recommendations. Pried off the old ones with a vise grip, drilled a center hole down with a standard bit, then drilled from the bottom up with the 3 5/8in hole saw starting it the pre drilled hole. I got them all done but it was a bit of a struggle with the hole saw I bought. If I would do it again, I would get one that was deeper. This one barely made it through both pieces of wood.
Jumbo Cupholders (https://www.amazon.com/gp/product/B0789HG6NW?tag=amznpcfx-20)
Hole Saw (buy a deeper one) (https://www.amazon.com/gp/product/B0C6MN14B1?tag=amznpcfx-20)
View attachment 1252914 (https://www.pokerchipforum.com/attachments/1252914/)
Hey, I noticed that the link to the battery pack on Amazon (https://www.amazon.com/?tag=amznpcfx-20) isn't available. Is this the same thing ? https://www.amazon.com/AITIAO-Batte...5e-a276-bde72f74bcef&pd_rd_i=B09LTSNJTW&psc=1 (https://www.amazon.com/AITIAO-Battery-Container-5-5x2-1mm-Connector/dp/B09LTSNJTW/ref=dp_prsubs_sccl_1/139-3323471-6884929?pd_rd_w=Dnp05&content-id=amzn1.sym.53e0c629-1936-47cb-93a2-c361b12e7d3c&pf_rd_p=53e0c629-1936-47cb-93a2-c361b12e7d3c&pf_rd_r=QZ0S2NQY187N1CAZYGQT&pd_rd_wg=JTQ2D&pd_rd_r=a7641803-f28b-415e-a276-bde72f74bcef&pd_rd_i=B09LTSNJTW&psc=1&tag=amznpcfx-20)
ColquhounRegular82 posts
Posted Mar 31, 2024, 6:34 AM#1309
SalmonblasterMicro-Stakes Grinder11 posts
rainy_trailsMicro-Stakes Grinder11 posts
Posted Mar 31, 2024, 6:38 AM#1311
ColquhounRegular82 posts
Posted Mar 31, 2024, 6:39 AM#1312
thanks! curious, why would you need a 4-pack? Wouldn’t you only be able to use 1 pack at a time
I guess you could keep a few loaded up with batteries and swap them out for those really long sessions. :ROFL: :ROFLMAO:
Now that I think of it...how long do the battery packs last with these LED lights?
rainy_trailsMicro-Stakes Grinder11 posts
Posted Mar 31, 2024, 6:40 AM#1313
I guess you could keep a few loaded up with batteries and swap them out for those really long sessions. :ROFL: :ROFLMAO:
Hahaha that’s fair lmao
SalmonblasterMicro-Stakes Grinder11 posts
Posted Mar 31, 2024, 6:52 AM#1314
I guess you could keep a few loaded up with batteries and swap them out for those really long sessions. :ROFL: :ROFLMAO:
Now that I think of it...how long do the battery packs last with these LED lights?
Mine was at 7 hours and still going strong last session..now if I can just remember which pack I used, I'll be able to give you a number when those finally die. :LOL: :laugh:
rainy_trailsMicro-Stakes Grinder11 posts
digiratiRegular33 posts
digiratiRegular33 posts
Posted Apr 1, 2024, 1:20 AM#1317
OK, I finished cutting out all of the holes for my larger cupholders and everything went smoothly. I followed the excellent step by step guide by @greedyintern (https://www.pokerchipforum.com/members/17235/) (thanks for the great explanation and photos).
One thing nobody mentioned, and it would keep me from doing the cupholder mods every again, is that whatever pressboard material Barrington is using between the plywood and the table felt smells like what I'd expect a camel's ass to smell like on a hot Sahara day. That, PLUS CRAP!
(https://www.pokerchipforum.com/threads/barrington-poker-table-thread.30910/#-)
greedyinternRegular46 posts
Posted Apr 1, 2024, 3:05 AM#1318
OK, I finished cutting out all of the holes for my larger cupholders and everything went smoothly. I followed the excellent step by step guide by @greedyintern (https://www.pokerchipforum.com/members/17235/) (thanks for the great explanation and photos).
One thing nobody mentioned, and it would keep me from doing the cupholder mods every again, is that whatever pressboard material Barrington is using between the plywood and the table felt smells like what I'd expect a camel's ass to smell like on a hot Sahara day. That, PLUS CRAP!
Glad it went well! Sorry I didn't warn you about the smell! Haha
rainy_trailsMicro-Stakes Grinder11 posts
Posted Apr 1, 2024, 5:22 AM#1319
Alright boys, this coming week or 2 i’ll do the White LED and Cup Holder upgrade.. I feel confident after all the comments !
rainy_trailsMicro-Stakes Grinder11 posts
Posted Apr 1, 2024, 6:07 AM#1320
I recently upgraded my cup holders after a couple of close calls of having drinks spilled onto the playing surface. The cup holders that come with the table are a joke (a very cruel and sad joke). If you're on the fence about upgrading yours, don't delay. Get them upgraded. They're a huge improvement.
View attachment 1289094 (https://www.pokerchipforum.com/attachments/1289094/)
I was really encouraged by the posts by @dmoney (https://www.pokerchipforum.com/members/3698/) and @greedyintern (https://www.pokerchipforum.com/members/17235/). Huge shout out to them and their guides. Those helped tremendously. This is dedicated to @Saoliver (https://www.pokerchipforum.com/members/1603/) who asked for a video (in the thread - not to me personally) but this is as close to a video I could muster. I hope this is helpful. :)
Items/tools:
View attachment 1289142 (https://www.pokerchipforum.com/attachments/1289142/)
Replacement cup holders (https://www.amazon.com/YH-Poker-Jumbo-Stainless-Holders/dp/B0789HG6NW/?tag=amznpcfx-20)
Gloves
Eye protection
Auto trim removal tool (https://www.amazon.com/dp/B0C6V39SVH?tag=amznpcfx-20)
Screwdriver
Hole saw (3 5/8") (https://www.amazon.com/dp/B01987566S?tag=amznpcfx-20) - (In retrospect, I would have used a different hole saw. Maybe the Milwaukee one)
Tape measure
Cardboard sheet
Hole saw arbor
1/4" drill bit
1/8" drill bit
Screw
Drill
Hair dryer (not pictured)
Step 1: Remove original cup holders
This step is pretty simple. Set the hairdryer on high heat and keep it approximately 1 inch away from the cup holder for about a minute. Most of the cup holders will only require a minute for the glue to loosen up. I only had a couple that needed more time. For those, I did it again for another minute.
View attachment 1289155 (https://www.pokerchipforum.com/attachments/1289155/)
After the hairdryer, use the auto trim tool to pry the cup holder away from the loose glue. Work the tool around the cup holder while gently pulling the cup and glue apart.
View attachment 1289156 (https://www.pokerchipforum.com/attachments/1289156/)
A couple of things to keep in mind when you remove the cup holder from the table:
The cup holder will be hot from the hairdryer so wear your gloves.
The glue will be very sticky so pull directly up and not to the side. Try not to get any on your the table/padding.
View attachment 1289157 (https://www.pokerchipforum.com/attachments/1289157/)
Step 2: Mark the drill hole
Before you move onto this step, make sure all the glue has completely cooled off and dried.
This step is relatively easy but requires some concentration. The exactness of this step will ensure your new cup holders will be where you want them to be.
The original cup holders on my Barrington is measured at 3 1/2" across. You should double check yours if you're going to follow this step of my guide.
View attachment 1289168 (https://www.pokerchipforum.com/attachments/1289168/)
The new cup holders measure 4" across.
View attachment 1289169 (https://www.pokerchipforum.com/attachments/1289169/)
Since the size difference between the 2 cup holders is 1/2", we will need to mark the new center hole 1/4" away from the original center.
Here is a reference on how I calculated my center hole. I started the measure from the outer edge of the original cup holder. The idea is to mark the new center at the 2" mark.
View attachment 1289453 (https://www.pokerchipforum.com/attachments/1289453/)
Here is a better visualization of this. The new center hole has to be 1/4" closer to the table and yet remain in center of the left/right side edges.
View attachment 1289461 (https://www.pokerchipforum.com/attachments/1289461/)
I tried using a marker on the glue but found it difficult to accurately mark the exact location of the new hole. I decided to use a screw instead and that worked much better. The good thing about this is that I could move the screw easily to make fine adjustments as much as I needed. Once I've double (tripled!) checked my measurement I screwed in the screw to make a pilot hole. I didn't drill too deep - just deep enough to make a visible hole.
View attachment 1289462 (https://www.pokerchipforum.com/attachments/1289462/)
Ultimately, I ended up with this outcome. I then took my 1/8" drill bit and drilled through the table using the pilot hole as a guide.
View attachment 1289471 (https://www.pokerchipforum.com/attachments/1289471/)
Step 3: Drill out the new holes (from the bottom)
Flip the table upside down.
Before I drilled the hole with my hole saw, I drilled through the existing hole using the 1/4" drill bit. The reason for this is that the drill arbor is 1/4" so I wanted to make sure the arbor was aligned exactly to the new center. In retrospect, I suspect I could have used the 1/4" bit instead of the 1/8" bit in Step 2 and saved a step.
Drilling the hole was the worst part (for me). The hardest part was intentionally going slow and not hurry the process. The thing to note here is to stop drilling immediately after you've broken through to the foam. I was a nervous wreck trying not to over drill.
As you can see below, the foam is glued to the wood so I had to carefully separate the foam after I had drilled through the wood. Try to retain as much foam as you can in the original hole. This will help with the snugness of the new cup holder.
View attachment 1289474 (https://www.pokerchipforum.com/attachments/1289474/)
Here is an "in progress" picture of the process. I really wanted to see the new cup holder put in so I did that one right away (it's rad). I was also doubting I did the math properly in Step 2 so I wanted to quadruple check it was right (it was). TRUST THE MATH!
I also wanted to show the new Barringtons have clearance for the holes without sawing any of the posts.
Please ignore my monstrosity of a drill. The nerds over at r/tools will ban me if they ever saw that thing.
View attachment 1289481 (https://www.pokerchipforum.com/attachments/1289481/)
Step 4: Insert new cup holders and ENJOY
This step is easy and the most enjoyable. The new cup holders will be very snug (tight) in the new opening. I used a cardboard sheet to help me evenly apply pressure and knead the cup holder in. Think flattening pizza dough - same idea and motion.
Others mentioned having to tape their new cup holders with masking / duct tape to make them snug but I didn't have to do that. The foam and vinyl were enough to keep these cup holders very tight and snug. Oh, speaking of foam, trim away the excess foam that will be sticking out of the bottom after you're all done.
That's it! Enjoy your new rad cup holders!
Don't yell at me about my chairs. They're next to be upgraded!
View attachment 1289497 (https://www.pokerchipforum.com/attachments/1289497/)
Quick question: So, you didn't ultimately need the `1/8 drill bit? I will be using this guide !
kach33Micro-Stakes Grinder8 posts
Posted Apr 1, 2024, 10:15 AM#1321
I have a question for those that have done the cup holders. How do you know when to stop cutting with the hole saw before you cut into the padding? Possibly the feel or sound?
I’ve been wanting to do this for a while now and think I’m ready to try.
davesilver88Micro-Stakes Grinder15 posts
Posted Apr 1, 2024, 1:13 PM#1322
I have a question for those that have done the cup holders. How do you know when to stop cutting with the hole saw before you cut into the padding? Possibly the feel or sound?
I’ve been wanting to do this for a while now and think I’m ready to try.
For me it was the feel
RadicusScoutRegular28 posts
Posted Apr 1, 2024, 2:18 PM#1323
Quick question: So, you didn't ultimately need the `1/8 drill bit? I will be using this guide !
Looking back on it, I don't think so. I think I could have just used the 1/4" bit with from the get go.
Let us know how it goes!
RadicusScoutRegular28 posts
Posted Apr 1, 2024, 2:21 PM#1324
I have a question for those that have done the cup holders. How do you know when to stop cutting with the hole saw before you cut into the padding? Possibly the feel or sound?
I’ve been wanting to do this for a while now and think I’m ready to try.
For me it was the feel
Yep. Same for me.
Take it really slow. I'd stop and look at the hole every now and then to see how far I've drilled. When you're about to reach the bottom layer (you can actually feel a difference in the wood), go really slow and as soon as you break through that - stop drilling immediately.
You got this.
digiratiRegular33 posts
Posted Apr 1, 2024, 8:05 PM#1325
I have a question for those that have done the cup holders. How do you know when to stop cutting with the hole saw before you cut into the padding? Possibly the feel or sound?
I’ve been wanting to do this for a while now and think I’m ready to try.
I have the LED version of the Barrington table. There were two stages when cutting with the hole saw from the bottom. The first stage is the plywood and it was obvious when you got through that. The next stage was this terrible smelling press board, and for that you also feel when you've gone through it. I didn't push down very hard, but I also used a nice arbored hole saw that the arbor stuck out enough to almost keep me from going further. It went smoothly.
kach33Micro-Stakes Grinder8 posts
Posted Apr 1, 2024, 10:05 PM#1326
For me it was the feel
Yep. Same for me.
Take it really slow. I'd stop and look at the hole every now and then to see how far I've drilled. When you're about to reach the bottom layer (you can actually feel a difference in the wood), go really slow and as soon as you break through that - stop drilling immediately.
You got this.
I have the LED version of the Barrington table. There were two stages when cutting with the hole saw from the bottom. The first stage is the plywood and it was obvious when you got through that. The next stage was this terrible smelling press board, and for that you also feel when you've gone through it. I didn't push down very hard, but I also used a nice arbored hole saw that the arbor stuck out enough to almost keep me from going further. It went smoothly.
Awesome. That’s what I thought, just go slow and pay attention to the sound and feel.
Funny story, I work nights so after thinking and reading about this all night last night I came home and went to sleep. I had a dream I actually messed it up and cut through the foam. I don’t normally remember much of my dreams but I do that one
It seems pretty straightforward. Thanks for the help!
digiratiRegular33 posts
Posted Apr 1, 2024, 10:34 PM#1327
IMPORTANT: So, I thought everything went perfectly, but there was one problem. The straps that hold the table together when folded run through the two cup holder areas at the ends of the table. On one, the hole saw cut through it without any problem. However, on the other end, either the strap got pulled by the teeth of the hole saw or the excess felt got caught and pulled it causing a tear in the original table felt. Not the end of the world since I purchased a custom table topper like most people in this forum. This is obviously a fluke since I don’t recall seeing anyone else mention this. Because the strap is in between the pressboard material and the plywood you really can’t avoid cutting it. My guess is that I was going too slow through the plywood and therefore the teeth just pulled instead of cut this strap or the excess table felt. Either way, my advice is to go FULL SPEED through the plywood (which is the first layer you cut through). You’re going to feel when you cut through it. That way you will cut, not pull, on the straps/excess felt.

digiratiRegular33 posts
Posted Apr 2, 2024, 4:10 AM#1328
Question for those who bought this dimmer off Amazon (https://www.amazon.com/?tag=amznpcfx-20): https://a.co/d/eKGk49u (https://a.co/d/eKGk49u?tag=amznpcfx-20)

Both of the dimmers in the package I received would NOT allow for turning of the LED lights. It would only allow for the lights to go down to about 30% of their brightness. Seems kind of screwy that the knob on these has an OFF position, but the lights never go down to zero/off.
Did anyone else have this issue?
Danny_BananaNewbie1 posts
Posted Apr 2, 2024, 5:34 AM#1329
Question for those who bought this dimmer off Amazon: https://a.co/d/eKGk49u (https://a.co/d/eKGk49u?tag=amznpcfx-20)
Both of the dimmers in the package I received would NOT allow for turning of the LED lights. It would only allow for the lights to go down to about 30% of their brightness. Seems kind of screwy that the knob on these has an OFF position, but the lights never go down to zero/off.
Did anyone else have this issue?
Mine worked fine. Can turn off and dim all the way to barely on. Sounds like you got defective stock.
TX_Golf_N_PokerRegular48 posts
Posted Apr 2, 2024, 6:03 AM#1330
I bought the regular version and exchanged it to the LED version for just those reasons. I never plan on using the LED's but the heavier deck is definitely a plus.
Be warned...the folded table is HEAVY. I bought the bag for it and it's better, but two people makes getting it set up much easier.
I will admit I was totally not expecting the LED table to have the heft that it did. Definitely a two-person job for my setup, but it also pays to have strapping young sons that want to show off their muscles...
The LED table is a brut, and yes, 2 people to set it up would be easier, but I'd say it's still doable by one for the majority of adult men. I'm 66 and not muscle bound in any way whatsoever, and I've done it twice. I bought the bag for the second time I used it and it does make it quite a bit easier. I have to move it about 60 feet from my house to my detached garage for storage.
EastCoastCaliMicro-Stakes Grinder11 posts
rainy_trailsMicro-Stakes Grinder11 posts
ColquhounRegular82 posts
digiratiRegular33 posts
Posted Apr 3, 2024, 2:12 AM#1334
Did anyone use a different cup holder set than this one?
No, those are the ones I used and they're great. I cannot see needing anything deeper.
They seem deep enough.
I've installed mine and they're perfect.
rainy_trailsMicro-Stakes Grinder11 posts
Posted Apr 3, 2024, 11:38 PM#1335
what am i doing wrong :(

digiratiRegular33 posts
Posted Apr 3, 2024, 11:40 PM#1336
what am i doing wrong :(View attachment 1304827 (https://www.pokerchipforum.com/attachments/1304827/)
The LED strip should of already had lead wires running off it. Also, you need to be sure you cut the LED strip only along the thin black line they add every inch or so for s guide.
rainy_trailsMicro-Stakes Grinder11 posts
Posted Apr 3, 2024, 11:43 PM#1337
The LED strip should of already had lead wires running off it. Also, you need to be sure you cut the LED strip only along the thin black line they add every inch or so for s guide.
i cut the lead off lol
digiratiRegular33 posts
Posted Apr 3, 2024, 11:58 PM#1338
i cut the lead off lol
Well, then try scrapping off the plastic to try and get to the contacts. Good luck.
rainy_trailsMicro-Stakes Grinder11 posts
Posted Apr 4, 2024, 12:00 AM#1339
Well, then try scrapping off the plastic to try and get to the contacts. Good luck.
i have a soldering iron nvm i fixed it haha
MrBooshRegular32 posts
digiratiRegular33 posts
Posted Apr 4, 2024, 12:53 AM#1341
You have convinced me to upgrade my LED lights to the warm white LED's you have. I have already ordered and received all the goodies from Amazon. Now I just need to find some free time to do the upgrade. Thanks for the inspiration! I can't wait to show off the results.
I recommend peeling off the tape backing and sticking them to the old LED strip (if you have the LED version of the table). I tried without doing that and they would slip out in spots.
greedyinternRegular46 posts
Posted Apr 4, 2024, 12:59 AM#1342
I recommend peeling off the tape backing and sticking them to the old LED strip (if you have the LED version of the table). I tried without doing that and they would slip out in spots.
Yeah it all depends on your table. I was able to wedge mine in and only peel off about 6 in of adhesive at the ends. I did this just because I was testing the lights but I've never circled back to peel off the rest of the adhesive.
Definitely start without any slack. I accidentally started with a little too much and I barely made it to the end!
SalmonblasterMicro-Stakes Grinder11 posts
Posted Apr 4, 2024, 1:08 AM#1343
You have convinced me to upgrade my LED lights to the warm white LED's you have. I have already ordered and received all the goodies from Amazon. Now I just need to find some free time to do the upgrade. Thanks for the inspiration! I can't wait to show off the results.
GET THE DIMMER!!!
ColquhounRegular82 posts
Posted Apr 4, 2024, 1:10 AM#1344
I'm interested in doing this upgrade to COB led's but I'm not sure I understand whats involved with cutting them, and splicing, etc.
Also, is it one long strip, or two halves?
rainy_trailsMicro-Stakes Grinder11 posts
Posted Apr 4, 2024, 1:21 AM#1345
Yeah it all depends on your table. I was able to wedge mine in and only peel off about 6 in of adhesive at the ends. I did this just because I was testing the lights but I've never circled back to peel off the rest of the adhesive.
Definitely start without any slack. I accidentally started with a little too much and I barely made it to the end!
how did you feed the LED through the Barrington? The friction on the silicon won’t let me pull it through lol
digiratiRegular33 posts
Posted Apr 4, 2024, 1:22 AM#1346
I'm interested in doing this upgrade to COB led's but I'm not sure I understand whats involved with cutting them, and splicing, etc.
Also, is it one long strip, or two halves?
It’s one long strip. You’ll only make one cut. It’s easy.
greedyinternRegular46 posts
Posted Apr 4, 2024, 1:22 AM#1347
I'm interested in doing this upgrade to COB led's but I'm not sure I understand whats involved with cutting them, and splicing, etc.
Also, is it one long strip, or two halves?
It's one long strip. You do need cut it and attach an end for the barrel, and use a Y connector. It's all very simple once it's in front of you. I can go into more detail, just on mobile now.
greedyinternRegular46 posts
Posted Apr 4, 2024, 1:23 AM#1348
how did you feed the LED through the Barrington? The friction on the silicon won’t let me pull it through lol
Very carefully. :D
digiratiRegular33 posts
Posted Apr 4, 2024, 1:33 AM#1349
how did you feed the LED through the Barrington? The friction on the silicon won’t let me pull it through lol
I used needle nose pliers.
MrBooshRegular32 posts
Posted Apr 4, 2024, 4:14 AM#1350
I recommend peeling off the tape backing and sticking them to the old LED strip (if you have the LED version of the table). I tried without doing that and they would slip out in spots.
Thank you for the advise. I appreciate it!
GET THE DIMMER!!!
I have had the dimmers for a while now. They make a huge difference.
ctestbMicro-Stakes Grinder8 posts
Posted Apr 7, 2024, 6:46 PM#1351
I just did it after taking the cup holders out and waiting 3 weeks being too scared to actually drill into it. Only went too far on the first two but still no issues. What a game changer. Whoever is out there debating it - DO IT.
However, I will join the general consensus - Get a GOOD drill bit. I got the cheapest one I could find thinking I will never use it again - It torqued and twisted and I went through 3 batteries drilling the 10 holes. Brother in law is a plumber and let me use his after doing 6 and wanted to give up due to wrist pain. His was a much better brand and didn't snag up once.
Also recommendations:
1.) There are two layers of board (at least with mine) You can feel once you get through the first layer. I would stop and take the plug out of the bit. This helped tremendously with not catching/ torquing my wrist.
- A good way to make life easier and not torque, is to slowly apply pressure while drilling straight down in a circular motion. This sped the time up greatly.
I actually had to rip some of the foam off for the last 8 due to it being too tight.
bbury10Newbie4 posts
Posted Apr 18, 2024, 11:40 PM#1352
Has anyone used cupholders that are the same diameter, just deeper? It seems like most have gone the “jumbo” 4 inch diameter route which require expanding the existing cutout. I dont think ill need anything wider than a can or bottle so, if possible would prefer the easier diy.
Can’t seem to find anything online that fits. I measured and my Barrington w/ LED cup holders are 3 3/8 edge to edge.
digiratiRegular33 posts
ColquhounRegular82 posts
Posted Apr 19, 2024, 12:40 AM#1354
Has anyone used cupholders that are the same diameter, just deeper? It seems like most have gone the “jumbo” 4 inch diameter route which require expanding the existing cutout. I dont think ill need anything wider than a can or bottle so, if possible would prefer the easier diy.
Can’t seem to find anything online that fits. I measured and my Barrington w/ LED cup holders are 3 3/8 edge to edge.
You still need to cut holes with the smaller cup holders...why not get larger ones while you're going through the trouble?
Lord_FoldemortMicro-Stakes Grinder6 posts
Posted Apr 19, 2024, 7:14 AM#1355
You still need to cut holes with the smaller cup holders...why not get larger ones while you're going through the trouble?
I second this. This was my exact thought process. I actually bought deeper ones of the same width first and was irritated by the fact that the only fit beer bottles or cans, whiskey glasses and beer glasses were way to big to fit. Ended up going with wider cupholders and couldnt be happier.
bbury10Newbie4 posts
Posted Apr 19, 2024, 1:06 PM#1356
Never was good with peer pressure.
4 inch jumbos and saw have been ordered
NotRealNameNoSirRegular73 posts
Posted Apr 19, 2024, 1:17 PM#1357
Never was good with peer pressure.
4 inch jumbos and saw have been ordered
I ordered mine a few months ago, still haven't dragged it outside to drill into!
davesilver88Micro-Stakes Grinder15 posts
Posted Apr 19, 2024, 1:35 PM#1358
You gotta go with the jumbo. I’ve had 3 games with my new table, and when my cousin put his tequila rocks ever so perfectly into the cup holders, I felt very satisfied
ColquhounRegular82 posts
Posted Apr 19, 2024, 2:37 PM#1359
You gotta go with the jumbo. I’ve had 3 games with my new table, and when my cousin put his tequila rocks ever so perfectly into the cup holders, I felt very satisfied
Great idea…make it easier for your opponents to get drunk at the table. +EV :ROFL: :ROFLMAO:
davesilver88Micro-Stakes Grinder15 posts
Posted Apr 19, 2024, 2:42 PM#1360
Great idea…make it easier for your opponents to get drunk at the table. +EV :ROFL: :ROFLMAO:
i ended up drinking too, so it was neutral or -ev lol
bbury10Newbie4 posts
Posted Apr 21, 2024, 11:13 PM#1361
If you’re going to go to a forum for experts opinions… take their advice! Just want to say I appreciate you guys swaying me to the jumbo cup holders rather than just deeper. I cant emphasize enough how glad i am went this route. Night and day difference!
Used @RadicusScout (https://www.pokerchipforum.com/members/10148/) blueprint from few pages back and worked flawlessly. One of the first diy projects that didn’t end up with multiple Home Depot trips or scouring YouTube to find a solution for a surprise/disaster mid project.
I went w/ the 3 5/8 Milwaukee and 3/8 Arbor. Worked like a charm. Once i get my custom topper and chips from the upcoming group order ill post better pictures but for the time being
RadicusScoutRegular28 posts
Posted Apr 21, 2024, 11:16 PM#1362
If you’re going to go to a forum for experts opinions… take their advice! Just want to say I appreciate you guys swaying me to the jumbo cup holders rather than just deeper. I cant emphasize enough how glad i am went this route. Night and day difference!
Used @RadicusScout (https://www.pokerchipforum.com/members/10148/) blueprint from few pages back and worked flawlessly. One of the first diy projects that didn’t end up with multiple Home Depot trips or scouring YouTube to find a solution for a surprise/disaster mid project.
I went w/ the 3 5/8 Milwaukee and 3/8 Arbor. Worked like a charm. Once i get my custom topper and chips from the upcoming group order ill post better pictures but for the time being
That's an awesome looking upgrade! I'm happy my guide helped.
Looking forward to seeing the entire ensemble!
HuskerchipperRegular35 posts
Posted Apr 24, 2024, 4:22 AM#1363
Can you guys please let this thread die before I end up buying one of these sumbitches.:confused

DodgerRegular46 posts
SixSpeedFuryRegular64 posts
Posted Apr 24, 2024, 6:50 AM#1365
Can you guys please let this thread die before I end up buying one of these sumbitches.:(

RadicusScoutRegular28 posts
Posted Apr 24, 2024, 2:12 PM#1366
elemenoNewbie4 posts
Posted Apr 24, 2024, 2:20 PM#1367
Can you guys please let this thread die before I end up buying one of these sumbitches.:confusedView attachment 1317457 (https://www.pokerchipforum.com/attachments/1317457/)
Honestly, this table is great value for the money, especially if you wait for a sale. In hindsight, if I were playing with dice chips on a dining table, I’d upgrade to this table before getting chips. I also think it’s fine stock (the heavier LED version, at least), but definitely deeper/wider cup holders would be a nice upgrade, but not a must have for me. I’m thinking about a topper for purely aesthetic reasons, but the felt is fine and the crease in the middle went unnoticed during play.
davesilver88Micro-Stakes Grinder15 posts
Posted Apr 25, 2024, 1:15 PM#1368
Honestly, this table is great value for the money, especially if you wait for a sale. In hindsight, if I were playing with dice chips on a dining table, I’d upgrade to this table before getting chips. I also think it’s fine stock (the heavier LED version, at least), but definitely deeper/wider cup holders would be a nice upgrade, but not a must have for me. I’m thinking about a topper for purely aesthetic reasons, but the felt is fine and the crease in the middle went unnoticed during play.
The table is without question a monster step in the right direction if you're playing on some random table. And yes, it's my opinion too that the table should be upgraded before the chips, the table seems to be more important.
My issue with stock cup holders was that they appear to be cup holders, but they are closer to coasters. And I'm not against coasters, I played on a lifetime foldable table with some cheap felt I just put on top from Amazon (https://www.amazon.com/?tag=amznpcfx-20) for a long time - never had a spill. But, when you appear to be a cup holder when you're infact just a coaster, I felt it was more likely have spills - so I upgraded the cup holders before my first game. It was a pain in the butt, so worth it though.
And I also agree, the stock felt is fine and the crease isn't as bad as one may think. I say that but I do have a custom table top too.
Tony_MMicro-Stakes Grinder17 posts
Posted Apr 25, 2024, 8:11 PM#1369
The table is without question a monster step in the right direction if you're playing on some random table. And yes, it's my opinion too that the table should be upgraded before the chips, the table seems to be more important.
My issue with stock cup holders was that they appear to be cup holders, but they are closer to coasters. And I'm not against coasters, I played on a lifetime foldable table with some cheap felt I just put on top from Amazon for a long time - never had a spill. But, when you appear to be a cup holder when you're infact just a coaster, I felt it was more likely have spills - so I upgraded the cup holders before my first game. It was a pain in the butt, so worth it though.
And I also agree, the stock felt is fine and the crease isn't as bad as one may think. I say that but I do have a custom table top too.
I thought they were ashtrays
kach33Micro-Stakes Grinder8 posts
Posted Apr 26, 2024, 1:22 AM#1370
I know it’s been said but anyone on the fence about upgrading the cup holders and adding the cob led lights should DO IT! I finished this morning and wow what a difference the cup holders make.
I got the same lights linked earlier in the thread and they worked out great, it’s almost like they’re diffused already.
I’m not the most handy person, I did build my other table myself though, but this was pretty straightforward. Like everyone says, just go slow. By the start of the third one I was pretty confident and it went smooth from there knowing the feel and sounds to pay attention too. I even stopped a few times each hole to vacuum the saw dust out of the way and take a look.
Well worth the little bit it takes for these upgrades. Next step is a topper from @rjdev7 (https://www.pokerchipforum.com/members/1014/). I just gotta place the order
The lights here are a little hard to see turned as dim as they are in the semi sunlight but they’re plenty bright turned all the way up. I’d say that’s about 20% in the pic which is actually about perfect in person
bbury10Newbie4 posts
Posted Apr 26, 2024, 1:56 AM#1371
Are there any other vendors similar to rjdev that offer toppers? It sounds like he is understandably digging out of backlog of requests. I have no problem waiting and plan to buy multiple custom toppers from him based on reviews/feedback and rotate them.
I’d also like to get something nearer-term to get my game going.. can’t be having the black/brown stock barrington for opening night!
NotRealNameNoSirRegular73 posts
Posted Apr 26, 2024, 2:00 AM#1372
I recently upgraded my cup holders after a couple of close calls of having drinks spilled onto the playing surface. The cup holders that come with the table are a joke (a very cruel and sad joke). If you're on the fence about upgrading yours, don't delay. Get them upgraded. They're a huge improvement.
View attachment 1289094 (https://www.pokerchipforum.com/attachments/1289094/)
I was really encouraged by the posts by @dmoney (https://www.pokerchipforum.com/members/3698/) and @greedyintern (https://www.pokerchipforum.com/members/17235/). Huge shout out to them and their guides. Those helped tremendously. This is dedicated to @Saoliver (https://www.pokerchipforum.com/members/1603/) who asked for a video (in the thread - not to me personally) but this is as close to a video I could muster. I hope this is helpful. :)
Items/tools:
View attachment 1289142 (https://www.pokerchipforum.com/attachments/1289142/)
Replacement cup holders (https://www.amazon.com/YH-Poker-Jumbo-Stainless-Holders/dp/B0789HG6NW/?tag=amznpcfx-20)
Gloves
Eye protection
Auto trim removal tool (https://www.amazon.com/dp/B0C6V39SVH?tag=amznpcfx-20)
Screwdriver
Hole saw (3 5/8") (https://www.amazon.com/dp/B01987566S?tag=amznpcfx-20) - (In retrospect, I would have used a different hole saw. Maybe the Milwaukee one)
Tape measure
Cardboard sheet
Hole saw arbor
1/4" drill bit
1/8" drill bit
Screw
Drill
Hair dryer (not pictured)
Step 1: Remove original cup holders
This step is pretty simple. Set the hairdryer on high heat and keep it approximately 1 inch away from the cup holder for about a minute. Most of the cup holders will only require a minute for the glue to loosen up. I only had a couple that needed more time. For those, I did it again for another minute.
View attachment 1289155 (https://www.pokerchipforum.com/attachments/1289155/)
After the hairdryer, use the auto trim tool to pry the cup holder away from the loose glue. Work the tool around the cup holder while gently pulling the cup and glue apart.
View attachment 1289156 (https://www.pokerchipforum.com/attachments/1289156/)
A couple of things to keep in mind when you remove the cup holder from the table:
The cup holder will be hot from the hairdryer so wear your gloves.
The glue will be very sticky so pull directly up and not to the side. Try not to get any on your the table/padding.
View attachment 1289157 (https://www.pokerchipforum.com/attachments/1289157/)
Step 2: Mark the drill hole
Before you move onto this step, make sure all the glue has completely cooled off and dried.
This step is relatively easy but requires some concentration. The exactness of this step will ensure your new cup holders will be where you want them to be.
The original cup holders on my Barrington is measured at 3 1/2" across. You should double check yours if you're going to follow this step of my guide.
View attachment 1289168 (https://www.pokerchipforum.com/attachments/1289168/)
The new cup holders measure 4" across.
View attachment 1289169 (https://www.pokerchipforum.com/attachments/1289169/)
Since the size difference between the 2 cup holders is 1/2", we will need to mark the new center hole 1/4" away from the original center.
Here is a reference on how I calculated my center hole. I started the measure from the outer edge of the original cup holder. The idea is to mark the new center at the 2" mark.
View attachment 1289453 (https://www.pokerchipforum.com/attachments/1289453/)
Here is a better visualization of this. The new center hole has to be 1/4" closer to the table and yet remain in center of the left/right side edges.
View attachment 1289461 (https://www.pokerchipforum.com/attachments/1289461/)
I tried using a marker on the glue but found it difficult to accurately mark the exact location of the new hole. I decided to use a screw instead and that worked much better. The good thing about this is that I could move the screw easily to make fine adjustments as much as I needed. Once I've double (tripled!) checked my measurement I screwed in the screw to make a pilot hole. I didn't drill too deep - just deep enough to make a visible hole.
View attachment 1289462 (https://www.pokerchipforum.com/attachments/1289462/)
Ultimately, I ended up with this outcome. I then took my 1/8" drill bit and drilled through the table using the pilot hole as a guide.
View attachment 1289471 (https://www.pokerchipforum.com/attachments/1289471/)
Step 3: Drill out the new holes (from the bottom)
Flip the table upside down.
Before I drilled the hole with my hole saw, I drilled through the existing hole using the 1/4" drill bit. The reason for this is that the drill arbor is 1/4" so I wanted to make sure the arbor was aligned exactly to the new center. In retrospect, I suspect I could have used the 1/4" bit instead of the 1/8" bit in Step 2 and saved a step.
Drilling the hole was the worst part (for me). The hardest part was intentionally going slow and not hurry the process. The thing to note here is to stop drilling immediately after you've broken through to the foam. I was a nervous wreck trying not to over drill.
As you can see below, the foam is glued to the wood so I had to carefully separate the foam after I had drilled through the wood. Try to retain as much foam as you can in the original hole. This will help with the snugness of the new cup holder.
View attachment 1289474 (https://www.pokerchipforum.com/attachments/1289474/)
Here is an "in progress" picture of the process. I really wanted to see the new cup holder put in so I did that one right away (it's rad). I was also doubting I did the math properly in Step 2 so I wanted to quadruple check it was right (it was). TRUST THE MATH!
I also wanted to show the new Barringtons have clearance for the holes without sawing any of the posts.
Please ignore my monstrosity of a drill. The nerds over at r/tools will ban me if they ever saw that thing.
View attachment 1289481 (https://www.pokerchipforum.com/attachments/1289481/)
Step 4: Insert new cup holders and ENJOY
This step is easy and the most enjoyable. The new cup holders will be very snug (tight) in the new opening. I used a cardboard sheet to help me evenly apply pressure and knead the cup holder in. Think flattening pizza dough - same idea and motion.
Others mentioned having to tape their new cup holders with masking / duct tape to make them snug but I didn't have to do that. The foam and vinyl were enough to keep these cup holders very tight and snug. Oh, speaking of foam, trim away the excess foam that will be sticking out of the bottom after you're all done.
That's it! Enjoy your new rad cup holders!
Don't yell at me about my chairs. They're next to be upgraded!
View attachment 1289497 (https://www.pokerchipforum.com/attachments/1289497/)
Quoting this to force myself to actually do it soon. Ive had the cupholders for too long.
RadicusScoutRegular28 posts
Posted Apr 26, 2024, 4:06 AM#1373
Quoting this to force myself to actually do it soon. Ive had the cupholders for too long.
I believe in you. You got this.

ctestbMicro-Stakes Grinder8 posts
Posted May 17, 2024, 1:27 PM#1374
Quoting this to force myself to actually do it soon. Ive had the cupholders for too long.
I did the exact same thing - once you realize that basically worst case scenario is the cup holders aren't SUPER tight, which you can fix by wrapping them in tape or saran wrap, and they still will sit in and not fall out - you should get the courage. Only advice I'd give is dish out the extra cash for a really good circle bit. I bought the cheapest on amazon (https://www.amazon.com/?tag=amznpcfx-20) and I mean, you get what you pay for.
Lord_FoldemortMicro-Stakes Grinder6 posts
Posted May 17, 2024, 2:37 PM#1375
Quoting this to force myself to actually do it soon. Ive had the cupholders for too long.

davesilver88Micro-Stakes Grinder15 posts
Posted May 17, 2024, 2:39 PM#1376

Quoting this to force myself to actually do it soon. Ive had the cupholders for too long.
NotRealNameNoSirRegular73 posts
Posted May 17, 2024, 2:47 PM#1377
Youre all bullies, I still haven't done this.
davesilver88Micro-Stakes Grinder15 posts
Posted May 17, 2024, 3:38 PM#1378
Youre all bullies, I still haven't done this.

ctestbMicro-Stakes Grinder8 posts
Posted May 17, 2024, 8:05 PM#1379
110% Game changer - I did the cup holders and topper and everyone cared and commented on the cup holders more than the new topper
FishmanNewbie3 posts
Posted May 18, 2024, 12:58 PM#1380
I’ve been hemming and hawing on the LED version. if it was no light I’d snap one up from the Walmart sale. … these tables look great.
ctestbMicro-Stakes Grinder8 posts
Posted May 18, 2024, 1:01 PM#1381
I’ve been hemming and hawing on the LED version. if it was no light I’d snap one up from the Walmart sale. … these tables look great.
I didn't get the lighted table and do not regret it. I don't have lighting issues and (to me) it's just another cable for someone to trip over
Schmendr1ckRegular99 posts
Posted May 18, 2024, 1:59 PM#1382
I didn't get the lighted table and do not regret it. I don't have lighting issues and (to me) it's just another cable for someone to trip over
I own two of the lighted tables. I never use the lights and TBH I'm not sure I even know where the cables are - stuck in a drawer somewhere, presumably. The bright blue LEDs are painful. :cool
But in addition to lights, that version of the table has a thicker plywood base and larger legs. It's a sturdier (but also heavier) table. When I bought them it was a $20-30 price difference and turned out to be well worth it.
davesilver88Micro-Stakes Grinder15 posts
Posted May 18, 2024, 11:44 PM#1383
Youre all bullies, I still haven't done this.
Last night someone knocked their elbow into a beer bottle and it woulda spilled, but the jumbo cup holder saved it. No joke! I was very proud.
ValueTownNewbie2 posts
Posted May 18, 2024, 11:47 PM#1384
I got 2 tables, 1 ea, when they went on sale last time. .
NotRealNameNoSirRegular73 posts
Posted Jun 9, 2024, 3:55 PM#1385
I ordered mine a few months ago, still haven't dragged it outside to drill into!
Quoting this to force myself to actually do it soon. Ive had the cupholders for too long.
I believe in you. You got this.
Youre all bullies, I still haven't done this.
TODAY IS THE DAY.
RadicusScoutRegular28 posts
Posted Jun 9, 2024, 5:07 PM#1386
TODAY IS THE DAY.
HAVE FUN!

Pics or it didn't happen.
DodgerRegular46 posts
Posted Jun 9, 2024, 6:42 PM#1387
TODAY IS THE DAY.

NymorMicro-Stakes Grinder18 posts
Posted Jun 9, 2024, 9:37 PM#1388
NotRealNameNoSirRegular73 posts
Posted Jun 9, 2024, 9:41 PM#1389
ALRIGHT. Step one done, was definitely afraid of ruining the rail already. We got this.

NotRealNameNoSirRegular73 posts
Posted Jun 9, 2024, 10:05 PM#1390
ALRIGHT. Step one done, was definitely afraid of ruining the rail already. We got this.
View attachment 1341798 (https://www.pokerchipforum.com/attachments/1341798/)
Everything looks wrong but thats how projects go until they're done, then I love my work for all its imperfections. Pilots in place like I'm grounded, storm comin, I'm standin in place but the drill runnin.

EastCoastCaliMicro-Stakes Grinder11 posts
Posted Jun 9, 2024, 10:08 PM#1391
Everything looks wrong but thats how projects go until they're done, then I love my work for all its imperfections. Pilots in place like I'm grounded, storm comin, I'm standin in place but the drill runnin.
View attachment 1341821 (https://www.pokerchipforum.com/attachments/1341821/)

NotRealNameNoSirRegular73 posts
Posted Jun 9, 2024, 10:55 PM#1392
Not done with the hole yet but gotta cut the fabric safely. Also dont have the pipe cutter so 4 of the 10 aren't getting done today.

Edit: mission currently postponed due to hangry wife. Agreed plan is no longer in place.

SalmonblasterMicro-Stakes Grinder11 posts
NotRealNameNoSirRegular73 posts
Posted Jun 16, 2024, 5:43 PM#1394

:ROFL: :ROFLMAO: :ROFL: :ROFLMAO: :ROFL: :ROFLMAO:
Well TIMED, PADRE. Just purchased this. Game next Saturday, gotta finish today.

ColquhounRegular82 posts
Posted Jun 16, 2024, 5:46 PM#1395
Well TIMED, PADRE. Just purchased this. Game next Saturday, gotta finish today.
View attachment 1344848 (https://www.pokerchipforum.com/attachments/1344848/)
Wait…for that you need to remove the legs from the top to cut them, correct?
I would think it would be far easier with an oscillating tool or angle grinder with a metal cutoff blade/wheel. If you don’t have, maybe borrow or rent?
SalmonblasterMicro-Stakes Grinder11 posts
Posted Jun 16, 2024, 5:47 PM#1396
Well TIMED, PADRE. Just purchased this. Game next Saturday, gotta finish today.
View attachment 1344848 (https://www.pokerchipforum.com/attachments/1344848/)
Excited to see how it turns out!! Hope you know that my post was all in good fun as I love seeing the projects people get into and getting new tips and ideas from them.
NotRealNameNoSirRegular73 posts
Posted Jun 16, 2024, 5:49 PM#1397
Wait…for that you need to remove the Leah’s from the top to cut them correct?
I would think it would be far easier with an oscillating tool or angle grinder with a metal cutoff blade/wheel. If you don’t have, maybe borrow or rent?
Eh, youre probably right but didnt want to purchase one. Why is taking the legs off so tough? Getting the table out now.
Excited to see how it turns out!! Hope you know that my post was all in good fun as I love seeing the projects people get into and getting new tips and ideas from them.
For sure, no problem at all.
ColquhounRegular82 posts
Posted Jun 16, 2024, 5:55 PM#1398
Eh, youre probably right but didnt want to purchase one. Why is taking the legs off so tough? Getting the table out now.
For sure, no problem at all.
Yeah definitely not worth buying an expensive tool for this. If taking off the top isn’t too much trouble, that’s great! :tup:
NotRealNameNoSirRegular73 posts
Posted Jun 16, 2024, 6:51 PM#1399
@Colquhoun (https://www.pokerchipforum.com/members/7696/) always appreciate your input, no problem. Legs come off easy enough, finished up the other holes and will do these next before lining up the legs and knocking some inches off em.

EastCoastCaliMicro-Stakes Grinder11 posts
NotRealNameNoSirRegular73 posts
Posted Jun 16, 2024, 7:00 PM#1401
Am I the only one who didn’t have to mess with the legs for the cup holders? I’m confused…
Newer ones you don't need to. Older version you gotta.
EastCoastCaliMicro-Stakes Grinder11 posts
Posted Jun 16, 2024, 7:01 PM#1402
Newer ones you don't need to. Older version you gotta.
Ohhh ok, gotchya.
NotRealNameNoSirRegular73 posts
Posted Jun 16, 2024, 8:07 PM#1403
Okay! Pipes cut, holes cut, table is righted. Now Ive got to widen the pleather a bit and sink the cupholders.


NotRealNameNoSirRegular73 posts
Posted Jun 16, 2024, 8:10 PM#1404
AYOOOOOOOOO

NotRealNameNoSirRegular73 posts
Posted Jun 16, 2024, 8:21 PM#1405
Im the man. Took me 174 months to do this but eventually just used some noise cancelling headphones to ignore the corgi and bagpipes.
They're definitely not all centered, but my apes can't make change so Im not worried about it. Table was $86; with cupholders, tools to implement, topper, and bag for table and topper I might as well have just gone custom.

NotRealNameNoSirRegular73 posts
Posted Jun 21, 2024, 3:36 PM#1406
@KingHigh (https://www.pokerchipforum.com/members/16959/) surprisingly easy, but if you've got the old version make sure you get a pipe cutter too. Doesn't have to be fancy. I'll post a picture here of the finished product tomorrow, hosting first game since I dropped the bigger cupholders.
davesilver88Micro-Stakes Grinder15 posts
Posted Jun 21, 2024, 6:23 PM#1407
@KingHigh (https://www.pokerchipforum.com/members/16959/) surprisingly easy, but if you've got the old version make sure you get a pipe cutter too. Doesn't have to be fancy. I'll post a picture here of the finished product tomorrow, hosting first game since I dropped the bigger cupholders.
Good luck with your game! Gonna be great
KingHighMicro-Stakes Grinder14 posts
Posted Jun 22, 2024, 12:57 AM#1408
I know it’s been said but anyone on the fence about upgrading the cup holders and adding the cob led lights should DO IT! I finished this morning and wow what a difference the cup holders make.
I got the same lights linked earlier in the thread and they worked out great, it’s almost like they’re diffused already.
I’m not the most handy person, I did build my other table myself though, but this was pretty straightforward. Like everyone says, just go slow. By the start of the third one I was pretty confident and it went smooth from there knowing the feel and sounds to pay attention too. I even stopped a few times each hole to vacuum the saw dust out of the way and take a look.
Well worth the little bit it takes for these upgrades. Next step is a topper from @rjdev7 (https://www.pokerchipforum.com/members/1014/). I just gotta place the order
The lights here are a little hard to see turned as dim as they are in the semi sunlight but they’re plenty bright turned all the way up. I’d say that’s about 20% in the pic which is actually about perfect in person
The lights look very cool! Would you mind sending me the link to order? Thanks!
KingHighMicro-Stakes Grinder14 posts
Posted Jun 22, 2024, 6:36 PM#1409

I’m removing the original cupholders to replace them with jumbo sized. I’ve encountered the strap right through the center of the cup. Can someone tell me if this is this the end of my table having a functioning buckle? I assume I need to cut/drill through it.
EastCoastCaliMicro-Stakes Grinder11 posts
Posted Jun 22, 2024, 6:42 PM#1410
View attachment 1347598 (https://www.pokerchipforum.com/attachments/1347598/)I’m removing the original cupholders to replace them with jumbo sized. I’ve encountered the strap right through the center of the cup. Can someone tell me if this is this the end of my table having a functioning buckle? I assume I need to cut/drill through it.
I drilled thru mine accidentally and so far still functions fine. But I haven’t tested it extensively, so don’t quote me. Just be careful and be aware it’s lost some strength.
KingHighMicro-Stakes Grinder14 posts
Posted Jun 22, 2024, 9:39 PM#1411
Was able to remove the strap, cut the hole and reattach it with a screw to the side. Worked out well. Thanks.
View attachment 1249332 (https://www.pokerchipforum.com/attachments/1249332/)
That sounds like a great idea! How did you go about doing that?
KingHighMicro-Stakes Grinder14 posts
Posted Jun 22, 2024, 9:40 PM#1412
I drilled thru mine accidentally and so far still functions fine. But I haven’t tested it extensively, so don’t quote me. Just be careful and be aware it’s lost some strength.
Thanks for the info. I have a carry bag for my table so drilling through it could work out fine for me is what I’m thinking
GK WillieNewbie1 posts
suchj0shMicro-Stakes Grinder13 posts
Posted Jun 22, 2024, 10:30 PM#1414
Good bit smaller than the Barrington. Wish it was a touch bigger.
NotRealNameNoSirRegular73 posts
SamarathNewbie2 posts
Posted Jun 23, 2024, 7:27 PM#1416
So a question I have not seen asked or answered. Have started to replace cupholders on my Barrington table. My question is this: How do you avoid messing up the straps that hold the table together when its folded. The straps are anchored under the cups at each end. There appears no way to remove them without removing the rail, and I would prefer to avoid that.
kach33Micro-Stakes Grinder8 posts
Posted Jun 24, 2024, 5:33 AM#1417
KingHighMicro-Stakes Grinder14 posts
KingHighMicro-Stakes Grinder14 posts
Posted Jun 24, 2024, 6:08 AM#1419
So a question I have not seen asked or answered. Have started to replace cupholders on my Barrington table. My question is this: How do you avoid messing up the straps that hold the table together when it’s folded. The straps are anchored under the cups at each end. There appears no way to remove them without removing the rail, and I would prefer to avoid that.
I did the cupholders replacement job for myself just today. I sawed right through the straps. The clip end of the straps seem to be attached by the piece on the strap that is pressed under the railing. Surely the integrity of the strap has been compromised but I get the feeling it will still hold the table together well enough for me to put it in the bag and zip it up.
kach33Micro-Stakes Grinder8 posts
Posted Jun 24, 2024, 10:04 AM#1420
Very cool! I have the newer Barrington without the LEDs. I feel like it would look odd if I just glued LEDs to the inside of the vinyl. Is the Barrington w LEDs railing designed differently?
I believe the rail on the LED table is raised just a tiny bit to fit the lights, they’re like tucked under it. I didn’t have to actually glue the new ones in, I just pushed them into place right over the old ones. I’m not sure if they would fit under the regular table rail or not.
As far as the strap in the cup holder I sawed through mine as well and feel the same as you about its integrity surely being compromised but it seems to be holding the table together just fine. I don’t move it around much so I wasn’t that worried about it anyway.
EastCoastCaliMicro-Stakes Grinder11 posts
kach33Micro-Stakes Grinder8 posts
Posted Jun 24, 2024, 12:38 PM#1422
I love this setup and have thought about it for a while.
I'm curious if anyone has done the same thing with RGB cob replacements, and if so what they used? I find myself a little lost with connectors and whatnot. I'd love to get everything you got and just change it to RGB cob instead of just white.
You should do it, it’s simple. If you order from the links above I’m confident you wouldn’t have any problems. I was the same way with the connectors and all that but once you get it all and look at it you can tell how they connect and what not.
For the actual install on the table I just pushed them under the rail right over the existing lights and it fits perfectly. No glue or anything like that and they haven’t moved at all. I would recommend getting the dimmers though, they’re pretty bright at 100% so it’s nice to be able to adjust them however bright you want.
EastCoastCaliMicro-Stakes Grinder11 posts
Posted Jun 24, 2024, 12:54 PM#1423
You should do it, it’s simple. If you order from the links above I’m confident you wouldn’t have any problems. I was the same way with the connectors and all that but once you get it all and look at it you can tell how they connect and what not.
For the actual install on the table I just pushed them under the rail right over the existing lights and it fits perfectly. No glue or anything like that and they haven’t moved at all. I would recommend getting the dimmers though, they’re pretty bright at 100% so it’s nice to be able to adjust them however bright you want.
I actually do already have the dimmers, love them!
I will eventually get something and I know I could figure it out given the right connections. My fear is some of the RGB COB lights have what visually appear to be slightly different connections, so I'm afraid I'll buy all this just to realize the connectors you linked don't match up to the rgb lights. Hate to waste money on guess and check stuff, ya know. Also, I just clicked the link and remembered, the last time I looked they were currently unavailable and they still are, so I'd have to wait for those to come back into stock regardless.
greedyinternRegular46 posts
Posted Jun 24, 2024, 1:08 PM#1424
I actually do already have the dimmers, love them!
I will eventually get something and I know I could figure it out given the right connections. My fear is some of the RGB COB lights have what visually appear to be slightly different connections, so I'm afraid I'll buy all this just to realize the connectors you linked don't match up to the rgb lights. Hate to waste money on guess and check stuff, ya know. Also, I just clicked the link and remembered, the last time I looked they were currently unavailable and they still are, so I'd have to wait for those to come back into stock regardless.
The difficulty is finding RGB COB lights that are small enough.
I needed to find 8mm lights and the only COB lights I could find at that width were single color.
Every RGB COB strip I've found is 50% wider at 12mm.
They still might work, but I might be tight and a little more difficult to get them in there. If you do go that route, please report back! I'd be down to swap mine out eventually.
EastCoastCaliMicro-Stakes Grinder11 posts
Posted Jun 24, 2024, 1:11 PM#1425
The difficulty is finding RGB COB lights that are small enough.
I needed to find 8mm lights and the only COB lights I could find at that width were single color.
Every RGB COB strip I've found is 50% wider at 12mm.
They still might work, but I might be tight and a little more difficult to get them in there. If you do go that route, please report back! I'd be down to swap mine out eventually.
Oh that's riiight, I forgot about that part. I found some that were 10mm I think, but it was hardwired or something, I forget. Too many question marks with what I found for me to blindly buy and try at the time. Maybe I'll revisit it soon.
KingHighMicro-Stakes Grinder14 posts
Posted Jun 24, 2024, 3:41 PM#1426
I recently upgraded my cup holders after a couple of close calls of having drinks spilled onto the playing surface. The cup holders that come with the table are a joke (a very cruel and sad joke). If you're on the fence about upgrading yours, don't delay. Get them upgraded. They're a huge improvement.
View attachment 1289094 (https://www.pokerchipforum.com/attachments/1289094/)
I was really encouraged by the posts by @dmoney (https://www.pokerchipforum.com/members/3698/) and @greedyintern (https://www.pokerchipforum.com/members/17235/). Huge shout out to them and their guides. Those helped tremendously. This is dedicated to @Saoliver (https://www.pokerchipforum.com/members/1603/) who asked for a video (in the thread - not to me personally) but this is as close to a video I could muster. I hope this is helpful. :)
Items/tools:
View attachment 1289142 (https://www.pokerchipforum.com/attachments/1289142/)
Replacement cup holders (https://www.amazon.com/YH-Poker-Jumbo-Stainless-Holders/dp/B0789HG6NW/?tag=amznpcfx-20)
Gloves
Eye protection
Auto trim removal tool (https://www.amazon.com/dp/B0C6V39SVH?tag=amznpcfx-20)
Screwdriver
Hole saw (3 5/8") (https://www.amazon.com/dp/B01987566S?tag=amznpcfx-20) - (In retrospect, I would have used a different hole saw. Maybe the Milwaukee one)
Tape measure
Cardboard sheet
Hole saw arbor
1/4" drill bit
1/8" drill bit
Screw
Drill
Hair dryer (not pictured)
Step 1: Remove original cup holders
This step is pretty simple. Set the hairdryer on high heat and keep it approximately 1 inch away from the cup holder for about a minute. Most of the cup holders will only require a minute for the glue to loosen up. I only had a couple that needed more time. For those, I did it again for another minute.
View attachment 1289155 (https://www.pokerchipforum.com/attachments/1289155/)
After the hairdryer, use the auto trim tool to pry the cup holder away from the loose glue. Work the tool around the cup holder while gently pulling the cup and glue apart.
View attachment 1289156 (https://www.pokerchipforum.com/attachments/1289156/)
A couple of things to keep in mind when you remove the cup holder from the table:
The cup holder will be hot from the hairdryer so wear your gloves.
The glue will be very sticky so pull directly up and not to the side. Try not to get any on your the table/padding.
View attachment 1289157 (https://www.pokerchipforum.com/attachments/1289157/)
Step 2: Mark the drill hole
Before you move onto this step, make sure all the glue has completely cooled off and dried.
This step is relatively easy but requires some concentration. The exactness of this step will ensure your new cup holders will be where you want them to be.
The original cup holders on my Barrington is measured at 3 1/2" across. You should double check yours if you're going to follow this step of my guide.
View attachment 1289168 (https://www.pokerchipforum.com/attachments/1289168/)
The new cup holders measure 4" across.
View attachment 1289169 (https://www.pokerchipforum.com/attachments/1289169/)
Since the size difference between the 2 cup holders is 1/2", we will need to mark the new center hole 1/4" away from the original center.
Here is a reference on how I calculated my center hole. I started the measure from the outer edge of the original cup holder. The idea is to mark the new center at the 2" mark.
View attachment 1289453 (https://www.pokerchipforum.com/attachments/1289453/)
Here is a better visualization of this. The new center hole has to be 1/4" closer to the table and yet remain in center of the left/right side edges.
View attachment 1289461 (https://www.pokerchipforum.com/attachments/1289461/)
I tried using a marker on the glue but found it difficult to accurately mark the exact location of the new hole. I decided to use a screw instead and that worked much better. The good thing about this is that I could move the screw easily to make fine adjustments as much as I needed. Once I've double (tripled!) checked my measurement I screwed in the screw to make a pilot hole. I didn't drill too deep - just deep enough to make a visible hole.
View attachment 1289462 (https://www.pokerchipforum.com/attachments/1289462/)
Ultimately, I ended up with this outcome. I then took my 1/8" drill bit and drilled through the table using the pilot hole as a guide.
View attachment 1289471 (https://www.pokerchipforum.com/attachments/1289471/)
Step 3: Drill out the new holes (from the bottom)
Flip the table upside down.
Before I drilled the hole with my hole saw, I drilled through the existing hole using the 1/4" drill bit. The reason for this is that the drill arbor is 1/4" so I wanted to make sure the arbor was aligned exactly to the new center. In retrospect, I suspect I could have used the 1/4" bit instead of the 1/8" bit in Step 2 and saved a step.
Drilling the hole was the worst part (for me). The hardest part was intentionally going slow and not hurry the process. The thing to note here is to stop drilling immediately after you've broken through to the foam. I was a nervous wreck trying not to over drill.
As you can see below, the foam is glued to the wood so I had to carefully separate the foam after I had drilled through the wood. Try to retain as much foam as you can in the original hole. This will help with the snugness of the new cup holder.
View attachment 1289474 (https://www.pokerchipforum.com/attachments/1289474/)
Here is an "in progress" picture of the process. I really wanted to see the new cup holder put in so I did that one right away (it's rad). I was also doubting I did the math properly in Step 2 so I wanted to quadruple check it was right (it was). TRUST THE MATH!
I also wanted to show the new Barringtons have clearance for the holes without sawing any of the posts.
Please ignore my monstrosity of a drill. The nerds over at r/tools will ban me if they ever saw that thing.
View attachment 1289481 (https://www.pokerchipforum.com/attachments/1289481/)
Step 4: Insert new cup holders and ENJOY
This step is easy and the most enjoyable. The new cup holders will be very snug (tight) in the new opening. I used a cardboard sheet to help me evenly apply pressure and knead the cup holder in. Think flattening pizza dough - same idea and motion.
Others mentioned having to tape their new cup holders with masking / duct tape to make them snug but I didn't have to do that. The foam and vinyl were enough to keep these cup holders very tight and snug. Oh, speaking of foam, trim away the excess foam that will be sticking out of the bottom after you're all done.
That's it! Enjoy your new rad cup holders!
Don't yell at me about my chairs. They're next to be upgraded!
View attachment 1289497 (https://www.pokerchipforum.com/attachments/1289497/)
Thank you for this how-to post! It was my road map and gave me the confidence to do my own cup holder replacement. I’m happy to report that everything went well and my table came out looking great. I also gained some new found confidence in my woodworking abilities and am already planning my next project. Good times!

SamarathNewbie2 posts
Posted Jun 24, 2024, 5:26 PM#1427
I did the cupholders replacement job for myself just today. I sawed right through the straps. The clip end of the straps seem to be attached by the piece on the strap that is pressed under the railing. Surely the integrity of the strap has been compromised but I get the feeling it will still hold the table together well enough for me to put it in the bag and zip it up.
Thanks
exodusMicro-Stakes Grinder10 posts
Posted Jul 7, 2024, 1:53 AM#1428
I have the old Barrington table and I already pulled the cup holders out. Is there a better way of finding the center of the holes than just eye balling it? The leather isn’t cut evenly so it’s difficult to measure the center of the hole exactly.
ColquhounRegular82 posts
Posted Jul 7, 2024, 2:10 AM#1429
I have the old Barrington table and I already pulled the cup holders out. Is there a better way of finding the center of the holes than just eye balling it? The leather isn’t cut evenly so it’s difficult to measure the center of the hole exactly.
You could make a template by cutting a paper circle the size of the cup holder. Then fold the paper circle in half in a couple of different directions, and where the fold lines intersect, is the center. Place the paper circle in the hole and mark the center with an awl or sharp point.
exodusMicro-Stakes Grinder10 posts
Posted Jul 7, 2024, 2:37 AM#1430
You could make a template by cutting a paper circle the size of the cup holder. Then fold the paper circle in half in a couple of different directions, and where the fold lines intersect, is the center. Place the paper circle in the hole and mark the center with an awl or sharp point.
This is genius! Thank you
Tony_MMicro-Stakes Grinder17 posts
Posted Jul 7, 2024, 2:44 AM#1431
You could make a template by cutting a paper circle the size of the cup holder. Then fold the paper circle in half in a couple of different directions, and where the fold lines intersect, is the center. Place the paper circle in the hole and mark the center with an awl or sharp point.
This is the way
ColquhounRegular82 posts
kach33Micro-Stakes Grinder8 posts
exodusMicro-Stakes Grinder10 posts
FishmanNewbie3 posts
Posted Jul 9, 2024, 1:10 PM#1435
exodusMicro-Stakes Grinder10 posts
Posted Jul 13, 2024, 12:14 AM#1436
I finally did it and it wasn’t as scary as I thought it would be. I got a lot of help from this forum so just wanted to say thanks. Also, one of my cups sag a bit too much into the armrest but the rest are good. Hopefully there will be no more spilling at my games.

ColquhounRegular82 posts
Posted Jul 13, 2024, 2:04 AM#1437
So I finished my Barrington mods (for now) but still need to order a topper.
New LEDs, Dimmer, AA Battery Pack, and Jumbo Cupholders
COB LEDs
I wasn't the biggest fan of the blue LEDs and didn't like how they were so spaced out. I saw someone talk about the COB LEDs and how they are amost diffused already and ordered the warm white and couldn't be happier. The LEDs are very close together so you don't need to put something in front of them to diffuse them like I was trying to do with the old LEDs. Instead of ripping out the old LEDs, I actually just wedged the new LEDs right on top of the current ones. It worked out great.
I did have to cut the light strip and attach another tail end. Very easy to do but measure accurately before you cut! You don't have much leeway with the 16.4ft strip. And then used the Y connector that also came with the COB connector package.
Screwed and glued on some velcro, glued velcro to the battery pack, then buttoned up everything else. Happy with it.
COB LED Lights (https://www.amazon.com/dp/B0BVR755VK?tag=amznpcfx-20)
COB Connector Package (https://www.amazon.com/dp/B0C2CVFGL8?tag=amznpcfx-20)
Dimmer (https://www.amazon.com/weideer-Lights-Dimmer-DC12V-24V-K-018-BK/dp/B092HX9435?tag=amznpcfx-20)
Battery Pack (https://www.amazon.com/gp/product/B09131Y9L8?tag=amznpcfx-20)
Jumbo Cupholders
I went with the jumbos after reading recommendations. Pried off the old ones with a vise grip, drilled a center hole down with a standard bit, then drilled from the bottom up with the 3 5/8in hole saw starting it the pre drilled hole. I got them all done but it was a bit of a struggle with the hole saw I bought. If I would do it again, I would get one that was deeper. This one barely made it through both pieces of wood.
Jumbo Cupholders (https://www.amazon.com/gp/product/B0789HG6NW?tag=amznpcfx-20)
Hole Saw (buy a deeper one) (https://www.amazon.com/gp/product/B0C6MN14B1?tag=amznpcfx-20)
View attachment 1252914 (https://www.pokerchipforum.com/attachments/1252914/)
Hey @greedyintern (https://www.pokerchipforum.com/members/17235/) , the COB led connector package seems to be unavailable on Amazon (https://www.amazon.com/?tag=amznpcfx-20). I don't know anything about these and would like to do the LED mod, is there another connector package on Amazon (https://www.amazon.com/?tag=amznpcfx-20) that is comparable?
Thanks!
pHperfect1Newbie1 posts
Posted Jul 13, 2024, 7:23 PM#1438
Out with the old in with the new!!
MarhaultMicro-Stakes Grinder12 posts
Posted Jul 16, 2024, 1:44 AM#1439
Hey @greedyintern (https://www.pokerchipforum.com/members/17235/) , the COB led connector package seems to be unavailable on Amazon. I don't know anything about these and would like to do the LED mod, is there another connector package on Amazon that is comparable?
Thanks!
The battery pack is also unavailable. I'm looking for the same stuff lol just ordered 2 new tables to save some change instead of gorilla tables and wanting to upgrade the LEDs. Can you just use a dimmer on the existing LEDs? Does it take any extra hardware other than the dimmer switch posted earlier?
greedyinternRegular46 posts
Posted Jul 16, 2024, 1:46 AM#1440
Hey @greedyintern (https://www.pokerchipforum.com/members/17235/) , the COB led connector package seems to be unavailable on Amazon. I don't know anything about these and would like to do the LED mod, is there another connector package on Amazon that is comparable?
Thanks!
The battery pack is also unavailable. I'm looking for the same stuff lol just ordered 2 new tables to save some change instead of gorilla tables and wanting to upgrade the LEDs. Can you just use a dimmer on the existing LEDs? Does it take any extra hardware other than the dimmer switch posted earlier?
Ah that stinks. I'll look for another COB kit with the Y connector. And a battery pack!
Yes, you can just use the dimmer with the existing stock LEDs
MarhaultMicro-Stakes Grinder12 posts
Posted Jul 16, 2024, 1:51 AM#1441
Ah that stinks. I'll look for another COB kit with the Y connector. And a battery pack!
Yes, you can just use the dimmer with the existing stock LEDs
Appreciate you following up and helping us. I might just go with a dimmer on the stock LEDs. Does the one you linked plug right up?
PreditorMicro-Stakes Grinder13 posts
Posted Jul 17, 2024, 8:38 PM#1442
Anyone have any tips or product suggestions for treating and reparing tears/rips in the vinyl rail?
MarhaultMicro-Stakes Grinder12 posts
Posted Jul 17, 2024, 9:45 PM#1443
Got the new LED version it's much nicer than the old Barrington. Much nicer rail. Feels more solid too.Time to retire the old one for nothing but travel.


glynnNewbie3 posts
Posted Jul 17, 2024, 9:58 PM#1444
30YEARFIXMicro-Stakes Grinder12 posts
Posted Jul 27, 2024, 6:29 PM#1445
Big shout out to @greedyintern (https://www.pokerchipforum.com/members/17235/) , just did the LED mod. I used a different brand but it was a COB LED.
The hardest part for me was routing the LED from the top of the table to the bottom. Instead of a dimmer, I installed a zigbee controller and I got a rechargeable wireless battery to power them. Now I can control the LEDs from my phone thru HomeKit.
I also installed the handles. Going to attempt the cupholder mod next.
greedyinternRegular46 posts
Posted Jul 27, 2024, 6:33 PM#1446
Now I can control the LEDs from my phone thru HomeKit.
Awesome! Taking it to another level!
ColquhounRegular82 posts
Posted Jul 27, 2024, 11:08 PM#1447
Big shout out to @greedyintern (https://www.pokerchipforum.com/members/17235/) , just did the LED mod. I used a different brand but it was a COB LED.
The hardest part for me was routing the LED from the top of the table to the bottom. Instead of a dimmer, I installed a zigbee controller and I got a rechargeable wireless battery to power them. Now I can control the LEDs from my phone thru HomeKit.
I also installed the handles. Going to attempt the cupholder mod next.
This is great! Can you post the links to the parts you purchased? I’m going to try this at some point…
30YEARFIXMicro-Stakes Grinder12 posts
Posted Jul 28, 2024, 3:16 AM#1448
suchj0shMicro-Stakes Grinder13 posts
Posted Jul 29, 2024, 8:53 PM#1449
Time to dive in. Definitely want to change the LEDs and cupholders. Works fine for now, though!

30YEARFIXMicro-Stakes Grinder12 posts
Posted Jul 29, 2024, 9:30 PM#1450
Good luck. Just completed the cup holders. I’m the least handy person ever, so if I can do it anyone can. Was able to do it with no help and rather proud of myself lol
Good luck. Took a few hours between few days but ended up good.
30YEARFIXMicro-Stakes Grinder12 posts
Posted Jul 29, 2024, 9:44 PM#1451
Good luck. Just completed the cup holders. I’m the least handy person ever, so if I can do it anyone can. Was able to do it with no help and rather proud of myself lol
Good luck. Took a few hours between few days but ended up good.
Again big thanks to @greedyintern (https://www.pokerchipforum.com/members/17235/) - followed his write up and once you get the tools and your hands dirty it becomes straight forward.
Now can’t wait to play!!!
greedyinternRegular46 posts
Posted Jul 29, 2024, 9:48 PM#1452
Again big thanks to @greedyintern (https://www.pokerchipforum.com/members/17235/) - followed his write up and once you get the tools and your hands dirty it becomes straight forward.
Now can’t wait to play!!!
Glad you were able to do it! It does feel great once you get it all finished and upgraded. Well worth it and a great sense of accomplishment.
Good luck out there!
suchj0shMicro-Stakes Grinder13 posts
Posted Jul 29, 2024, 10:02 PM#1453
Good luck. Just completed the cup holders. I’m the least handy person ever, so if I can do it anyone can. Was able to do it with no help and rather proud of myself lol
Good luck. Took a few hours between few days but ended up good.
Seems doable for sure! Just have to make the time.
30YEARFIXMicro-Stakes Grinder12 posts
Posted Jul 29, 2024, 10:11 PM#1454
Seems doable for sure! Just have to make the time.
If it helps. I spent more time reading all the posts than the actual time to do the job. LED lights I spent about two hrs (most of the time was just getting the entry point) and the cup holders I would say about 4-5 hours.
use the hair dryer low and to the center for a few mins till the original ones become hot and used a plastic pry tool till it gives. The hair dryer part took about an hour and drilling and vacuuming those holes took the rest of the time.
30YEARFIXMicro-Stakes Grinder12 posts
Posted Aug 2, 2024, 12:29 PM#1455
Got a question for you all. I don’t keep the table open all the time, only when we host games. Does anyone have any good advice on how to open and close the table, already got some scuff marks on the wood on the side.
Is there a trick to easily open and close the table and carry it away?
glynnNewbie3 posts
Posted Aug 2, 2024, 5:27 PM#1456
I put it on an area rug and unfold the legs, then lift from one of the longer sides such that the legs nearest to me catch onto the rug. Then, while the legs on the far side are still lifted, I move around to that side and gently place them down.
The instructions demand that you have a second person help you flip the table without using two legs to hold the weight as described above, but that is overly cautious imo. They are very strong.
I have a padded dolly that I use to move it to and from its storage area.
30YEARFIXMicro-Stakes Grinder12 posts
Posted Aug 2, 2024, 6:23 PM#1457
I’ve done it myself but I should get that dolly to put it back in storage - that’s a great idea. Then ask whatever player to give me a hand for setup.
exodusMicro-Stakes Grinder10 posts
Posted Aug 3, 2024, 1:14 AM#1458
Got a question for you all. I don’t keep the table open all the time, only when we host games. Does anyone have any good advice on how to open and close the table, already got some scuff marks on the wood on the side.
Is there a trick to easily open and close the table and carry it away?
I usually open the table by myself. I put down a rug and open one side and pull the leg out and do the same for the opposite side. Once the table is fully opened on its side. I push on the top left leg of one side of the table and lean my body back while holding the center of the table to get it up.
If this is too much work I’d just wait for my friends to come and help me setup the table.
30YEARFIXMicro-Stakes Grinder12 posts
Posted Aug 3, 2024, 1:48 AM#1459
I usually open the table by myself. I put down a rug and open one side and pull the leg out and do the same for the opposite side. Once the table is fully opened on its side. I push on the top left leg of one side of the table and lean my body back while holding the center of the table to get it up.
If this is too much work I’d just wait for my friends to come and help me setup the table.
This is exactly what I was doing but I noticed the side is a bit scuffed from all the open and closing. I figure I can put it up but have my friends help me put it back when nights over.
HuskerchipperRegular35 posts
Posted Aug 15, 2024, 4:03 AM#1460
When did the price jump back up? Just received a topper and was ready to pull the trigger. :mad:
30YEARFIXMicro-Stakes Grinder12 posts
Posted Aug 15, 2024, 4:13 AM#1461
When did the price jump back up? Just received a topper and was ready to pull the trigger. :mad:
I paid the higher price
BLK21JKMicro-Stakes Grinder6 posts
Posted Aug 18, 2024, 5:09 PM#1462
The hardest part for me was routing the LED from the top of the table to the bottom.
Tell me about this part. Do I need to flip the table over for this, or can I release the legs on one side and kind of half-crack it while it’s still upright?
I guess if I have to flip the thing I’ll do the cup holders at same time. Cup holders and replacement LED strips have been here forever, stuck behind my laziness.
30YEARFIXMicro-Stakes Grinder12 posts
Posted Aug 18, 2024, 7:26 PM#1463
Tell me about this part. Do I need to flip the table over for this, or can I release the legs on one side and kind of half-crack it while it’s still upright?
I guess if I have to flip the thing I’ll do the cup holders at same time. Cup holders and replacement LED strips have been here forever, stuck behind my laziness.
You don’t need to flip it over but I would recommend slightly bending the table. I used a zip tie to go route from top to the bottom of the table. You may want to use a fish tape if you have it.
30YEARFIXMicro-Stakes Grinder12 posts
Posted Aug 19, 2024, 12:21 AM#1464
You don’t need to flip it over but I would recommend slightly bending the table. I used a zip tie to go route from top to the bottom of the table. You may want to use a fish tape if you have it.
Now I remember correctly, put it on the side and slightly bend, that was the easiest way for me to get it in.
OleFartsNewbie1 posts
Posted Aug 25, 2024, 10:40 PM#1465
Big shout out to @greedyintern (https://www.pokerchipforum.com/members/17235/) , just did the LED mod. I used a different brand but it was a COB LED.
The hardest part for me was routing the LED from the top of the table to the bottom. Instead of a dimmer, I installed a zigbee controller and I got a rechargeable wireless battery to power them. Now I can control the LEDs from my phone thru HomeKit.
I also installed the handles. Going to attempt the cupholder mod next.
Did you do your modification on a non-LED or LED Barrington?
I am trying to decide which one to purchase. From what I read in this thread the LED version is 15-20lbs heavier, which I am not to keen on, and it would be nice to know that if I wanted to add the lights later it would work.
30YEARFIXMicro-Stakes Grinder12 posts
Posted Aug 25, 2024, 11:31 PM#1466
Did you do your modification on a non-LED or LED Barrington?
I am trying to decide which one to purchase. From what I read in this thread the LED version is 15-20lbs heavier, which I am not to keen on, and it would be nice to know that if I wanted to add the lights later it would work.
I did it on the LED version. The LED version has like a half an inch section made for the led. Rather than use the supplied one, I got the aftermarket led from Amazon (https://www.amazon.com/?tag=amznpcfx-20) and laid it over.
cathat12Newbie1 posts
Posted Aug 29, 2024, 3:10 AM#1467
Hello, is it possible to replace the vinyl on a Barrington table? #firstpost
ColquhounRegular82 posts
Posted Aug 29, 2024, 4:32 AM#1468
JJDiamondsRegular29 posts
Posted Aug 31, 2024, 12:58 AM#1469
Just picked this up for $150 from Facebook marketplace. I think I'm going to attempt to install the larger cup holders.

greedyinternRegular46 posts
Posted Aug 31, 2024, 1:04 AM#1470
SaoliverRegular51 posts
Posted Aug 31, 2024, 1:06 AM#1471
Just picked this up for $150 from Facebook marketplace. I think I'm going to attempt to install the larger cup holders.
View attachment 1381377 (https://www.pokerchipforum.com/attachments/1381377/)
There was a practically new one on offer up near me for $70 recently. I was too slow!
JJDiamondsRegular29 posts
Posted Aug 31, 2024, 1:07 AM#1472
There was a practically new one on offer up near me for $70 recently. I was too slow!
Yeah this one posted this morning and I jumped on it. I've been keeping an eye out for one and I'm happy I got this one on great condition
NymorMicro-Stakes Grinder18 posts
Posted Aug 31, 2024, 2:23 PM#1473
Would taking a hair dryer to the vinyl at the same time help get those wrinkles out? (It is vinyl isn't it?)
JJDiamondsRegular29 posts
Posted Aug 31, 2024, 7:45 PM#1474
Would taking a hair dryer to the vinyl at the same time help get those wrinkles out? (It is vinyl isn't it?)
I just tried that and it worked. I don't feel like spending the time getting all the wrinkles out right now though haha. Thanks for the tip!
NymorMicro-Stakes Grinder18 posts
Posted Aug 31, 2024, 7:51 PM#1475
I just tried that and it worked. I don't feel like spending the time getting all the wrinkles out right now though haha. Thanks for the tip!
Cool, just err on the side of caution and be gentle with the heat.
kmccormick100Regular53 posts
Posted Sep 11, 2024, 5:14 PM#1476
Costco has the LED version for $229 right now (with the blackjack layout?). Seems like a pretty solid deal, especially with a few upgrades

greedyinternRegular46 posts
Posted Sep 11, 2024, 5:29 PM#1477
Very interesting... It's advertised as a poker table but it looks like the blackjack is an inlay? Based on the image on the box? Looks like a very decent deal.
MrBooshRegular32 posts
Posted Sep 11, 2024, 5:31 PM#1478
Costco has the LED version for $229 right now (with the blackjack layout?). Seems like a pretty solid deal, especially with a few upgrades
View attachment 1386638 (https://www.pokerchipforum.com/attachments/1386638/)
It looks like it has a topper on it. If you look at the picture on the box, it looks like it may have at least one topper it comes with. Plus the lights are not blue!!! This looks like a great deal with the upgrades!
97destroyerNewbie4 posts
Posted Sep 11, 2024, 6:05 PM#1479
Hmm, I don't see it on the web site
harrysalloutMicro-Stakes Grinder11 posts
Posted Sep 11, 2024, 6:05 PM#1480
Looks like it may even be 2 toppers.

greedyinternRegular46 posts
Posted Sep 11, 2024, 6:25 PM#1481
Yeah, looks like a gray and black poker base, black and red blackjack overlay, and then not sure what the last red overlay is (it's also folded up in a bag on the table)

MrBooshRegular32 posts
Posted Sep 11, 2024, 10:15 PM#1482
I think the lights may be color changing as well.
wootakiMicro-Stakes Grinder6 posts
Posted Sep 12, 2024, 1:48 AM#1483
Checked my local Costco for it today after I saw this post. They aren't carrying it. If anyone in the Houston area sees it please let me know which location. Sugar Land does not have it. Hopefully the deal spreads from California to Texas, I'd pick it up even though I was leaning towards a round table.
allforcharityRegular91 posts
Posted Sep 12, 2024, 2:47 AM#1484
Checked my local Costco for it today after I saw this post. They aren't carrying it. If anyone in the Houston area sees it please let me know which location. Sugar Land does not have it. Hopefully the deal spreads from California to Texas, I'd pick it up even though I was leaning towards a round table.
Did you try online?
greedyinternRegular46 posts
Posted Sep 12, 2024, 2:50 AM#1485
Did you try online?
I can't seem to find it anywhere online even with the product number
JJDiamondsRegular29 posts
Posted Sep 12, 2024, 3:01 PM#1486
golobosMicro-Stakes Grinder12 posts
JJDiamondsRegular29 posts
Posted Sep 12, 2024, 3:20 PM#1488
Looks like it has wider but not deeper cupholders no?
It's hard to tell but I think they look like the smaller size. I would be surprised if they made them bigger but that would be nice
greedyinternRegular46 posts
Posted Sep 12, 2024, 3:21 PM#1489
Called my Costco here outside Milwaukee. They have 15 of them right now. I'm going to go check it out later today and I can send some photos.
wootakiMicro-Stakes Grinder6 posts
Posted Sep 12, 2024, 3:38 PM#1490
smart move. just called another store and they didnt have it in stock but staff was kind enough to look into it further (as its a new SKU) and told me that Austin and Dallas stores are carrying it so probably only a matter of time til its in Houston inventories.
Called my Costco here outside Milwaukee. They have 15 of them right now. I'm going to go check it out later today and I can send some photos.
greedyinternRegular46 posts
Posted Sep 12, 2024, 10:20 PM#1491
iLogikMicro-Stakes Grinder9 posts
Posted Sep 12, 2024, 10:25 PM#1492
TheBigTaterRegular48 posts
Posted Sep 12, 2024, 10:25 PM#1493
Those look like the same size as the old Barrington 6 player 3in1 tables except with lights. Wish my Cotsco had some of these.
golobosMicro-Stakes Grinder12 posts
Posted Sep 13, 2024, 12:49 AM#1494
I want to buy this one for the bag alone
MrBooshRegular32 posts
Posted Sep 13, 2024, 3:32 AM#1495
I want to buy this one for the bag alone
This bag will fit the LED or standard version of Barrington tables. Decent price as well. I have 3 of them.
Hengme Folding Table Storage Bag, Portable Carry Bag for Folding Picnic Tables Storage or Carry 600D Waterproof Large Moving Bags Protective Covers https://a.co/d/bw4GrbA (https://a.co/d/bw4GrbA?tag=amznpcfx-20)
43.3 x 43.3 x 7.9
ColquhounRegular82 posts
Posted Sep 14, 2024, 1:15 AM#1496
I wonder if you can change the LED color. That first post shows them in red, but the following photos (and other similar Barrington tables) are all blue LEDs.
greedyinternRegular46 posts
Posted Sep 14, 2024, 1:18 AM#1497
I wonder if you can change the LED color. That first post shows them in red, but the following photos (and other similar Barrington tables) are all blue LEDs.
Take a look at my full album. It has a button on the side that I press to cycle through the colors.
https://photos.app.goo.gl/qxarNidBLc7JKxEV6
ColquhounRegular82 posts
Posted Sep 14, 2024, 1:23 AM#1498
Take a look at my full album. It has a button on the side that I press to cycle through the colors.
https://photos.app.goo.gl/qxarNidBLc7JKxEV6
D’oh! Thanks for that.
Damn, what a great feature.
DaneWojNewbie1 posts
Posted Sep 14, 2024, 8:11 PM#1499
I was at Costco today and my wife said “no!”
mugenpowrMicro-Stakes Grinder10 posts
Posted Sep 14, 2024, 8:59 PM#1500
I was at Costco today and my wife said “no!”
Same here

iLogikMicro-Stakes Grinder9 posts
Posted Sep 14, 2024, 11:37 PM#1501
I hope mine doesn’t notice it in the kart :)
InBobWeTrustMicro-Stakes Grinder6 posts
Posted Sep 15, 2024, 3:07 AM#1502
Here is the item number, if anyone wants to do a stock check: 1740653
InBobWeTrustMicro-Stakes Grinder6 posts
Posted Sep 15, 2024, 3:09 AM#1503
Here are the different LED colors it can do. It can also do white, but I guess the picture I took didn't save


BroskiNewbie2 posts
Posted Sep 15, 2024, 3:11 AM#1504
tried searching it online and can't find it. anyone wanna post a link?
InBobWeTrustMicro-Stakes Grinder6 posts
Posted Sep 15, 2024, 3:18 AM#1505
tried searching it online and can't find it. anyone wanna post a link?
I couldn't find it either, but the prices online are always way higher. Call your local warehouse and tell them to do a stock check. The item # is 1740653
shadowlerNewbie1 posts
Posted Sep 15, 2024, 4:42 AM#1506
Costco in Richmond off Central ave has a few in stock when I stopped by today. I already have one from the last sale and I opt for the non-LED version so no need to give the wife any puppy eyes this time.

BrandoooNewbie3 posts
Posted Sep 15, 2024, 9:58 PM#1507
Has anyone seen these at a Costco outside of California or Texas?
InBobWeTrustMicro-Stakes Grinder6 posts
Posted Sep 16, 2024, 12:18 AM#1508
Has anyone seen these at a Costco outside of California or Texas?
Call the item number into your local warehouse. They can tell you if anyone in your region stocks it
JJDiamondsRegular29 posts
Posted Sep 16, 2024, 3:18 AM#1509
Just finished upgrading the cupholders. I need to fix some of the wrinkles around the cupholders but I'll do that later this week.

Chris ManzoniMicro-Stakes Grinder13 posts
Posted Sep 16, 2024, 6:01 AM#1510
Checked my local Costco for it today after I saw this post. They aren't carrying it. If anyone in the Houston area sees it please let me know which location. Sugar Land does not have it. Hopefully the deal spreads from California to Texas, I'd pick it up even though I was leaning towards a round table.
It was in Costco Burbank today
wootakiMicro-Stakes Grinder6 posts
Posted Sep 16, 2024, 3:26 PM#1511
It was in Costco Burbank today
I'm im Houston but stores in my area should be stocked this week if anyone wants to know. They said the regional depot had them on order last time I called.
dajebrizaNewbie1 posts
Posted Sep 16, 2024, 5:08 PM#1512
Are these the full-sized tables or is there a larger Barrington model?
BroskiNewbie2 posts
Posted Sep 16, 2024, 5:11 PM#1513
Well I called the closest one to me which was in Mobile, Al. Don't have it and said she does not ser where it's on order for any store in the region... :cry:
TheChipVaultMicro-Stakes Grinder12 posts
Posted Sep 16, 2024, 11:37 PM#1514
Called my local Costco and they said likely at the end of the month.
Chris ManzoniMicro-Stakes Grinder13 posts
Posted Sep 17, 2024, 2:37 AM#1515
InBobWeTrustMicro-Stakes Grinder6 posts
Posted Sep 17, 2024, 6:02 AM#1516
Are these the full-sized tables or is there a larger Barrington model?
This is an 8 seater. I believe they have a 10 seater table. According to amazon (https://www.amazon.com/?tag=amznpcfx-20), the difference in length is 71" vs 84".
EDIT: I can't count, the Costco table is a 10-seater.
BrandoooNewbie3 posts
Posted Sep 17, 2024, 1:59 PM#1517
This is an 8 seater. I believe they have a 10 seater table. According to amazon, the difference in length is 71" vs 84".
There are 10 cup-holders and the box in one of the pictures posted earlier says it's 84".
InBobWeTrustMicro-Stakes Grinder6 posts
Posted Sep 17, 2024, 2:16 PM#1518
There are 10 cup-holders and the box in one of the pictures posted earlier says it's 84".
My mistake! So this is why I consistently lose at Blackjack...
JJDiamondsRegular29 posts
Posted Sep 18, 2024, 12:44 AM#1519
Someone's trying to make soke money off the new costco barrington table lol

ColquhounRegular82 posts
Posted Sep 18, 2024, 2:17 AM#1520
No Barrington tables at 2 Costcos in Suffolk County, NY
But I got rotisserie chickens and a frozen yogurt, so I got that going for me.
Hot NutsShark105 posts
mugenpowrMicro-Stakes Grinder10 posts
Posted Sep 18, 2024, 4:59 AM#1522
Lists for $800, will take $400.
I can do this all day
DaMrkstrMicro-Stakes Grinder19 posts
Posted Sep 18, 2024, 8:07 PM#1523
My Costco in Huntington Beach, CA had a bunch of them available as of this past Sunday. My wife definitely judged me when I pointed out the table and the good deal :ROFL: :ROFLMAO:
HuskerchipperRegular35 posts
Posted Sep 18, 2024, 8:41 PM#1524
How does this Costco table compare to the Walmart tables? I see the multi-color LED w/button, multiple felt choices and carry bag which are all nice. Are they the same size? Dimensions and weight??
Chris ManzoniMicro-Stakes Grinder13 posts
Posted Sep 18, 2024, 10:40 PM#1525
How does this Costco table compare to the Walmart tables? I see the multi-color LED w/button, multiple felt choices and carry bag which are all nice. Are they the same size? Dimensions and weight??
71x32 (29" high) - 60 pounds. Good for 6, ok for 8, tight for 9, no good for 10 players.
HuskerchipperRegular35 posts
Posted Sep 18, 2024, 11:46 PM#1526
71x32 (29" high) - 60 pounds. Good for 6, ok for 8, tight for 9, no good for 10 players.
Ok, so a bit smaller/lighter. Thank you for the reply.
Hot NutsShark105 posts
Posted Sep 18, 2024, 11:48 PM#1527
There are 10 cup-holders and the box in one of the pictures posted earlier says it's 84".
Chris ManzoniMicro-Stakes Grinder13 posts
Posted Sep 19, 2024, 12:29 AM#1528
The ones at Costco are the smaller version as far as I can tell. You’re not getting 10 players around it. Good news is, they have a display model that you can check out for yourself if you need to. It’s not available on their website.
BrandoooNewbie3 posts
harrysalloutMicro-Stakes Grinder11 posts
Posted Sep 19, 2024, 3:18 AM#1530
greedyinternRegular46 posts
Posted Sep 19, 2024, 3:33 AM#1531
Yeah, it's the same size as the others. I prefer playing 8 comfortably - could do 10 but it's very tight.
BatteredAggieNewbie1 posts
Posted Sep 20, 2024, 4:53 PM#1532
Just finished upgrading the cupholders. I need to fix some of the wrinkles around the cupholders but I'll do that later this week.
View attachment 1388803 (https://www.pokerchipforum.com/attachments/1388803/)
Looks nice!
How hard was it to replace the cup holders? What did you have to do?
JJDiamondsRegular29 posts
Posted Sep 20, 2024, 5:00 PM#1533
Looks nice!
How hard was it to replace the cup holders? What did you have to do?
I followed the instructions on this thread and it wasn't that bad. I removed the cup holders with a heat gun then drilled a hole in the middle of the cup holder so I knew where to drill the hole from the bottom. The challenging part I didn't realize I would have to do is cut the metal support beam on the bottom to be able to fit four of the cup holders. Took me a couple hours and cost about $50 bucks. Definitely worth it
exodusMicro-Stakes Grinder10 posts
Posted Sep 20, 2024, 6:13 PM#1534
Looks nice!
How hard was it to replace the cup holders? What did you have to do?
It’s not too hard as long as you have the right tools and use the guides on this thread. I was scared that I might ruin the table but it came out perfectly fine. You may need to trim the poles underneath but it’s easy to undo the screws and use a pipe cutter.
iamJ11Micro-Stakes Grinder5 posts
Posted Sep 22, 2024, 1:47 PM#1535
Y'all have been helpful in providing some info for the table so I registered just to give some insights back.
First, Houston Sugar Land Costco has the tables in stock as of yesterday (Saturday). Must've had 10+. LEDs, different tops, and carrying case are allc nice luxury. Even has physical button on the side for the lights.
Second, I have the ESPN table and currently in the process of upgrading to COB LEDs with dimmer/USB for power, bigger cupholders, new speedcloth and vinyl material.
So with any tables with LEDs, there is a 1/4" of particle board that sits between the table and the padded armrest--its where you attach the LED strip on the inside edge. Be careful when drilling using the 3 5/8" holesaw as it will provide a tight clearance for that sandwiched particle board. Worst case, you drill too far into the inside and the LED strip will have no backing to attach to.
ColquhounRegular82 posts
Posted Sep 24, 2024, 7:51 PM#1536
The only Barrington I’ve seen is at a local BJ’s. Small, 4-person table with cards and 100 dice chips. Definitely not the quality of the other Barringtons and was quite small.


DaMrkstrMicro-Stakes Grinder19 posts
Posted Sep 24, 2024, 8:23 PM#1537
I live in Huntington Beach, and they have the ten-seater in stock, so if anyone out of state wants it, I can accommodate for a price :P
MrBooshRegular32 posts
Posted Sep 24, 2024, 10:22 PM#1538
The only Barrington I’ve seen is at a local BJ’s. Small, 4-person table with cards and 100 dice chips. Definitely not the quality of the other Barringtons and was quite small.
Who doesn't love a good old, four person BJ table?
wootakiMicro-Stakes Grinder6 posts
Posted Sep 25, 2024, 4:30 PM#1539
Okay just recently picked up the Costco setup. In the process of getting a topper so made some measurements if anyone is curious and wanted closeups of the thickness of the topper that comes with the table.
I have 74 1/4" x 32 1/4" from LED to LED and the topper that comes with it is 74" x 32".
This is my first poker table and I've never sat down in a casino poker room or card house yet, but color me impressed for $230. I suspect it would last a few years for monthly games and close to a good year for weekly games before the railing starts to tear up.
wootakiMicro-Stakes Grinder6 posts
Posted Sep 25, 2024, 4:33 PM#1540
Y'all have been helpful in providing some info for the table so I registered just to give some insights back.
First, Houston Sugar Land Costco has the tables in stock as of yesterday (Saturday). Must've had 10+. LEDs, different tops, and carrying case are allc nice luxury. Even has physical button on the side for the lights.
Second, I have the ESPN table and currently in the process of upgrading to COB LEDs with dimmer/USB for power, bigger cupholders, new speedcloth and vinyl material.
So with any tables with LEDs, there is a 1/4" of particle board that sits between the table and the padded armrest--its where you attach the LED strip on the inside edge. Be careful when drilling using the 3 5/8" holesaw as it will provide a tight clearance for that sandwiched particle board. Worst case, you drill too far into the inside and the LED strip will have no backing to attach to.
Interested in seeing the process if you're able to document with pictures. My biggest peeve is the LED's. Just recently discovered the new COB strips and thats first for sure.
DaMrkstrMicro-Stakes Grinder19 posts
Posted Sep 25, 2024, 10:49 PM#1541
I was at Costco today and my wife said “no!”
After a few investigatory visits, and major wife convincing that it's both my wedding anniversary gift and my Christmas gift :ROFL: :ROFLMAO:, I pulled the trigger today and bought it here in Huntington Beach, CAI And I am glad I got it not a moment later, because they have been selling out fast, and I took the second to last one! The box is really big and heavy. I will attempt to have self control and not open it until Christmas day and not use it until after! And it will be perfect timing for when my other part of the Christmas gift (my first ever Mirage Tina (https://www.pokerchipforum.com/glossary/terms/tina.206) web mold hybrid ceramics set from Justin at Broken Arrow) arrives in December after this October group buy! :ROFL: :ROFLMAO: God bless Costco. I still use my original poker set I purchased from there nearly 20 years ago, which is honestly much better quality than regular dice chips. At my last poker game I told my buddies I was about to pull the trigger on a $400 set from China and they thought I was a bit crazy, and thought mine was sufficient. lol. They definitely got me thinking though and debating, poker table or new chips, or both?!?! hmmm. :unsure: BOTH! :rolleyes::ROFL: :ROFLMAO:
greedyinternRegular46 posts
Posted Sep 25, 2024, 10:59 PM#1542
Interested in seeing the process if you're able to document with pictures. My biggest peeve is the LED's. Just recently discovered the new COB strips and thats first for sure.
Yup, COB LEDs are soooo much better :)
iamJ11Micro-Stakes Grinder5 posts
Posted Sep 26, 2024, 1:19 AM#1543
So I'm almost complete but unfornately didn't take pics of all the steps..
But here's the final almost complete project.
I'm able to get a USB adapter for rhe LEDs so I can use a battery brick to power them. Just make sure your brixk can output at 12v
Also showing CO lights on vs off. The lights makes a difference
Lmk if y'all have questions.
ColquhounRegular82 posts
Posted Sep 26, 2024, 1:37 AM#1544
So I'm almost complete but unfornately didn't take pics of all the steps..
But here's the final almost complete project.
I'm able to get a USB adapter for rhe LEDs so I can use a battery brick to power them. Just make sure your brixk can output at 12v
Also showing CO lights on vs off. The lights makes a difference
Lmk if y'all have questions.
Do you have links to the lights, connectors, etc?
iamJ11Micro-Stakes Grinder5 posts
Posted Sep 26, 2024, 2:07 AM#1545
ColquhounRegular82 posts
Posted Sep 26, 2024, 3:41 AM#1546
iamJ11Micro-Stakes Grinder5 posts
Posted Sep 26, 2024, 4:11 AM#1547
You cut the LED strip in two, correct? Which connectors did you use for this?
Yup. I cut it right in middle. The LED strip has pigtail on both ends. So all I had to do was strip the wires and connect to existing cord.
The ESPN table has a RJ11 cord with 4 strands. 2 each for positive and negative.
Rooster410Micro-Stakes Grinder12 posts
Posted Sep 26, 2024, 1:37 PM#1548
Anyone have any tips on how to safely remove the cup holders? The newer tables seem to be harder to remove them on.
harrysalloutMicro-Stakes Grinder11 posts
Posted Sep 26, 2024, 2:19 PM#1549
Anyone have any tips on how to safely remove the cup holders? The newer tables seem to be harder to remove them on.
I recall it was suggested to use a heat gun or hair dryer to soften the adhesive.
DaMrkstrMicro-Stakes Grinder19 posts
Posted Sep 26, 2024, 5:42 PM#1550
This might be a stupid question, so please excuse me if it is, since I am new here to the forum and to the poker accessories and paraphernalia addiction...But what is wrong with some of the these new poker tables such as the new Costco Barrington one, right out of the box? Is it just the people want to soup up their tables and make them more comfortable and swankier, or is it un-usable as is, or am I missing something? :unsure::ROFL: :ROFLMAO:
harrysalloutMicro-Stakes Grinder11 posts
Posted Sep 26, 2024, 5:50 PM#1551
This might be a stupid question, so please excuse me if it is, since I am new here to the forum and to the poker accessories and paraphernalia addiction...But what is wrong with some of the these new poker tables such as the new Costco Barrington one, right out of the box? Is it just the people want to soup up their tables and make them more comfortable and swankier, or is it un-usable as is, or am I missing something? :unsure::ROFL: :ROFLMAO:
OEM cup holders are too shallow (spilled drinks)
OEM lights are a bit bright for some so they either add a dimmer or add different led lights.
JJDiamondsRegular29 posts
Posted Sep 26, 2024, 5:52 PM#1552
This might be a stupid question, so please excuse me if it is, since I am new here to the forum and to the poker accessories and paraphernalia addiction...But what is wrong with some of the these new poker tables such as the new Costco Barrington one, right out of the box? Is it just the people want to soup up their tables and make them more comfortable and swankier, or is it un-usable as is, or am I missing something? :unsure::ROFL: :ROFLMAO:
I think the biggest upgrade for quality of life is the cupholders. The stock cupholders will only fit cans and they are super shallow. $50 bucks and a couple hours at most gives you cupholders that will fit whiskey glass or really any cups and cut back on drinks getting knocked over
DaMrkstrMicro-Stakes Grinder19 posts
Posted Sep 26, 2024, 5:55 PM#1553
I think the biggest upgrade for quality of life is the cupholders. The stock cupholders will only fit cans and they are super shallow. $50 bucks and a couple hours at most gives you cupholders that will fit whiskey glass or really any cups and cut back on drinks getting knocked over
but it sounds like you risk damaging the felt, or the rail padding, or the LED lights, no? It just looks like a lot of risk for maybe marginal reward, lol, but I guess each person has to make that judgment call on their own if it is worth it or not. thanks!
NotRealNameNoSirRegular73 posts
Posted Sep 26, 2024, 5:57 PM#1554
but it sounds like you risk damaging the felt, or the rail padding, or the LED lights, no? It just looks like a lot of risk for maybe marginal reward, lol, but I guess each person has to make that judgment call on their own if it is worth it or not. thanks!
Eh, risk of damage is low and risk of spilled drink is very very high every time you host. You can call it marginal reward, sure, but I like my players to be comfortable and these instructions were helpful.
JJDiamondsRegular29 posts
Posted Sep 26, 2024, 5:57 PM#1555
but it sounds like you risk damaging the felt, or the rail padding, or the LED lights, no? It just looks like a lot of risk for maybe marginal reward, lol, but I guess each person has to make that judgment call on their own if it is worth it or not. thanks!
I don't have the table with led lights so I don't have to worry about that. If you have a topper you don't have to worry about damaging the felt as much either.
This thread has so much information it makes the upgrade incredibly easy. I didn't even try that hard and I didn't make any mistakes
DaMrkstrMicro-Stakes Grinder19 posts
Posted Sep 26, 2024, 6:03 PM#1556
Eh, risk of damage is low and risk of spilled drink is very very high every time you host. You can call it marginal reward, sure, but I like my players to be comfortable and these instructions were helpful.
alright, that's fair, I do want to protect my new table and purchase! I will check out the instructions! thank you!
DaMrkstrMicro-Stakes Grinder19 posts
Posted Sep 26, 2024, 6:04 PM#1557
I don't have the table with led lights so I don't have to worry about that. If you have a topper you don't have to worry about damaging the felt as much either.
This thread has so much information it makes the upgrade incredibly easy. I didn't even try that hard and I didn't make any mistakes
thank you! I will have to find the starting point of the upgrade instructions in this massive thread! :P
exodusMicro-Stakes Grinder10 posts
Posted Sep 26, 2024, 8:22 PM#1558
This might be a stupid question, so please excuse me if it is, since I am new here to the forum and to the poker accessories and paraphernalia addiction...But what is wrong with some of the these new poker tables such as the new Costco Barrington one, right out of the box? Is it just the people want to soup up their tables and make them more comfortable and swankier, or is it un-usable as is, or am I missing something? :unsure::ROFL: :ROFLMAO:
Nothing wrong with using the table right out the box. You could buy side tables instead of drilling into the table to make cup holders but that can get expensive. My group likes to drink and so we have 2-3 spills everytime we play. After I’ve upgraded the cup holders I haven’t had a spill yet. Some groups are more careful and upgrading the table wouldn’t be necessary. It’s up to you if the upgrading the table is necessary.
NotRealNameNoSirRegular73 posts
Posted Sep 26, 2024, 8:37 PM#1559
Nothing wrong with using the table right out the box. You could buy side tables instead of drilling into the table to make cup holders but that can get expensive. My group likes to drink and so we have 2-3 spills everytime we play. After I’ve upgraded the cup holders I haven’t had a spill yet. Some groups are more careful and upgrading the table wouldn’t be necessary. It’s up to you if the upgrading the table is necessary.
Can't trust my apes with anything nice, the cupholders have been great for us.
iamJ11Micro-Stakes Grinder5 posts
Posted Sep 27, 2024, 4:01 AM#1560
I think the biggest upgrade for quality of life is the cupholders. The stock cupholders will only fit cans and they are super shallow. $50 bucks and a couple hours at most gives you cupholders that will fit whiskey glass or really any cups and cut back on drinks getting knocked over
Another less talked about advantage of the bigger cupholders... normal phone can fit in it! Unless you're rocking the Nokia 6100, you wont fit any phone in the original cupholders.
JJDiamondsRegular29 posts
Posted Sep 27, 2024, 4:14 AM#1561
Another less talked about advantage of the bigger cupholders... normal phone can fit in it! Unless you're rocking the Nokia 6100, you wont fit any phone in the original cupholders.
Good point!
andrebttxNewbie3 posts
Posted Sep 29, 2024, 1:53 AM#1562
The new Costco Barrington has hit the home game

Christened with a very ridiculous Straight Flush in a baby pot

btbmasonMicro-Stakes Grinder12 posts
Posted Sep 29, 2024, 5:08 PM#1563
If anyone around Indianapolis is looking for the Costco Barrington, they have a lot of stock at the Michigan Rd location as of this morning.

ChipandchairRegular29 posts
Posted Sep 29, 2024, 9:36 PM#1564
Yoda18Newbie1 posts
Posted Sep 30, 2024, 2:36 AM#1565
it is in lay topper for black jack topper.
$229 at store locally
$329 online.
Way better deal to get locally.
Anybody know if what kind of battery pack we can buy to Velcro under the table instead of using a ac-dc adapter to plug in wall?
iLogikMicro-Stakes Grinder9 posts
Posted Sep 30, 2024, 3:00 AM#1566
This is the one i got, works perfect since i upgraded the lights

ColquhounRegular82 posts
Posted Sep 30, 2024, 2:13 PM#1567
it is in lay topper for black jack topper.
$229 at store locally
$329 online.
Way better deal to get locally.
Anybody know if what kind of battery pack we can buy to Velcro under the table instead of using a ac-dc adapter to plug in wall?
An inexpensive battery option is a AA battery holder. A 2-pack is less than $9.
https://a.co/d/gSy7rVx (https://a.co/d/gSy7rVx?tag=amznpcfx-20)

SluggerNewbie1 posts
Posted Sep 30, 2024, 9:03 PM#1568
CostCo near Perimeter Mall in Atlanta had 6 tables this weekend. $229. I snagged the last one today. They said they are getting a few more in a day or two. They are selling fast but arriving at CostCo locations near Atlanta. I planned this out. I called two weeks ago and gave them the item number. They estimated they would get them on today's date but they arrived a couple days early... If you want one call your local CostCo and ask if they have item #1740653. If they say no ask if they are expecting any.... Thanks to everyone on the thread for giving me the heads up. I joined the forum because of you guys
MandosMicro-Stakes Grinder7 posts
Posted Oct 8, 2024, 5:20 PM#1569
I just wish the costco ones came with improved cupholders, then it would be ready to go off the shelf. Good news is i won't have to buy another thanks to that.
LTrainNewbie1 posts
Posted Oct 10, 2024, 7:06 PM#1570
My wife approved this capital expense! She was not too happy about strapping it to her roof rack on the drive home, after finding it would not fit in her car!
autoNewbie4 posts
Posted Oct 10, 2024, 11:49 PM#1571
I bought a Barrington poker table at Costco in Burbank, California.

RakrulMicro-Stakes Grinder10 posts
Posted Oct 11, 2024, 10:38 AM#1572
I checked aliexpress as they're made in China and I found two vendors. They're sold for a mere $689 and $732 with only $572 and $865 in shipping to Norway. So for ~$1600 I can get a Barrington table here in Norway!
JackJackRegular44 posts
Posted Oct 12, 2024, 2:38 PM#1573
Has anyone removed the legs and found a way to use it as a topper?
GoJo_DingoNewbie3 posts
Posted Oct 13, 2024, 4:14 AM#1574
ColquhounRegular82 posts
Hot NutsShark105 posts
Posted Oct 13, 2024, 4:31 AM#1576
Always preferred Bally over Williams back in the day. I could control the Bally's flippers a lot better.
Eight Ball Deluxe is the best pinball machine ever made. I could play all day on a quarter winning free games to max out at 10. No one else could get in to play so I'd sell my credits. I'd also make bets on who would win a game. Easy money.
Stop talking and start chalking.
ColquhounRegular82 posts
Posted Oct 13, 2024, 4:37 AM#1577
Always preferred Bally over Williams back in the day. I could control the Bally's flippers a lot better.
Eight Ball Deluxe is the best pinball machine ever made. I could play all day on a quarter winning free games to max out at 10. No one else could get in to play so I'd sell my credits. I'd also make bets on who would win a game. Easy money.
Bally were more classic old-school machines, and the Williams seemed to be more modern (and I always love the center pin in Williams).
Captain Fantastic is a favorite Bally machine, but Gorgar by Williams is my all-time favorite.
Hot NutsShark105 posts
Posted Oct 13, 2024, 4:49 AM#1578
I like the old-school machines better like I like old-school chips. Bally's flippers were weighted. The center pin on Williams is cool too.
The newer machines became just too busy for me and more gimmicky with too many multi-balls. I liked Gorgar. The machine I played at Space Odyssey arcade had a bug. Some quarters would go in and get stuck in the side of the coin return. We'd go in and rake out several dollars at a time. I got banned once for it sort of.
My top 4 in order: Eight Ball Deluxe, Xenon (favorite multi-ball), Skateball, Kiss (original). I would love to play The Rolling Stones and Rush machines just for the music.
Hot NutsShark105 posts
Posted Oct 13, 2024, 5:05 AM#1579
mojo13Newbie2 posts
Posted Oct 13, 2024, 10:30 AM#1580
Just got my table setup from Walmart from the last sale. Much heavier than I anticipated (which is good) and seems like it will hold up to the limited use it will see from my game. Learned a lot from this thread and looking to upgrade the cupholders soon.
Bluegrass PokerNewbie4 posts
Posted Oct 13, 2024, 10:21 PM#1581
I was at Costco today and my wife said “no!”
I was at Costco today and my wife said “you should get one. You couldn’t build another that cheap could you?”
I need to go get it before she changes her mind.
hodMicro-Stakes Grinder6 posts
Posted Oct 15, 2024, 2:27 PM#1582
Well.
Pleasantly surprised these are in the UK. Was in the market for a table, and got one of the led ones delivered. Don’t think there’s any other choice of table.
So much better than most of the crud on eBay (https://www.ebay.com/?mkcid=1&mkrid=711-53200-19255-0&siteid=0&campid=5338995683&customid=&toolid=10001&mkevt=1), even allowing for the aspects with room for improvement -
Cup holders (why put in such narrow and shallow ones at all?)
LED brightness/wire
slightly different heights of playing surface at the fold.
Thanks to this thread if I choose too I can address most of the above, easily and cheaply.
Now to get a custom cloth…
augster123Micro-Stakes Grinder8 posts
Posted Oct 15, 2024, 8:34 PM#1583
Seems like 1 left in Foster City, CA. It took a lot of self control not to buy it. That and visions of an unhappy wife reminding me we have no room for it.

ZyhreNewbie2 posts
Posted Oct 19, 2024, 1:23 AM#1584
HuskerchipperRegular35 posts
Posted Oct 20, 2024, 1:39 AM#1585
The LED version has slightly thicker wood and weighs 11.5lbs more
Hot NutsShark105 posts
Posted Oct 20, 2024, 4:47 AM#1586
HuskerchipperRegular35 posts
Posted Oct 20, 2024, 5:16 AM#1587
I looked up the specs on Barringtons website and that's what I found. I don't have one and don't really care WHAT makes it heavier.
tritonMicro-Stakes Grinder7 posts
sethwanabNewbie3 posts
Posted Oct 26, 2024, 6:28 PM#1589
I can confirm the new Barringtons vs the older blue top have thicker Plywood and a thicker more rounded cushion surface. The cupholder upgrade is a MUST.
ZyhreNewbie2 posts
Posted Oct 26, 2024, 6:35 PM#1590
I can confirm the new Barringtons vs the older blue top have thicker Plywood and a thicker more rounded cushion surface. The cupholder upgrade is a MUST.
Is the upgrade just simply pulling out the plastic ones and dropping in the deeper ones? Or do you need to hole saw out the bottom?
ChipperAttitudeNewbie4 posts
Posted Oct 26, 2024, 7:03 PM#1591
I bought a Barrington poker table at Costco in Burbank, California.
View attachment 1401304 (https://www.pokerchipforum.com/attachments/1401304/)
Have you been back to this location recently and seen them still in stock?
Thanks!
tritonMicro-Stakes Grinder7 posts
Posted Oct 26, 2024, 7:11 PM#1592
autoNewbie4 posts
Posted Oct 26, 2024, 8:15 PM#1593
Have you been back to this location recently and seen them still in stock?
Thanks!
I was at this location last week and they still had them in stock.
ChipperAttitudeNewbie4 posts
Posted Oct 26, 2024, 9:46 PM#1594
I was at this location last week and they still had them in stock.
Bless you.
ChipperAttitudeNewbie4 posts
Posted Oct 26, 2024, 9:50 PM#1595
When using a custom topper, does one simply place it on the unfolded table for poker sessions and roll up the topper for storage when not in use? It is secure enough during play in this manner?
JJDiamondsRegular29 posts
Posted Oct 26, 2024, 9:59 PM#1596
When using a custom topper, does one simply place it on the unfolded table for poker sessions and roll up the topper for storage when not in use? It is secure enough during play in this manner?
Yup. I haven't had any issues with it moving around too much
mojo13Newbie2 posts
Posted Oct 26, 2024, 10:15 PM#1597
It looks like your cupholders came out very clean vs some I've seen did you just use a heat gun on the inside of the cupholders also?
tritonMicro-Stakes Grinder7 posts
Posted Oct 27, 2024, 2:08 AM#1598
It looks like your cupholders came out very clean vs some I've seen did you just use a heat gun on the inside of the cupholders also?
Used a hair dryer and the trim remove tool. I heated the cups until I was able to pry them loose with the tool. Then I let them cool before I removed them. This way the glue doesn’t string all over the table.
BaroneSanitationRegular28 posts
BaroneSanitationRegular28 posts
Posted Nov 5, 2024, 1:25 PM#1600
walmart barrington is 179
walmart barrington led is 199
costco barrington led is 229
looking for a second table, which is the one to get? leaning towards the cheapest one and using money saved to upgrade the cupholders. are the LED's a much added benefit to game play? feel like i'd tilt myself looking directly into the light.. or is the weight of the table better?
EastCoastCaliMicro-Stakes Grinder11 posts
Posted Nov 5, 2024, 1:32 PM#1601
walmart barrington is 179
walmart barrington led is 199
costco barrington led is 229
looking for a second table, which is the one to get? leaning towards the cheapest one and using money saved to upgrade the cupholders. are the LED's a much added benefit to game play? feel like i'd tilt myself looking directly into the light.. or is the weight of the table better?
I got the Walmart barrington and love it for the price. My thought process was for ~$20 extra bucks, whynot have the LED’s as an option. I will say I’ve been trying to find an rgb cob light replacement for them ever since and can’t seem to figure it all out, which has been a bummer. I don’t know if I would have regretted getting the lesser for such little money saved, but I didn’t want to regret it.
BaroneSanitationRegular28 posts
Posted Nov 7, 2024, 1:33 PM#1602
Well.
Pleasantly surprised these are in the UK. Was in the market for a table, and got one of the led ones delivered. Don’t think there’s any other choice of table.
So much better than most of the crud on eBay, even allowing for the aspects with room for improvement -
Cup holders (why put in such narrow and shallow ones at all?)
LED brightness/wire
slightly different heights of playing surface at the fold.
Thanks to this thread if I choose too I can address most of the above, easily and cheaply.
Now to get a custom cloth…
i saw the different height on the surface at the fold in someone elses picture. can you share a picture? wonder why it is that way for the costco one, the walmart barringtons are good at the fold. debating the costco one but this may tilt me
NotRealNameNoSirRegular73 posts
Posted Nov 7, 2024, 1:35 PM#1603
i saw the different height on the surface at the fold in someone elses picture. can you share a picture? wonder why it is that way for the costco one, the walmart barringtons are good at the fold. debating the costco one but this may tilt me
I don't know exactly what you mean but the bottom of the table has wires that can be adjusted to change the height of the table and how it sits. My table doesn't have an discernible height difference at the middle, but I also use a topper to lay over it anyways.
BaroneSanitationRegular28 posts
Posted Nov 7, 2024, 1:39 PM#1604
I don't know exactly what you mean but the bottom of the table has wires that can be adjusted to change the height of the table and how it sits. My table doesn't have an discernible height difference at the middle, but I also use a topper to lay over it anyways.

it looks really raised at the fold here in this picture and someone else said different heights of playing at the fold. true i guess a custom topper over it would be fine? just if you use the costco hold em it looks like a considerable height difference where dealing across may hit a snag? don't have that level of difference with the walmart barrington from my experience so was just curious peoples experience with the costco one thus far
andrebttxNewbie3 posts
Posted Nov 8, 2024, 10:14 PM#1605
Is that the middle of the costco barrington table? is it not level or is the picture playing tricks on me
It’s a folding table, so there is technically the crease in the middle of the table if you don’t have a topper on it. But it never once caused a problem catch a card or chip.
mooncerealNewbie3 posts
Posted Nov 13, 2024, 12:14 AM#1606
What’s up guys! I’m looking into buying the brown barrington table on sale from Walmart to use as a dining room table top. Has anyone had experience taking off the legs and using it for this purpose?
JackJackRegular44 posts
Posted Nov 13, 2024, 1:43 AM#1607
What’s up guys! I’m looking into buying the brown barrington table on sale from Walmart to use as a dining room table top. Has anyone had experience taking off the legs and using it for this purpose?
I’m interested in this as well. This is my plan with the Costco one.
Hot NutsShark105 posts
Posted Nov 13, 2024, 1:54 AM#1608
I think the rail would sit a little too high on top of the table and be annoying.
JackJackRegular44 posts
Posted Nov 13, 2024, 2:24 AM#1609
I think the rail would sit a little too high on top of the table and be annoying.
Over a kitchen table I could see that being an issue.
I plan on putting it over a table that is 32” x 64”, so the table should nest inside the table top pretty well.
mooncerealNewbie3 posts
Posted Nov 13, 2024, 2:26 AM#1610
Over a kitchen table I could see that being an issue.
I plan on putting it over a table that is 32” x 64”, so the table should nest inside the table top pretty well.
keep us posted we’d like to see it.
ColquhounRegular82 posts
Posted Nov 13, 2024, 10:05 AM#1611
Over a kitchen table I could see that being an issue.
I plan on putting it over a table that is 32” x 64”, so the table should nest inside the table top pretty well.
You’ll still have a center support that is almost the height of the edges:


I guess you could put some small blocks under the table at each end so the table stays level, but the final height of the playing surface will still be a couple inches higher than the dining table. If that’s ok, it could work.
The other thing you’ll need to think about is that since so little of the Barrington table will be touching the dining table, it may slide around very easily…and be trouble when someone leans in to scoop a pot or bumps it when getting up.
JackJackRegular44 posts
Posted Nov 13, 2024, 12:04 PM#1612
You’ll still have a center support that is almost the height of the edges:
View attachment 1419785 (https://www.pokerchipforum.com/attachments/1419785/)View attachment 1419786 (https://www.pokerchipforum.com/attachments/1419786/)
I guess you could put some small blocks under the table at each end so the table stays level, but the final height of the playing surface will still be a couple inches higher than the dining table. If that’s ok, it could work.
The other thing you’ll need to think about is that since so little of the Barrington table will be touching the dining table, it may slide around very easily…and be trouble when someone leans in to scoop a pot or bumps it when getting up.
Hmmm … interesting.
Technically my tables are 32x32 and I was going to join two for the 64x32 I mentioned. Perhaps I can keep them separate and nest them individually.
mooncerealNewbie3 posts
Posted Nov 13, 2024, 12:10 PM#1613
You’ll still have a center support that is almost the height of the edges:
View attachment 1419785 (https://www.pokerchipforum.com/attachments/1419785/)View attachment 1419786 (https://www.pokerchipforum.com/attachments/1419786/)
I guess you could put some small blocks under the table at each end so the table stays level, but the final height of the playing surface will still be a couple inches higher than the dining table. If that’s ok, it could work.
The other thing you’ll need to think about is that since so little of the Barrington table will be touching the dining table, it may slide around very easily…and be trouble when someone leans in to scoop a pot or bumps it when getting up.
Hmm super helpful to see the underside of the table, glad you have pictures. It looks like this probably won’t fit right on my table
ColquhounRegular82 posts
Posted Nov 13, 2024, 2:54 PM#1614
Hmm super helpful to see the underside of the table, glad you have pictures. It looks like this probably won’t fit right on my table
I grabbed the pics from other posts earlier in this thead. :ROFL: :ROFLMAO:
Apologies to those that I did not give photo credit.
BleedingChipsMicro-Stakes Grinder11 posts
Posted Nov 14, 2024, 1:15 AM#1615
For anyone in WNY, they restocked today at Costco in Rochester.
JackJackRegular44 posts
Posted Nov 14, 2024, 1:31 AM#1616
For anyone in WNY, they restocked today at Costco in Rochester.
Dang!
I am hoping for a Death Star soon, this indicates that isn’t likely.
hodMicro-Stakes Grinder6 posts
Posted Nov 14, 2024, 9:41 PM#1617
i saw the different height on the surface at the fold in someone elses picture. can you share a picture? wonder why it is that way for the costco one, the walmart barringtons are good at the fold. debating the costco one but this may tilt me
This is the best I’ve got. If you look back a couple of posts at the photo from underneath, on my table too much material has been removed in the recess on one side where the hinge is. I’m going to remove it and put in a spacer to level it all up.

hodMicro-Stakes Grinder6 posts
Posted Nov 14, 2024, 9:43 PM#1618
This is the best I’ve got. If you look back a couple of posts at the photo from underneath, on my table too much material has been removed in the recess on one side where the hinge is. I’m going to remove it and put in a spacer to level it all up.
View attachment 1420537 (https://www.pokerchipforum.com/attachments/1420537/)
This looks really minor but a 1-2mm difference in height if you’re sliding a card at it is really noticeable!
iLogikMicro-Stakes Grinder9 posts
Posted Nov 17, 2024, 1:37 AM#1619
Finally got to doing the light thing, messed it up a bit but works fine :)
Thank you all for all the advice in this thread!


ef28Micro-Stakes Grinder10 posts
dazokiMicro-Stakes Grinder6 posts
Posted Nov 21, 2024, 5:43 PM#1621
walmart barrington is 179
walmart barrington led is 199
costco barrington led is 229
looking for a second table, which is the one to get? leaning towards the cheapest one and using money saved to upgrade the cupholders. are the LED's a much added benefit to game play? feel like i'd tilt myself looking directly into the light.. or is the weight of the table better?
Oddly - the Walmart led jumped up to 299 while the non led is still at 179
NotRealNameNoSirRegular73 posts
ef28Micro-Stakes Grinder10 posts
NotRealNameNoSirRegular73 posts
Posted Nov 21, 2024, 6:31 PM#1624
Thanks. I did notice that walmart sells a premium version and the description says it has deeper cup holders. I wonder how much better quality for the premium.
These tables are great and I like them, but I would not expect anything premium from Walmart or CostCo. I haven't found cupholders that I liked on these, my players prefer big ol rocks glasses that only fit in jumbo.
BaroneSanitationRegular28 posts
Posted Nov 22, 2024, 6:37 PM#1625
Okay just recently picked up the Costco setup. In the process of getting a topper so made some measurements if anyone is curious and wanted closeups of the thickness of the topper that comes with the table.
I have 74 1/4" x 32 1/4" from LED to LED and the topper that comes with it is 74" x 32".
This is my first poker table and I've never sat down in a casino poker room or card house yet, but color me impressed for $230. I suspect it would last a few years for monthly games and close to a good year for weekly games before the railing starts to tear up.
did you order 74x32 for your custom topper how'd it fit? did you do any upgrades to the costco one? cupholders? led dimmer?
DanboberMicro-Stakes Grinder6 posts
Posted Nov 23, 2024, 7:00 PM#1626
So I finished my Barrington mods (for now) but still need to order a topper.
New LEDs, Dimmer, AA Battery Pack, and Jumbo Cupholders
COB LEDs
I wasn't the biggest fan of the blue LEDs and didn't like how they were so spaced out. I saw someone talk about the COB LEDs and how they are amost diffused already and ordered the warm white and couldn't be happier. The LEDs are very close together so you don't need to put something in front of them to diffuse them like I was trying to do with the old LEDs. Instead of ripping out the old LEDs, I actually just wedged the new LEDs right on top of the current ones. It worked out great.
I did have to cut the light strip and attach another tail end. Very easy to do but measure accurately before you cut! You don't have much leeway with the 16.4ft strip. And then used the Y connector that also came with the COB connector package.
Screwed and glued on some velcro, glued velcro to the battery pack, then buttoned up everything else. Happy with it.
COB LED Lights (https://www.amazon.com/dp/B0BVR755VK?tag=amznpcfx-20)
COB Connector Package (https://www.amazon.com/dp/B0C2CVFGL8?tag=amznpcfx-20)
Dimmer (https://www.amazon.com/weideer-Lights-Dimmer-DC12V-24V-K-018-BK/dp/B092HX9435?tag=amznpcfx-20)
Battery Pack (https://www.amazon.com/gp/product/B09131Y9L8?tag=amznpcfx-20)
Jumbo Cupholders
I went with the jumbos after reading recommendations. Pried off the old ones with a vise grip, drilled a center hole down with a standard bit, then drilled from the bottom up with the 3 5/8in hole saw starting it the pre drilled hole. I got them all done but it was a bit of a struggle with the hole saw I bought. If I would do it again, I would get one that was deeper. This one barely made it through both pieces of wood.
Jumbo Cupholders (https://www.amazon.com/gp/product/B0789HG6NW?tag=amznpcfx-20)
Hole Saw (buy a deeper one) (https://www.amazon.com/gp/product/B0C6MN14B1?tag=amznpcfx-20)
View attachment 1252914 (https://www.pokerchipforum.com/attachments/1252914/)
Nicely done! I just picked up the Costco LED version and would like to add the COB lights on top, as you did. How did you manage to get the new LEDs to fish through the top of the table and down through the hole in the bottom? It’s pretty snug in there with the existing leds. Any tips would be appreciated.
Now that it’s been done for a while, anything you would have done differently?
BaroneSanitationRegular28 posts
Posted Nov 23, 2024, 7:19 PM#1627
Nicely done! I just picked up the Costco LED version and would like to add the COB lights on top, as you did. How did you manage to get the new LEDs to fish through the top of the table and down through the hole in the bottom? It’s pretty snug in there with the existing leds. Any tips would be appreciated.
Now that it’s been done for a while, anything you would have done differently?
Are the costco lights too bright?
DanboberMicro-Stakes Grinder6 posts
Posted Nov 23, 2024, 7:40 PM#1628
In my opinion, and others on here, yes. I’d also prefer a continuous led rather than a little bead of light every inch or two.
BaroneSanitationRegular28 posts
Posted Nov 23, 2024, 7:50 PM#1629
In my opinion, and others on here, yes. I’d also prefer a continuous led rather than a little bead of light every inch or two.
i hadn't seen a verdict on the costco one was curious if it was pretty bright. i had seen it mentioned on the walmart led barrington. would a dimmer help with the costco one or is COB the way
DanboberMicro-Stakes Grinder6 posts
Posted Nov 23, 2024, 7:55 PM#1630
I’m sure a dimmer would help and could be a good starting place, as it could be used even if eventually moving to COB. I’m assuming the Costco LEDs are the same as the Walmart tables.

BaroneSanitationRegular28 posts
Posted Nov 23, 2024, 11:58 PM#1631
Yea looks pretty bad. I was hoping I could buy a smaller, deeper cup holder to place/glue into the existing ones, but from the looks of it, if I did that, regular sized cans wouldn’t fit.
are there holders out there the same width lip to lip of the factory ones but as deep as the jumbos?
BaroneSanitationRegular28 posts
Posted Nov 23, 2024, 11:59 PM#1632
I’m sure a dimmer would help and could be a good starting place, as it could be used even if eventually moving to COB. I’m assuming the Costco LEDs are the same as the Walmart tables. View attachment 1425198 (https://www.pokerchipforum.com/attachments/1425198/)
those cupholders look better than the walmart ones.. are they deeper? black stainless steel?
DanboberMicro-Stakes Grinder6 posts
Posted Nov 24, 2024, 1:59 AM#1633
those cupholders look better than the walmart ones.. are they deeper? black stainless steel?
Yes, black stainless steel, slightly deeper but same width so I’ll probably still upgrade.
DesiBoyzNewbie1 posts
Posted Nov 25, 2024, 12:02 AM#1634
Been Reading a lot of LED Barrington thread from few days now . Going to purchase two next week.
My question is for the people who are using the AA battery pack .
How long does the batteries last if you continuously leave it ON using 8AA.
i only host twice a year and if the batteries could last like 6-7 hours i don't want to spend the money on the powerbank.
And anyone who knows more about voltages/wattages.. i have 20000mah samsung power bank with 45W P.D. can that work if i buy the DC to USB-C adapter as one of the posters in the thread did.
https://www.samsung.com/ca/business/mobile-accessories/battery-pack-20ah-beige-eb-p4520xuegca/
in the output section of this it says Output Voltage: 3.3-20 V but i guess its auto, depending on the device.
ColquhounRegular82 posts
Posted Nov 25, 2024, 2:21 AM#1635
Been Reading a lot of LED Barrington thread from few days now . Going to purchase two next week.
My question is for the people who are using the AA battery pack .
How long does the batteries last if you continuously leave it ON using 8AA.
i only host twice a year and if the batteries could last like 6-7 hours i don't want to spend the money on the powerbank.
And anyone who knows more about voltages/wattages.. i have 20000mah samsung power bank with 45W P.D. can that work if i buy the DC to USB-C adapter as one of the posters in the thread did.
https://www.samsung.com/ca/business/mobile-accessories/battery-pack-20ah-beige-eb-p4520xuegca/
in the output section of this it says Output Voltage: 3.3-20 V but i guess its auto, depending on the device.
Earlier in this thread:
Mine was at 7 hours and still going strong last session..now if I can just remember which pack I used, I'll be able to give you a number when those finally die. :LOL: :laugh:
I bought a two-pack of AA battery packs but I haven’t used them yet. I planned on filling both up to have ready, but if you can get 7+ hours from one, that would be awesome.
BaroneSanitationRegular28 posts
Posted Nov 28, 2024, 2:31 AM#1636

brought it home tonight
JackJackRegular44 posts
Posted Nov 28, 2024, 2:49 AM#1637
Manufacturer sale … nice!
horseshoezRegular25 posts
harrysalloutMicro-Stakes Grinder11 posts
Posted Nov 28, 2024, 8:15 AM#1639
Just got mine a few weeks ago for $229.99. Bastards! :ROFL: :ROFLMAO:
You can always get a price adj in the warehouse
acezagMicro-Stakes Grinder5 posts
Posted Nov 28, 2024, 10:50 AM#1640
did you order 74x32 for your custom topper how'd it fit? did you do any upgrades to the costco one? cupholders? led dimmer?
I have the same questions, plus wondering where you ordered the custom topper - was it from the guy here in the forums, or do you have another source?
BaroneSanitationRegular28 posts
Posted Nov 28, 2024, 11:15 AM#1641
Just got mine a few weeks ago for $229.99. Bastards! :ROFL: :ROFLMAO:
I posted for that reason! Go get a price match and pick yourself up a dollar fitty glizzzy
horseshoezRegular25 posts
Posted Nov 28, 2024, 3:32 PM#1642
I posted for that reason! Go get a price match and pick yourself up a dollar fitty glizzzy
Didn’t even know Costco did that. Thank you! Hellz ya I will!
JackJackRegular44 posts
Posted Nov 28, 2024, 3:46 PM#1643
Didn’t even know Costco did that. Thank you! Hellz ya I will!
There is a quirk though, you have to have the paper receipt. Atleast at our locations.
BaroneSanitationRegular28 posts
Posted Nov 28, 2024, 3:54 PM#1644
There is a quirk though, you have to have the paper receipt. Atleast at our locations.
Dang! That's whack. Ours usually just scans our card.
chipinlaRegular37 posts
Posted Nov 29, 2024, 5:02 PM#1645
Costco Barrington with LEDs on sale for $199.99

gustavo1234Newbie2 posts
Posted Dec 6, 2024, 4:22 AM#1646
Anybody know a good spot to get custom felts made for this table?
This table would be great if it came with wheels lol! It’s so heavy to move around!
HuskerchipperRegular35 posts
Posted Dec 6, 2024, 4:33 AM#1647
Anybody know a good spot to get custom felts made for this table?
This table would be great if it came with wheels lol! It’s so heavy to move around!
Look around here and you will likely find what you are looking for...

gustavo1234Newbie2 posts
kach33Micro-Stakes Grinder8 posts
Posted Dec 6, 2024, 8:21 AM#1649
Anybody know a good spot to get custom felts made for this table?
This table would be great if it came with wheels lol! It’s so heavy to move around!
I use these to move tables around the garage. I just set them near each foot and lift it onto them one end at a time and they easily roll to where I need them
https://a.co/d/2jwhlNH (https://a.co/d/2jwhlNH?tag=amznpcfx-20)
HeavyLiftNewbie1 posts
Posted Dec 6, 2024, 9:44 PM#1650
Does anyone have pictures of a dimmer installed with the original LED lights? Table coming this week and want to get a jump on improvements
Cheers
DanboberMicro-Stakes Grinder6 posts
Posted Dec 7, 2024, 12:49 AM#1651
Does anyone have pictures of a dimmer installed with the original LED lights? Table coming this week and want to get a jump on improvements
Cheers
Here ya go. $10 Amazon (https://www.amazon.com/?tag=amznpcfx-20) dimmer. It does the job, but white turns pretty orange/red as you go low. Also, likely due to the cheap $10 product, you can hear a buzzing sound. The main issue I still see is the lack of a diffuser - don’t love the look of seeing each individual light.
iLogikMicro-Stakes Grinder9 posts
Posted Dec 7, 2024, 1:01 AM#1652
U need to upgrade that lol if u don’t like it…
DanboberMicro-Stakes Grinder6 posts
Posted Dec 7, 2024, 1:07 AM#1653
U need to upgrade that lol if u don’t like it…
Agreed! Thinking COB light strip may be the way to go but also hoping to learn from others who have taken the plunge before me
iLogikMicro-Stakes Grinder9 posts
Posted Dec 7, 2024, 1:08 AM#1654
There is another thread that covers this, I did it and it works great!
RegularjohnRegular30 posts
Posted Dec 8, 2024, 12:50 AM#1655
Saturday morning cupholder upgrade assembly line with @sethwanab (https://www.pokerchipforum.com/members/13582/)
Three tables upgraded in just over 90 min start to finish.View attachment 1409702 (https://www.pokerchipforum.com/attachments/1409702/)
the new tables seem extremely durable this time around.... a few questions...
how did you loosen the existing cup holders without damaging the cushion? ive heard of people using a hairdryer to get the glue to soften up
there appears to be 2 layers of wood now, im assuming you had to go through both layers?
SaditsfactMicro-Stakes Grinder7 posts
Posted Dec 8, 2024, 1:09 AM#1656
Thank you guys for putting me on this sale, swooped it up last night, hauled it up my stairs by myself… was a heavy sucker…

Put it right next to my other table that looks like it might be featured on that fugly table thread (they made me want to get a new one lmao) @Mushmanchuman (https://www.pokerchipforum.com/members/6871/)
The lights are kind of bright and harsh on the eyes and I see there’s things you can do about that…
Also happy to hear the cup holders have been upgraded slightly? It looks like a normal can size cup works well and catches the edge to prevent spillage but a white claw type of can, will easily splash the pot in a bad way…
tritonMicro-Stakes Grinder7 posts
Posted Dec 8, 2024, 1:18 AM#1657
the new tables seem extremely durable this time around.... a few questions...
how did you loosen the existing cup holders without damaging the cushion? ive heard of people using a hairdryer to get the glue to soften up
there appears to be 2 layers of wood now, im assuming you had to go through both layers?
Yes used a hair dryer and it worked well. I let the cups sit loosened for two minutes to avoid glue strings when I removed them. See this page of the thread for detailed instructions:
https://www.pokerchipforum.com/threads/barrington-poker-table-thread.30910/page-42
Wood definitely thicker on the newer tables but the hole saw worked well.
JackJackRegular44 posts
Posted Dec 8, 2024, 1:52 AM#1658
Yes used a hair dryer and it worked well. I let the cups sit loosened for two minutes to avoid glue strings when I removed them. See this page of the thread for detailed instructions:
https://www.pokerchipforum.com/threads/barrington-poker-table-thread.30910/page-42
Wood definitely thicker on the newer tables but the hole saw worked well.
What size cup holders did you go with? I’ve seen the post previously with a link to jumbo cup holders. I’m curious what the largest size would be that works
RegularjohnRegular30 posts
Posted Dec 8, 2024, 1:59 AM#1659
Yes used a hair dryer and it worked well. I let the cups sit loosened for two minutes to avoid glue strings when I removed them. See this page of the thread for detailed instructions:
https://www.pokerchipforum.com/threads/barrington-poker-table-thread.30910/page-42
Wood definitely thicker on the newer tables but the hole saw worked well.
Did you do the measurements he mentioned or just drilled straight down? It's possible I have a monkey brain and I'm not understanding the purpose of measuring for a pilot hole. The hole saw should just fit right in?
tritonMicro-Stakes Grinder7 posts
Posted Dec 8, 2024, 2:17 AM#1660
What size cup holders did you go with? I’ve seen the post previously with a link to jumbo cup holders. I’m curious what the largest size would be that works
We used the cup holders that were linked in the instructions.
Did you do the measurements he mentioned or just drilled straight down? It's possible I have a monkey brain and I'm not understanding the purpose of measuring for a pilot hole. The hole saw should just fit right in?
Yes we used his methodology but just used a sharpie to mark. We weren’t exact but were close enough (wanted to make sure we didn’t cut into the outer rail)
RegularjohnRegular30 posts
Posted Dec 8, 2024, 2:32 AM#1661
Yes we used his methodology but just used a sharpie to mark. We weren’t exact but were close enough (wanted to make sure we didn’t cut into the outer rail)
Thanks for the response. Last time I did this, I didn't measure, I just drilled and everything went fine, so wasn't sure of the purpose of measuring... Not sure I do yet lol will probably just assume that method is the correct way and go with that.
And you guys drilled with the table flipped right?
JDPokerMicro-Stakes Grinder10 posts
Posted Dec 8, 2024, 3:30 AM#1662
Thanks for the heads up guys...got my price adjustment today.
TheChipVaultMicro-Stakes Grinder12 posts
Posted Dec 8, 2024, 10:12 PM#1663
No price adjustment for me.. over 30 days
ripinpeace12Newbie1 posts
Posted Dec 11, 2024, 4:13 AM#1664
Anyone have a preference for a diffuser?
OTGladiatorNewbie2 posts
Posted Dec 11, 2024, 6:25 AM#1665
harrysalloutMicro-Stakes Grinder11 posts
Posted Dec 11, 2024, 3:27 PM#1666
Is this in Houston by chance?
The app shows in stock at both the Williowbrook and Woodlands locations for $169.99.
QuadNinesNewbie2 posts
Posted Dec 12, 2024, 2:59 AM#1667
Anyone have insight as to why these are $329 (currently 12/11/2024) on the Costco website? My closest Costco is Spartanburg SC... Is it due to Christmas? Gouging due to popularity? Or is "free shipping" actually embedded in the $329 price? IE are these still much cheaper IF you pick up in store?? Thanks..!
OTGladiatorNewbie2 posts
Posted Dec 12, 2024, 4:38 AM#1668
Anyone have insight as to why these are $329 (currently 12/11/2024) on the Costco website? My closest Costco is Spartanburg SC... Is it due to Christmas? Gouging due to popularity? Or is "freee shipping" actually embedded in the $329 price? IE are these still much cheaper IF you pick up in store?? Thanks..!
Not sure. I’m going to go check the location that @harrysallout (https://www.pokerchipforum.com/members/563/) mentioned to see if it’s at that $170 price in store. Guess you gotta go check? Not sure whether the app pricing is different from the website. I’m not a member, so not sure how they list stuff. Just gonna use a friend to get me in and check it out.
ColquhounRegular82 posts
Posted Dec 12, 2024, 4:54 AM#1669
Anyone have insight as to why these are $329 (currently 12/11/2024) on the Costco website? My closest Costco is Spartanburg SC... Is it due to Christmas? Gouging due to popularity? Or is "freee shipping" actually embedded in the $329 price? IE are these still much cheaper IF you pick up in store?? Thanks..!
I think the website shows prices assuming it’s being shipped to you (or your local store) and are building in those costs. The items bulk shipped in quantity to the store are at a much greater discount.
harrysalloutMicro-Stakes Grinder11 posts
Posted Dec 12, 2024, 7:05 AM#1670
In the Costco app if you click warehouse at the bottom you can check inventory in the warehouse.


ChipandchairRegular29 posts
Posted Dec 12, 2024, 12:26 PM#1671
Tried the price adjustment and was told I needed the paper receipt or needed to pull up the purchase on the app in order to get price adjusted.
ColquhounRegular82 posts
Posted Dec 12, 2024, 6:21 PM#1672
Tried the price adjustment and was told I needed the paper receipt or needed to pull up the purchase on the app in order to get price adjusted.
That’s the first time I’ve ever heard this. They can always pull up your purchase history as soon as they scan your card, I’ve done it many times.
Either they changed policy, or it was someone who didn’t want to go through the trouble.
zabelNewbie2 posts
Posted Dec 12, 2024, 6:36 PM#1673
Is this in Houston by chance?
Yes I just bought one yesterday at the I10 and bunker hill location. Be ware that its very heavy and large.
good luck!
ChipandchairRegular29 posts
Posted Dec 12, 2024, 7:47 PM#1674
That’s the first time I’ve ever heard this. They can always pull up your purchase history as soon as they scan your card, I’ve done it many times.
Either they changed policy, or it was someone who didn’t want to go through the trouble.
The oak Brook IL location says they changed their policy in March of this year. Need paper or pull it up on the app yourself. They will not look it up. Likely coming to a Costco near you as they were the first in the area to have card scanners at entry also.
ColquhounRegular82 posts
Posted Dec 12, 2024, 10:55 PM#1675
The oak Brook IL location says they changed their policy in March of this year. Need paper or pull it up on the app yourself. They will not look it up. Likely coming to a Costco near you as they were the first in the area to have card scanners at entry also.
Ahhh…good ol’ customer service.
Evaporating at a store near you!
Next thing you know, you’ll be ringing up merchandise yourself!
Oh, wait…
JackJackRegular44 posts
Posted Dec 13, 2024, 3:12 PM#1676
Anyone have a preference for a diffuser?
Interested as well
SnowConeYetiNewbie2 posts
Posted Dec 13, 2024, 4:43 PM#1677
Got my price adjustment as it went down to $170 here in Indy. Thanks guys.
porscheinvestorNewbie1 posts
Posted Dec 17, 2024, 1:56 AM#1678
I recently upgraded my cup holders after a couple of close calls of having drinks spilled onto the playing surface. The cup holders that come with the table are a joke (a very cruel and sad joke). If you're on the fence about upgrading yours, don't delay. Get them upgraded. They're a huge improvement.
View attachment 1289094 (https://www.pokerchipforum.com/attachments/1289094/)
I was really encouraged by the posts by @dmoney (https://www.pokerchipforum.com/members/3698/) and @greedyintern (https://www.pokerchipforum.com/members/17235/). Huge shout out to them and their guides. Those helped tremendously. This is dedicated to @Saoliver (https://www.pokerchipforum.com/members/1603/) who asked for a video (in the thread - not to me personally) but this is as close to a video I could muster. I hope this is helpful. :)
Items/tools:
View attachment 1289142 (https://www.pokerchipforum.com/attachments/1289142/)
Replacement cup holders (https://www.amazon.com/YH-Poker-Jumbo-Stainless-Holders/dp/B0789HG6NW/?tag=amznpcfx-20)
Gloves
Eye protection
Auto trim removal tool (https://www.amazon.com/dp/B0C6V39SVH?tag=amznpcfx-20)
Screwdriver
Hole saw (3 5/8") (https://www.amazon.com/dp/B01987566S?tag=amznpcfx-20) - (In retrospect, I would have used a different hole saw. Maybe the Milwaukee one)
Tape measure
Cardboard sheet
Hole saw arbor
1/4" drill bit
1/8" drill bit
Screw
Drill
Hair dryer (not pictured)
Step 1: Remove original cup holders
This step is pretty simple. Set the hairdryer on high heat and keep it approximately 1 inch away from the cup holder for about a minute. Most of the cup holders will only require a minute for the glue to loosen up. I only had a couple that needed more time. For those, I did it again for another minute.
View attachment 1289155 (https://www.pokerchipforum.com/attachments/1289155/)
After the hairdryer, use the auto trim tool to pry the cup holder away from the loose glue. Work the tool around the cup holder while gently pulling the cup and glue apart.
View attachment 1289156 (https://www.pokerchipforum.com/attachments/1289156/)
A couple of things to keep in mind when you remove the cup holder from the table:
The cup holder will be hot from the hairdryer so wear your gloves.
The glue will be very sticky so pull directly up and not to the side. Try not to get any on your the table/padding.
View attachment 1289157 (https://www.pokerchipforum.com/attachments/1289157/)
Step 2: Mark the drill hole
Before you move onto this step, make sure all the glue has completely cooled off and dried.
This step is relatively easy but requires some concentration. The exactness of this step will ensure your new cup holders will be where you want them to be.
The original cup holders on my Barrington is measured at 3 1/2" across. You should double check yours if you're going to follow this step of my guide.
View attachment 1289168 (https://www.pokerchipforum.com/attachments/1289168/)
The new cup holders measure 4" across.
View attachment 1289169 (https://www.pokerchipforum.com/attachments/1289169/)
Since the size difference between the 2 cup holders is 1/2", we will need to mark the new center hole 1/4" away from the original center.
Here is a reference on how I calculated my center hole. I started the measure from the outer edge of the original cup holder. The idea is to mark the new center at the 2" mark.
View attachment 1289453 (https://www.pokerchipforum.com/attachments/1289453/)
Here is a better visualization of this. The new center hole has to be 1/4" closer to the table and yet remain in center of the left/right side edges.
View attachment 1289461 (https://www.pokerchipforum.com/attachments/1289461/)
I tried using a marker on the glue but found it difficult to accurately mark the exact location of the new hole. I decided to use a screw instead and that worked much better. The good thing about this is that I could move the screw easily to make fine adjustments as much as I needed. Once I've double (tripled!) checked my measurement I screwed in the screw to make a pilot hole. I didn't drill too deep - just deep enough to make a visible hole.
View attachment 1289462 (https://www.pokerchipforum.com/attachments/1289462/)
Ultimately, I ended up with this outcome. I then took my 1/8" drill bit and drilled through the table using the pilot hole as a guide.
View attachment 1289471 (https://www.pokerchipforum.com/attachments/1289471/)
Step 3: Drill out the new holes (from the bottom)
Flip the table upside down.
Before I drilled the hole with my hole saw, I drilled through the existing hole using the 1/4" drill bit. The reason for this is that the drill arbor is 1/4" so I wanted to make sure the arbor was aligned exactly to the new center. In retrospect, I suspect I could have used the 1/4" bit instead of the 1/8" bit in Step 2 and saved a step.
Drilling the hole was the worst part (for me). The hardest part was intentionally going slow and not hurry the process. The thing to note here is to stop drilling immediately after you've broken through to the foam. I was a nervous wreck trying not to over drill.
As you can see below, the foam is glued to the wood so I had to carefully separate the foam after I had drilled through the wood. Try to retain as much foam as you can in the original hole. This will help with the snugness of the new cup holder.
View attachment 1289474 (https://www.pokerchipforum.com/attachments/1289474/)
Here is an "in progress" picture of the process. I really wanted to see the new cup holder put in so I did that one right away (it's rad). I was also doubting I did the math properly in Step 2 so I wanted to quadruple check it was right (it was). TRUST THE MATH!
I also wanted to show the new Barringtons have clearance for the holes without sawing any of the posts.
Please ignore my monstrosity of a drill. The nerds over at r/tools will ban me if they ever saw that thing.
View attachment 1289481 (https://www.pokerchipforum.com/attachments/1289481/)
Step 4: Insert new cup holders and ENJOY
This step is easy and the most enjoyable. The new cup holders will be very snug (tight) in the new opening. I used a cardboard sheet to help me evenly apply pressure and knead the cup holder in. Think flattening pizza dough - same idea and motion.
Others mentioned having to tape their new cup holders with masking / duct tape to make them snug but I didn't have to do that. The foam and vinyl were enough to keep these cup holders very tight and snug. Oh, speaking of foam, trim away the excess foam that will be sticking out of the bottom after you're all done.
That's it! Enjoy your new rad cup holders!
Don't yell at me about my chairs. They're next to be upgraded!
View attachment 1289497 (https://www.pokerchipforum.com/attachments/1289497/)
Killer detail! thanks for the step by step, will be doing this soon!
JackJackRegular44 posts
Posted Dec 19, 2024, 11:37 AM#1679
When installing cup holders did anyone else run into their felt and create some creases in the playing surface? The creases/wrinkles are not large, but there are a couple in the grey playing surface as a result of the hole saw catching it under the rail.
BugeRegular53 posts
Posted Dec 19, 2024, 2:25 PM#1680
When installing cup holders did anyone else run into their felt and create some creases in the playing surface? The creases/wrinkles are not large, but there are a couple in the grey playing surface as a result of the hole saw catching it under the rail.
Can you remove the arm rest in that section and pull the felt tight then staple it?
EastCoastCaliMicro-Stakes Grinder11 posts
Posted Dec 19, 2024, 2:51 PM#1681
Why the F is it always $329.99 in mass, how are we F’in so different…
ChipandchairRegular29 posts
Posted Dec 19, 2024, 2:59 PM#1682
When installing cup holders did anyone else run into their felt and create some creases in the playing surface? The creases/wrinkles are not large, but there are a couple in the grey playing surface as a result of the hole saw catching it under the rail.
A lot of people prefer to replace the felt with SSC or use a topper on these anyway. There is a current topper group buy going on now
Bluegrass PokerNewbie4 posts
Posted Dec 19, 2024, 3:52 PM#1683
Why the F is it always $329.99 in mass, how are we F’in so different…
Darn Massholes!
JackJackRegular44 posts
Posted Dec 19, 2024, 5:40 PM#1684
Can you remove the arm rest in that section and pull the felt tight then staple it?
I am not sure, I think I would have to take the bottom off the table, cupholders out, rail off, etc. Complete disassembly.
JJDiamondsRegular29 posts
Posted Dec 19, 2024, 6:11 PM#1685
When installing cup holders did anyone else run into their felt and create some creases in the playing surface? The creases/wrinkles are not large, but there are a couple in the grey playing surface as a result of the hole saw catching it under the rail.
You could just get a topper for the table... that would be the easiest fix.
JackJackRegular44 posts
Posted Dec 19, 2024, 6:49 PM#1686
That’s the plan. Just a matter of whether I do the group buy then sell on marketplace for the extras to offset cost, or if I buy a one off.
fortysixandtwoMicro-Stakes Grinder11 posts
Posted Dec 19, 2024, 8:23 PM#1687
Been gone awhile..are these Costco tables the same size as the Walmart ones that have the upgraded rails?
BaroneSanitationRegular28 posts
Posted Dec 21, 2024, 7:11 PM#1688


Finally upgraded cupholders on my costco barrington. I had done the Walmart non led upgrade a few months ago, this costco upgrade was definitely a tougher task to complete.
Question - anyone know how to properly hook this dimmer? Bought the one rec on this thread, but not having any luck with it. If I plug the table direct into the wall and connect the dimmer it kinda works but it takes like the full knob turn to barley get a dim. Hooking it with the battery block it gives no response
ChipandchairRegular29 posts
ColquhounRegular82 posts
horseshoezRegular25 posts
Posted Dec 21, 2024, 7:31 PM#1691
The install of the COB LED and dimmer doesn't scare me one bit......only because my best friend and member of our poker group is one hell of an electrician. I literally just threw it in his lap. "Hey bud, going to perform an upgrade on my table and it looks like this. You're doing it. Thanks." hahahahahaha
BaroneSanitationRegular28 posts
Posted Dec 22, 2024, 2:24 AM#1692
Can you elaborate on how the Costco table upgrade is a tougher task? Is it just the LED issues?
it definitely is a better made table than the walmart one. Heavier I would guess from the thicker plywood, so took me a lot longer. May not be an issue if you have a good drill, mine is mid. Lots of glue, lots of staples after sawing through every first level. Had to pull a couple staples out at every hole then the second level was just thick so just took time for me. No issues with the led during the upgrade. Lots of good info on the this thread for the cup holder replacement, if ya follow it shouldn't run into any problems you can't get around. GL with it!
BLK21JKMicro-Stakes Grinder6 posts
Posted Dec 24, 2024, 5:27 PM#1693
View attachment 1437214 (https://www.pokerchipforum.com/attachments/1437214/)
Question - anyone know how to properly hook this dimmer? Bought the one rec on this thread, but not having any luck with it. If I plug the table direct into the wall and connect the dimmer it kinda works but it takes like the full knob turn to barley get a dim. Hooking it with the battery block it gives no response
See my post below. Try flipping the dimmer 180 in your chain - those are one-way only.
Those PWM rotary dimmers for LEDs are not bi-directional - you have to have the “input” pigtail connected to your battery pack and the “output” pigtail to the LEDs.
Easy to miss and not a big deal, unless your battery and/or LED strip has a M connector where you want a F connector - then you’ll need an adapter or need to cut/splice a connector or two.
I encountered this with the rechargeable battery pack that I’m using, but it came with a Y-connector cable with both M and F plugs so I shoved that in the chain and all was good.
ef28Micro-Stakes Grinder10 posts
Posted Dec 27, 2024, 11:30 PM#1694

Went on sale at Costco to the lowest price I’ve seen. Had a relative pick it up for me since it was in San Diego.
BaroneSanitationRegular28 posts
Posted Dec 28, 2024, 1:01 AM#1695
View attachment 1439237 (https://www.pokerchipforum.com/attachments/1439237/)Went on sale at Costco to the lowest price I’ve seen. Had a relative pick it up for me since it was in San Diego.
getting me a price adjustment tomorrow!! ... do i need a third table...
JackJackRegular44 posts
Posted Dec 28, 2024, 5:38 AM#1696
In Omaha it was $199 yesterday. $149 today. Outside my 30 days. Dang.
grelcoNewbie3 posts
Posted Dec 28, 2024, 11:46 PM#1697
Anyone have a preference for a diffuser?
Interested in this as well. Seems this would be a more elegant solution than a dimmer if possible
BaroneSanitationRegular28 posts
Posted Dec 29, 2024, 2:30 PM#1698
In Omaha it was $199 yesterday. $149 today. Outside my 30 days. Dang.
Can’t you just say you will buy it and return it with the outside 30 day receipt?
BaroneSanitationRegular28 posts
Posted Dec 29, 2024, 2:31 PM#1699
Interested in this as well. Seems this would be a more elegant solution than a dimmer if possible
What’s that do? The above instructions on the recommended dimmer worked
JackJackRegular44 posts
Posted Dec 29, 2024, 3:00 PM#1700
Can’t you just say you will buy it and return it with the outside 30 day receipt?
Yes I could but won’t. I am already down to $169 with multiple price adjustments so it is $20. My table also has 9 new cup holders in it since I bought it (10th broke upon install). So the table I bought is not in a condition to actually return.
BaroneSanitationRegular28 posts
Posted Dec 29, 2024, 4:11 PM#1701
Yes I could but won’t. I am already down to $169 with multiple price adjustments so it is $20. My table also has 9 new cup holders in it since I bought it (10th broke upon install). So the table I bought is not in a condition to actually return.
Oh hell no I wouldn’t actually load it up from home for $20. Just meant saying it to them, for them to then just process it. But if they were in the store you could buy it new then wheel it to CS and return it with the $169 receipt if they wanna play games.
JackJackRegular44 posts
Posted Dec 29, 2024, 8:45 PM#1702
My wife actually told me that I should buy 3 of them, do the topper group buy, and then sell the tables with toppers on marketplace ha
PostoakpokerMicro-Stakes Grinder6 posts
Posted Dec 30, 2024, 9:55 PM#1703
Would a few people mind sharing pictures of their Costco Barrington set up in their poker room? Trying to see how it comes to my existing table.
There are lots of stock images & pictures of it in the Costco warehouses but that's not a table's "natural environment".
grelcoNewbie3 posts
Posted Jan 1, 2025, 3:24 PM#1704
What’s that do? The above instructions on the recommended dimmer worked
A plastic diffuser strip in front of the LEDs, so the light from them is more of a solid bar than pinpoint LEDs (That are harsh). Dimming them is one solution but it doesn't solve the pinpoint look...there's not a lot of room there for a strip though. I might try something if I can find the right diffuser material.
ColquhounRegular82 posts
Posted Jan 1, 2025, 4:04 PM#1705
A plastic diffuser strip in front of the LEDs, so the light from them is more of a solid bar than pinpoint LEDs (That are harsh). Dimming them is one solution but it doesn't solve the pinpoint look...there's not a lot of room there for a strip though. I might try something if I can find the right diffuser material.
Spending money on a diffuser that may or may not eliminate the pinpoint effect may not be the best option. Placing a strip of COB led lights directly in front of the existing led lights may be a more expensive option, but users earlier in this thread have shown it to be a very attractive solution.
I have yet to purchase the cob light strip, but it’s in the plan.
BaroneSanitationRegular28 posts
Posted Jan 1, 2025, 5:17 PM#1706
Spending money on a diffuser that may or may not eliminate the pinpoint effect may not be the best option. Placing a strip of COB led lights directly in front of the existing led lights may be a more expensive option, but users earlier in this thread have shown it to be a very attractive solution.
I have yet to purchase the cob light strip, but it’s in the plan.
i feel like i've seen you talking about doing it forever on the barrington threads! haha, new year new poker table... do it!
the dimmer ended up working for me after blk's suggestion, i thought i had tried it every which way.
ColquhounRegular82 posts
Posted Jan 1, 2025, 5:21 PM#1707
i feel like i've seen you talking about doing it forever on the barrington threads! haha, new year new poker table... do it!
the dimmer ended up working for me after blk's suggestion, i thought i had tried it every which way.
Yeah, been dragging my feet on the light upgrade. Hell, I still have the hole saw and large cup holders, but haven’t done that either.
No home game right now has let me procrastinate the upgrades. Someday!
JackJackRegular44 posts
Posted Jan 2, 2025, 11:00 PM#1708
Does anyone have any storage case recs for the Barrington table? My Costco one’s zipper broke off immediately
PostoakpokerMicro-Stakes Grinder6 posts
ColquhounRegular82 posts
horseshoezRegular25 posts
Posted Jan 3, 2025, 1:24 AM#1711
Does anyone have any storage case recs for the Barrington table? My Costco one’s zipper broke off immediately
Get the one from Amazon (https://www.amazon.com/?tag=amznpcfx-20). The bag that’s included is a piece of shit and has the worst zipper known to man. My father-in-law is a tailor and I didn’t even bother taking it to him to get it fixed. Garbage.
JackJackRegular44 posts
Posted Jan 3, 2025, 2:54 AM#1712
Get the one from Amazon. The bag that’s included is a piece of shit and has the worst zipper known to man. My father-in-law is a tailor and I didn’t even bother taking it to him to get it fixed. Garbage.
Edit: Deleted
JackJackRegular44 posts
Posted Jan 3, 2025, 2:55 AM#1713
SaditsfactMicro-Stakes Grinder7 posts
Posted Jan 3, 2025, 2:56 AM#1714
Well I just went to get a price adjustment and apparently this costco wanted to get rid of them so badly, I got an adjustment of $93.74!!!
I purchased it less than a month ago for the 169.99 sale
JackJackRegular44 posts
Posted Jan 3, 2025, 2:59 AM#1715
Well I just went to get a price adjustment and apparently this costco wanted to get rid of them so badly, I got an adjustment of $93.74!!!
I purchased it less than a month ago for the 169.99 sale
Wow
BaroneSanitationRegular28 posts
Posted Jan 3, 2025, 3:26 AM#1716
Well I just went to get a price adjustment and apparently this costco wanted to get rid of them so badly, I got an adjustment of $93.74!!!
I purchased it less than a month ago for the 169.99 sale
Nice! Dang I need to stop into mine
Jp74Newbie4 posts
Posted Jan 3, 2025, 4:08 AM#1717
Gotta love Costco’s “Get it the hell out of here” pricing.
PostoakpokerMicro-Stakes Grinder6 posts
Posted Jan 3, 2025, 4:09 AM#1718
Well I just went to get a price adjustment and apparently this costco wanted to get rid of them so badly, I got an adjustment of $93.74!!!
I purchased it less than a month ago for the 169.99 sale
Does that mean your warehouse is selling them for $77 at the moment??
SaditsfactMicro-Stakes Grinder7 posts
Posted Jan 3, 2025, 4:36 AM#1719
Does that mean your warehouse is selling them for $77 at the moment??
I think that included tax, so it was like $85 or something
But when I back on the floor I couldn’t find any, the computer looked like there were 3 left (but maybe that was in the whole neighboring areas).
BaroneSanitationRegular28 posts
Posted Jan 3, 2025, 4:54 AM#1720
I think that included tax, so it was like $85 or something
But when I back on the floor I couldn’t find any, the computer looked like there were 3 left (but maybe that was in the whole neighboring areas).
What’s your zip code or store location
Jp74Newbie4 posts
Posted Jan 3, 2025, 5:07 AM#1721
I picked one up tonight and it was @$149. So no crazy Eddie deals here yet,
SaditsfactMicro-Stakes Grinder7 posts
Posted Jan 3, 2025, 5:46 AM#1722
What’s your zip code or store location
It was the Redmond, Washington Costco 98052
cigarherbNewbie3 posts
Posted Jan 9, 2025, 3:24 AM#1723
I grabbed one at my local Costco this weekend for $150. They still have several as of today. This is in Lubbock, TX.
ZenBlenderNewbie2 posts
Posted Jan 11, 2025, 11:15 PM#1724
I finished my Barrington cup holders upgrade, and only messed up one of the holes (oops!) You have to be super extra careful when getting close to the end of drilling each hole so as to not overshoot and tear the vinyl. I used some electrical tape to patch it up, which doesn't look too bad, but still annoying that it happened.
JackJackRegular44 posts
Posted Jan 12, 2025, 1:09 AM#1725
I finished my Barrington cup holders upgrade, and only messed up one of the holes (oops!) You have to be super extra careful when getting close to the end of drilling each hole so as to not overshoot and tear the vinyl. I used some electrical tape to patch it up, which doesn't look too bad, but still annoying that it happened.
I didn’t catch any vinyl with the hole saw, but the vinyl did get messed up when I drilled my holes, the vinyl was wrinkled like someone pulled on it. I also broke a cup holder during install with my mallet, so I had order more. But all in all nobody will notice but me.
DaMrkstrMicro-Stakes Grinder19 posts
Posted Jan 13, 2025, 11:14 PM#1726
It's possible the stock LEDs are not the dimmable type but the COB LEDs that some have upgraded to are dimmable. I know some LEDs can be finicky with a drop in voltage that a standard dimmer provides.
My apologies if this was already answered, but did anybody confirm if the stock LEDs on the Costco Barrington are dimmable or not, if you buy a dimmer such as this one? Thank you! https://a.co/d/0u5Gvug (https://a.co/d/0u5Gvug?tag=amznpcfx-20)
ChipandchairRegular29 posts
Posted Jan 13, 2025, 11:21 PM#1727
My apologies if this was already answered, but did anybody confirm if the stock LEDs on the Costco Barrington are dimmable or not, if you buy a dimmer such as this one? Thank you! https://a.co/d/0u5Gvug (https://a.co/d/0u5Gvug?tag=amznpcfx-20)
I can confirm. It really only had one dim option but it lowers it
DaMrkstrMicro-Stakes Grinder19 posts
Posted Jan 13, 2025, 11:22 PM#1728
I can confirm. It really only had one dim option but it lowers it
Thank you. Was it acceptable and worth it, or not a noticeable/good difference?
ChipandchairRegular29 posts
Posted Jan 13, 2025, 11:23 PM#1729
Thank you. Was it acceptable and worth it, or not a noticeable/good difference?
Yes. Worth it. Noticeable. You dial it down and nothing happens and then it suddenly goes dim and then off. It jumps from too bright to being dim enough to be playable
DaMrkstrMicro-Stakes Grinder19 posts
Posted Jan 13, 2025, 11:24 PM#1730
Yes. Worth it. Noticeable. You dial it down and nothing happens and then it suddenly goes dim and then off. It jumps from too bright to being dim enough to be playable
Perfect, thanks!
DaMrkstrMicro-Stakes Grinder19 posts
JackJackRegular44 posts
DaMrkstrMicro-Stakes Grinder19 posts
Posted Jan 14, 2025, 3:52 AM#1733
I have not tried it but considered. Ultimately decided I expect failure based on past experiences with battery packs off Amazon in general
I ordered it, so I’ll see how it goes.
BaroneSanitationRegular28 posts
augster123Micro-Stakes Grinder8 posts
Posted Jan 14, 2025, 4:17 AM#1735
I ordered it, so I’ll see how it goes.
cool. please report back!
JackJackRegular44 posts
Posted Jan 14, 2025, 4:29 AM#1736
If there was a convenient way to do this with an 18v Makita battery I would do that over AA’s without hesitation.
Chile85Newbie4 posts
JackJackRegular44 posts
Posted Jan 14, 2025, 2:03 PM#1738
My kids have a bunch of 12v ride on toys that I converted to DeWalt 20v batteries that step down to 12v. I wonder if the kits on Amazon would work. I used a kit like this: https://a.co/d/9RlbCOr (https://a.co/d/9RlbCOr?tag=amznpcfx-20).
I’d imagine the amperage would be a big issue. But I’m not an electrician. Though I do like that solution for power wheels, dramatically speeds them up. Replacing motors isn’t fun but easy enough, and just the cost of using these batteries to increase the fun.
JDPokerMicro-Stakes Grinder10 posts
Posted Jan 14, 2025, 8:02 PM#1739
Costco in Yonkers NY still has 7-8 tables available at $149.97.
RJTMicro-Stakes Grinder13 posts
Posted Jan 18, 2025, 2:14 PM#1740
$149 at my Costco, I bought the last 3 they had. Now on to a few mods. Thanks to everyone that has shared information about these.
augster123Micro-Stakes Grinder8 posts
Posted Jan 18, 2025, 3:31 PM#1741
$149 at my Costco, I bought the last 3 they had. Now on to a few mods. Thanks to everyone that has shared information about these.
Congratulations on the 300 lbs of new tables :ROFL: :ROFLMAO:
I barely got my 1 home. I can only imagine trying to get 3 in a trunk.
cigarherbNewbie3 posts
Posted Jan 18, 2025, 3:50 PM#1742
Congratulations on the 300 lbs of new tables :ROFL: :ROFLMAO:
I barely got my 1 home. I can only imagine trying to get 3 in a trunk.
I bought a furniture dolly to sit mine on to move around. Just no good way to grab them and move them around.
ZenBlenderNewbie2 posts
Posted Jan 18, 2025, 3:58 PM#1743
I can confirm. It really only had one dim option but it lowers it
Interesting. I got my Barrington from Costco a few weeks ago and the LEDs are not dimmable. There's a red button that cycles between red / green / blue / white / off, but I don't see a dimmer control. Is it a separate button?
RJTMicro-Stakes Grinder13 posts
Posted Jan 18, 2025, 3:58 PM#1744
Congratulations on the 300 lbs of new tables :ROFL: :ROFLMAO:
I barely got my 1 home. I can only imagine trying to get 3 in a trunk.
I have a truck with a topper and a lay down hand truck so it wasn't bad. My idea was to buy 3 and sell 2. I have one sold for $250 and if the other sells for that then I get mine for free and make $50.
cigarherbNewbie3 posts
Posted Jan 18, 2025, 4:15 PM#1745
Interesting. I got my Barrington from Costco a few weeks ago and the LEDs are not dimmable. There's a red button that cycles between red / green / blue / white / off, but I don't see a dimmer control. Is it a separate button?
I believe the dimmer being spoken of is something that was added, and did not come with the table. They are adding a dimmer switch.
RJTMicro-Stakes Grinder13 posts
Hot NutsShark105 posts
Posted Jan 18, 2025, 5:45 PM#1747
Congratulations on the 300 lbs of new tables :ROFL: :ROFLMAO:
I barely got my 1 home. I can only imagine trying to get 3 in a trunk.
Why are these tables from Costco 40 lbs heavier then my non-LED table? MDF vs plywood?
RJTMicro-Stakes Grinder13 posts
Posted Jan 18, 2025, 5:49 PM#1748
Why are these tables from Costco 40 lbs heavier then my non-LED table? MDF vs plywood?
Plywood
RJTMicro-Stakes Grinder13 posts
DaMrkstrMicro-Stakes Grinder19 posts
ChipandchairRegular29 posts
DaMrkstrMicro-Stakes Grinder19 posts
Posted Jan 28, 2025, 5:27 PM#1752
Does anyone have any storage case recs for the Barrington table? My Costco one’s zipper broke off immediately
Same thing just happened to me. I called the company medal sports from the manual and they offered to send me a replacement for free. But I am still looking into maybe buying a more sturdy replacement like the one everyone is mentioning.
DaMrkstrMicro-Stakes Grinder19 posts
Posted Jan 28, 2025, 5:40 PM#1753
Nice! What size topper did you order?
Still tbd. I am finalizing my order, but will remeasure my table today to confirm. The first time I measured I got 74.5 x 32.75. But I’m seeing that most people on here are getting 74.5 x 32.5 and are happy with it so I’m double checking. Definitely don’t want to have to trim it. And most liked even that small difference will be barely noticeable when thinking that it would be a 0.125 inch diff on each side worst case. Did you order one and happy with your size? Has anyone else ended up measuring 74.5 x 32.75 as well? Thanks!
BaroneSanitationRegular28 posts
Posted Jan 28, 2025, 5:51 PM#1754
Still tbd. I am finalizing my order, but will remeasure my table today to confirm. The first time I measured I got 74.5 x 32.75. But I’m seeing that most people on here are getting 74.5 x 32.5 and are happy with it so I’m double checking. Definitely don’t want to have to trim it. And most liked even that small difference will be barely noticeable when thinking that it would be a 0.125 inch diff on each side worst case. Did you order one and happy with your size? Has anyone else ended up measuring 74.5 x 32.75 as well? Thanks!
Glad the battery back/dimmer combo is working out for ya! When i ordered a topper for my walmart barrington I did 74x32. Did the same size for the costco one and it's works fine for me. It's not pressed up against the led, and the slight spacing around it looks good imo, but there is room to go larger on the order. whats the card shuffler you are using in your home game? is it good?
phil7488Newbie1 posts
Posted Jan 28, 2025, 6:01 PM#1755
Got mine in yesterday with the LEDs. Can't wait to run the first game in a couple of weeks.
RJTMicro-Stakes Grinder13 posts
Posted Jan 28, 2025, 6:01 PM#1756
RJTMicro-Stakes Grinder13 posts
ChipandchairRegular29 posts
Posted Jan 28, 2025, 6:04 PM#1758
Still tbd. I am finalizing my order, but will remeasure my table today to confirm. The first time I measured I got 74.5 x 32.75. But I’m seeing that most people on here are getting 74.5 x 32.5 and are happy with it so I’m double checking. Definitely don’t want to have to trim it. And most liked even that small difference will be barely noticeable when thinking that it would be a 0.125 inch diff on each side worst case. Did you order one and happy with your size? Has anyone else ended up measuring 74.5 x 32.75 as well? Thanks!
I have four 74x32 toppers en route so I am hopping I will be happy with that size. Thanks
DaMrkstrMicro-Stakes Grinder19 posts
DaMrkstrMicro-Stakes Grinder19 posts
Posted Jan 28, 2025, 6:44 PM#1760
Still tbd. I am finalizing my order, but will remeasure my table today to confirm. The first time I measured I got 74.5 x 32.75. But I’m seeing that most people on here are getting 74.5 x 32.5 and are happy with it so I’m double checking. Definitely don’t want to have to trim it. And most liked even that small difference will be barely noticeable when thinking that it would be a 0.125 inch diff on each side worst case. Did you order one and happy with your size? Has anyone else ended up measuring 74.5 x 32.75 as well? Thanks!
Has anybody ordered at 74.5 x 32.75 topper and happy with it?
augster123Micro-Stakes Grinder8 posts
Posted Jan 31, 2025, 2:56 PM#1761
price down to a black chip in NorCal. Gonna go get a refund for mine.

JackJackRegular44 posts
Posted Jan 31, 2025, 3:12 PM#1762
RJTMicro-Stakes Grinder13 posts
Posted Feb 2, 2025, 12:05 AM#1763
price down to a black chip in NorCal. Gonna go get a refund for mine.
View attachment 1455054 (https://www.pokerchipforum.com/attachments/1455054/)
I bought the last 5 at my Costco. Floor model was trashed or would have gotten it also.
augster123Micro-Stakes Grinder8 posts
Posted Feb 2, 2025, 1:13 AM#1764
I bought the last 5 at my Costco. Floor model was trashed or would have gotten it also.
yeah, i showed up to get the refund, and they didn't have any left, even though inventory showed 1. so they wouldn't give me the difference. should have called first.
RJTMicro-Stakes Grinder13 posts
Posted Feb 2, 2025, 1:25 AM#1765
yeah, i showed up to get the refund, and they didn't have any left, even though inventory showed 1. so they wouldn't give me the difference. should have called first.
I'm going to try and get the price match on the first 3 I bought at the $150, we will see.
RJTMicro-Stakes Grinder13 posts
Posted Feb 2, 2025, 1:50 AM#1766
New topper. See my post about toppers I made.
4SUMERZMicro-Stakes Grinder20 posts
Posted Feb 2, 2025, 2:27 AM#1767
Interesting. I got my Barrington from Costco a few weeks ago and the LEDs are not dimmable. There's a red button that cycles between red / green / blue / white / off, but I don't see a dimmer control. Is it a separate button?
You can buy a dimmer from Amazon (https://www.amazon.com/?tag=amznpcfx-20) like the one in the pic above that hooks between power supply and the LED's
ChipandchairRegular29 posts
Posted Feb 2, 2025, 2:42 AM#1768
New topper. See my post about toppers I made.
Link?
RJTMicro-Stakes Grinder13 posts
Posted Feb 2, 2025, 2:54 AM#1769
Link?
I made an entire post.
RJTMicro-Stakes Grinder13 posts
Posted Feb 2, 2025, 3:00 AM#1770
OryxNewbie1 posts
Posted Feb 4, 2025, 4:46 PM#1771
Hey I was looking at the COSTCO US site and the table is listed at $329 USD. Here in windsor Ontario it's 379.99 CAD. right now you should be getting close to $1.38 CAD per $1.00 USD. If you're in Michigan or close to a border city with a COSTCO it might be worth doing the math to see if it's cheaper. Only difference between the two is that the US one has an extra topper
RJTMicro-Stakes Grinder13 posts
Posted Feb 6, 2025, 9:21 PM#1772
yeah, i showed up to get the refund, and they didn't have any left, even though inventory showed 1. so they wouldn't give me the difference. should have called first.
Same here, no refund even though within the 30 days.
PostoakpokerMicro-Stakes Grinder6 posts
Posted Feb 6, 2025, 9:22 PM#1773
The warehouse where you're requesting the price adjustment credit has to have the item in stock (at least one unit) to give credit due to a price drop. As stated, best to call ahead of time to check, as the app's inventory is not real-time.
soleman16Newbie1 posts
DaMrkstrMicro-Stakes Grinder19 posts
Posted Feb 7, 2025, 6:53 PM#1775
Looks great! Are those the stock cup holders? From the pictures they look plenty deep, but I've heard a lot of people say otherwise.
@soleman16 (https://www.pokerchipforum.com/members/20562/) Yes, they are the stock, small black cup holders on the Costco Barrington. They are unfortunately very shallow and small. However, I don't have the time or patience or DIY skills to do the cup holder replacement myself, so instead found some cheap good scotch glasses that have a narrow base and get bigger at the top, which work great. Any beer can fits find in the cupholder as well as water bottles, just not a standard whiskey cup. That said, I did have one spill early on because of the shallowness, but people figured it out and it wasn't an issue the rest of the game! I am glad the pictures were able to deceive you! :)
I mean if someone in the Orange County / LA area who has done the cup holder replacement successfully is eager to do it again on my table for a price, I would definitely consider that! :ROFL: :ROFLMAO::). Otherwise I am keeping it stock!
DaMrkstrMicro-Stakes Grinder19 posts
Posted Feb 7, 2025, 7:17 PM#1776
Still tbd. I am finalizing my order, but will remeasure my table today to confirm. The first time I measured I got 74.5 x 32.75. But I’m seeing that most people on here are getting 74.5 x 32.5 and are happy with it so I’m double checking. Definitely don’t want to have to trim it. And most liked even that small difference will be barely noticeable when thinking that it would be a 0.125 inch diff on each side worst case. Did you order one and happy with your size? Has anyone else ended up measuring 74.5 x 32.75 as well? Thanks!
@Chipandchair (https://www.pokerchipforum.com/members/4850/) I ended up re-measuring and re-measuring and finally ordered a 74.25 x 32.25. Based on people's posts here it seemed like a popular order size as well. I will report back on the fit once I get it!
ThunderFDU1Newbie2 posts
Posted Feb 13, 2025, 10:24 PM#1777
These mods are amazing. Seeing all these posts makes me think it looks easy to do. Thanks all
bzamboMicro-Stakes Grinder7 posts
Posted Feb 23, 2025, 1:38 AM#1778
I would think that divot in the middle would drive me bonkers if I was playing with that all night.
2SevenMaximumNewbie1 posts
Posted Feb 27, 2025, 1:26 PM#1779
Heads up that right now Costco has the Barrington led version for 199 delivered.
JackJackRegular44 posts
Posted Feb 27, 2025, 2:02 PM#1780
Heads up that right now Costco has the Barrington led version for 199 delivered.

BaroneSanitationRegular28 posts
Posted Feb 27, 2025, 5:15 PM#1781
I picked up 2 in store for $99 and returned one of them with my $169 purchase since it was outside the price match window.

CheckMicro-Stakes Grinder9 posts
Posted Mar 3, 2025, 2:39 AM#1782
So I finished my Barrington mods (for now) but still need to order a topper.
New LEDs, Dimmer, AA Battery Pack, and Jumbo Cupholders
COB LEDs
I wasn't the biggest fan of the blue LEDs and didn't like how they were so spaced out. I saw someone talk about the COB LEDs and how they are amost diffused already and ordered the warm white and couldn't be happier. The LEDs are very close together so you don't need to put something in front of them to diffuse them like I was trying to do with the old LEDs. Instead of ripping out the old LEDs, I actually just wedged the new LEDs right on top of the current ones. It worked out great.
I did have to cut the light strip and attach another tail end. Very easy to do but measure accurately before you cut! You don't have much leeway with the 16.4ft strip. And then used the Y connector that also came with the COB connector package.
Screwed and glued on some velcro, glued velcro to the battery pack, then buttoned up everything else. Happy with it.
COB LED Lights (https://www.amazon.com/dp/B0BVR755VK?tag=amznpcfx-20)
COB Connector Package (https://www.amazon.com/dp/B0C2CVFGL8?tag=amznpcfx-20)
Dimmer (https://www.amazon.com/weideer-Lights-Dimmer-DC12V-24V-K-018-BK/dp/B092HX9435?tag=amznpcfx-20)
Battery Pack (https://www.amazon.com/gp/product/B09131Y9L8?tag=amznpcfx-20)
Jumbo Cupholders
I went with the jumbos after reading recommendations. Pried off the old ones with a vise grip, drilled a center hole down with a standard bit, then drilled from the bottom up with the 3 5/8in hole saw starting it the pre drilled hole. I got them all done but it was a bit of a struggle with the hole saw I bought. If I would do it again, I would get one that was deeper. This one barely made it through both pieces of wood.
Jumbo Cupholders (https://www.amazon.com/gp/product/B0789HG6NW?tag=amznpcfx-20)
Hole Saw (buy a deeper one) (https://www.amazon.com/gp/product/B0C6MN14B1?tag=amznpcfx-20)
View attachment 1252914 (https://www.pokerchipforum.com/attachments/1252914/)
Great write-up! Do you have a new link for the COB connector package for the LED lights? The one in this post no longer works. I am not great with the electrical stuff, so any help (like a new Amazon (https://www.amazon.com/?tag=amznpcfx-20) link) with what is needed here would be really helpful!
greedyinternRegular46 posts
Posted Mar 3, 2025, 4:16 AM#1783
Great write-up! Do you have a new link for the COB connector package for the LED lights? The one in this post no longer works. I am not great with the electrical stuff, so any help (like a new Amazon link) with what is needed here would be really helpful!
Frustrating that that package isn't available anymore.
Here is a similar 10mm one (https://a.co/d/663xxbC?tag=amznpcfx-20) that is very close to that first connector package that I listed.
And here is an 8mm one that's also very close (https://a.co/d/bNH0C63?tag=amznpcfx-20) but it doesn't have clear connections like the first one, but that doesn't really matter. You do, however, get more items in case you screw up or one fails in this one.
What I never realized is that I used an 8 mm COB light strip and 10 mm connections. It's all been working fine, but maybe I should have used 8 mm connections :)
I assume as long as your connection package is bigger than the light strip it will probably work, but not the other way around. Good luck!
CheckMicro-Stakes Grinder9 posts
Posted Mar 3, 2025, 11:07 PM#1784
Frustrating that that package isn't available anymore.
Here is a similar 10mm one (https://a.co/d/663xxbC?tag=amznpcfx-20) that is very close to that first connector package that I listed.
And here is an 8mm one that's also very close (https://a.co/d/bNH0C63?tag=amznpcfx-20) but it doesn't have clear connections like the first one, but that doesn't really matter. You do, however, get more items in case you screw up or one fails in this one.
What I never realized is that I used an 8 mm COB light strip and 10 mm connections. It's all been working fine, but maybe I should have used 8 mm connections :)
I assume as long as your connection package is bigger than the light strip it will probably work, but not the other way around. Good luck!
This is super helpful! Thanks for taking the time to link me. I added it to my cart. If you were to do it over again, would you pair the 8mm lights with the 8mm connectors?
How is everything working out with the lights and table? Are you still happy with the Barrington table? Did you also upgrade the cupholders as well?
With the discounted pricing, I currently have four of the Barrington tables in my cart but hovering over the buy button as I continue my research. So, first-hand experience and customization from people like you is the feedback I'm looking for.
Thanks again for taking the time to help me!
CheckMicro-Stakes Grinder9 posts
Posted Mar 7, 2025, 12:35 AM#1785
Well, I just purchased four Barrington tables from Costco online. Not sure how I feel about it, haha.
Is there a support group or 12-step program on this forum?
rjdev7Regular40 posts
Posted Mar 7, 2025, 1:14 AM#1786
Step 1 buy a barrington
Step 2 buy a table topper
Step 3 buy a new chip set
Step 4 buy another table topper that matches the chip set
Repeat steps 3 and 4 until wife is mad
JackJackRegular44 posts
Posted Mar 7, 2025, 1:46 AM#1787
Well, I just purchased four Barrington tables from Costco online. Not sure how I feel about it, haha.
Is there a support group or 12-step program on this forum?
This is an environment of enablers… only 12 step program is the expanded version of what RJdev7 just said
CheckMicro-Stakes Grinder9 posts
Posted Mar 7, 2025, 2:02 AM#1788
Step 1 buy a barrington
Step 2 buy a table topper
Step 3 buy a new chip set
Step 4 buy another table topper that matches the chip set
Repeat steps 3 and 4 until wife is mad
I'm currently working on the chip set. Once that is finalized, matching toppers and dealer buttons are next. Oh, and matching cut cards. I also have to do the cupholders and COB LEDs with dimmers.
I need serious help.
rjdev7Regular40 posts
Posted Mar 7, 2025, 2:06 AM#1789
EverGreenGSOMicro-Stakes Grinder6 posts
Posted Mar 7, 2025, 7:09 PM#1790
I would think that divot in the middle would drive me bonkers if I was playing with that all night.
That's what custom toppers are forrrr
EverGreenGSOMicro-Stakes Grinder6 posts
Posted Mar 7, 2025, 7:10 PM#1791
Step 1 buy a barrington
Step 2 buy a table topper
Step 3 buy a new chip set
Step 4 buy another table topper that matches the chip set
Repeat steps 3 and 4 until wife is mad

bzamboMicro-Stakes Grinder7 posts
Posted Mar 7, 2025, 7:52 PM#1792
That's what custom toppers are forrrr
Even with the topper wouldn’t the bump still be felt?
EverGreenGSOMicro-Stakes Grinder6 posts
Posted Mar 7, 2025, 8:00 PM#1793
Even with the topper wouldn’t the bump still be felt?
Why would I tell you to get a topper if that was the case?
SnowConeYetiNewbie2 posts
Posted Mar 7, 2025, 8:00 PM#1794
Even with the topper wouldn’t the bump still be felt?
Honestly not really, I guess if you really try to dig in there but its not noticeable and I have had no issues with cards or chips catching.
bzamboMicro-Stakes Grinder7 posts
Posted Mar 7, 2025, 8:09 PM#1795
Why would I tell you to get a topper if that was the case?
Don’t want to go back and forth with you. But Im assuming the topper would help but still not fully fix the divot. Just my reasoning for replying.
EverGreenGSOMicro-Stakes Grinder6 posts
Posted Mar 7, 2025, 10:46 PM#1796
Don’t want to go back and forth with you. But Im assuming the topper would help but still not fully fix the divot. Just my reasoning for replying.
Dude your original post was about the fold in the middle
My reply was that's what the custom topper is for
and yet you still ask me if that will fix the issue. LOL
CheckMicro-Stakes Grinder9 posts
Posted Mar 7, 2025, 11:29 PM#1797
Don’t want to go back and forth with you. But Im assuming the topper would help but still not fully fix the divot. Just my reasoning for replying.
You can get an additional thin layer of foam to put under the topper if you're really paranoid. Although I don't have personal experience (yet), a topper seems to solve the issue of folding crack. The topper is a nice upgrade to what appears to be a very nice table for the money that also folds up and stores conveniently.
I'm sure others can chime in as to whether they still notice the fold divot even after adding a topper.
rambiezelNewbie3 posts
Posted Mar 7, 2025, 11:38 PM#1798
Don’t want to go back and forth with you. But Im assuming the topper would help but still not fully fix the divot. Just my reasoning for replying.
With my table, when I place the topper on before a game, the divot isn’t visible. After a few hours of play, I can barely notice it, and even then, it doesn’t impact gameplay or bother me at all. That’s just my personal experience.
bzamboMicro-Stakes Grinder7 posts
Posted Mar 8, 2025, 12:41 AM#1799
You can get an additional thin layer of foam to put under the topper if you're really paranoid. Although I don't have personal experience (yet), a topper seems to solve the issue of folding crack. The topper is a nice upgrade to what appears to be a very nice table for the money that also folds up and stores conveniently.
I'm sure others can chime in as to whether they still notice the fold divot even after adding a topper.
With this in mind…can you buy a custom rail anywhere? I have an outdoor table that I would love to also use for a poker night but I feel like a rail is necessary.
CheckMicro-Stakes Grinder9 posts
Posted Mar 8, 2025, 1:20 AM#1800
With this in mind…can you buy a custom rail anywhere? I have an outdoor table that I would love to also use for a poker night but I feel like a rail is necessary.
I'm new here and not the best person to ask, but I bet there is someone on here that will know for sure. There's a guy for everything on here. Otherwise, I would contact a carpenter on your local craigslist to do it for you. I'm sure you could get something done for a reasonable price.
mugenpowrMicro-Stakes Grinder10 posts
Posted Mar 8, 2025, 1:25 AM#1801
I'm new here and not the best person to ask, but I bet there is someone on here that will know for sure. There's a guy for everything on here. Otherwise, I would contact a carpenter on your local craigslist to do it for you. I'm sure you could get something done for a reasonable price.
@Irish (https://www.pokerchipforum.com/members/114/)
mugenpowrMicro-Stakes Grinder10 posts
bzamboMicro-Stakes Grinder7 posts
Posted Mar 8, 2025, 1:34 AM#1803
Dude your original post was about the fold in the middle
My reply was that's what the custom topper is for
and yet you still ask me if that will fix the issue. LOL
Yes if it will fully fix the issue. I didn’t know if maybe it would only mask it a bit. Sorry for asking a follow up question. Haha. I won’t do that again with you my man.
bzamboMicro-Stakes Grinder7 posts
Posted Mar 8, 2025, 2:06 AM#1804
I'm new here and not the best person to ask, but I bet there is someone on here that will know for sure. There's a guy for everything on here. Otherwise, I would contact a carpenter on your local craigslist to do it for you. I'm sure you could get something done for a reasonable price.
I’d love to know or find someone who does this. I’m not near talented enough to tackle something like this. But I’d be willing to pay.
bzamboMicro-Stakes Grinder7 posts
Posted Mar 8, 2025, 2:11 AM#1805
I have a rectangular table and I’d like to just buy a topper (with a thin layer of foam underneath) but I feel like without a rail it’s pointless. Has anyone seen a rectangular rail?
CheckMicro-Stakes Grinder9 posts
Posted Mar 10, 2025, 1:22 AM#1806
UncleMiltyMicro-Stakes Grinder16 posts
Posted Mar 10, 2025, 1:30 AM#1807
UncleMiltyMicro-Stakes Grinder16 posts
Posted Mar 10, 2025, 1:31 AM#1808
I can’t remember what size i used, but i do wish i went to Home Depot and bought one an 1/8” bigger like my gut told me i should.
I’m almost positive I used a 3 1/2” hole saw.
CheckMicro-Stakes Grinder9 posts
Posted Mar 10, 2025, 1:43 AM#1809
I’m almost positive I used a 3 1/2” hole saw.
Well, now I'm confused since every DIY post in this thread indicates a 3 5/8" hole saw being used. Everyone's complaint is they wish their hole saw was deeper to help get through the wood.
UncleMiltyMicro-Stakes Grinder16 posts
Posted Mar 10, 2025, 1:45 AM#1810
Well, now I'm confused since every DIY post in this thread indicates a 3 5/8" hole saw being used. Everyone's complaint is they wish their hole saw was deeper to help get through the wood.
I’ll pull mine and post a photo. It was deep enough to get through both pieces of wood, but just a bit too small.
UncleMiltyMicro-Stakes Grinder16 posts
Posted Mar 10, 2025, 1:54 AM#1811
I’ll pull mine and post a photo. It was deep enough to get through both pieces of wood, but just a bit too small.


UncleMiltyMicro-Stakes Grinder16 posts
Posted Mar 10, 2025, 1:55 AM#1812
I’ll pull mine and post a photo. It was deep enough to get through both pieces of wood, but just a bit too small.
Milwaukee 3.5”. Had I used the same saw but 3 5/8 it would have been perfect.
BaroneSanitationRegular28 posts
Posted Mar 10, 2025, 2:24 AM#1813
UncleMiltyMicro-Stakes Grinder16 posts
Posted Mar 10, 2025, 2:27 AM#1814
That is the one I used and have done two table upgrades based on info in this thread.
3.5 or 3 5/8?
BaroneSanitationRegular28 posts
Posted Mar 10, 2025, 2:28 AM#1815
3.5 or 3 5/8?

CheckMicro-Stakes Grinder9 posts
Posted Mar 10, 2025, 2:35 AM#1816
Milwaukee 3.5”. Had I used the same saw but 3 5/8 it would have been perfect.
Thanks so much for checking! 3 5/8 it is!
That is the one I used and have done two table upgrades based on info in this thread.
Perfect. That's the one I saw earlier. And you thought it was deep enough for your tables?
Lastly, based on the info in this thread, would you add anything after doing two installs? I'm about to do four tables, so want to make sure I have ALL the facts from the people that have gone through this.
JoseRijoNewbie3 posts
JoseRijoNewbie3 posts
Posted Mar 17, 2025, 2:03 AM#1818
I want to add that if any of my peeps in the Boston area want to upgrade their cupholders for the price of a beer or two, I have the hole saw, drill and template!
MeridianFCMicro-Stakes Grinder11 posts
Posted Mar 17, 2025, 10:51 AM#1819
For what it’s worth I played on a Barrington for the first time last week. I have to say it’s pretty nice. Obviously the pre-printed topper is crap but that’s obviously replaceable
Hot NutsShark105 posts
Posted Mar 20, 2025, 10:09 PM#1820
raynmanasRegular49 posts
Posted Mar 20, 2025, 10:27 PM#1821
Hot NutsShark105 posts
Posted Mar 21, 2025, 12:21 AM#1822
isn't that just a copy of the (horrendous) barrington default graphics? why would anyone buy this?
Is. Someone who doesn't know about PCF and wants a cheap upgrade (hides crease, cards slide much better) might be a buyer.
sleepyheadMicro-Stakes Grinder6 posts
Posted Mar 27, 2025, 10:46 PM#1823
Anyone have a preference for a diffuser?
I did a diffuser mod even before I knew this thread existed. I wouldn’t bother with it if I were you. There isn’t enough room between the LEDs and the diffuser to actually diffuse it enough to make much of a difference. On mine you can still see the individual LEDs, it’s just slightly dimmer now. I ordered a dimmer off Amazon (https://www.amazon.com/?tag=amznpcfx-20) that should arrive tomorrow but if I were to do it all again I’d just get the COB LED strip.
FlopalopagusMicro-Stakes Grinder12 posts
Posted Mar 28, 2025, 12:09 AM#1824
I did a diffuser mod even before I knew this thread existed. I wouldn’t bother with it if I were you. There isn’t enough room between the LEDs and the diffuser to actually diffuse it enough to make much of a difference. On mine you can still see the individual LEDs, it’s just slightly dimmer now. I ordered a dimmer off Amazon that should arrive tomorrow but if I were to do it all again I’d just get the COB LED strip.
Dimmer makes a huge difference! You won’t regret it if you are going to play with the lights in.
EverGreenGSOMicro-Stakes Grinder6 posts
Posted Apr 1, 2025, 12:44 AM#1825
Dimmer makes a huge difference! You won’t regret it if you are going to play with the lights in.
Does your dimmer actually dim or just slightly dim and then off?
FlopalopagusMicro-Stakes Grinder12 posts
Posted Apr 1, 2025, 12:51 AM#1826
Mostly dim and then off. When I break out the table next time I’ll take a few photos at the various levels. It’s good enough quality and truly makes a big difference to my players. At full strength nobody likes it. At a very low setting everyone likes it a lot. Almost always gets “ahhhh there it is” each time I turn them on. Lol.
MrBooshRegular32 posts
Posted Apr 6, 2025, 9:06 PM#1827
I have been meaning to upgrade the lights on my two Barrington tables for a long while now. I actually ordered all the parts about a year ago and have just been putting it off. With our league's Main Event Championship tournament coming up, I wanted to finally get the new lights up and running.
I went with the natural white COD lights instead of the warm white. I actually ordered two sets of the warm white that I still have in the packaging.
This was not as difficult as I thought it would be. I found it easier to pull the new lights through the hole after i cut the old LED lights out. On the first table I attached the new lights over the old LED strip. On the second table, I just pulled the old lights completely off and attached the new ones in their place. I think I would just rip any future LED strips off if I do any more tables down the road.
The first two pics are of the first table that I went over the old LED Strip.


This is the second table that I pulled the old strip off. Really not much of a difference visually. I just like that they sit a little further back under the rail by a tiny bit.

FlopalopagusMicro-Stakes Grinder12 posts
Posted Apr 6, 2025, 9:23 PM#1828
ColquhounRegular82 posts
Posted Apr 6, 2025, 9:31 PM#1829
I have been meaning to upgrade the lights on my two Barrington tables for a long while now. I actually ordered all the parts about a year ago and have just been putting it off. With our league's Main Event Championship tournament coming up, I wanted to finally get the new lights up and running.
I went with the natural white COD lights instead of the warm white. I actually ordered two sets of the warm white that I still have in the packaging.
This was not as difficult as I thought it would be. I found it easier to pull the new lights through the hole after i cut the old LED lights out. On the first table I attached the new lights over the old LED strip. On the second table, I just pulled the old lights completely off and attached the new ones in their place. I think I would just rip any future LED strips off if I do any more tables down the road.
The first two pics are of the first table that I went over the old LED Strip.
View attachment 1490912 (https://www.pokerchipforum.com/attachments/1490912/)View attachment 1490913 (https://www.pokerchipforum.com/attachments/1490913/)
This is the second table that I pulled the old strip off. Really not much of a difference visually. I just like that they sit a little further back under the rail by a tiny bit.
View attachment 1490914 (https://www.pokerchipforum.com/attachments/1490914/)
Looks great! Are the COB connectors you used available on Amazon (https://www.amazon.com/?tag=amznpcfx-20)? I want to make sure I get the right ones.
MrBooshRegular32 posts
Posted Apr 6, 2025, 10:05 PM#1830
Looks great! Are the COB connectors you used available on Amazon? I want to make sure I get the right ones.
I did order my connectors from Amazon (https://www.amazon.com/?tag=amznpcfx-20) just over a year ago. It looks like that particular set of connectors are not available anymore. I'm sure there are others just like them. Here is the link that I used, which I found earlier on this thread.
https://a.co/d/brmMjg5 (https://a.co/d/brmMjg5?tag=amznpcfx-20)
I actually just used butt splices to connect the wires to the power connectors. It seemed much more sturdy to do it that way. The connectors that the kit came with were kind of weak. I could easily pull the wires out of them with a simple tug. I wanted to make sure it is not going to come apart down the road if I lug the table around every now and then.
BKisbackMicro-Stakes Grinder9 posts
Posted Apr 7, 2025, 1:25 AM#1831
ChrisArmyKnifeNewbie1 posts
Posted Apr 9, 2025, 5:10 PM#1832
Is anyone still seeing good deals on the LED Barrington at Costco? I’m not having much luck locally (Western NY). Should I just pull the trigger on this Walmart LED table for $249?
And just to confirm- they are pretty much the same, but the Costco one would just have the extra topper?
JackJackRegular44 posts
Posted Apr 9, 2025, 5:23 PM#1833
Is anyone still seeing good deals on the LED Barrington at Costco? I’m not having much luck locally (Western NY). Should I just pull the trigger on this Walmart LED table for $249?
And just to confirm- they are pretty much the same, but the Costco one would just have the extra topper?
Mine hasn’t had any locally in months. They were on sale last month but not currently.
As for them being the same I believe the Walmart one is 15 pounds heavier so something is different.
ColquhounRegular82 posts
Posted Apr 9, 2025, 5:33 PM#1834
Is anyone still seeing good deals on the LED Barrington at Costco? I’m not having much luck locally (Western NY). Should I just pull the trigger on this Walmart LED table for $249?
And just to confirm- they are pretty much the same, but the Costco one would just have the extra topper?
I think Costco put them on clearance and ended carrying them.
The Costco one is basically the same as the LED version Barrington, not the original, which is a bit lighter.
The difference between them is that the Costco one had a button to change the lights to one of 4 colors, the LED table is just blue. Also, there’s 3 toppers, one for blackjack, pai gow etc.
Other than that, the construction is the same for both.
JackJackRegular44 posts
Posted Apr 9, 2025, 5:34 PM#1835
I think Costco put them on clearance and ended carrying them.
The Costco one is basically the same as the LED version Barrington, not the original, which is a bit lighter.
The difference between them is that the Costco one had a button to change the lights to one of 4 colors, the LED table is just blue. Also, there’s 3 toppers, one for blackjack, pai gow etc.
Other than that, the construction is the same for both.
And the 15 pound difference? I thought the Costco one was MDF so heavier, but that is compared to non-LED Barrington.
ColquhounRegular82 posts
Posted Apr 9, 2025, 6:16 PM#1836
And the 15 pound difference? I thought the Costco one was MDF so heavier, but that is compared to non-LED Barrington.
The LED one is heavier than the regular Barrington. I was under the impression that the LED and Costco one were both the same weight (minus a few toppers)
JackJackRegular44 posts
Posted Apr 9, 2025, 6:40 PM#1837
The LED one is heavier than the regular Barrington. I was under the impression that the LED and Costco one were both the same weight (minus a few toppers)
I am just going by the sites. Walmart says 100 pounds and Costco says 85 (LED to LED)
TwinChameleonMicro-Stakes Grinder5 posts
Posted Apr 13, 2025, 5:00 AM#1838
I think the Costco table is the only one that comes with the carrying/storage cover as well? I see no mention (or picture) of it in the Walmart listing.
ColquhounRegular82 posts
Posted Apr 13, 2025, 6:22 AM#1839
I think the Costco table is the only one that comes with the carrying/storage cover as well? I see no mention (or picture) of it in the Walmart listing.
Yea I believe that’s true, but I’ve also read some criticism of the quality of the bag/zipper.
BKisbackMicro-Stakes Grinder9 posts
Posted Apr 13, 2025, 5:05 PM#1840
Found this in the app, then located what I think was the single one in the warehouse between a rack of kids' clothes and a box of squishmallows. Felt like it was too good to pass up at this price.

redstarNewbie3 posts
Posted Apr 19, 2025, 3:46 AM#1841
Big thanks to all the advise in this thread finished my upgrade! (Still have to attach a power source to the bottom so it doesn’t have to be plugged into the wall but that should be easy.)
Here are before and after pics with a topper from @rjdev7 (https://www.pokerchipforum.com/members/1014/)


TwinChameleonMicro-Stakes Grinder5 posts
BugeRegular53 posts
redstarNewbie3 posts
Posted Apr 19, 2025, 3:23 PM#1844
can you send a link to those colored cup holders? Looks great!
https://a.co/d/hx7iw9A (https://a.co/d/hx7iw9A?tag=amznpcfx-20)
Did you reupholster the rails or is it a new table?
Reupholstered the rail plus added a second piece of plywood below the original a half inch smaller on the inside to add depth and so there would be space for the lights. Plus then the lights would be recessed under a lip and the topper would tuck under the lip as well.
BugeRegular53 posts
Posted Apr 20, 2025, 11:50 AM#1845
https://a.co/d/hx7iw9A (https://a.co/d/hx7iw9A?tag=amznpcfx-20)
Reupholstered the rail plus added a second piece of plywood below the original a half inch smaller on the inside to add depth and so there would be space for the lights. Plus then the lights would be recessed under a lip and the topper would tuck under the lip as well.
Looks awesome. Well done!
springboxMicro-Stakes Grinder10 posts
Posted Apr 21, 2025, 9:42 PM#1846
Anyone know if these slide in cup holders fit under a Barrington rail? The non-LED variety.

redstarNewbie3 posts
GamifyNewbie2 posts
Posted Apr 23, 2025, 3:03 PM#1848
isn't that just a copy of the (horrendous) barrington default graphics? why would anyone buy this?
Hi , I made this mat and I am glad to know why it is not selling well! I would love to discuss this further ( private DM ?)
raynmanasRegular49 posts
Posted Apr 23, 2025, 3:27 PM#1849
Hi , I made this mat and I am glad to know why it is not selling well! I would love to discuss this further ( private DM ?)
because is is the same as the default graphics on the barrington table that everyone is trying to cover. aside from hiding the seam, it defeats the rest of the purpose of a topper.
JP1984Newbie4 posts
Posted Apr 23, 2025, 3:34 PM#1850
TwinChameleonMicro-Stakes Grinder5 posts
Posted Apr 23, 2025, 3:36 PM#1851
Hi , I made this mat and I am glad to know why it is not selling well! I would love to discuss this further ( private DM ?)
I’m going off memory, but I recall my three main objections being:
-
Weird bright blue color (a medium/dark green is my pref. Grey/black is fine too)
-
Card outlines on table are spaced really far apart. I prefer them uniformly spaced, or not there at all.
-
The “Flop” “Turn” “River” text. Anyone who owns a poker table does not need giant text telling them this. It’s tacky.
A simpler mat design would probably sell better.
sleepyheadMicro-Stakes Grinder6 posts
Posted Apr 23, 2025, 11:00 PM#1852
Costco Barrington owner here. Recently swapped out the cupholders using @RadicusScout (https://www.pokerchipforum.com/members/10148/) instructions. I ended up having difficulty marking the center point given there was about 1 1/2” from the level of the arm rail to the wood underneath the previous cupholder so I made up a little paper template out of a recipe card that was 2 3/4” in diameter (same as the existing hole) and then cut a small hole 1/4” from the center where I wanted the new center to be and marked it with a sharpie. I took the template out and did the same to each cupholder hole and then drilled with a 1/4” drill bit for the pilot hole.

I also added a LED diffuser strip over the LEDs (wouldn’t recommend) and added a dimmer that I got off Amazon (https://www.amazon.com/?tag=amznpcfx-20).

Just waiting on my topper from @rjdev7 (https://www.pokerchipforum.com/members/1014/) and then I’ll be cooking with gas.
sleepyheadMicro-Stakes Grinder6 posts
Posted Apr 24, 2025, 2:42 PM#1853
And look what showed up today…

Sizing was spot on for my table. Ordered 74 1/4” X 32 1/2” with un-sewn edges.
Putting it into play tomorrow night.
GamifyNewbie2 posts
Posted Apr 25, 2025, 4:00 PM#1854
because is is the same as the default graphics on the barrington table that everyone is trying to cover. aside from hiding the seam, it defeats the rest of the purpose of a topper.
OK Thanks
idkWhenToFoldNewbie3 posts
Posted Apr 25, 2025, 7:12 PM#1855
And look what showed up today…
View attachment 1499182 (https://www.pokerchipforum.com/attachments/1499182/)
Sizing was spot on for my table. Ordered 74 1/4” X 32 1/2” with un-sewn edges.
Putting it into play tomorrow night.
Hey I got the same exact topper and table lol.
Can you link the exact diffuser you got for your leds and how is the topper with the leds on thanks!
sleepyheadMicro-Stakes Grinder6 posts
Posted Apr 26, 2025, 12:21 PM#1856
Hey I got the same exact topper and table lol.
Can you link the exact diffuser you got for your leds and how is the topper with the leds on thanks!
I got the diffuser from a Canadian company. Surprisingly I had a hard time finding such a product but I’m sure there are similar out there if you look hard enough. Most of what I had found came with the metal channel and other hardware for mounting LEDs that I didn’t need. Basically it’s meant to be used for LED strip lighting for under cabinets and applications like that. Here’s the link so you can get a closer look:
https://www.leevalley.com/en-ca/sho...zAXW_zOQzYIVsdkvqe7SXpTpnGzxCnVW&item=00U4237 (https://www.leevalley.com/en-ca/shop/hardware/lighting/channels-and-diffusers/101524-diffusers-for-led-tape-lighting-surface-mount-channels?srsltid=AfmBOopTJAfwJ5PdEtWF4ivnzAXW_zOQzYIVsdkvqe7SXpTpnGzxCnVW&item=00U4237)
The diffuser itself has two “legs” or tabs on the side that run the length of it and its bendable so it was able to bend with the curve of the table no problem. The diffuser didn’t fit under the gap between the arm rail and the table top so I ended up cutting off one tab the whole length of it and it was then able to be pushed in place and held in by tension between the felt and the underside of the arm rail. Looks super clean.
The reason I wouldn’t recommend it is because you can still clearly see the individual LED bulbs and it didn’t dim or diffuse them as much as I had expected. So personally I think using just the dimmer would suffice.
As for the topper, everyone at my game was super impressed. It didn’t block the LEDs at all if that’s your concern and everyone liked how the cards slid across it when dealing. I’ll definitely be ordering a second one soon.
Here’s an action shot

idkWhenToFoldNewbie3 posts
Posted Apr 26, 2025, 9:33 PM#1857
I got the diffuser from a Canadian company. Surprisingly I had a hard time finding such a product but I’m sure there are similar out there if you look hard enough. Most of what I had found came with the metal channel and other hardware for mounting LEDs that I didn’t need. Basically it’s meant to be used for LED strip lighting for under cabinets and applications like that. Here’s the link so you can get a closer look:
https://www.leevalley.com/en-ca/sho...zAXW_zOQzYIVsdkvqe7SXpTpnGzxCnVW&item=00U4237 (https://www.leevalley.com/en-ca/shop/hardware/lighting/channels-and-diffusers/101524-diffusers-for-led-tape-lighting-surface-mount-channels?srsltid=AfmBOopTJAfwJ5PdEtWF4ivnzAXW_zOQzYIVsdkvqe7SXpTpnGzxCnVW&item=00U4237)
The diffuser itself has two “legs” or tabs on the side that run the length of it and its bendable so it was able to bend with the curve of the table no problem. The diffuser didn’t fit under the gap between the arm rail and the table top so I ended up cutting off one tab the whole length of it and it was then able to be pushed in place and held in by tension between the felt and the underside of the arm rail. Looks super clean.
The reason I wouldn’t recommend it is because you can still clearly see the individual LED bulbs and it didn’t dim or diffuse them as much as I had expected. So personally I think using just the dimmer would suffice.
As for the topper, everyone at my game was super impressed. It didn’t block the LEDs at all if that’s your concern and everyone liked how the cards slid across it when dealing. I’ll definitely be ordering a second one soon.
Here’s an action shot
View attachment 1500165 (https://www.pokerchipforum.com/attachments/1500165/)
Awesome!! Thanks for the insights, I’ve seen that shuffler around where’s it from?
sleepyheadMicro-Stakes Grinder6 posts
Posted Apr 26, 2025, 9:51 PM#1858
Awesome!! Thanks for the insights, I’ve seen that shuffler around where’s it from?
Just a cheap Amazon (https://www.amazon.com/?tag=amznpcfx-20) one. Anyone on PCF would say unless you’re dropping $6K on a used Deckmate then don’t bother with an automatic shuffler. I don’t know all the science behind it as to how good it actually shuffles but we’ve been using it the last couple of games just to get the shuffling started with a spare deck and then switch the deck out. We usually give the deck one more manual shuffle and a few cuts and it’s good to go.
Here’s the link
https://a.co/d/3Sj6SvB (https://a.co/d/3Sj6SvB?tag=amznpcfx-20)
PokerDogDocRegular37 posts
Posted May 3, 2025, 4:05 AM#1859
Has anyone tried covering the original cup holders with some sort of lid or cap rather than replacing them?
I don’t allow drinks at the table (we use small side tables), so I’d rather have no cup holders at all… but I don’t want to go to the work and expense of removing the holders, fill in the spot with foam and re-covering the rails with fresh vinyl.
I’m imagining some sort of coaster, snap on silicone lid, something like a mini manhole cover, etc. I’d rather have a decent looking (and immovable) cover than an exposed/open/empty cup holder.
These things from Amazon (https://www.amazon.com/?tag=amznpcfx-20) are kind of what I’m thinking, but not exactly:
https://a.co/d/dVYMrpY (https://a.co/d/dVYMrpY?tag=amznpcfx-20)
https://a.co/d/d19u55p (https://a.co/d/d19u55p?tag=amznpcfx-20)
Any brainstorming solutions or ideas out there?
idkWhenToFoldNewbie3 posts
Posted May 3, 2025, 4:56 AM#1860
Has anyone tried covering the original cup holders with some sort of lid or cap rather than replacing them?
I don’t allow drinks at the table (we use small side tables), so I’d rather have no cup holders at all… but I don’t want to go to the work and expense of removing the holders, fill in the spot with foam and re-covering the rails with fresh vinyl.
I’m imagining some sort of coaster, snap on silicone lid, something like a mini manhole cover, etc. I’d rather have a decent looking (and immovable) cover than an exposed/open/empty cup holder.
These things from Amazon are kind of what I’m thinking, but not exactly:
https://a.co/d/dVYMrpY (https://a.co/d/dVYMrpY?tag=amznpcfx-20)
https://a.co/d/d19u55p (https://a.co/d/d19u55p?tag=amznpcfx-20)
Any brainstorming solutions or ideas out there?
The rails do come off but for me the cupholders were SUPER glued to the wood of the table, you can probably rewrap the rails over the old vinyl and fill the cup holders with some type of foam?
PokerDogDocRegular37 posts
Posted May 3, 2025, 4:06 PM#1861
Thanks @idkWhenToFold (https://www.pokerchipforum.com/members/21207/) , that’s one suggestion I can consider, and I’m not opposed to doing some “reupholstering” work in the rails if it comes down to that.
If possible, I’d prefer to go even simpler and maybe find some sort of “cap” or “lid” I can put on/over the top of each cup holder. Maybe something that snaps in place? I think I’ll have to break out my ruler and take measurements and then do some trial or error.
Anyone else have additional ideas or suggestions?
TwinChameleonMicro-Stakes Grinder5 posts
Posted May 3, 2025, 4:11 PM#1862
3D printing a cap is probably the most sleek.
You could also just glue leather coasters to the top of foam cylinders cut to sit flush and put em in the cup holders. Mileage may vary on how that looks.
PokerDogDocRegular37 posts
Posted May 3, 2025, 4:19 PM#1863
Thanks @TwinChameleon (https://www.pokerchipforum.com/members/21154/) , those are both good suggestions. I don’t have access to a 3d printer but I can find someone who does… Or maybe someone here on the forum?
I’m also digging the “capped insert” idea as an another, simpler, solution.
TwinChameleonMicro-Stakes Grinder5 posts
Posted May 3, 2025, 4:44 PM#1864
if i decide not to install deeper cup holders in mine, I may ask my friend to 3d model caps. If so, I’ll share it here.
extreme517Micro-Stakes Grinder17 posts
Posted May 3, 2025, 8:04 PM#1865
I'm interested in caps of some sort if anyone comes up with an option!
KingHighMicro-Stakes Grinder14 posts
Posted Jul 7, 2025, 8:52 PM#1866
Any recommendations for table cover for my Barrington? I’m looking for something with an elastic band, similar to pool table covers.
I keep the table up, ready for action. (Pictured is my current 3 piece cover system)


UncleMiltyMicro-Stakes Grinder16 posts
Posted Jul 7, 2025, 9:15 PM#1867
I’m hoping to find something as well. For now i just turn the topper upside down.
ngmcs8203Regular49 posts
Posted Jul 7, 2025, 10:51 PM#1868
I wonder if you can pay a local seamstress/tailor to just sew something for you.
QuadNinesNewbie2 posts
Posted Jul 8, 2025, 1:05 AM#1869
I have 2 BBO's we play on - an 8 seater round and a 10 seater oval. Tables are in areas with a lot of foot traffic, and I wanted some really heavy duty covers to keep people from messing with them. I searched around and ended up ordering 2 custom "outdoor furniture covers" from Sealskin Covers- in their "Custom Elite" line. These things are bullet proof. For the Round table, I ordered it 56" by 4" deep, with their "drawstring" option. it drapes over the table and covers well underneath the rail. For our Oval, I ordered it 96" long, by 46" wide, with a "curvature width" of 68" - also 4" deep, with the drawstring tie down option. They are jet black with a very rubbery feel to the material. FULLY waterproof, and thick. This might be overkill for your table, but for where ours are located (locker room area), they are awesome!!!
KingHighMicro-Stakes Grinder14 posts
Posted Jul 8, 2025, 3:54 AM#1870
I have 2 BBO's we play on - an 8 seater round and a 10 seater oval. Tables are in areas with a lot of foot traffic, and I wanted some really heavy duty covers to keep people from messing with them. I searched around and ended up ordering 2 custom "outdoor furniture covers" from Sealskin Covers- in their "Custom Elite" line. These things are bullet proof. For the Round table, I ordered it 56" by 4" deep, with their "drawstring" option. it drapes over the table and covers well underneath the rail. For our Oval, I ordered it 96" long, by 46" wide, with a "curvature width" of 68" - also 4" deep, with the drawstring tie down option. They are jet black with a very rubbery feel to the material. FULLY waterproof, and thick. This might be overkill for your table, but for where ours are located (locker room area), they are awesome!!!
Woah those are some serious covers! Probably cost more than my barrington table which is by definition an overkill haha
I just fold laundry on my table when I’m not playing poker so now that I’m thinking about it, my plastic and tablecloth covers are actually probably all the protection I need. I just have a sickness and am always looking for new accessories for my poker room, even ones I don’t need
ngmcs8203Regular49 posts
Posted Jul 8, 2025, 4:22 AM#1871
Probably cost more than my barrington table
Sir, you are on PCF. By joining, you agree to overspending on stuff you do not need.
I got my Barrington for $150 but have spent well over $150 modifying it.
KingHighMicro-Stakes Grinder14 posts
Posted Jul 8, 2025, 5:24 AM#1872
Sir, you are on PCF. By joining, you agree to overspending on stuff you do not need.
I got my Barrington for $150 but have spent well over $150 modifying it.
You’re so right— quick, someone send me the link to the custom elite line pro max mole skin table covers that will complete me!
UncleMiltyMicro-Stakes Grinder16 posts
Posted Jul 8, 2025, 6:06 AM#1873
You’re so right— quick, someone send me the link to the custom elite line pro max mole skin table covers that will complete me!
I just ordered one. $107 shipped and all in.
hard58coreNewbie1 posts
Posted Jul 8, 2025, 2:44 PM#1874
Looks like you've already attempted a sheet, but have you tried a fitted sheet? I've bee using a cheap twin size fitted sheet on one of mine for years. Not going to have the protection a pool table cover would, but it keeps the dust off and are easy to wash themselves.
KingHighMicro-Stakes Grinder14 posts
Posted Jul 8, 2025, 3:48 PM#1875
I just ordered one. $107 shipped and all in.
Looks like you've already attempted a sheet, but have you tried a fitted sheet? I've bee using a cheap twin size fitted sheet on one of mine for years. Not going to have the protection a pool table cover would, but it keeps the dust off and are easy to wash themselves.
I’ll have to give this a try, thanks!
augster123Micro-Stakes Grinder8 posts
Posted Jul 8, 2025, 5:20 PM#1876
TX_Golf_N_PokerRegular48 posts
Posted Jul 9, 2025, 3:20 PM#1877
I have 2 BBO's we play on - an 8 seater round and a 10 seater oval. Tables are in areas with a lot of foot traffic, and I wanted some really heavy duty covers to keep people from messing with them. I searched around and ended up ordering 2 custom "outdoor furniture covers" from Sealskin Covers- in their "Custom Elite" line. These things are bullet proof. For the Round table, I ordered it 56" by 4" deep, with their "drawstring" option. it drapes over the table and covers well underneath the rail. For our Oval, I ordered it 96" long, by 46" wide, with a "curvature width" of 68" - also 4" deep, with the drawstring tie down option. They are jet black with a very rubbery feel to the material. FULLY waterproof, and thick. This might be overkill for your table, but for where ours are located (locker room area), they are awesome!!!
No pics?
horseshoezRegular25 posts
Posted Jul 12, 2025, 3:27 PM#1878
rjdev7Regular40 posts
Posted Jul 12, 2025, 6:58 PM#1879
ColquhounRegular82 posts
Posted Jul 12, 2025, 7:14 PM#1880
Even the LED version at $199 is a good deal.
UncleMiltyMicro-Stakes Grinder16 posts
Posted Jul 12, 2025, 9:19 PM#1881
I have the led version. Just bought this one for table 2.
horseshoezRegular25 posts
Posted Jul 12, 2025, 10:41 PM#1882
Don't forget to add the Allstate plan to it. Worth every penny. I've purchased it for other stuff and the process is seamless should you need to use it.
PseudoPsanityNewbie2 posts
Posted Jul 13, 2025, 3:14 AM#1883
Don't forget to add the Allstate plan to it. Worth every penny. I've purchased it for other stuff and the process is seamless should you need to use it.
Maybe this is sarcasm and I'm an idiot. But I'm genuinely curious, what are you anticipating happening to your poker table that you need insurance on it?
upNdownShark114 posts
Posted Jul 13, 2025, 3:46 AM#1884
Maybe this is sarcasm and I'm an idiot. But I'm genuinely curious, what are you anticipating happening to your poker table that you need insurance on it?
I’m guessing he’s a buffalo bills fan?
horseshoezRegular25 posts
Posted Jul 13, 2025, 4:52 AM#1885
Maybe this is sarcasm and I'm an idiot. But I'm genuinely curious, what are you anticipating happening to your poker table that you need insurance on it?
I have three boys that are thirteen and under. My folding table from Costco looks like Picasso got a hold of it. I’ve come home from work with a fishing rod hanging from my willow tree. Need I say more?
PseudoPsanityNewbie2 posts
Posted Jul 13, 2025, 11:09 AM#1886
I have three boys that are thirteen and under. My folding table from Costco looks like Picasso got a hold of it. I’ve come home from work with a fishing rod hanging from my willow tree. Need I say more?
Makes sense!
InspectorCUINewbie1 posts
Posted Jul 13, 2025, 2:42 PM#1887
In Portugal, we don't have a Barrington poker table, and a custom topper is a bit expensive due to import taxes and shipping.
But we can buy a Vevor poker table and a standard topper and cut it to the exact size of the playing surface... and this is the final result!

tabletalker7Shark116 posts
Posted Jul 13, 2025, 6:39 PM#1888
I’m guessing he’s a buffalo bills fan?
Allstate won't sell insurance to Bills Mafia
horseshoezRegular25 posts
Posted Jul 13, 2025, 6:50 PM#1889
Allstate won't sell insurance to Bills Mafia
No they won't, and even though we are a Falcons household, my children behave like Bills Mafia when they're high on sugar.
roughrabbitMicro-Stakes Grinder9 posts
Posted Jul 13, 2025, 10:59 PM#1890
Anyone else have issues with sloping near the center of the table? Sitting in the center while dealing, the top two or three cards always slide off the top of the deck. Table was bought new and has been used for a total of 4 home games so far, no outrageous bills Mafia body slams have occurred either.
horseshoezRegular25 posts
Posted Jul 14, 2025, 1:14 AM#1891
Anyone else have issues with sloping near the center of the table? Sitting in the center while dealing, the top two or three cards always slide off the top of the deck. Table was bought new and has been used for a total of 4 home games so far, no outrageous bills Mafia body slams have occurred either.
I haven’t myself but the table should have a turnbuckle underneath and you can adjust the slope by tightening or loosening the turnbuckle.
ef28Micro-Stakes Grinder10 posts
Posted Jul 14, 2025, 1:19 AM#1892
Mine starting sloping after 3 games. As @horseshoez (https://www.pokerchipforum.com/members/5314/) stated there is a tightening device underneath the table. I Haven’t tried it yet to see if it resolves issue. Next game will try and see if it solves the problem.
ColquhounRegular82 posts
Posted Jul 14, 2025, 2:03 AM#1893
Yes, that’s what the cable is for under the table. Since there is no other support for a split table, the cable is what keeps it from collapsing in. Set that turnbuckle so that the table is perfectly flat.
horseshoezRegular25 posts
Posted Jul 14, 2025, 2:35 AM#1894
Also, for those who don’t like the faint crease that appears when the topper is laid on the felt, I recommend placing thin sheets of poster board down the center of the table. Just make sure they don’t reach the edges, so they remain hidden when the topper is on top.
doughboy63Micro-Stakes Grinder7 posts
Posted Jul 14, 2025, 3:13 AM#1895
horseshoezRegular25 posts
Posted Jul 14, 2025, 3:44 AM#1896
thanks for the heads up! Pulled the trigger, $162 shipped all in with taxes. Heck of a deal.
You bet. I have like 3 different apps monitor its pricing :ROFL: :ROFLMAO:
ColquhounRegular82 posts
Posted Jul 14, 2025, 5:46 AM#1897
Also, for those who don’t like the faint crease that appears when the topper is laid on the felt, I recommend placing thin sheets of poster board down the center of the table. Just make sure they don’t reach the edges, so they remain hidden when the topper is on top.
I always wondered if those silicone gap fillers that they make for kitchen countertops would work for the gap under a topper:


horseshoezRegular25 posts
UncleMiltyMicro-Stakes Grinder16 posts
Posted Jul 15, 2025, 6:47 AM#1899
MeridianFCMicro-Stakes Grinder11 posts
Posted Jul 15, 2025, 10:58 AM#1900
Just so people know the price has gone back up already
JJDiamondsRegular29 posts
Posted Jul 15, 2025, 2:15 PM#1901
@JJDiamonds (https://www.pokerchipforum.com/members/18521/) just in case you’re in the market for another table. I just bought one it arrived today. $162 all in and delivered!
I saw the sale price and thought about it... I'm just going to keep looking on Offerup and Facebook Marketplace for a good deal. Thanks for the heads up!
TweedledumNewbie3 posts
Posted Jul 17, 2025, 1:31 AM#1902
You bet. I have like 3 different apps monitor its pricing :ROFL: :ROFLMAO:
Nuts, I missed it! What apps do you use? Checking prices randomly isn't working for me 😅
horseshoezRegular25 posts
Posted Jul 17, 2025, 4:12 AM#1903
On the phone, I use an app called Keepa. There is another one called https://camelcamelcamel.com/ which is web based and doesn't have an app but still works just as well. ShopSavvy is a good app but it's mostly for price comparisons rather than being alerted to a price drop for specific items.
Overall, Keepa is the way to go.
UncleMiltyMicro-Stakes Grinder16 posts
Posted Jul 17, 2025, 5:47 AM#1904
On the phone, I use an app called Keepa. There is another one called https://camelcamelcamel.com/ which is web based and doesn't have an app but still works just as well. ShopSavvy is a good app but it's mostly for price comparisons rather than being alerted to a price drop for specific items.
Overall, Keepa is the way to go.
Keepa says it’s an Amazon (https://www.amazon.com/?tag=amznpcfx-20) price tracker?
horseshoezRegular25 posts
Posted Jul 17, 2025, 6:17 AM#1905
Keepa says it’s an Amazon price tracker?
Correct, just for Amazon (https://www.amazon.com/?tag=amznpcfx-20). Google Chrome has a built in tracker for it as well. Not sure how long it’s been around but I’ve been using that as well.
ekricketRegular68 posts
Posted Jul 17, 2025, 6:19 AM#1906
Mine starting sloping after 3 games. As @horseshoez (https://www.pokerchipforum.com/members/5314/) stated there is a tightening device underneath the table. I Haven’t tried it yet to see if it resolves issue. Next game will try and see if it solves the problem.
I’ve had to tighten mine up a couple times. Super easy and effective.
I think the turnbuckles might just loosen some from folding and unfolding. So it’s best to tighten them after every setup/takedown. I put mine up after every game, so it moves about once a week.
UncleMiltyMicro-Stakes Grinder16 posts
Posted Jul 17, 2025, 7:08 AM#1907
Correct, just for Amazon. Google Chrome has a built in tracker for it as well. Not sure how long it’s been around but I’ve been using that as well.
So Keepa amazon (https://www.amazon.com/?tag=amznpcfx-20) price tracker will also track Walmart prices? Thanks for you input BTW
davislaneMicro-Stakes Grinder18 posts
NewenneNewbie1 posts
horseshoezRegular25 posts
Posted Jul 17, 2025, 8:03 AM#1910
So Keepa amazon price tracker will also track Walmart prices? Thanks for you input BTW
No, for Walmart I use the Google Chrome price tracker that's built into the browser. However, what will happen sometimes is that when Keepa shows you a price drop on Amazon (https://www.amazon.com/?tag=amznpcfx-20), sometimes the Walmart price will have also dropped as a result.
MeridianFCMicro-Stakes Grinder11 posts
Posted Jul 17, 2025, 9:56 AM#1911
Nuts, I missed it! What apps do you use? Checking prices randomly isn't working for me 😅
I use PCF.
BleedingChipsMicro-Stakes Grinder11 posts
Posted Aug 8, 2025, 4:42 PM#1912
Big shout out to @greedyintern (https://www.pokerchipforum.com/members/17235/) , just did the LED mod. I used a different brand but it was a COB LED.
The hardest part for me was routing the LED from the top of the table to the bottom. Instead of a dimmer, I installed a zigbee controller and I got a rechargeable wireless battery to power them. Now I can control the LEDs from my phone thru HomeKit.
I also installed the handles. Going to attempt the cupholder mod next.
This is awesome! Can you help me understand how you connected both light strips and the power pack? The photo is unclear and I am not seeing how online.
BleedingChipsMicro-Stakes Grinder11 posts
Posted Aug 12, 2025, 5:07 PM#1913

I finally took the plunge on replacing the horrible stock LED strips with COB lights!
It was nerve racking to peel off the old lights and figure out how to get the new ones set up, but learned some things along the way. This was a harder project than I expected because I didn’t have the right equipment at the first attempt to install. I would feel much more confident doing this project again after figuring it out.
-
Go slow with peeling off the old lights to avoid ripping any extra material.
-
Wait to pull adhesive backing off and make any extra cuts until placement of new light strip has been double checked. I have a centimeter of dark space (see if you can find it) because I didn’t confirm placement first before peeling off adhesives.
-
Start placing new LED strips on opposite side of the red power button/original power setup and make sure the cuts are as close to the fold gap as possible to ensure continuity.
-
The hardest part is threading the new LED strips through the existing holes where the lights connect under the table. Some super thin needle nose pliers may help.
-
Flipping the table on its side makes working on the underside of the table MUCH easier and helped avoid it collapsing (the legs did collapse on me when I tried the “slightly closed upright position”
Lights used: MIWISE COB LED Strip Light... https://www.amazon.com/dp/B0CLLJ2513?ref=ppx_pop_mob_ap_share (https://www.amazon.com/dp/B0CLLJ2513?ref=ppx_pop_mob_ap_share&tag=amznpcfx-20)
Super easy to use solder-less connectors that I wish I would have bought first and saved me 2 hours of time. GXILEE 2 Pin 8mm Cob LED Strip... https://www.amazon.com/dp/B09VKVR99Y?ref=ppx_pop_mob_ap_share (https://www.amazon.com/dp/B09VKVR99Y?ref=ppx_pop_mob_ap_share&tag=amznpcfx-20)
Dc power splitter 1 female-2 male cord https://a.co/d/8xPuYQr (https://a.co/d/8xPuYQr?tag=amznpcfx-20)
JoseRijoNewbie3 posts
Posted Aug 13, 2025, 11:11 PM#1914
It looks awesome. Did you have a color temperature preference?
BleedingChipsMicro-Stakes Grinder11 posts
Posted Aug 15, 2025, 1:11 PM#1915
It looks awesome. Did you have a color temperature preference?
Thank you! I wanted a warm light and have it turned to the lowest possible brightness setting to avoid eye fatigue.
gvijaykrishnanMicro-Stakes Grinder5 posts
Posted Sep 2, 2025, 4:45 PM#1916
I’ve had to tighten mine up a couple times. Super easy and effective.
I think the turnbuckles might just loosen some from folding and unfolding. So it’s best to tighten them after every setup/takedown. I put mine up after every game, so it moves about once a week.
Hi
Is there any video of how to tighten or loosen that turnbuckle cable ? I’m not able to figure it out
gvijaykrishnanMicro-Stakes Grinder5 posts
MudfeverNewbie1 posts
Posted Sep 9, 2025, 6:51 PM#1918
First thanks to all those who posted their process and procedures and tools used.
Finally did the cup holder upgrade! A major improvement in usefulness. I used the Jumbo cup holders from Amazon (https://www.amazon.com/?tag=amznpcfx-20). And the Milwaukee hole saw. I used a hairdryer to loosen the glue to pop out the old cup holders. Then I drilled a pilot from above (moved in towards the table 1/4 inch to account for the size difference) and then flipped the table to cut with the hole saw from below. In the corners, you can see on the saw how it rubbed the leg poles. The power box had to be moved for drilling, but then went back to original location. Drilling from the bottom saved the vinyl.
I honestly don’t know how you guys are doing this in basements or apartments. The mess was pretty unbelievable and I did it in the driveway.


I use custom toppers from @rjdev7 (https://www.pokerchipforum.com/members/1014/), so I am not pressured to change out the felt. I have different toppers for different sets.
Mud
curlyhead44Micro-Stakes Grinder5 posts
Posted Sep 13, 2025, 5:32 AM#1919
Man just opened up my Barrington 10 person table and the rail / padding on one side is ~1 cm off! Whole point of getting this is not have to DIY anything other than getting a custom table topper xD. Tell me if im being OCD in being bothered by this lol
gvijaykrishnanMicro-Stakes Grinder5 posts
Posted Sep 13, 2025, 1:46 PM#1920
Is there any video of how to tighten or loosen that turnbuckle cable under the table ? I’m not able to figure it out
harrysalloutMicro-Stakes Grinder11 posts
Posted Sep 13, 2025, 8:27 PM#1921
gvijaykrishnanMicro-Stakes Grinder5 posts
chipinlaRegular37 posts
Posted Sep 14, 2025, 11:31 PM#1923
Finally got around to doing the upgrade. 6 down. 4 more to go.

chipinlaRegular37 posts
Posted Sep 19, 2025, 2:39 AM#1924
Upgrade complete!

chipinlaRegular37 posts
Posted Sep 19, 2025, 6:01 PM#1925
By the way, Walmart has raised the prices on the Barringtons.

ekricketRegular68 posts
Rooster410Micro-Stakes Grinder12 posts
Posted Sep 19, 2025, 8:30 PM#1927
Most I've paid for a Barrington was $160 from Walmart. I also was part of the Wayfair (I think it was Wayfair) deal where they were listed for $90 with shipping. Crazy.
gvijaykrishnanMicro-Stakes Grinder5 posts
Posted Sep 19, 2025, 9:46 PM#1928
Just seeing this sorry! I wouldn’t flip it over. With the table upright, start turning the turnbuckle one way.
If it helps level it, keep going.
If it doesn’t help, turn the turnbuckle the other way until the table is level to your liking.
If you are asking how to turn a turnbuckle, just grasp it and continuously twist it in the plane of the cables one way or the other to tighten or loosen it.
Thank you so much, appreciate you getting back on this
tabletalker7Shark116 posts
chipinlaRegular37 posts
Posted Sep 19, 2025, 11:18 PM#1930
Wow. I remember getting mine for $99 with free shipping
Yup, I think mine was $179 about 2 years ago
chipinlaRegular37 posts
Posted Sep 19, 2025, 11:18 PM#1931
TBH, if I didn’t know better it’s still a great table for $399
mugenpowrMicro-Stakes Grinder10 posts
Posted Sep 20, 2025, 12:07 AM#1932
Wow. I remember getting mine for $99 with free shipping
Good deal. I bought mine for $94.72

Tarsus4Micro-Stakes Grinder8 posts
Posted Sep 20, 2025, 12:41 PM#1933
Yup, I think mine was $179 about 2 years ago
Mine from Walmart.com just a month ago was $250 shipped. Great value even at that price, sad to see it go up. Maybe Costco will have a restocked deal in the $300 range for the holidays.
chipzillaRegular35 posts
Posted Oct 7, 2025, 8:31 AM#1934
The Barrington with LED lights at Walmart dropped back down to $299 today. Anyone's guess how long this price lasts.
They also have the one without LED lights for $249.

paulkerseyNewbie1 posts
Posted Oct 7, 2025, 3:04 PM#1935
Amazon.ca seems to have a really great deal today. I assume this is the standard table where the felt can be adjusted? Does anyone have this version of the table?

curlyhead44Micro-Stakes Grinder5 posts
Posted Oct 7, 2025, 3:33 PM#1936
The Barrington with LED lights at Walmart dropped back down to $299 today. Anyone's guess how long this price lasts.
They also have the one without LED lights for $249.
View attachment 1574225 (https://www.pokerchipforum.com/attachments/1574225/)
Nice, will get one of the two, do people tend to like the LED one more or find it annoying? Going to be getting an rjdev custom topper if it makes a difference.
ColquhounRegular82 posts
Posted Oct 7, 2025, 3:41 PM#1937
Nice, will get one of the two, do people tend to like the LED one more or find it annoying? Going to be getting an rjdev custom topper if it makes a difference.
The LED one is preferable, as it has heavier duty legs and a thicker plywood deck. It adds 20 lbs to an already fairly heavy table, but I think it’s worth it. Even if you never use the LEDs, it’s worth the upgrade.
ColquhounRegular82 posts
Posted Oct 7, 2025, 3:44 PM#1938
Amazon.ca seems to have a really great deal today. I assume this is the standard table where the felt can be adjusted? Does anyone have this version of the table?
View attachment 1574262 (https://www.pokerchipforum.com/attachments/1574262/)
I think that’s the standard Barrington, but that may be an older picture, not sure.
They had that blue felt a while back and have been producing the one with the brown felt for the last couple of years:

I would verify if considering.
Tarsus4Micro-Stakes Grinder8 posts
Posted Oct 7, 2025, 4:38 PM#1939
The LED one is preferable, as it has heavier duty legs and a thicker plywood deck. It adds 20 lbs to an already fairly heavy table, but I think it’s worth it. Even if you never use the LEDs, it’s worth the upgrade.
I have the brown table, it is plenty sturdy. I debated this when I ordered but I'm glad I went with the lighter one, it's already just borderline too heavy for one person to set-up/collapse or move more than a few feet.
I believe the brown table is the same as the blue table. Amazon (https://www.amazon.com/?tag=amznpcfx-20) has the blue table (for $60 more) and it seems to match specs.
Trip7MHKNewbie1 posts
Posted Oct 8, 2025, 7:22 PM#1940
I also have the Brown table, it's plenty sturdy and plenty heavy for me.
PokerDogDocRegular37 posts
Posted Oct 11, 2025, 2:28 AM#1941
I also have the Brown table, it's plenty sturdy and plenty heavy for me.
I have the brown table, it is plenty sturdy. I debated this when I ordered but I'm glad I went with the lighter one, it's already just borderline too heavy for one person to set-up/collapse or move more than a few feet.
I believe the brown table is the same as the blue table. Amazon has the blue table (for $60 more) and it seems to match specs.
The LED one is preferable, as it has heavier duty legs and a thicker plywood deck. It adds 20 lbs to an already fairly heavy table, but I think it’s worth it. Even if you never use the LEDs, it’s worth the upgrade.
Pros and cons to both, but as someone who has to set up and breakdown for every game, I find my non-LED “brown felt/black rail” version rock solid and at about the limit of what I can work with while also ensuring I don’t drop it or break it. That and a good overhead light suits my needs. I use this lamp from IKEA—$105 without the shade (I had one to use) or $130 with it (shade sold separately).


PokerDogDocRegular37 posts
curlyhead44Micro-Stakes Grinder5 posts
Posted Oct 11, 2025, 2:48 AM#1943
Thanks for all the info everyone, went back and forth ended up going blue a few days ago for sturdiness tho would probably go brown if could do it over with what more recent posters have mentioned xD didn’t want to wait in case sale ended
chipinlaRegular37 posts
Posted Oct 11, 2025, 2:53 AM#1944
Thanks for all the info everyone, went back and forth ended up going blue a few days ago for sturdiness tho would probably go brown if could do it over with what more recent posters have mentioned xD didn’t want to wait in case sale ended
Get a topper
curlyhead44Micro-Stakes Grinder5 posts
Posted Oct 11, 2025, 2:57 AM#1945
Get a topper
Absolutely, waiting for it to come to measure before ordering from @rjdev7 (https://www.pokerchipforum.com/members/1014/), not sure if that’s still relevant / saw it in older posts maybe when the measurement was changing but want to be sure
PokerDogDocRegular37 posts
Posted Oct 11, 2025, 5:35 AM#1946
waiting for it to come to measure before ordering from @rjdev7, not sure if that’s still relevant / saw it in older posts maybe when the measurement was changing but want to be sure

Absolutely still relevant.
TX_Golf_N_PokerRegular48 posts
Posted Oct 13, 2025, 2:41 AM#1947
Man just opened up my Barrington 10 person table and the rail / padding on one side is ~1 cm off! Whole point of getting this is not have to DIY anything other than getting a custom table topper xD. Tell me if im being OCD in being bothered by this lol
Not OCD. I'd be steamed if it came brand new out of the box like that.
curlyhead44Micro-Stakes Grinder5 posts
Posted Oct 13, 2025, 3:00 AM#1948
Not OCD. I'd be steamed if it came brand new out of the box like that.
Appreciate the confirmation lol. Ended up returning it with the next try arriving tomorrow., finger crossed
chipzillaRegular35 posts
Posted Oct 13, 2025, 8:41 PM#1949
Walmart LED table back up to $399 today. No LED version is $349. Wow, lot's of price changes in a short time.

HuskerchipperRegular35 posts
Posted Oct 13, 2025, 8:45 PM#1950
Walmart LED table back up to $399 today. No LED version is $349. Wow, lot's of price changes in a short time.
View attachment 1576856 (https://www.pokerchipforum.com/attachments/1576856/)
I haven't paid much attention since I picked one up last Christmas but thinking about another. What's the lowest the LED version has been in the last 6 months?
chipzillaRegular35 posts
Posted Oct 14, 2025, 12:02 AM#1951
I haven't paid much attention since I picked one up last Christmas but thinking about another. What's the lowest the LED version has been in the last 6 months?
I think prices have been varying a lot recently. $399 now. $299 last week. Some posters got them for under $200 early in the year.
HuskerchipperRegular35 posts
Posted Oct 14, 2025, 12:45 AM#1952
I think prices have been varying a lot recently. $399 now. $299 last week. Some posters got them for under $200 early in the year.
Thank you
MongooseMicro-Stakes Grinder21 posts
Posted Oct 14, 2025, 3:12 AM#1953
Walmart LED table back up to $399 today. No LED version is $349. Wow, lot's of price changes in a short time.
Wait a couple of months. Prices typically get much better that time of year.
TX_Golf_N_PokerRegular48 posts
Posted Oct 14, 2025, 4:29 AM#1954
I think prices have been varying a lot recently. $399 now. $299 last week. Some posters got them for under $200 early in the year.
The last two years they came down a lot around black Friday, or thereafter. I would not be a buyer at these prices unless I really needed one stat!
augster123Micro-Stakes Grinder8 posts
Posted Oct 14, 2025, 5:53 PM#1955
Costco seems to be the best bet if you don't mind picking up a large item. They appear to get a couple of big shipments per year and are empty the rest of the time. I think the listed at like $250 and then drop down to $200 after a few weeks. I think some folks bought them for even less than that.
dazokiMicro-Stakes Grinder6 posts
Posted Oct 14, 2025, 5:55 PM#1956
i picked up the LED table for $200 last november.
ColquhounRegular82 posts
Posted Oct 14, 2025, 6:20 PM#1957
Costco seems to be the best bet if you don't mind picking up a large item. They appear to get a couple of big shipments per year and are empty the rest of the time. I think the listed at like $250 and then drop down to $200 after a few weeks. I think some folks bought them for even less than that.
The Barringtons at Costco were just offered during the holidays last year and were discounted steeply afterward. They weren't re-stocked either.
There is a slight possibilty that they will appear again this holiday season, but generally they switch things up from year to year.
MrBooshRegular32 posts
Posted Oct 14, 2025, 7:07 PM#1958
I watch the Deals Guy on YouTube and when he was at Costco in one of his recent videos, you could see a table in the background so hopefully they will be back everywhere this year.
SootedFishNewbie1 posts
Posted Oct 25, 2025, 7:28 PM#1959
Has anyone replaced the rail on the barrington entirely and went to the cup holders that slide under the rail instead of being built into it? I have been considering this since I prefer the cupholders to not be in the rail but am on the fence and would love to see if someone else has done this.
willkoNewbie1 posts
Posted Nov 4, 2025, 12:44 AM#1960
Based on what I am reading in this thread, it sounds like the Barrington tables just had a sale about a month ago, which I sadly missed. Does anyone think it's likely that there will be a sale for Black Friday or Cyber Monday? I've been checking Amazon (https://www.amazon.com/?tag=amznpcfx-20)/Wal-Mart/Wayfair daily to check for sales on the Premium Charleston 10-player table.
If they don't go on sale by Cyber Monday, I'll probably just bite the bullet and buy it at full price in order to get it in time to replace the cupholders before I have friends/family over for a home game around the holidays.
chipzillaRegular35 posts
Posted Nov 6, 2025, 7:27 AM#1961
5V LED
Thanks to @greedyintern (https://www.pokerchipforum.com/members/17235/), @RadicusScout (https://www.pokerchipforum.com/members/10148/), @dmoney (https://www.pokerchipforum.com/members/3698/), and others for the great cupholder and LED mod instructions.
https://www.pokerchipforum.com/threads/barrington-poker-table-thread.30910/post-2352520
https://www.pokerchipforum.com/threads/barrington-poker-table-thread.30910/post-2405037
Just finished mine and it turned out great thanks to those detailed instructions.
For the COB LED lights, I did make a minor change which I haven’t seen posted. In case anyone’s interested:
The earlier LED lights are 12V, as are the dimmer and power bank. I instead used a 5V LED strip and dimmer. I wanted 5V so I could use a standard power bank, like the kind to charge a cell phone. It didn’t appeal to me to have a dedicated 12V power bank just for the table….I don’t have any other devices needing the 12V and I already have multiple 5V power banks.
It turns out Amazon (https://www.amazon.com/?tag=amznpcfx-20) has many 5V LED cob strips to choose at very low price. In fact, they typically have a standard USB-A plug already attached to the strip. If you plug it into a standard 5V power bank, it works! It’s too bright of course, so a dimmer is needed. Many have a basic dimmer also built-in to that USB plug, making a very low cost solution. I tried it, and it works, though only providing 6 discrete steps of dimming from about 100% down to about 25%. I chose a 5v strip with just the plain USB plug (no dimmer) and added a separate 5V dimmer which allows continuous dimming from 100% down to 0% (off), so I can use it at about the 15-20% setting which I prefer for my eye comfort.
The 5V strip I used was 3 meters long, enough for half the table with about 20” extra. So I bought two (about $10 each). There is one available 5 meters long, but that is barely long enough, or maybe a hair short. Buying two pieces also means I get two USB plugs and don’t have to add COB strip connectors.
5V COB LED lights (https://www.amazon.com/dp/B0DZH99SWJ?ref=ppx_yo2ov_dt_b_fed_asin_title&th=1&tag=amznpcfx-20)
5V Dimmer (https://www.amazon.com/dp/B07RP836LM?ref=ppx_yo2ov_dt_b_fed_asin_title&th=1&tag=amznpcfx-20)
Male USB plug to bare wire cable (https://www.amazon.com/dp/B0CHVM39WL?ref=ppx_yo2ov_dt_b_fed_asin_title&tag=amznpcfx-20)
Female USB plug to bare wire cable (https://www.amazon.com/dp/B0CLSC8FHY?ref=ppx_yo2ov_dt_b_fed_asin_title&tag=amznpcfx-20) (Optional. Delete if willing to cut and strip wiring)
Pictures:
Finished table:

Final mounted dimmer hardware:

Hardware in testing mode: This is where I used the optional Female-USB-plug-to-bare-wire cable for convenience. This cable can be skipped if you simply cut the end of the LED strip near the strip’s USB plug, strip the wires, and mount them directly to the dimmer. I did that in the picture above (final mounting):

Comparison of original Barrington LED lights to the 5V cob strip light. The latter is much more densely packed like the 12V LED’s. FYI, the 12V LED’s density is 480 LED’s per meter, the ones used by @greedyintern (https://www.pokerchipforum.com/members/17235/). The 5V LED density is less at 400 LED/M. It looks fine to me. If I dim it way down I can see individual LED’s similar to @greedyintern (https://www.pokerchipforum.com/members/17235/) described also for the 12V LED’s. When lit, it looks good and fairly defused to me.

Most of the 5V LED’s on Amazon (https://www.amazon.com/?tag=amznpcfx-20) are actually even lower density, 320 LED/meter. Here’s a comparison of 320 LED/M (left) to 400 LED/M (right). Both are 5V LEDs. Also the left side is a 8mm strip (like @greedyintern (https://www.pokerchipforum.com/members/17235/) 12V 480 LED/meter strip), while the right side is 5mm I used. The right strip is powered at minimum setting ~ 10% so it looks very faint, while the left strip is at about 25% (min setting of its built-in cheap dimmer). You can see the discrete LED’s of both by zooming-in. 400 LED/M strips were harder to find, which is why I used the 5mm strip. Both look good to me when lit up, especially compared to the original Barrington LEDs.

I took some current measurements at different dimmers setting with an inserted ammeter. The full 3 meter length was measured. I cut about 20” off from each strip for actual install, so actual game night current usage will be proportionally lower than in this table below. For the 400 LED/M strip I measured both/two strips while connected in parallel so I could verify the power bank would be sufficient. All readings are current in Amperes:
100%85%75%50%25%0%
Two 5V LED strip with 400 LED/m, 5mm3.11 A1.97 A1.32 A0.75 A0
One 5V LED strip with 320 LED/m, 8mm1.27 A1.09 A0.84 A0.12 A
From row 1, the required power bank needed can be calculated by: Capacity = Current x Time.
E.g., at 50% dimmer setting, Capacity = 1,320mA x 1 hr = 1320 mAH rated power bank needed for each 1hr of run time. My 10,000mAH USB power bank is more than enough, especially since I’ll be running closer to the 20% dimmer setting and can get close to 13hrs of run time. I verified this, left the lights on for 9 hours at 20%, and the power bank was still 50% full (based on its indicator lights).
Here’s the 5V LED with 320 LED/m, 8mm with a built-in dimmer and USB plug. (https://www.amazon.com/dp/B0DQQ1JFTG?ref=ppx_yo2ov_dt_b_fed_asin_title&th=1&tag=amznpcfx-20)
cowboy7Newbie2 posts
Posted Nov 11, 2025, 3:07 AM#1962
GusMicro-Stakes Grinder10 posts
Tarsus4Micro-Stakes Grinder8 posts
Posted Nov 11, 2025, 3:18 AM#1964
And LED-version is $250.
Is there rough consensus here about which one people prefer? I've heard the LED one is sturdier, weighing 79lbs vs 66lbs for the non-LED.
For people who've played on both, which would you recommend?
Everyone I know here likes whichever one they bought, which I suppose is praise enough =) I personally would stick with the lighter one because it's FINE and heavy enough to lug around as it is. But I haven't used both and it seems like you can't go wrong either way.
ColquhounRegular82 posts
Posted Nov 11, 2025, 5:18 AM#1965
And LED-version is $250.
Is there rough consensus here about which one people prefer? I've heard the LED one is sturdier, weighing 79lbs vs 66lbs for the non-LED.
For people who've played on both, which would you recommend?
I have had both, I like the thicker deck of the LED one, but it’s definitely heavier. If you need it mobile, I would consider the lighter one. Since I’m not moving it much, a thicker plywood deck is preferable.
The LED one has slightly deeper cup holders, but not enough to make a real difference. An upgrade for those is a nice improvement.
The metal tubing for the legs is a bit wider, but both tables are sturdy.
On the LED table, the padded rail is slightly more elevated over the deck than the non-LED, I’m guessing si the lights can show.
lennonNewbie1 posts
Posted Nov 12, 2025, 2:16 AM#1966
So I finished my Barrington mods (for now) but still need to order a topper.
New LEDs, Dimmer, AA Battery Pack, and Jumbo Cupholders
COB LEDs
I wasn't the biggest fan of the blue LEDs and didn't like how they were so spaced out. I saw someone talk about the COB LEDs and how they are amost diffused already and ordered the warm white and couldn't be happier. The LEDs are very close together so you don't need to put something in front of them to diffuse them like I was trying to do with the old LEDs. Instead of ripping out the old LEDs, I actually just wedged the new LEDs right on top of the current ones. It worked out great.
I did have to cut the light strip and attach another tail end. Very easy to do but measure accurately before you cut! You don't have much leeway with the 16.4ft strip. And then used the Y connector that also came with the COB connector package.
Screwed and glued on some velcro, glued velcro to the battery pack, then buttoned up everything else. Happy with it.
COB LED Lights (https://www.amazon.com/dp/B0BVR755VK?tag=amznpcfx-20)
COB Connector Package (https://www.amazon.com/dp/B0C2CVFGL8?tag=amznpcfx-20)
Dimmer (https://www.amazon.com/weideer-Lights-Dimmer-DC12V-24V-K-018-BK/dp/B092HX9435?tag=amznpcfx-20)
Battery Pack (https://www.amazon.com/gp/product/B09131Y9L8?tag=amznpcfx-20)
Jumbo Cupholders
I went with the jumbos after reading recommendations. Pried off the old ones with a vise grip, drilled a center hole down with a standard bit, then drilled from the bottom up with the 3 5/8in hole saw starting it the pre drilled hole. I got them all done but it was a bit of a struggle with the hole saw I bought. If I would do it again, I would get one that was deeper. This one barely made it through both pieces of wood.
Jumbo Cupholders (https://www.amazon.com/gp/product/B0789HG6NW?tag=amznpcfx-20)
Hole Saw (buy a deeper one) (https://www.amazon.com/gp/product/B0C6MN14B1?tag=amznpcfx-20)
View attachment 1252914 (https://www.pokerchipforum.com/attachments/1252914/)
How did you run the cob lights from under the table to the sides of it? EDIT: It looks like you may have just followed the way the existing led strips were ran? I’m guessing that hole they run through was already there?
chipzillaRegular35 posts
Posted Nov 12, 2025, 3:32 AM#1967
How did you run the cob lights from under the table to the sides of it? EDIT: It looks like you may have just followed the way the existing led strips were ran? I’m guessing that hole they run through was already there?
Yes, just follow the existing light strip. It goes into the hole at the middle of the table.
PokerDogDocRegular37 posts
Posted Nov 16, 2025, 4:15 PM#1968
*** CUP HOLDER COVERS ***
I don’t like drinks on the table due to spillage, etc. so I use side tables instead. Because of that, doing the cup holder upgrade made no sense for my situation and I’ve been in search of a way to “cap off” the stock cup holders that come with my Barrington.
I’m happy to say that I’ve found a solution and wanted to share.
 (https://www.pokerchipforum.com/attachments/img_9443-webp.1592125/)
Supplies from Amazon:
12 Pack Regular Mouth Mason Jar Lids - Acacia Wooden Storage, Canning Ball Jar with Airtight Silicone Seal, Brown (https://www.pokerchipforum.com/threads/barrington-poker-table-thread.30910/#-12-pack-regular-mouth-mason-jar-lids-acacia-wooden-storage-canning-ball-jar-with-airtight-silicone-seal-brown)
https://a.co/d/8qTRtv7 (https://a.co/d/8qTRtv7?tag=amznpcfx-20)
 (https://www.pokerchipforum.com/attachments/img_9504-webp.1592149/) _) (https://www.pokerchipforum.com/attachments/img_9249-webp.1592138/)
(https://www.pokerchipforum.com/threads/barrington-poker-table-thread.30910/#-)
12 PCS Silicone Seal Rings Reusable Leak Proof Sealing Gaskets Replacement for Mason Jar Lids (Regular Mouth 70mm) (https://www.pokerchipforum.com/threads/barrington-poker-table-thread.30910/#-12-pcs-silicone-seal-rings-reusable-leak-proof-sealing-gaskets-replacement-for-mason-jar-lids-regular-mouth-70mm)
https://a.co/d/hvyms6c (https://a.co/d/hvyms6c?tag=amznpcfx-20)
 (https://www.pokerchipforum.com/attachments/img_9253-webp.1592140/)
Note that you need to be sure to buy the “regular mouth” size of both the lids and the gaskets, and you must get the lids made from acacia wood because of their tapered lip. Do not get the bamboo ones as their lip is rounded and they won’t fit well.
 (https://www.pokerchipforum.com/attachments/img_9314-webp.1592152/)
Add the silicone gasket to the lid, placing it between the gray flange already there and the underside of the wooden lip. Be sure the “open” side of the gasket is facing up, as shown (also note the tapered lip of the lid).
 (https://www.pokerchipforum.com/attachments/img_9254-webp.1592141/) ) (https://www.pokerchipforum.com/attachments/img_9255-webp.1592142/) ) (https://www.pokerchipforum.com/attachments/img_9256-webp.1592143/)
When capping the cup holder off you may need to work the gasket back and forth a bit and maybe tuck it down a bit so it sits inside the cup holder rim.
I try adding links below to short video clips to show how loose the lid fits without the added gasket and how much better it is with it.
Without:
https://photos.app.goo.gl/Q21EyLpfPHAuCjsj6
With:
https://photos.app.goo.gl/WwJEH6KjfzJLn4fk8
You can see how secure it is with the added gasket.
I really wanted black cup holders and black lids to make them blend in more, but I was only partly successful. Attempts at prepping and painting the cup holders failed as the paint would never fully cure and harden even after 2 weeks (even paint made specifically for metal), and the powder-coated black cup holders that come with some Barrington tables are about 1/8 inch too tall to fit flush with the rail.
That’s why you may have seen my request for replacement cup holders here on PCF… I needed to get back to the original stainless steel after a few failed attempts!
However, I was able to paint my lids black. Just remove the gray silicone flange/cover, mask off the bottom with painters tape, and apply a few thin coats of fast-drying spray paint. I chose a black hammered-finish which I think looks nice. Be sure to let this cure for several days. Remove the masking, put the original flange back on, add the extra gasket and your back in business.
 (https://www.pokerchipforum.com/attachments/img_9264-webp.1592144/) ) (https://www.pokerchipforum.com/attachments/img_9265-webp.1592145/)
 (https://www.pokerchipforum.com/attachments/img_9266-webp.1592146/)
Here’s the finished product (missing my semi-custom table topper). Pretty dang happy with how this turned out.
 (https://www.pokerchipforum.com/attachments/img_9500-webp.1592147/)

PokerDogDocRegular37 posts
Posted Nov 16, 2025, 4:32 PM#1969
cowboy7Newbie2 posts
Posted Nov 17, 2025, 3:22 AM#1970
For people that have bought the non-LED version, would you purchase @ $199?
ColquhounRegular82 posts
Posted Nov 17, 2025, 3:25 AM#1971
For people that have bought the non-LED version, would you purchase @ $199?
New? Yes, that's decent sale price. It's been cheaper, but that was a while back.
dazokiMicro-Stakes Grinder6 posts
Posted Nov 17, 2025, 11:44 PM#1972
Price drop alert

chipzillaRegular35 posts
GusMicro-Stakes Grinder10 posts
Posted Nov 18, 2025, 12:07 AM#1974
I’m picking up a non-LED one, hoping it doesn’t get damaged in shipping
If anyone has a properly fitting topper in decent shape I’m in the market! Just ordered the recommended storage bag to help make it mobile
dazokiMicro-Stakes Grinder6 posts
Posted Nov 18, 2025, 2:14 AM#1975
I’m picking up a non-LED one, hoping it doesn’t get damaged in shipping
If anyone has a properly fitting topper in decent shape I’m in the market! Just ordered the recommended storage bag to help make it mobile
It’s packaged pretty well - double boxed ala PCF packing guide - lots of foam and edge protection. A hand cart is helpful - weighs like 80lbs and it’s awkward to hold.
TweedledumNewbie3 posts
Posted Nov 18, 2025, 4:07 AM#1976
My non led table arrived a couple days ago! I'm happy with the $200 price I paid, but just a little bit less happy now that I see the price dropped a little lower. I remember seeing that someone was making reasonably priced, nice toppers for these but I can't seem to find that now. Is someone still making them? Those of you who have toppers, are you happy with them?
GusMicro-Stakes Grinder10 posts
Posted Nov 18, 2025, 4:26 AM#1977
My non led table arrived a couple days ago! I'm happy with the $200 price I paid, but just a little bit less happy now that I see the price dropped a little lower. I remember seeing that someone was making reasonably priced, nice toppers for these but I can't seem to find that now. Is someone still making them? Those of you who have toppers, are you happy with them?
@rjdev7 (https://www.pokerchipforum.com/members/1014/) is your man for toppers. I got a round topper for a different table and it was a big improvement. He makes Barrington-sized toppers at $135 shipped I think... the one I got shipped from Lithuania I think (or Latvia?) so I don't know if new tariffs have impacted pricing.
chipzillaRegular35 posts
Posted Nov 18, 2025, 4:46 AM#1978
My non led table arrived a couple days ago! I'm happy with the $200 price I paid, but just a little bit less happy now that I see the price dropped a little lower. I remember seeing that someone was making reasonably priced, nice toppers for these but I can't seem to find that now. Is someone still making them? Those of you who have toppers, are you happy with them?
@rjdev7 (https://www.pokerchipforum.com/members/1014/) is your man for toppers. I got a round topper for a different table and it was a big improvement. He makes Barrington-sized toppers at $135 shipped I think... the one I got shipped from Lithuania I think (or Latvia?) so I don't know if new tariffs have impacted pricing.
Great toppers! The order thread is here: https://www.pokerchipforum.com/threads/made-to-order-custom-table-toppers.96993/
I'm also waiting for Ryan's reply from my request 8 days ago. He get's busy and eventually replies.
MixalotMicro-Stakes Grinder7 posts
Posted Nov 23, 2025, 2:53 AM#1979
$149 for the non led at Wally World
jellomuncherNewbie1 posts
Posted Nov 24, 2025, 3:42 PM#1980
Took a stab at a table I got over the weekend for a tourney I hosted. Really happy with the black/gold look.
Got blessed in return with a straight flush!
BugeRegular53 posts
Posted Nov 24, 2025, 7:56 PM#1981
The rail is so much nicer on these new ones vs the old ones. Great pickup!
dazokiMicro-Stakes Grinder6 posts
Posted Nov 25, 2025, 2:17 AM#1982
Lowest i have ever seen - now is the time

JJDiamondsRegular29 posts
Posted Nov 26, 2025, 7:04 PM#1983
$180 was too good of a deal to pass up. Finally ordered the LED version and now my other table will be just for transporting to other games and if I ever need a second table
djfayzeMicro-Stakes Grinder23 posts
Posted Nov 26, 2025, 7:12 PM#1984
$180 was too good of a deal to pass up. Finally ordered the LED version and now my other table will be just for transporting to other games and if I ever need a second table
I’m glad I made the upgrade to the LED, I love it.
dazokiMicro-Stakes Grinder6 posts
Posted Nov 26, 2025, 7:39 PM#1985
$180 was too good of a deal to pass up. Finally ordered the LED version and now my other table will be just for transporting to other games and if I ever need a second table

grantcm05Newbie2 posts
Posted Nov 26, 2025, 10:17 PM#1986
$180 was too good of a deal to pass up. Finally ordered the LED version and now my other table will be just for transporting to other games and if I ever need a second table
Finally.
doughboy63Micro-Stakes Grinder7 posts
Posted Nov 30, 2025, 7:17 PM#1987
Brown ones are $149 and LED are $169 at Walmart right now.
greedyinternRegular46 posts
Posted Dec 3, 2025, 9:05 PM#1988
thePokerClubMicro-Stakes Grinder13 posts
ColquhounRegular82 posts
chipzillaRegular35 posts
DodgerRegular46 posts
Posted Dec 9, 2025, 2:53 AM#1992
@jamesjkim (https://www.pokerchipforum.com/members/16024/) just spotted they were down to $119 at Walmart. Insane!
Good looking out. I’ve been following here and that specific product page for about a month and a half now. It just keeps dropping!
greedyinternRegular46 posts
DodgerRegular46 posts
Posted Dec 9, 2025, 2:55 AM#1994
Also, for guys who purchased at a higher price point, if you reach out to customer service, they may honor the new price. Had a buddy pick one up at $189 and reached out and was refunded the difference.
DodgerRegular46 posts
Posted Dec 9, 2025, 2:55 AM#1995
I assume in person?
Nope! Just grabbed one online. Free shipping.
greedyinternRegular46 posts
Posted Dec 9, 2025, 2:59 AM#1996
Nope! Just grabbed one online. Free shipping.
I checked right when I saw the post for 119 and it still said 169. I'm assuming it's regional. I'm in Wisconsin.
EDIT: Oooooh, I see - the standard table is $119! Great deal. I prefer the LED table though since the armrests sit a little higher and if you put a topper on it sits a little nicer.
iLogikMicro-Stakes Grinder9 posts
Posted Dec 9, 2025, 4:00 AM#1997
I could use a back up to my backup 😏
munchieesNewbie1 posts
Posted Dec 10, 2025, 8:40 PM#1998
I could use a back up to my backup 😏

Isildur74Micro-Stakes Grinder5 posts
Posted Dec 10, 2025, 8:51 PM#1999
Thank you to PCF for pointing out the sale on Barrington, my wife got it for me for Christmas. Shipped to the house in 2 days, our first time playing on it she tries to bluff me off with quads. She is regretting it already <3 Thanks PCF!
FlopalopagusMicro-Stakes Grinder12 posts
Posted Dec 10, 2025, 9:29 PM#2000
Hope that you made her pay twice over. :)
Mine came today too.
NotRealNameNoSirRegular73 posts
Posted Dec 10, 2025, 9:46 PM#2001
Hope that you made her pay twice over. :)
Mine came today too.
Good, use this time to UPGRADE YOUR CUPHOLDERS.
Jonesey07Regular38 posts
Posted Dec 10, 2025, 9:50 PM#2002
Good, use this time to UPGRADE YOUR CUPHOLDERS.
soooo.. any suggestions?
thePokerClubMicro-Stakes Grinder13 posts
Posted Dec 10, 2025, 9:54 PM#2003
soooo.. any suggestions?
I second this...any good info on how to upgrade the cupholders?
I just purchased 2 and they arrived this week. My next Event is on Jan 9 so I have a bit of time.
NotRealNameNoSirRegular73 posts
Posted Dec 10, 2025, 10:29 PM#2004
I second this...any good info on how to upgrade the cupholders?
I just purchased 2 and they arrived this week. My next Event is on Jan 9 so I have a bit of time.
soooo.. any suggestions?
Below is the post I used. Not a handy guy at all but it worked perfectly. Already ordered another set. The shallow cupholders are a liability, too many bottles and cans get knocked over, the deeper ones fit rocks or pint glasses just fine.
https://www.pokerchipforum.com/threads/barrington-cup-holder-upgrade.112566/post-2317867
Standard cup holders are definitely too shallow and the upgrades are a really nice improvement for the cost/time.
View attachment 1228738 (https://www.pokerchipforum.com/attachments/1228738/)
Pro tip: drill your pilot hole from the top side of the table, then flip the table over and use the hole saw from the bottom side (https://www.pokerchipforum.com/threads/barrington-poker-table-thread.30910/post-2192696). It saves you from ripping the pleather on the rail.
Cup Holders
https://www.amazon.com/gp/product/B0789HG6NW/ (https://www.amazon.com/gp/product/B0789HG6NW/?tag=amznpcfx-20)
Hole Saw
https://www.amazon.com/gp/product/B08YJFNQR7/ (https://www.amazon.com/gp/product/B08YJFNQR7/?tag=amznpcfx-20)
My upgrade
https://www.pokerchipforum.com/threads/barrington-poker-table-thread.30910/post-2192321
Also adding a drawer again, big upgrade. I usually store extra card setup, bank, and a few racks of workhorse chips in there. This is not as essential as the cupholders for me but is even easier. Comes right off when its time to fold the table but feels perfectly sturdy holding 300+ chips. It does reduce clearance under the table, if your banker is larger you may have to worry about that.
Hey everyone! This is a guide on how to install a drawer to a barrington foldable poker table (or any foldable table) for under $75. With this mod you can still fold the table as usual for storage. You only need a screwdriver (electric preferred) and these things from amazon:
-
this specific 16in drawer (Amazon Drawer (https://rstyle.me/+WYbfAVrkAdU27kvH3aMX7g)) (the pwr one isn't necessary)
-
40lbs Neodymium Magnets 10pcs(Amazon Magnets (https://rstyle.me/+glswAFLDBszEeiRlNDVOhg))
It’s super simple as all you really need to do is screw the magnets under the table like this. Just make sure that the magnets align with the drawer sliders by marking it with a sharpie:
View attachment 1375848 (https://www.pokerchipforum.com/attachments/1375848/)
The magnets are super strong and should be able to hold 4 racks of chips easily. If you want stronger magnets there are stronger options but I found the 40lbs is more than enough. After the magnets are installed, just attach the sliders for the drawer to the magnets and you’re done! For a better and more flush look, push the sliding part of the drawer all the way to the end and have the actual drawer be on the outside of the wall like this:
View attachment 1376316 (https://www.pokerchipforum.com/attachments/1376316/)View attachment 1375849 (https://www.pokerchipforum.com/attachments/1375849/)
The drawer itself can hold up to 4 racks of chips and still have some wiggle room. This is super convenient as I can take chips out from this drawer for rebuys, store cash, etc. The best part of this is that it really only takes away about two inches of space between your legs and table (i have a friend who’s 6’4 230lbs and he can sit under the table fine with our chairs).
After you’re done having a good poker session, you can just pull off the drawer (with the sliders connected) and set it aside. This way you can fold up your table like normal. You’ll find that taking the actual drawer off from the table will take some force as the magnets work very well.
Hopefully this is helpful for anyone looking to install a drawer for cheap without having to lose the best part about the table! Here are some more pictures of what it looks like if anyone needs:
View attachment 1376317 (https://www.pokerchipforum.com/attachments/1376317/)View attachment 1376318 (https://www.pokerchipforum.com/attachments/1376318/)View attachment 1376591 (https://www.pokerchipforum.com/attachments/1376591/)
NOTE: It helps wonders if you have a low-profile chip tray bc it's slightly difficult to access the last row of chips. Not necessary just annoying.
TheBigTaterRegular48 posts
Posted Dec 10, 2025, 10:31 PM#2005
I checked right when I saw the post for 119 and it still said 169. I'm assuming it's regional. I'm in Wisconsin.
EDIT: Oooooh, I see - the standard table is $119! Great deal. I prefer the LED table though since the armrests sit a little higher and if you put a topper on it sits a little nicer.
Yeah they didn't discount the LED table any more (still $169) but I wouldn't ever need lighting around the rail on a table, just seems too mush of a pain that I don't need, although the rails are a tad better on those newer table. The basic table when priced right (below $100-$120) is just an excellent deal.
greedyinternRegular46 posts
Posted Dec 10, 2025, 10:55 PM#2006
I still prefer the LED table. With a dimmer it helps illuminate the cards quite a bit and doesn't blind you.
(You might have to go to the quoted post to see my pictures)
You might not plan to use the LEDs, but I highly recommend it. Getting the warm white COB LEDs and dimmer is a game changer.
LEDs off:
View attachment 1299681 (https://www.pokerchipforum.com/attachments/1299681/)
Warm white COB LEDs at about 30%:
View attachment 1299683 (https://www.pokerchipforum.com/attachments/1299683/)
ColquhounRegular82 posts
Hot NutsShark105 posts
Posted Dec 11, 2025, 12:19 AM#2008
I skipped upgrading cupholders and bought 4 side carts with wheels off Amazon (https://www.amazon.com/?tag=amznpcfx-20) for $25 each. They have 3 levels. Drinks up top, cell phones mid level, The Bank and extra chips on bottom beside the bourbon. Took me 15 mins to put together. I only have to get up to pee now.
Jonesey07Regular38 posts
Posted Dec 11, 2025, 12:24 AM#2009
I skipped upgrading cupholders and bought 4 side carts with wheels off Amazon for $25 each. They have 3 levels. Drinks up top, cell phones mid level, The Bank and extra chips on bottom beside the bourbon. Took me 15 mins to put together. I only have to get up to pee now.
That's cool..
WHERES THE LINK!
Hot NutsShark105 posts
Posted Dec 11, 2025, 12:33 AM#2010
tabletalker7Shark116 posts
Posted Dec 11, 2025, 5:55 AM#2011
I only have to get up to pee now.

Hot NutsShark105 posts
NotRealNameNoSirRegular73 posts
Posted Dec 11, 2025, 1:13 PM#2013
Working on a trough. Then we'll have no breaks. More hands per hour.
Telling you, if casinos figure out how to painlessly hook people up to catheters we're in trouble.
KevinPower5Newbie2 posts
Posted Dec 12, 2025, 12:49 AM#2014
For all the people who have replaced the cupholders - Do you have problems folding the table back up? Do you need to remove the cup holders in order to do it?
ef28Micro-Stakes Grinder10 posts
Posted Dec 12, 2025, 12:58 AM#2015
For all the people who have replaced the cupholders - Do you have problems folding the table back up? Do you need to remove the cup holders in order to do it?
I have the version with the lights and the bigger cup holders does not interfere when folding the table.
chippitydoodahRegular94 posts
Posted Dec 12, 2025, 1:13 AM#2016
I skipped upgrading cupholders and bought 4 side carts with wheels off Amazon for $25 each. They have 3 levels. Drinks up top, cell phones mid level, The Bank and extra chips on bottom beside the bourbon. Took me 15 mins to put together. I only have to get up to pee now.
You should drill 2 holes in the top shelf and drop in deep cup holders
chipzillaRegular35 posts
Posted Dec 12, 2025, 2:28 AM#2017
For all the people who have replaced the cupholders - Do you have problems folding the table back up? Do you need to remove the cup holders in order to do it?
No problem folding with new cup holders. It doesn’t come close to interfering with folding. There is more than 1” of clearance.

KevinPower5Newbie2 posts
Posted Dec 12, 2025, 2:52 AM#2018
woodsyMicro-Stakes Grinder7 posts
Posted Dec 12, 2025, 3:17 AM#2019
What is the best aftermarket bag for a Costco size with led? My bag has a few holes and the zipper went missing
greedyinternRegular46 posts
Posted Dec 12, 2025, 3:19 AM#2020
woodsyMicro-Stakes Grinder7 posts
ColquhounRegular82 posts
JJDiamondsRegular29 posts
Posted Dec 12, 2025, 6:16 AM#2023
Second time installing the bigger cup holders and first time attempting to upgrade the lights. Both sides were working before I removed the adhesive and put them in place but only one side is working now. Thats a problem for Saturday at this point.
JJDiamondsRegular29 posts
Posted Dec 13, 2025, 10:46 AM#2024
Fixed the problem with the lights and I'm ready to go for next weeks game.


thePokerClubMicro-Stakes Grinder13 posts
Posted Dec 13, 2025, 3:07 PM#2025
Looks great, where did you get your mat?
BaroneSanitationRegular28 posts
JJDiamondsRegular29 posts
NotRealNameNoSirRegular73 posts
Posted Dec 14, 2025, 1:50 AM#2028
Agh that's annoying. Working on upgrading cupholders, took the old ones out then realized I don't have the pilot bit for the hole saw. Gotta pack everything up again and come back to it later.
RegularjohnRegular30 posts
Posted Dec 14, 2025, 2:15 AM#2029
I thought I saw a topper that had backgammon and checkers/chess on it.... Anyone know anything about those?
wormlipsNewbie1 posts
Posted Dec 15, 2025, 3:25 AM#2030
I recently upgraded my cup holders after a couple of close calls of having drinks spilled onto the playing surface. The cup holders that come with the table are a joke (a very cruel and sad joke). If you're on the fence about upgrading yours, don't delay. Get them upgraded. They're a huge improvement.
View attachment 1289094 (https://www.pokerchipforum.com/attachments/1289094/)
I was really encouraged by the posts by @dmoney (https://www.pokerchipforum.com/members/3698/) and @greedyintern (https://www.pokerchipforum.com/members/17235/). Huge shout out to them and their guides. Those helped tremendously. This is dedicated to @Saoliver (https://www.pokerchipforum.com/members/1603/) who asked for a video (in the thread - not to me personally) but this is as close to a video I could muster. I hope this is helpful. :)
Items/tools:
View attachment 1289142 (https://www.pokerchipforum.com/attachments/1289142/)
Replacement cup holders (https://www.amazon.com/YH-Poker-Jumbo-Stainless-Holders/dp/B0789HG6NW/?tag=amznpcfx-20)
Gloves
Eye protection
Auto trim removal tool (https://www.amazon.com/dp/B0C6V39SVH?tag=amznpcfx-20)
Screwdriver
Hole saw (3 5/8") (https://www.amazon.com/dp/B01987566S?tag=amznpcfx-20) - (In retrospect, I would have used a different hole saw. Maybe the Milwaukee one)
Tape measure
Cardboard sheet
Hole saw arbor
1/4" drill bit
1/8" drill bit
Screw
Drill
Hair dryer (not pictured)
Step 1: Remove original cup holders
This step is pretty simple. Set the hairdryer on high heat and keep it approximately 1 inch away from the cup holder for about a minute. Most of the cup holders will only require a minute for the glue to loosen up. I only had a couple that needed more time. For those, I did it again for another minute.
View attachment 1289155 (https://www.pokerchipforum.com/attachments/1289155/)
After the hairdryer, use the auto trim tool to pry the cup holder away from the loose glue. Work the tool around the cup holder while gently pulling the cup and glue apart.
View attachment 1289156 (https://www.pokerchipforum.com/attachments/1289156/)
A couple of things to keep in mind when you remove the cup holder from the table:
The cup holder will be hot from the hairdryer so wear your gloves.
The glue will be very sticky so pull directly up and not to the side. Try not to get any on your the table/padding.
View attachment 1289157 (https://www.pokerchipforum.com/attachments/1289157/)
Step 2: Mark the drill hole
Before you move onto this step, make sure all the glue has completely cooled off and dried.
This step is relatively easy but requires some concentration. The exactness of this step will ensure your new cup holders will be where you want them to be.
The original cup holders on my Barrington is measured at 3 1/2" across. You should double check yours if you're going to follow this step of my guide.
View attachment 1289168 (https://www.pokerchipforum.com/attachments/1289168/)
The new cup holders measure 4" across.
View attachment 1289169 (https://www.pokerchipforum.com/attachments/1289169/)
Since the size difference between the 2 cup holders is 1/2", we will need to mark the new center hole 1/4" away from the original center.
Here is a reference on how I calculated my center hole. I started the measure from the outer edge of the original cup holder. The idea is to mark the new center at the 2" mark.
View attachment 1289453 (https://www.pokerchipforum.com/attachments/1289453/)
Here is a better visualization of this. The new center hole has to be 1/4" closer to the table and yet remain in center of the left/right side edges.
View attachment 1289461 (https://www.pokerchipforum.com/attachments/1289461/)
I tried using a marker on the glue but found it difficult to accurately mark the exact location of the new hole. I decided to use a screw instead and that worked much better. The good thing about this is that I could move the screw easily to make fine adjustments as much as I needed. Once I've double (tripled!) checked my measurement I screwed in the screw to make a pilot hole. I didn't drill too deep - just deep enough to make a visible hole.
View attachment 1289462 (https://www.pokerchipforum.com/attachments/1289462/)
Ultimately, I ended up with this outcome. I then took my 1/8" drill bit and drilled through the table using the pilot hole as a guide.
View attachment 1289471 (https://www.pokerchipforum.com/attachments/1289471/)
Step 3: Drill out the new holes (from the bottom)
Flip the table upside down.
Before I drilled the hole with my hole saw, I drilled through the existing hole using the 1/4" drill bit. The reason for this is that the drill arbor is 1/4" so I wanted to make sure the arbor was aligned exactly to the new center. In retrospect, I suspect I could have used the 1/4" bit instead of the 1/8" bit in Step 2 and saved a step.
Drilling the hole was the worst part (for me). The hardest part was intentionally going slow and not hurry the process. The thing to note here is to stop drilling immediately after you've broken through to the foam. I was a nervous wreck trying not to over drill.
As you can see below, the foam is glued to the wood so I had to carefully separate the foam after I had drilled through the wood. Try to retain as much foam as you can in the original hole. This will help with the snugness of the new cup holder.
View attachment 1289474 (https://www.pokerchipforum.com/attachments/1289474/)
Here is an "in progress" picture of the process. I really wanted to see the new cup holder put in so I did that one right away (it's rad). I was also doubting I did the math properly in Step 2 so I wanted to quadruple check it was right (it was). TRUST THE MATH!
I also wanted to show the new Barringtons have clearance for the holes without sawing any of the posts.
Please ignore my monstrosity of a drill. The nerds over at r/tools will ban me if they ever saw that thing.
View attachment 1289481 (https://www.pokerchipforum.com/attachments/1289481/)
Step 4: Insert new cup holders and ENJOY
This step is easy and the most enjoyable. The new cup holders will be very snug (tight) in the new opening. I used a cardboard sheet to help me evenly apply pressure and knead the cup holder in. Think flattening pizza dough - same idea and motion.
Others mentioned having to tape their new cup holders with masking / duct tape to make them snug but I didn't have to do that. The foam and vinyl were enough to keep these cup holders very tight and snug. Oh, speaking of foam, trim away the excess foam that will be sticking out of the bottom after you're all done.
That's it! Enjoy your new rad cup holders!
Don't yell at me about my chairs. They're next to be upgraded!
View attachment 1289497 (https://www.pokerchipforum.com/attachments/1289497/)
I bought the Barrington on sale last week for $120 through Walmart. I see it's up to $150 currently. I want to thank everyone who shared their mods and especially RadicusScout for this detailed post. I took out my original cup holders tonight with my wife's hairdryer and a mini crowbar. I elected to go with the jumbo cups after seeing so many people recommend them over the deeper cup holders of the same width. I look forward to receiving them and my hole saw in the mail this week.
TheHarmacistNewbie1 posts
Posted Dec 29, 2025, 8:34 PM#2031
Came here as a new chipper and now i'm reading this thread and going down a deeper rabbit hole of the barrington table. $120 at walmart is a steal so i'll likely wait for another deal to come around. Does the crease get on anyone's nerves? It doesn't bother me but wondering if folks have had players take issue with it.
JJDiamondsRegular29 posts
Posted Dec 29, 2025, 8:51 PM#2032
Came here as a new chipper and now i'm reading this thread and going down a deeper rabbit hole of the barrington table. $120 at walmart is a steal so i'll likely wait for another deal to come around. Does the crease get on anyone's nerves? It doesn't bother me but wondering if folks have had players take issue with it.
Most people use a topper. Its better material so the cards slide and gets rid of the crease
ColquhounRegular82 posts
Posted Dec 29, 2025, 9:33 PM#2033
Came here as a new chipper and now i'm reading this thread and going down a deeper rabbit hole of the barrington table. $120 at walmart is a steal so i'll likely wait for another deal to come around. Does the crease get on anyone's nerves? It doesn't bother me but wondering if folks have had players take issue with it.
Yes, best to wait for a sale on the Barrington. Especially if you consder adding a topper, upgraded cup holders, a bag, COB lights, a dimmer, and a battery pack...it's suddenly a $600 table! :wow: :ROFL: :ROFLMAO:
pezazMicro-Stakes Grinder5 posts
Posted Jan 20, 2026, 3:13 AM#2034
Upgraded my cup holders! Such an improvement, I can finally have a whiskey glass at the table and not on the floor.

MixalotMicro-Stakes Grinder7 posts
Posted Jan 20, 2026, 10:38 PM#2035
I did the same. New ones are a must. Also did the LED upgrade.

RadicusScoutRegular28 posts
Posted Jan 20, 2026, 10:49 PM#2036
Upgraded my cup holders! Such an improvement, I can finally have a whiskey glass at the table and not on the floor.
View attachment 1623754 (https://www.pokerchipforum.com/attachments/1623754/)
That looks amazing!
I love the Magritte painting.
pezazMicro-Stakes Grinder5 posts
Posted Jan 21, 2026, 2:35 AM#2037
That looks amazing!
I love the Magritte painting.
Thank you! It’s an oil painted reproduction, Magritte is my favorite artist
ColquhounRegular82 posts
Posted Jan 21, 2026, 2:56 AM#2038
....an oil painted reproduction....
An exact replica of the original, in your own home for your own use?!?
Watch out....the "tribute" police are everywhere here.
You might be told you should be more creative and make your own original painting. :rolleyes:
RadicusScoutRegular28 posts
Posted Jan 21, 2026, 2:59 AM#2039
Thank you! It’s an oil painted reproduction, Magritte is my favorite artist
Magritte is amazing.
The original is at the Art Institute here in Chicago. One on my favorite pieces there.
pezazMicro-Stakes Grinder5 posts
Posted Jan 21, 2026, 3:02 AM#2040
Magritte is amazing.
The original is at the Art Institute here in Chicago. One on my favorite pieces there.
Yes! First time I visited Chicago I went and saw it. That museum is amazing
NightowlMicro-Stakes Grinder6 posts
Posted Jan 23, 2026, 3:32 AM#2041
Yes! First time I visited Chicago I went and saw it. That museum is amazing
Just visited myself. Amazing
fisharefriendsNewbie2 posts
Posted Jan 31, 2026, 1:53 PM#2042
Was wondering if it’s possible to cut out for a chip tray on the led barrington table?
I have the opportunity to pick up one new in box for $150 and would like to have a chip tray. I assume I’ll need to move the hinge(s) but was curious if anyone has done this and if so has the process they used.
ColquhounRegular82 posts
Posted Jan 31, 2026, 3:42 PM#2043
Was wondering if it’s possible to cut out for a chip tray on the led barrington table?
I have the opportunity to pick up one new in box for $150 and would like to have a chip tray. I assume I’ll need to move the hinge(s) but was curious if anyone has done this and if so has the process they used.
Between the hinges and the leg mounts, I can’t imagine making a hole in the table in the middle without quite a bit of structural issues and moving critical parts around.
fisharefriendsNewbie2 posts
Posted Feb 1, 2026, 5:26 PM#2044
the_moooooNewbie1 posts
Posted Feb 2, 2026, 9:03 PM#2045
Just got my Barrington table. I got new cupholders and a hole saw. Wish me luck!
grahamplayscardsNewbie1 posts
Posted Feb 8, 2026, 4:40 AM#2046
how does everyone keep their playing surface clean? I’ve used a handheld vacuum and had good luck but don’t want to damage the felt, anyone have a good recommendation?
NightowlMicro-Stakes Grinder6 posts
Posted Feb 8, 2026, 5:11 AM#2047
how does everyone keep their playing surface clean? I’ve used a handheld vacuum and had good luck but don’t want to damage the felt, anyone have a good recommendation?
Pet hair roller
AlbinoDragonMicro-Stakes Grinder15 posts
Posted Feb 8, 2026, 6:53 AM#2048
how does everyone keep their playing surface clean? I’ve used a handheld vacuum and had good luck but don’t want to damage the felt, anyone have a good recommendation?
Honestly, I just throw mine in the washing machine. "Delicates" cycle and by itself. I skip the dryer and let it air dry before I use it again.
I have the "advantage" that I don't have a permanent table and actually use bungee cords to secure the felt (unsuited speed cloth) over a piece of Volara foam when I play, so it's easy to 'remove and replace'.
If it's glued or stapled down to a more permanent table, I can't help, but the felt I use is over 10 years old, ~ monthly games until recently, and doesn't need frequent washing as food is limited at the table (no juicy wing-fingers or stale burger-juice) so that helps the cleanliness.
MixalotMicro-Stakes Grinder7 posts
Posted Feb 8, 2026, 5:43 PM#2049
Pet hair roller
Yep. Lint roller works great.
neufieNewbie2 posts
Posted Feb 17, 2026, 5:17 AM#2050
Hey folks, I'm from Canada. Anyone buy cupholders to replace existing ones. I don't want to upgrade width, just make it deeper. Any insight?
ColquhounRegular82 posts
Posted Feb 17, 2026, 6:04 AM#2051
Hey folks, I'm from Canada. Anyone buy cupholders to replace existing ones. I don't want to upgrade width, just make it deeper. Any insight?
Why not wider? You'll need to drill a hole in the plywood under the existing cupholders anyway to put in anything deeper.
neufieNewbie2 posts
Posted Feb 17, 2026, 6:26 AM#2052
Why not wider? You'll need to drill a hole in the plywood under the existing cupholders anyway to put in anything deeper.
Nervous about cutting into the cushioned rest, or doing a bad job. Just less risk I guess
ColquhounRegular82 posts
Posted Feb 17, 2026, 12:25 PM#2053
Nervous about cutting into the cushioned rest, or doing a bad job. Just less risk I guess
Like I said, you’ll still need to cut a hole. It’s exactly the same process for a smaller diameter cup holder.
exodusMicro-Stakes Grinder10 posts
GiantPenisNewbie4 posts
Posted Mar 14, 2026, 2:13 PM#2055
Wonder when the next deal will be. These tables are 350-450 on just about every website I can find. Found the brown one for 220 and thought about pulling the trigger but somebody else’s bullet was faster than mine. Can everyone confirm the size is 84 inches long for the lighted and standard barrington?
I’ve found some similar cheaper tables( vevor and brands like that) but most are 72 inches.
Seems like Black Friday and holiday season is the time to buy one?
HuskerchipperRegular35 posts
Posted Mar 14, 2026, 6:25 PM#2056
Wonder when the next deal will be. These tables are 350-450 on just about every website I can find. Found the brown one for 220 and thought about pulling the trigger but somebody else’s bullet was faster than mine. Can everyone confirm the size is 84 inches long for the lighted and standard barrington?
I’ve found some similar cheaper tables( vevor and brands like that) but most are 72 inches.
Seems like Black Friday and holiday season is the time to buy one?
I would be patient and keep an eye on Walmart. They seem to frequently go on sale. I had a friend buy 2 of them for $169 in December. I bet they go on sale here again soon. Maybe Fathers Day?
GiantPenisNewbie4 posts
Posted Mar 16, 2026, 3:31 AM#2057
I would be patient and keep an eye on Walmart. They seem to frequently go on sale. I had a friend buy 2 of them for $169 in December. I bet they go on sale here again soon. Maybe Fathers Day?
I got lucky and scored a diy table from a guy who was moving! It’s pretty damn snazzy, no cup holders but I’m happy!
GamingWithChipsRegular26 posts
Posted Mar 28, 2026, 6:10 PM#2058
LED Barrington on sale at Costco Canada, or at least Ontario (don’t know how regional it is)

I’m guessing a new one or new version will be available later this year?
Old StateRegular50 posts
Posted Apr 28, 2026, 9:37 PM#2059
Are all these manufacturers making the same looking tables the same? Was thinking of getting one or two of these for tournaments but I see the same looking tables under other names than Barrington and the prices are all over the place
FlopalopagusMicro-Stakes Grinder12 posts
Posted Apr 28, 2026, 10:05 PM#2060
Are all these manufacturers making the same looking tables the same? Was thinking of getting one or two of these for tournaments but I see the same looking tables under other names than Barrington and the prices are all over the place
It’s a Barrington. Slightly less reinforced (just fine!). Comes with extra toppers for different games. Totally worth it.likely just needs a custom topper and you are good to go!
Old StateRegular50 posts
Posted Apr 28, 2026, 11:30 PM#2061
It’s a Barrington. Slightly less reinforced (just fine!). Comes with extra toppers for different games. Totally worth it.likely just needs a custom topper and you are good to go!
Which is a Barrington?
FlopalopagusMicro-Stakes Grinder12 posts
Posted Apr 28, 2026, 11:33 PM#2062
Old StateRegular50 posts
Posted Apr 28, 2026, 11:35 PM#2063
GamingWithChipsRegular26 posts
Posted Apr 28, 2026, 11:39 PM#2064
Are all these manufacturers making the same looking tables the same? Was thinking of getting one or two of these for tournaments but I see the same looking tables under other names than Barrington and the prices are all over the place
I can’t answer your question technically because I don’t have the actual knowledge but I know what you are talking about. When you search for Barringtons you will find many tables that looks very similar.
I’m only going to guess or assume here that many of those tables use the same or similar parts and then slap their logos on it.
Barringtons, as seen in this thread receive high praise for what they cost from many many PCFers, to me it feels like the default for inexpensive foldable table.
So you can buy others for probably cheaper but they may or may not be as good for the money as Barringtons are touted as.
Old StateRegular50 posts
Posted Apr 29, 2026, 12:04 AM#2065
I asked because some of these models show the cup holders on protruding through the bottom. I was thinking this may make them easier to replace with deeper ones
GusMicro-Stakes Grinder10 posts
Posted Apr 29, 2026, 12:13 AM#2066
Big problem with the cheapest tables is cheap packaging, which leads to more shipping damage. Check out the review on Amazon (https://www.amazon.com/?tag=amznpcfx-20) to see lots of "this table's great" alongside "This table arrived totally bashed up!"
Barrington ships from Walmart via FedEx (in my experience last year) and so both Barrington and Walmart have a vested interest in minimizing shipping damage. Unlike random chinese-made whitelabeled amazon (https://www.amazon.com/?tag=amznpcfx-20) tables.
I did a deep dive hoping to find the best deal and ultimately figured that the plain but well regarded (by PCF) Barrington was likely to outperform random Amazon (https://www.amazon.com/?tag=amznpcfx-20) slop table.
Also the tables on Walmart go from like $400 to $200 on sale (free shipping), to I think as low as $99 shipped around chirstmas?
Old StateRegular50 posts
Posted Apr 29, 2026, 12:19 AM#2067
Big problem with the cheapest tables is cheap packaging, which leads to more shipping damage. Check out the review on Amazon to see lots of "this table's great" alongside "This table arrived totally bashed up!"
Barrington ships from Walmart via FedEx (in my experience last year) and so both Barrington and Walmart have a vested interest in minimizing shipping damage. Unlike random chinese-made whitelabeled amazon tables.
I did a deep dive hoping to find the best deal and ultimately figured that the plain but well regarded (by PCF) Barrington was likely to outperform random Amazon slop table.
Also the tables on Walmart go from like $400 to $200 on sale (free shipping), to I think as low as $99 shipped around chirstmas?
Thank you. I’ll look to Walmart for one
GusMicro-Stakes Grinder10 posts
Posted Apr 29, 2026, 12:23 AM#2068
Thank you. I’ll look to Walmart for one
Costco and others stock them I think too, but not consistently. Like they get a few container loads in at random times and sell them out before reordering more months later
Also lots of custom made “toppers” made on PCF to the barrington dimensions.
LED version is $50-100 more and ~25lbs heavier, from like 60 to 85 pounds, the difference of decent portability. LED table has slightly different dimensions too, mostly relevant when sizing custom toppers
Also prices seem to vary wildly but you can see it’s all the same model barringrom table so comparison shopping is easy
BleedingChipsMicro-Stakes Grinder11 posts
Posted Apr 29, 2026, 12:16 PM#2069
Old StateRegular50 posts
Posted Apr 29, 2026, 1:28 PM#2070
DodgerRegular46 posts
BleedingChipsMicro-Stakes Grinder11 posts
Posted Apr 29, 2026, 7:34 PM#2072
GusMicro-Stakes Grinder10 posts
Old StateRegular50 posts
silverchipNewbie2 posts
Posted Apr 29, 2026, 8:34 PM#2075
I just missed the $119 in December and now can't possibly go for $349, so I'm waiting patiently.
Hoping for Father's Day sale.
MSB256Newbie1 posts
Posted May 4, 2026, 8:47 PM#2076
Standard Barrington jumped up to $358.67 on Amazon (https://www.amazon.com/?tag=amznpcfx-20), about a $70 increase. LED version is $399 from Walmart. Do I go LED if I want to order one today? Trying to play this weekend. Would have ordered the standard today but after that increase, the LED is in play.
PokerDogDocRegular37 posts
Posted May 5, 2026, 3:57 AM#2077
I just missed the $119 in December and now can't possibly go for $349, so I'm waiting patiently.
Hoping for Father's Day sale.
If I remember correctly, the Barrington's go on sale around (or just after?) the WSOP... so look for something late May - July
owlbeeMicro-Stakes Grinder10 posts
Posted May 12, 2026, 8:13 PM#2078
Josh KiferRegular50 posts
Posted May 12, 2026, 8:30 PM#2079
MrBooshRegular32 posts
Posted May 12, 2026, 9:05 PM#2080
They will go cheaper eventually.
mugenpowrMicro-Stakes Grinder10 posts
Posted May 12, 2026, 9:16 PM#2081
silverchipNewbie2 posts
Posted May 13, 2026, 12:53 AM#2082
wait till April 1
is that an April Fools joke?
mugenpowrMicro-Stakes Grinder10 posts
Posted May 13, 2026, 1:24 AM#2083


is that an April Fools joke?
Dallas75Newbie1 posts
Posted May 25, 2026, 10:16 PM#2084
Like many others, it took a little time for me to feel hopeful in taking on the task of upgrading my new table. But with the help of some great posts by @greedyintern (https://www.pokerchipforum.com/members/17235/), @RadicusScout (https://www.pokerchipforum.com/members/10148/) & @dmoney (https://www.pokerchipforum.com/members/3698/), I gave it a shot. Installed new cupholders & upgraded to the Cob LED strip with a dimmer & battery pack. I couldn’t be happier with how everything turned out, it’s well worth the time..trust me!!
A small thing I would add to the cupholder removal process, is separating the foam first. I added a picture showing what I mean by that. After I took out the old cupholders, I simply ran my finger around the interior top side edge scraping back a half inch or so of the foam from the wood all the way around. This way it would already be separated once you make it through both pieces of wood. As long as you’re still cautious towards the end, you won’t have to worry about tearing any part of the foam off once you’re pulling the holesaw back out. Small thing I know but it worked well for me, maybe it can help the next guy.
Like I said, I’m extremely satisfied with how everything turned out. The new cupholders line up perfectly and are a perfect size in my opinion. Plus, there’s now no big risk of one my friends knocking their drink over every 10 seconds. 👍🏼 The LED no longer blinds everyone at the table and is a smooth warm white that’s great for long sessions. I placed the new strip over the old & it worked perfectly. Purchased the strip, dimmer & battery pack off of the previous post recommendations from the members I mentioned. All that’s left is custom topper from @rjdev7 (https://www.pokerchipforum.com/members/1014/). Sent a PM at the beginning of the month, but I hear how backed up he gets. Hopefully I’ll hear something soon.
Let me know what you guys think!

QueensFoolMicro-Stakes Grinder19 posts
Posted May 31, 2026, 1:54 AM#2085
First off, a huge thank you to everyone on this thread for sharing your experiences and tips—it honestly made this upgrade a breeze!
I’ve had my Barrington for about a year, and I was lucky enough to snag it last year during a Prime weekend sale for $150 (definitely one of my better impulse purchases). We’ve used it a handful of times, and while it’s a solid table, every poker night inevitably ends with at least one drink taking an unexpected dive onto the playing surface. Why? Those original cupholders are shallower than a baking sheet. This upgrade is an absolute must. I’m genuinely shocked deeper cupholders aren’t standard—especially on a table designed for people who tend to keep beverages within arm’s reach.
All the guides and feedback here are 100% spot on. In my case, the original cupholders came out very easily without any heating. I also enlisted my dad to help because I’m the least handy person in my family. I like to call it teamwork; he’d probably call it supervision
Drilling was straightforward with a 3.5" hole saw. We did have to remove the buckles and straps that secure the table from the top two holes and reattach them to the outside afterward, since they were mounted directly beneath the original cupholders. After drilling, we trimmed back the vinyl on the rail to about where the original cupholder sat to make room for the larger replacements. We also had to slightly elongate a few holes since the new cupholders were a very tight fit. Other than that, the process was simple and well worth the effort.
Overall, I’d consider this a must-have upgrade for anyone with this table. The deeper cupholders make a huge difference, and now I can focus on losing chips instead of saving drinks.
At this point, the only upgrade left to really make this table pop is a custom topper from RJDev. Once that’s in place, I’m pretty sure the table will look better than the poker being played on it.
TosaElectricRailNewbie3 posts
Posted Jun 4, 2026, 10:10 PM#2086
Price tracker for the standard table can be found here: https://camelmart.com/product/55465427
Kind of hard to tell whether the price will drop further anytime soon, or whether this is the new "sale" price and it only goes up from here.

ABananaANewbie2 posts
ampbmMicro-Stakes Grinder18 posts
Posted Jun 14, 2026, 1:35 AM#2088
I just found these 100% thick vachetta leather handles at my local hardware store, thinking this would be a good addition to the table to actually be able to carry it. plan on using some bolts, washers & nuts to secure it to the flat side part of the table.
thoughts?
chipinlaRegular37 posts
Posted Jun 14, 2026, 1:46 AM#2089
I just found these 100% thick vachetta leather handles at my local hardware store, thinking this would be a good addition to the table to actually be able to carry it. plan on using some bolts, washers & nuts to secure it to the flat side part of the table.
thoughts?
How many did you get? I’m assuming at least 2? Or 4 for two people?
ampbmMicro-Stakes Grinder18 posts
Posted Jun 14, 2026, 2:13 AM#2090
How many did you get? I’m assuming at least 2? Or 4 for two people?
I just grabbed one, in my head I was thinking how I would carry it, I've come to the conclusion that I would use one hand with that handle and my other hand bracing it underneath on the other end . almost same concept as those foldable tables if that makes sense.
chipinlaRegular37 posts
Posted Jun 14, 2026, 2:15 AM#2091
I just grabbed one, in my head I was thinking how I would carry it, I've come to the conclusion that I would use one hand with that handle and my other hand bracing it underneath on the other end . almost same concept as those foldable tables if that makes sense.
I mean, it makes sense but I’ve pulled my back too many times now lol. My table doesn’t move at the point ha.
ampbmMicro-Stakes Grinder18 posts
Posted Jun 14, 2026, 2:24 AM#2092
I mean, it makes sense but I’ve pulled my back too many times now lol. My table doesn’t move at the point ha.
lol
I plans to stick it here, so when is folded, it'll be easy as it'll be almost center weighted. I used
@Dallas75 (https://www.pokerchipforum.com/members/23674/) pic for reference if that's ok. sorry 😔
woodsyMicro-Stakes Grinder7 posts
Posted Jun 14, 2026, 2:48 AM#2093
lol
I plans to stick it here, so when is folded, it'll be easy as it'll be almost center weighted. I used
@Dallas75 (https://www.pokerchipforum.com/members/23674/) pic for reference if that's ok. sorry 😔
Another option is getting an after market storage bag for your table. The Barrington bags that come with the table wear out pretty quick, and the zippers break. The after market bags have handles. Someone on this thread pointed me toward an after market bag and it's great. It has a big strap handle over the top, but even better is the smaller hand holds on the side for a 2 person lift.
https://a.co/d/g6RacIw (https://a.co/d/g6RacIw?tag=amznpcfx-20)
MrBooshRegular32 posts
Posted Jun 14, 2026, 2:18 PM#2094
Another option is getting an after market storage bag for your table. The Barrington bags that come with the table wear out pretty quick, and the zippers break. The after market bags have handles. Someone on this thread pointed me toward an after market bag and it's great. It has a big strap handle over the top, but even better is the smaller hand holds on the side for a 2 person lift.
https://a.co/d/g6RacIw (https://a.co/d/g6RacIw?tag=amznpcfx-20)
I have purchased many of the different bags available and actually like the Hengme bag better. It has just a little more room in the opening making it much easier to fit the slightly larger LED Barringtons into it. Once you toss it in a bag, throw the strap over your shoulder and it is so much easier to carry. No need for adding handles to the table. Plus it protects the table from scuffs and dings.
https://a.co/d/0ir2T0ls (https://a.co/d/0ir2T0ls?tag=amznpcfx-20)
Edited to add - Plus it is cheaper!
ColquhounRegular82 posts
Posted Jun 14, 2026, 3:59 PM#2095
I have purchased many of the different bags available and actually like the Hengme bag better. It has just a little more room in the opening making it much easier to fit the slightly larger LED Barringtons into it. Once you toss it in a bag, throw the strap over your shoulder and it is so much easier to carry. No need for adding handles to the table. Plus it protects the table from scuffs and dings.
https://a.co/d/0ir2T0ls (https://a.co/d/0ir2T0ls?tag=amznpcfx-20)
Edited to add - Plus it is cheaper!
I have the Hengme bag and I think the shoulder strap is the only way I could carry it.
What I think makes a handle difficult is the height of the table…you’re starting from a height that makes it tough. If you were lifting and carrying a heavy item with a handle that’s 18” off the ground, it’s easy. But with these tables, leaning down a bit, strapping it over your shoulder and standing up is much better, imo.
Even then, carry it alone only if you must. Otherwise, getting someone to assist is a HUGE help.
BaroneSanitationRegular28 posts
Posted Jun 15, 2026, 12:30 AM#2096
Another option is getting an after market storage bag for your table. The Barrington bags that come with the table wear out pretty quick, and the zippers break. The after market bags have handles. Someone on this thread pointed me toward an after market bag and it's great. It has a big strap handle over the top, but even better is the smaller hand holds on the side for a 2 person lift.
https://a.co/d/g6RacIw (https://a.co/d/g6RacIw?tag=amznpcfx-20)
This is the type of bag I use. I sling it on my shoulder with the strap and am able to manage it solo, even up and down stairs…the Walmart barrington at least...
I have the Costco barrington with LED as well and I need to make that a two person job when moving it.
ampbmMicro-Stakes Grinder18 posts
Posted Jun 15, 2026, 5:53 PM#2097
so I was working on the cup holders last night on my LED Barrington..first blew my hair dryer on the 3rd cup, then my Ryobi drill started smoking while drilling, had to call it quits for now until I get a heat gun and a electric power drill..anyways once I removed the 3 stock cup holders I notice the felt is stapled there, my concern is while drilling through will it snag the felt and rip and pull it? I've read another post where someone drilled through and it snagged and ripped their felt and now has a small tear running onto the playing area.
QueensFoolMicro-Stakes Grinder19 posts
Posted Jun 15, 2026, 6:55 PM#2098
so I was working on the cup holders last night on my LED Barrington..first blew my hair dryer on the 3rd cup, then my Ryobi drill started smoking while drilling, had to call it quits for now until I get a heat gun and a electric power drill..anyways once I removed the 3 stock cup holders I notice the felt is stapled there, my concern is while drilling through will it snag the felt and rip and pull it? I've read another post where someone drilled through and it snagged and ripped their felt and now has a small tear running on the playing area.
I was able to pop my cup holders out without using a heat gun or hair dryer, although your experience may vary. From what I found, they're glued to the table surface rather than the rail itself. Since you'll be drilling through that area anyway, the risk of damaging anything during removal is pretty low.
I followed the advice in this thread and drilled a pilot hole through the center of the old cup holder location first. Then I flipped the table over and drilled the new hole from the opposite side. You do need to be careful while drilling, but if you go slowly and stop once you reach the foam in the rail, you'll be fine. You'll definitely be able to feel when you get there.
For what it's worth, I barely snagged the fabric on one of my holes, and it had no effect on the playing surface. In my case, I wasn't too worried about it because I already had plant to purchase a topper to go over the original Barrington felt—I wasn't a big fan of the factory colors anyway. If you're really concerned about damaging the felt, you could always remove it before drilling and reinstall it afterward, or replace it with a different material while you have the table apart.
ampbmMicro-Stakes Grinder18 posts
Posted Jun 15, 2026, 7:19 PM#2099
I followed the advice in this thread and drilled a pilot hole through the center of the old cup holder location first. Then I flipped the table over and drilled the new hole from the opposite side. You do need to be careful while drilling, but if you go slowly and stop once you reach the foam in the rail, you'll be fine. You'll definitely be able to feel when you get there.
I'm also following the instructions from another member, I rather use their measurements and drill the pilot hole 1/4" away from the original center towards the felt to have the larger 4" lip to lip cup holder sit center on the rail. otherwise it'll be sitting to close to the edge and not center.
QueensFoolMicro-Stakes Grinder19 posts
Posted Jun 15, 2026, 7:34 PM#2100
I'm also following the instructions from another member, I rather use their measurements and drill the pilot hole 1/4" away from the original center towards the felt to have the larger 4" lip to lip cup holder sit center on the rail. otherwise it'll be sitting to close to the edge and not center.
I'm not sure I follow the reasoning on moving the pilot hole 1/4" from the original center. If the new cup holder is simply a larger diameter, the center point should still be the center point regardless of the size of the hole. Moving the pilot hole would actually shift the entire cup holder off-center relative to the original location, although that’s perfectly fine if the intent is to reposition the cup holder itself rather than just enlarge the existing opening.
I drilled mine centered on the original location, and they came out perfectly centered on the rail!
ampbmMicro-Stakes Grinder18 posts
Posted Jun 15, 2026, 7:45 PM#2101
I'm not sure I follow the reasoning on moving the pilot hole 1/4" from the original center. If the new cup holder is simply a larger diameter, the center point should still be the center point regardless of the size of the hole. Moving the pilot hole would actually shift the entire cup holder off-center relative to the original location, although that’s perfectly fine if the intent is to reposition the cup holder itself rather than just enlarge the existing opening.
I drilled mine centered on the original location, and they came out perfectly centered on the rail!
I think the reasoning was to avoid cutting to close to the outside edge of the table into the side frame.
I could be wrong but since reading majority of the modified cup holders on these barrington tables, looks like they all used the the 1/4" off original center hole and it turned out all centered.
do you have a picture of yours by chance? just for reference.
QueensFoolMicro-Stakes Grinder19 posts
Posted Jun 15, 2026, 7:48 PM#2102
Sure thing! I posted a couple of pictures earlier in the thread, but he is a picture of one of the finished cupholders:

ampbmMicro-Stakes Grinder18 posts
Posted Jun 15, 2026, 7:51 PM#2103
Sure thing! I posted a couple of pictures earlier in the thread, but he is a picture of one of the finished cupholders:
View attachment 1691858 (https://www.pokerchipforum.com/attachments/1691858/)
that looks centered, I'm wondering the different variations of measurements that still leads to the same center placement at the end.
QueensFoolMicro-Stakes Grinder19 posts
Posted Jun 15, 2026, 8:02 PM#2104
that looks centered, I'm wondering the different variations of measurements that still leads to the same center placement at the end.
That’s possible. I tried to make this as easy as possible for myself and not overcomplicate the process. Just take it slow. I’m certain you will be satisfied with the end result. Happy to answer any questions along the way!
ampbmMicro-Stakes Grinder18 posts
Posted Jun 15, 2026, 9:12 PM#2105
I'm thinking I could maybe go a couple more MM towards this outside frame to avoid having the cup holders sit to closely to the inner edge towards the felt.
QueensFoolMicro-Stakes Grinder19 posts
Posted Jun 15, 2026, 9:35 PM#2106
I'm thinking I could maybe go a couple more MM towards this outside frame to avoid having the cup holders sit to closely to the inner edge towards the felt.
What size hole saw are you using and what size are your cupholders?
ampbmMicro-Stakes Grinder18 posts
Posted Jun 15, 2026, 9:42 PM#2107
What size hole saw are you using and what size are your cupholders?
3-5/8" hole saw
large cup holders 4" lip to lip, inside diameter is 3.5"
QueensFoolMicro-Stakes Grinder19 posts
Posted Jun 15, 2026, 9:59 PM#2108
3-5/8" hole saw
large cup holders 4" lip to lip, inside diameter is 3.5"
3 5/8” should work, although the cupholders may or may not fit as snugly. I used a 3 1/2” and had to go back and slightly elongate some of the holes to get the new cupholders to fit. But they do not move whatsoever.
Can you explain your concern about the lip being too close to the edge of the rail/felt? If you move it in, they may not be exactly center as you had previously mentioned.
ampbmMicro-Stakes Grinder18 posts
Posted Jun 15, 2026, 10:49 PM#2109
3 5/8” should work, although the cupholders may or may not fit as snugly. I used a 3 1/2” and had to go back and slightly elongate some of the holes to get the new cupholders to fit. But they do not move whatsoever.
Can you explain your concern about the lip being too close to the edge of the rail/felt? If you move it in, they may not be exactly center as you had previously mentioned.
i mean like move it tad bit further away from the felt, since I have a bit more room towards the outside edge before hitting the rail frame, if that makes sense.
QueensFoolMicro-Stakes Grinder19 posts
Posted Jun 16, 2026, 12:08 AM#2110
i mean like move it tad bit further away from the felt, since I have a bit more room towards the outside edge before hitting the rail frame, if that makes sense.
I suppose that wouldn’t hurt anything - just might not be perfectly centered if that was the look you were going for. The rail is 5” across so you really only have about 1/2” on each side of the cupholder to play with. My thoughts are center it as best you can and call it a day!
chipzillaRegular35 posts
Posted Jun 16, 2026, 11:00 AM#2111
i mean like move it tad bit further away from the felt, since I have a bit more room towards the outside edge before hitting the rail frame, if that makes sense.
I also used the step by step guide by @RadicusScout (https://www.pokerchipforum.com/members/10148/) including moving the center point 1/4” closer to the felt. That enabled not hitting the edge frame of the table by about 1/8” margin . So if you want to, you probably have room to reduce this 1/4” center offset a bit.

There may be some manufacturing variation table to table. You could verify this edge frame clearance for each cup holder by drilling a small hole from the topside at the edge of each existing cup holder hole and measure between the small drilled hole to the edge frame. That’s what I did. That gave me confidence the saw would be close but wouldn’t hit the edge frame.

ampbmMicro-Stakes Grinder18 posts
Posted Jun 16, 2026, 6:47 PM#2112
ok so I just finished mine. I went with 1-7/8 instead of 2" and turned out pretty good.
when you mention to find the outside edge wouldn't we just use that side wall underneath to determine the max sidewall distance?
ampbmMicro-Stakes Grinder18 posts
Posted Jun 16, 2026, 6:52 PM#2113
I also used the step by step guide by @RadicusScout (https://www.pokerchipforum.com/members/10148/) including moving the center point 1/4” closer to the felt. That enabled not hitting the edge frame of the table by about 1/8” margin . So if you want to, you probably have room to reduce this 1/4” center offset a bit.
View attachment 1692025 (https://www.pokerchipforum.com/attachments/1692025/)
There may be some manufacturing variation table to table. You could verify this edge frame clearance for each cup holder by drilling a small hole from the topside at the edge of each existing cup holder hole and measure between the small drilled hole to the edge frame. That’s what I did. That gave me confidence the saw would be close but wouldn’t hit the edge frame.
View attachment 1692032 (https://www.pokerchipforum.com/attachments/1692032/)
wouldn't this be max edge you can saw?
like go right up to this wall and start drill and you'll still be within frame without damaging the edge?
chipzillaRegular35 posts
Posted Jun 16, 2026, 7:59 PM#2114
wouldn't this be max edge you can saw?
like go right up to this wall and start drill and you'll still be within frame without damaging the edge?
Sure, you could line up your saw a hair away from the wall and start sawing. You’d just be deviating from the step by step process @RadicusScout (https://www.pokerchipforum.com/members/10148/) posted. As long as you have a way to otherwise saw and be aligned with the existing smaller cup holder hole, you can change the process. The step by step process provides a center guide pilot hole to ensure such an alignment.
For me, slight damage to the wall is less critical. More important is that the new cut hole is located where you want and looks good from the top.
ampbmMicro-Stakes Grinder18 posts
Posted Jun 17, 2026, 7:40 PM#2115
anyone have any suggestions on a new lock to keep the folded table in place, my clip straps came out when doing the ungraded cup holders.
QueensFoolMicro-Stakes Grinder19 posts
Posted Jun 17, 2026, 9:41 PM#2116
anyone have any suggestions on a new lock to keep the folded table in place, my clip straps came out when doing the ungraded cup holders.
I used two small screws I had lying around in the garage to fasten it on the outside of the frame. It’s in the same place as before (near the cupholders on each side), but outside instead of mounted underneath the old cupholders.
ABananaANewbie2 posts
Posted Jun 23, 2026, 9:19 PM#2117
Doesn't seem the barrington got on the amazon (https://www.amazon.com/?tag=amznpcfx-20) prime days sale and staying steady on walmart. Anyone know if it's likely to go on sale anytime soon? Thinking i might just buy it on walmart for the 249.
ampbmMicro-Stakes Grinder18 posts
Posted Jul 4, 2026, 3:22 AM#2118
5V LED
Thanks to @greedyintern (https://www.pokerchipforum.com/members/17235/), @RadicusScout (https://www.pokerchipforum.com/members/10148/), @dmoney (https://www.pokerchipforum.com/members/3698/), and others for the great cupholder and LED mod instructions.
https://www.pokerchipforum.com/threads/barrington-poker-table-thread.30910/post-2352520
https://www.pokerchipforum.com/threads/barrington-poker-table-thread.30910/post-2405037
Just finished mine and it turned out great thanks to those detailed instructions.
For the COB LED lights, I did make a minor change which I haven’t seen posted. In case anyone’s interested:
The earlier LED lights are 12V, as are the dimmer and power bank. I instead used a 5V LED strip and dimmer. I wanted 5V so I could use a standard power bank, like the kind to charge a cell phone. It didn’t appeal to me to have a dedicated 12V power bank just for the table….I don’t have any other devices needing the 12V and I already have multiple 5V power banks.
It turns out Amazon has many 5V LED cob strips to choose at very low price. In fact, they typically have a standard USB-A plug already attached to the strip. If you plug it into a standard 5V power bank, it works! It’s too bright of course, so a dimmer is needed. Many have a basic dimmer also built-in to that USB plug, making a very low cost solution. I tried it, and it works, though only providing 6 discrete steps of dimming from about 100% down to about 25%. I chose a 5v strip with just the plain USB plug (no dimmer) and added a separate 5V dimmer which allows continuous dimming from 100% down to 0% (off), so I can use it at about the 15-20% setting which I prefer for my eye comfort.
The 5V strip I used was 3 meters long, enough for half the table with about 20” extra. So I bought two (about $10 each). There is one available 5 meters long, but that is barely long enough, or maybe a hair short. Buying two pieces also means I get two USB plugs and don’t have to add COB strip connectors.
5V COB LED lights (https://www.amazon.com/dp/B0DZH99SWJ?ref=ppx_yo2ov_dt_b_fed_asin_title&th=1&tag=amznpcfx-20)
5V Dimmer (https://www.amazon.com/dp/B07RP836LM?ref=ppx_yo2ov_dt_b_fed_asin_title&th=1&tag=amznpcfx-20)
Male USB plug to bare wire cable (https://www.amazon.com/dp/B0CHVM39WL?ref=ppx_yo2ov_dt_b_fed_asin_title&tag=amznpcfx-20)
Female USB plug to bare wire cable (https://www.amazon.com/dp/B0CLSC8FHY?ref=ppx_yo2ov_dt_b_fed_asin_title&tag=amznpcfx-20) (Optional. Delete if willing to cut and strip wiring)
Pictures:
Finished table:
View attachment 1586828 (https://www.pokerchipforum.com/attachments/1586828/)
Final mounted dimmer hardware:
View attachment 1586829 (https://www.pokerchipforum.com/attachments/1586829/)
Hardware in testing mode: This is where I used the optional Female-USB-plug-to-bare-wire cable for convenience. This cable can be skipped if you simply cut the end of the LED strip near the strip’s USB plug, strip the wires, and mount them directly to the dimmer. I did that in the picture above (final mounting):
View attachment 1586830 (https://www.pokerchipforum.com/attachments/1586830/)
Comparison of original Barrington LED lights to the 5V cob strip light. The latter is much more densely packed like the 12V LED’s. FYI, the 12V LED’s density is 480 LED’s per meter, the ones used by @greedyintern (https://www.pokerchipforum.com/members/17235/). The 5V LED density is less at 400 LED/M. It looks fine to me. If I dim it way down I can see individual LED’s similar to @greedyintern (https://www.pokerchipforum.com/members/17235/) described also for the 12V LED’s. When lit, it looks good and fairly defused to me.
View attachment 1586831 (https://www.pokerchipforum.com/attachments/1586831/)
Most of the 5V LED’s on Amazon are actually even lower density, 320 LED/meter. Here’s a comparison of 320 LED/M (left) to 400 LED/M (right). Both are 5V LEDs. Also the left side is a 8mm strip (like @greedyintern (https://www.pokerchipforum.com/members/17235/) 12V 480 LED/meter strip), while the right side is 5mm I used. The right strip is powered at minimum setting ~ 10% so it looks very faint, while the left strip is at about 25% (min setting of its built-in cheap dimmer). You can see the discrete LED’s of both by zooming-in. 400 LED/M strips were harder to find, which is why I used the 5mm strip. Both look good to me when lit up, especially compared to the original Barrington LEDs.
View attachment 1586832 (https://www.pokerchipforum.com/attachments/1586832/)
I took some current measurements at different dimmers setting with an inserted ammeter. The full 3 meter length was measured. I cut about 20” off from each strip for actual install, so actual game night current usage will be proportionally lower than in this table below. For the 400 LED/M strip I measured both/two strips while connected in parallel so I could verify the power bank would be sufficient. All readings are current in Amperes:
100%85%75%50%25%0%
Two 5V LED strip with 400 LED/m, 5mm3.11 A1.97 A1.32 A0.75 A0
One 5V LED strip with 320 LED/m, 8mm1.27 A1.09 A0.84 A0.12 A
From row 1, the required power bank needed can be calculated by: Capacity = Current x Time.
E.g., at 50% dimmer setting, Capacity = 1,320mA x 1 hr = 1320 mAH rated power bank needed for each 1hr of run time. My 10,000mAH USB power bank is more than enough, especially since I’ll be running closer to the 20% dimmer setting and can get close to 13hrs of run time. I verified this, left the lights on for 9 hours at 20%, and the power bank was still 50% full (based on its indicator lights).
Here’s the 5V LED with 320 LED/m, 8mm with a built-in dimmer and USB plug. (https://www.amazon.com/dp/B0DQQ1JFTG?ref=ppx_yo2ov_dt_b_fed_asin_title&th=1&tag=amznpcfx-20)
Hey what's that adaptor connected from the power bank to the cable?
Also for the dimmer switch is it ok to use a 12v one like this?
chipzillaRegular35 posts
Posted Jul 4, 2026, 4:23 AM#2119
Hey what's that adaptor connected from the power bank to the cable?
Also for the dimmer switch is it ok to use a 12v one like this?
For the adaptor, I think you mean the USB-C-male-to-USBA-female adaptor. I needed it because my existing power bank only had a USB-C port, whereas the black cable from the dimmer had a USB-A plug on it.
USBC Male to A Female (https://www.pokerchipforum.com/threads/barrington-poker-table-thread.30910/#-usbc-male-to-a-female)

I'm not sure about the dimmer you posted since I can't read the whole description. That's a 12V dimmer, so it will only work for 12V LED strip lights. You would need a 5V dimmer (like I used) if you use 5V LED lights. Also, it needs to be a PWM (pulse width modulation) style dimmer, so check the description to confirm.
djfayzeMicro-Stakes Grinder23 posts
Posted Jul 4, 2026, 5:32 AM#2120
For the adaptor, I think you mean the USB-C-male-to-USBA-female adaptor. I needed it because my existing power bank only had a USB-C port, whereas the black cable from the dimmer had a USB-A plug on it.
USBC Male to A Female
View attachment 1698583 (https://www.pokerchipforum.com/attachments/1698583/)
I'm not sure about the dimmer you posted since I can't read the whole description. That's a 12V dimmer, so it will only work for 12V LED strip lights. You would need a 5V dimmer (like I used) if you use 5V LED lights. Also, it needs to be a PWM (pulse width modulation) style dimmer, so check the description to confirm.
Hey @chipzilla (https://www.pokerchipforum.com/members/20933/)! I used your instructions and parts list to put the 5V COB LED lights on my table tonight, they look great. I’ve got one problem - when I plug into a 5V wall adapter they dim perfectly, however with the power bank I bought on Amazon (https://www.amazon.com/?tag=amznpcfx-20) anytime I go below full brightness they flash and freak out. My table is in the middle of the room so I definitely need a powerbank - which do you use?
chipzillaRegular35 posts
djfayzeMicro-Stakes Grinder23 posts
chipzillaRegular35 posts
Posted Jul 4, 2026, 7:58 PM#2123
I’ll try some other power banks around the house to see if I can find one that works.
Edit: Come to think of it, when I tested it after installing the first strip it did work. It was on my when I added the second strip that it struggled. I’m wondering if the second strip in parallel is the reason it’s having issues…
Two strips in parallel is definitely the correct hook up and should work. I tried a second very old 5v battery bank and it works too. So hopefully your other power banks solves the problem.
If your other power banks don't solve the problem, then I suspect you have a defective 5V dimmer and can try replacing it.
Hey, yes! Same dimmer and strips, although the strips didn’t have a dimmer already at the link from your post.
Oh, right. the strip I installed didn't have the cheap built-in dimmer, just a USB-A plug. (it was a different strip I tested that had the cheap built-in dimmer).
ArchonyxNewbie1 posts
Posted Jul 7, 2026, 5:08 AM#2124
Quick question for those of you who have done the cupholder modification. The cupholders I purchased have what appear to be similar dimensions to the jumbos everyone is using (3.9" lip to lip). I purchased a 3 5/8" hole saw, but when I held it up to the cupholders it appeared to be larger than the cupholders by a fair bit (see photo). To test this, I drilled out a piece of scrap wood with a 3.5" hole saw, and the cupholder dropped in just fine -- it wasn't tight at all, but it also didn't wiggle that much. Do I just have different sized cupholders than everyone else? Or is the reason everyone is going with the 3 5/8" hole saw because the hold padding/felt have to get squished into the hole as well and there needs to be some room in there?
Thanks!

djfayzeMicro-Stakes Grinder23 posts
Posted Jul 10, 2026, 5:55 AM#2125
Two strips in parallel is definitely the correct hook up and should work. I tried a second very old 5v battery bank and it works too. So hopefully your other power banks solves the problem.
If your other power banks don't solve the problem, then I suspect you have a defective 5V dimmer and can try replacing it.
Oh, right. the strip I installed didn't have the cheap built-in dimmer, just a USB-A plug. (it was a different strip I tested that had the cheap built-in dimmer).
Just an update - it was the power bank! Working great now
chipzillaRegular35 posts
Posted Jul 10, 2026, 7:16 AM#2126
Quick question for those of you who have done the cupholder modification. The cupholders I purchased have what appear to be similar dimensions to the jumbos everyone is using (3.9" lip to lip). I purchased a 3 5/8" hole saw, but when I held it up to the cupholders it appeared to be larger than the cupholders by a fair bit (see photo). To test this, I drilled out a piece of scrap wood with a 3.5" hole saw, and the cupholder dropped in just fine -- it wasn't tight at all, but it also didn't wiggle that much. Do I just have different sized cupholders than everyone else? Or is the reason everyone is going with the 3 5/8" hole saw because the hold padding/felt have to get squished into the hole as well and there needs to be some room in there?
Thanks!
View attachment 1699560 (https://www.pokerchipforum.com/attachments/1699560/)
Hopefully you got your install working already. I used the jumbo cupholders others have used, so I don't know that specific black cup holder you have. But yours looks a little smaller in diameter compared to mine. My cupholder measures 89.7mm (3 - 17/32") at the bottom outside diameter. It fits snuggly in the 3 - 5/8" hole cut by the hole saw. Pic attached is my cupholder as seen from the bottom of the table.

ampbmMicro-Stakes Grinder18 posts
Posted Jul 11, 2026, 9:17 AM#2127
For the adaptor, I think you mean the USB-C-male-to-USBA-female adaptor. I needed it because my existing power bank only had a USB-C port, whereas the black cable from the dimmer had a USB-A plug on it.
USBC Male to A Female
View attachment 1698583 (https://www.pokerchipforum.com/attachments/1698583/)
Instead of that adaptor could I use this instead?
chipzillaRegular35 posts
BlueEyedBBQNewbie1 posts
Posted Jul 20, 2026, 12:51 AM#2129
DeucekiesMicro-Stakes Grinder12 posts
Posted Jul 20, 2026, 1:02 AM#2130
Looks like the LED one is at $239 as well
horseshoezRegular25 posts
Posted Jul 22, 2026, 8:51 AM#2131
Walmart has the standard one for $149 again. Grab it while you can.
DeucekiesMicro-Stakes Grinder12 posts
Posted Jul 22, 2026, 4:09 PM#2132
And the LED version is $179. Might be time to pull the trigger?
Max DMicro-Stakes Grinder22 posts
DeucekiesMicro-Stakes Grinder12 posts
Posted Jul 22, 2026, 5:11 PM#2134
I went for it too. Signed up for the credit card at cashout to take $35 off the price too.
djfayzeMicro-Stakes Grinder23 posts
Posted Jul 22, 2026, 9:22 PM#2135
My inner monologue telling myself I don’t need a third right now….
QueensFoolMicro-Stakes Grinder19 posts
Posted Jul 22, 2026, 9:26 PM#2136
My inner monologue telling myself I don’t need a third right now….
Haha I’m doing the same about a second 🤣
TosaElectricRailNewbie3 posts
Posted Jul 23, 2026, 6:49 PM#2137
TosaElectricRailNewbie3 posts
DeucekiesMicro-Stakes Grinder12 posts
Posted Jul 24, 2026, 5:31 AM#2139
Standard table is down to $99, but the LED table went back up to $399.
BudsterNewbie3 posts
Posted Jul 24, 2026, 5:38 AM#2140
Cheers. I've been wracking my head about how to non-destructively modify a dining table for my game. I'm just going to pick one of these up and get a topper for it at some point.
antispaghettiNewbie1 posts
Posted Jul 24, 2026, 12:06 PM#2141
chipinlaRegular37 posts
Posted Jul 24, 2026, 4:13 PM#2142
SixSpeedFuryRegular64 posts
Posted Jul 24, 2026, 4:34 PM#2143
QueensFoolMicro-Stakes Grinder19 posts
Posted Jul 25, 2026, 7:32 PM#2144
UPDATE: I bought a second Barrington
Will update with wife’s reaction upon delivery
ampbmMicro-Stakes Grinder18 posts
Posted Jul 25, 2026, 8:20 PM#2145
UPDATE: I bought a second Barrington
Will update with wife’s reaction upon delivery
🤣
ouraouraNewbie1 posts
Posted Jul 26, 2026, 6:31 PM#2146
Has anybody converted a Barrington into a table topper? What would I need to think through to do this (while making sure I don't scuff my kitchen table)?
I just got the $99 Walmart deal - but really need a topper, not a full table.
QueensFoolMicro-Stakes Grinder19 posts
Posted Jul 26, 2026, 7:30 PM#2147
Has anybody converted a Barrington into a table topper? What would I need to think through to do this (while making sure I don't scuff my kitchen table)?
I just got the $99 Walmart deal - but really need a topper, not a full table.
I would just use the Barrington.
But if needed, you could unfasten the legs from the Barrington and lay the board on top of your kitchen table. Lie a table cloth down to protect the table and voila!
Keep in mind the Barrington is 84x32”. Not sure how big your kitchen table is, but not being anchored could be an issue.
Again, my recommendation would be to use the Barrington as is.
woodsyMicro-Stakes Grinder7 posts
Posted Jul 26, 2026, 7:56 PM#2148
Has anybody converted a Barrington into a table topper? What would I need to think through to do this (while making sure I don't scuff my kitchen table)?
I just got the $99 Walmart deal - but really need a topper, not a full table.
As noted in the last post, you may want to see if it will cover your complete table. Also the frame of the Barrington plus the playing surface height will bring the table much higher. It will feel like you're playing at " the kids table". I made a topper that perfectly covered my kitchen table, and just the plywood height made it feel like that.
jamesjkimRegular42 posts
Posted Jul 26, 2026, 9:07 PM#2149
I made individual armrests for my dining table to use with my topper. But if you get a Barrington for $100, it’s worth having. As pointed out, just removing the legs on the Barrington will work but it’s going to sit much higher and standard chairs will feel too low.

QueensFoolMicro-Stakes Grinder19 posts
Posted Jul 28, 2026, 6:17 PM#2150
UPDATE:
Table #2 has officially been delivered.
As promised, here's the Wife Reaction Report...
FedEx driver starts backing into the driveway...
Wife: "Babe... who's backing into the driveway??"
Me: "FedEx."
Wife: "Why?"
Me: "Because I bought another poker table."
Wife: "...Why??"
Me: "It was a good deal."
...long pause...
Blank stare.
Eye roll.
Walks away.
I feel like I handled the negotiation phase about as well as I possibly could.
Now I just need to figure out where I'm sleeping tonight.
chippitydoodahRegular94 posts
Posted Jul 28, 2026, 9:27 PM#2151
PapaWheelieMicro-Stakes Grinder12 posts
Posted Jul 28, 2026, 9:35 PM#2152
Has anybody converted a Barrington into a table topper? What would I need to think through to do this (while making sure I don't scuff my kitchen table)?
@ouraoura (https://www.pokerchipforum.com/members/24094/) did you ever go ahead and do this?
I'm in the same boat, but I'm too timid to take the initiative.
Max DMicro-Stakes Grinder22 posts
Posted Aug 3, 2026, 2:06 AM#2153
Arrived, used it last night and forgot to take action pics

ampbmMicro-Stakes Grinder18 posts
Posted Aug 6, 2026, 11:00 PM#2154
Anyone have any tips or suggestions try can share so we don't feel the center seam under a topper with the foldable tables?
I came across this for stoves and countertops and it looks thin enough.
chippitydoodahRegular94 posts
PreditorMicro-Stakes Grinder13 posts
Max DMicro-Stakes Grinder22 posts
Posted Aug 7, 2026, 2:14 AM#2157
Mississippi pot roast! It was a hit!
Max DMicro-Stakes Grinder22 posts
Posted Aug 7, 2026, 2:15 AM#2158
Can you get us length & width measurements of the playing surface?
Sorry I put the table away.
harrysalloutMicro-Stakes Grinder11 posts
Posted Aug 7, 2026, 4:09 AM#2159
Anyone have any tips or suggestions try can share so we don't feel the center seam under a topper with the foldable tables?
I came across this for stoves and countertops and it looks thin enough.
I use a black piece of construction paper that the kids use for school. Two sheets so they cover the gap and then put the topper on top of that. No more line.
chippitydoodahRegular94 posts
Posted Aug 7, 2026, 4:15 AM#2160
Has anyone measured the new table surface for ordering a topper?
jamesjkimRegular42 posts
Posted Aug 7, 2026, 4:34 AM#2161
Anyone have any tips or suggestions try can share so we don't feel the center seam under a topper with the foldable tables?
I came across this for stoves and countertops and it looks thin enough.
+1 to @horseshoez (https://www.pokerchipforum.com/members/5314/) recommendation to use a few pieces of cardstock. Has worked surprisingly well and costs next to nothing!
chipwormNewbie3 posts
Posted Aug 14, 2026, 6:49 PM#2162
Do you guys find those Barrington tables heavy? I bought one off Amazon (https://www.amazon.com/?tag=amznpcfx-20) this year and it was super heavy, as in not whacking the skirt/edge (below the arm rest) on the floor would usually require two guys to get it in position. I'm worried I'm going to destroy that edge if I keep setting it up and putting it away solo over and over again.
chipzillaRegular35 posts
Posted Aug 14, 2026, 7:02 PM#2163
Do you guys find those Barrington tables heavy? I bought one off Amazon this year and it was super heavy, as in not whacking the skirt/edge (below the arm rest) on the floor would usually require two guys to get it in position. I'm worried I'm going to destroy that edge if I keep setting it up and putting it away solo over and over again.
Yes, it’s heavy! There’s a bunch of posts about it. A popular option is to use a carry bag with straps like this one from Amazon (https://www.amazon.com/?tag=amznpcfx-20) :
https://a.co/d/04o8AoVa (https://a.co/d/04o8AoVa?tag=amznpcfx-20)
chipwormNewbie3 posts
Posted Aug 14, 2026, 7:07 PM#2164
Yes, it’s heavy! There’s a bunch of posts about it. A popular option is to use a carry bag with straps like this one from Amazon :
https://a.co/d/04o8AoVa (https://a.co/d/04o8AoVa?tag=amznpcfx-20)
Hey thanks for the tip! Just got ordered it. That should keep spiderwebs and dust off as well.
horseshoezRegular25 posts
Posted Aug 14, 2026, 7:19 PM#2165
Max DMicro-Stakes Grinder22 posts
Posted Aug 15, 2026, 12:11 AM#2166
chipwormNewbie3 posts
Posted Aug 15, 2026, 12:50 AM#2167
All_OutNewbie1 posts
Posted Sep 22, 2026, 8:58 PM#2168
I finally upgraded the cup holders in my Barrington LED table. Many thanks to those that posted their instructions and tips, especially @greedyintern (https://www.pokerchipforum.com/members/17235/) and @RadicusScout (https://www.pokerchipforum.com/members/10148/). I also want to reiterate an excellent point that @Dallas75 (https://www.pokerchipforum.com/members/23674/) brought up. Separating the foam from the table by running your finger around the hole after removing the original cup holder is very helpful. I forgot to do that on one and I ended up with a foam donut cut out that I had to use spray adhesive to put back in place. Having the foam there keeps the new cupholders tight.
Rather than measuring the pilot hole location across the hole and trying to mark on the non-flat glue area left behind from the old cup holder, I just flipped over an old cup holder, marked my pilot hole location on it, drilled a hole in it, then flipped it back and reinserted it in the hole and drilled a pilot hole through the table using the old cup holder as a guide.

I started by doing just one cupholder from start to finish just to get process down. Then continued on to the other 9.


I had done the battery pack mod a while back but you can see by my pilot hole that I would need to move things. I used 3M Command Strips for holding the switch and battery pack (not pictured).

I'm very pleased with how it came out. (Topper by @rjdev7 (https://www.pokerchipforum.com/members/1014/))

Again, thanks to the trailblazers that were the first to hack up their table and post about it here for others to use as a guide.
warewulfMicro-Stakes Grinder13 posts
horseshoezRegular25 posts
Posted Sep 24, 2026, 11:49 PM#2170
I keep mine in the inner box that the table came in. Though I don't use it very often.
My wife asked why it was still in the box, suggested I get a carry bag. After I showed her how easy it was to just put back in the box, she agreed to keep it that way lol.
Same on my end, but I double up and pack it with the zippered bag as well. I learned from past mistakes that the edges can sometimes hit the ground when taking it out of the box, which can result in a small tear or scuff on the vinyl.
pezazMicro-Stakes Grinder5 posts
Posted Oct 1, 2026, 3:17 PM#2171
Is anyone dealing with ripping of the foam cover on their table?
What kind of materials are you guys using to repair these rips? I was thinking some kind of gear tape like tenacious tape maybe.
PostoakpokerMicro-Stakes Grinder6 posts
Posted Oct 1, 2026, 3:19 PM#2172
Is anyone dealing with ripping of the foam on their table?
What kind of materials are you guys using to repair these rips? I was thinking some kind of gear tape like tenacious tape maybe.
If you're referring to the black vinyl on the rails, it rips very easily. Can't speak to best material for a repair, but I would imagine a search in this/other threads would yield results.
DodgerRegular46 posts
Posted Oct 1, 2026, 4:20 PM#2173
Is anyone dealing with ripping of the foam cover on their table?
What kind of materials are you guys using to repair these rips? I was thinking some kind of gear tape like tenacious tape maybe.
If you're referring to the black vinyl on the rails, it rips very easily. Can't speak to best material for a repair, but I would imagine a search in this/other threads would yield results.
You could use a leather and vinyl repair kit similar to what you may use on car vinyl. Usually found for under $10.
pezazMicro-Stakes Grinder5 posts
Posted Oct 1, 2026, 4:36 PM#2174
You could use a leather and vinyl repair kit similar to what you may use on car vinyl. Usually found for under $10.
Thanks! Good idea. I found some on Amazon (https://www.amazon.com/?tag=amznpcfx-20) and just ordered it
aFatCatMicro-Stakes Grinder19 posts
Posted Oct 9, 2026, 2:00 AM#2175
I been thinking about just buying it from walmart for 250, any other Ideas? I been lowball people on facebook for crazy after I saw the 100 dollar sale in the summer but I don't think I'm going to get that price
GamingWithChipsRegular26 posts
Posted Oct 9, 2026, 2:02 AM#2176
Those super low sales might come once a year or less. Depending how long you've already waited I would wait until black Friday, if no good sales just buy it. $250 USD isn't a bad price, it's just $100 is a steal.
aFatCatMicro-Stakes Grinder19 posts
Posted Oct 9, 2026, 2:15 AM#2177
Those super low sales might come once a year or less. Depending how long you've already waited I would wait until black Friday, if no good sales just buy it. $250 USD isn't a bad price, it's just $100 is a steal.
one dude just offered me 190 which I’m now really tempted on
ChipFinderSKMicro-Stakes Grinder10 posts
Posted Oct 9, 2026, 2:27 AM#2178
one dude just offered me 190 which I’m now really tempted on
Might as well wait until Black Friday if you don’t need it immediately
aFatCatMicro-Stakes Grinder19 posts
Posted Oct 9, 2026, 2:27 AM#2179
Might as well wait until Black Friday if you don’t need it immediately
ya I guess might as well
chipzillaRegular35 posts
aFatCatMicro-Stakes Grinder19 posts
chipzillaRegular35 posts
Posted Oct 9, 2026, 5:04 AM#2182
Looks like I'd be hoping for the 120 then, because at 169 after tax it's not as hot of a deal ig
IMO, $169 is still a great deal. Plus, don’t know if tariffs will be a factor this year.
chipzillaRegular35 posts
Posted Oct 9, 2026, 5:06 AM#2183
chippitydoodahRegular94 posts
Posted Oct 9, 2026, 6:24 AM#2184
I been thinking about just buying it from walmart for 250, any other Ideas? I been lowball people on facebook for crazy after I saw the 100 dollar sale in the summer but I don't think I'm going to get that price
I was selling a brand new Barrington on Facebook Marketplace for $150 (very reasonable) and I was getting these "lowball" guys like you. Negotiating is fine. Here's how my final negotiation went.


aFatCatMicro-Stakes Grinder19 posts
Posted Oct 9, 2026, 6:30 AM#2185
I was selling a brand new Barrington on Facebook Marketplace for $150 (very reasonable) and I was getting these "lowball" guys like you. Negotiating is fine. Here's how my final negotiation went.
View attachment 1742872 (https://www.pokerchipforum.com/attachments/1742872/)
View attachment 1742873 (https://www.pokerchipforum.com/attachments/1742873/)
LMAO, that's not how I lowball people but it's close enougth. I usally start asking if they are open to negotations and work from there. I will say I've gotten some crazy deals starting with a low offer just because the seller is in need to sell it so I've started throwing out those low offers
aFatCatMicro-Stakes Grinder19 posts
Posted Oct 9, 2026, 6:52 AM#2186


I got offered 150 for this custom table which makes me tempted. It's not foldable so i'm kinda debating. I think we do have extra room in the house for it though
chippitydoodahRegular94 posts
warewulfMicro-Stakes Grinder13 posts
Posted Oct 9, 2026, 4:13 PM#2188
So its reversible? Upside-down for cup holders or right side up for without? No offense but that thing is borderline Fugly Poker Table post worthy :ROFL: :ROFLMAO:
Ugly or not, if the speed cloth is clean and in decent shape, it's worth $150. The wholes for the cup holders are just to make it lighter... :unsure:
The Barrington cup holders are borderline useless anyway. The one thing I've found that fits in them well is the mini bottles of water.
aFatCatMicro-Stakes Grinder19 posts
Posted Oct 9, 2026, 6:39 PM#2189
So it’s reversible? Upside-down for cup holders or right side up for without? No offense but that thing is borderline Fugly Poker Table post worthy :ROFL: :ROFLMAO:
I been wondering the same thing. Like what are the holes for lol. Cup holders weren’t a major thing I was looking for so I was fine to live with out it
KenscoMicro-Stakes Grinder12 posts
Tony_MMicro-Stakes Grinder17 posts
Posted Oct 17, 2026, 5:12 AM#2191
nice job! I’ve been thinking, but haven’t looked yet if it’s possible, to install studs with wing nuts on the rails so I could loosen them in order to do something similar.